
Execution of algoQA-generated Test Scripts in TestComplete and Viewing the Report
Import algoQA-generated test scripts into TestComplete, execute them, export results, and generate customized MS Word reports.

Prerequisites
Downloading the Script
Perform the following:
- Navigate to the folder where the algoQA-generated scripts are uploaded. A sample script is attached.
- Download the script and extract the contents to your local folder.
Uploading the Script onto the TestComplete Tool
Perform the following:
Navigate to the folder where you have downloaded the algoQA-generated script.
Import this script into the TestComplete tool in the respective environment.
This algoQA-generated script will work as a TestComplete project.
Double-click the TestComplete project suite file to open the scripts in the TestComplete tool.
Double-click the project suite file with the extensions, such as .mds and .pjs to open the entire scripts in TestComplete.
After opening the scripts in TestComplete, you can review all the respective files related to TestComplete before execution.
Execution of the Scripts
Perform the following:
- You can execute scripts using the Feature Files option. Open the respective Feature File on the left pane that you want to execute in TestComplete. Details of the Feature File will be displayed in the right pane. Note: Images are not added automatically to the ImageRepository folder in TestComplete. If required, you can add them manually in algoQA Customize Script by navigating to Image Repo and using the Upload File option.

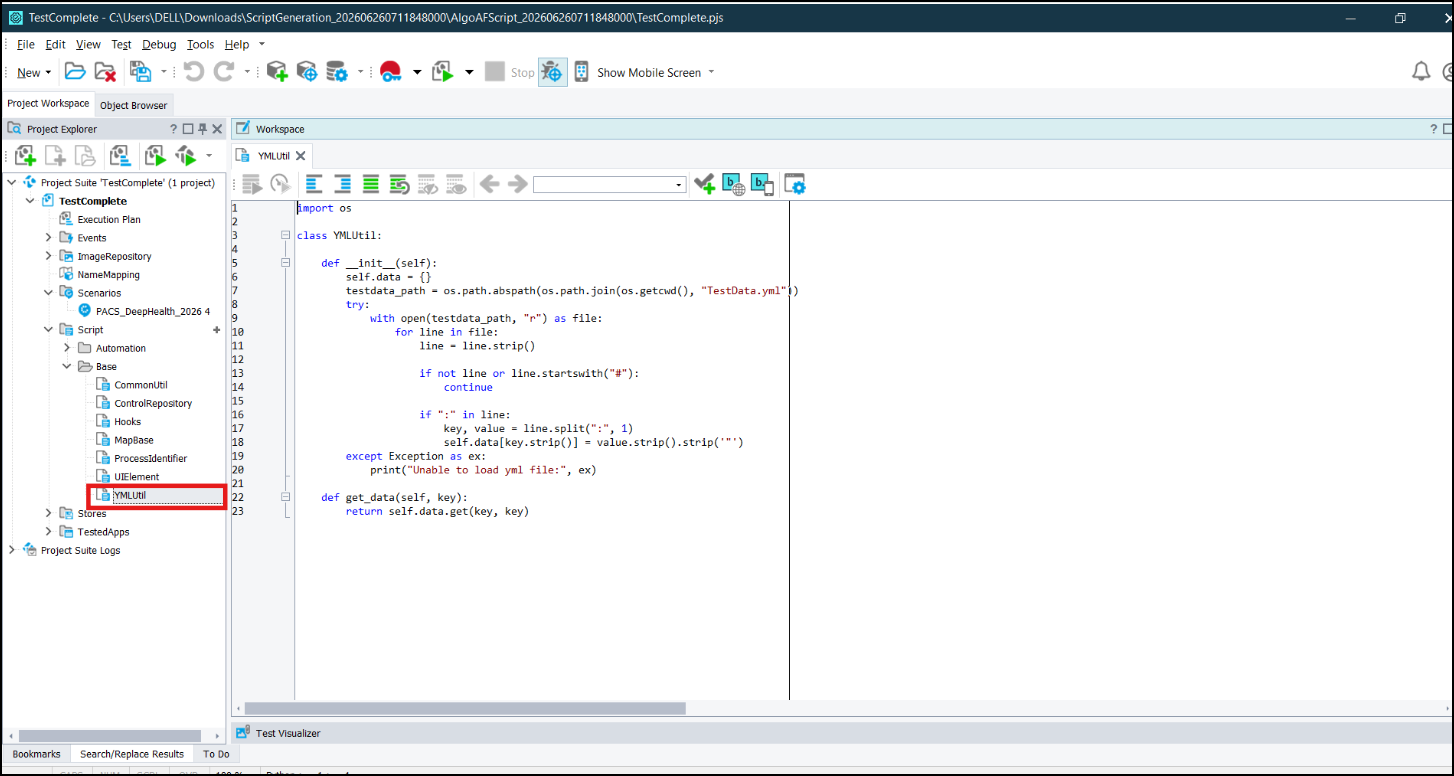
The YMLUtil file is also available in TestComplete > Script > Base.
Right-click on the respective scenario outline to select the 'Run This Scenario' option.

Upon completion of execution, you will be able to see the execution report.
The following screen appears. In this screen, click the 'Export Test results' icon to export all the information to the appropriate folder.
An optional last step has been added: “And screen is displayed with <content>.” A screenshot of the displayed screen is also attached to the report.

'Choose Storage Type and Location' window appears.
In this window, select More Menu (three dots) options to choose the appropriate folder path and click OK.

After exporting, navigate to the same folder where you have exported the files in the previous steps and locate the index file to view the results in the required browser.

Generating Customized MS Word Report using algoQA
Creating a separate folder to generate the MS Word report in the same folder
Perform the following:
Navigate to the TestComplete folder structure in the algoQA folder structure.
In this folder, create a folder named 'GenerateWordReport'.
Copy the path and paste it into a notepad for later use.
Viewing the report in the algoQA-generated folder structure and copying the report text file to the 'GenerateWordReport' folder
Perform the following:
- algoQA-generated scripts follow an organized folder structure as shown in the following sample screenshot. In this folder structure, select the TestComplete folder and navigate to the report text file as shown in the secondary screen.

Secondary screen

- Use the copied path in the notepad from Step 1 to open the 'GenerateWordReport' folder in a separate tab.
- Copy the report text file, as shown in the secondary screen, to the 'GenerateWordReport' folder.
Copying the supporting test execution files from the algoQA script-generated folder structure to 'GenerateWordReport' folder
Perform the following:
Navigate to the Log folder in the algoQA folder structure to access supporting files, such as screenshots and test execution files as shown in the following screenshot:

Use the copied path in the notepad from Step 1 to open the 'GenerateWordReport' folder in a separate tab.
Copy all the supporting files from the Log folder and paste them to the 'GenerateWordReport' folder which is opened in a separate tab.
'GenerateWordReport' folder contains the report in text file format and supporting test execution files from the Log folder.
Generating Customized MS Word Report using algoQA via Command Prompt
Perform the following:
In the algoQA script-generated folder structure, navigate to the algoReport folder.

Click the address bar at the top of the folder path to highlight the path.
Type 'cmd' in the address bar to launch Command Prompt.

Run the following command to generate the MS Word report in the 'GenerateWordReport' folder.
algoreport.exe "wordReport" "reportStoragepath"
This command instructs the algoreport.exe program to generate a report based on the provided Word document configuration and store it in the specified storage path.

The MS Word report will be generated in the 'GenerateWordReport' folder as shown:

Double-click the Word report generated in the previous step to view the report details, including the Test Execution Summary (field labels and values), Test Scenario Summary (scenario name, status, execution date and time, and test duration), and Test Step Summary (step number, status, description, expected results, and actual results).

Generating HTML Report using algoQA
Perform the following:
Once the script is executed,the HTML report is automatically generated and stored in the Test Report folder.
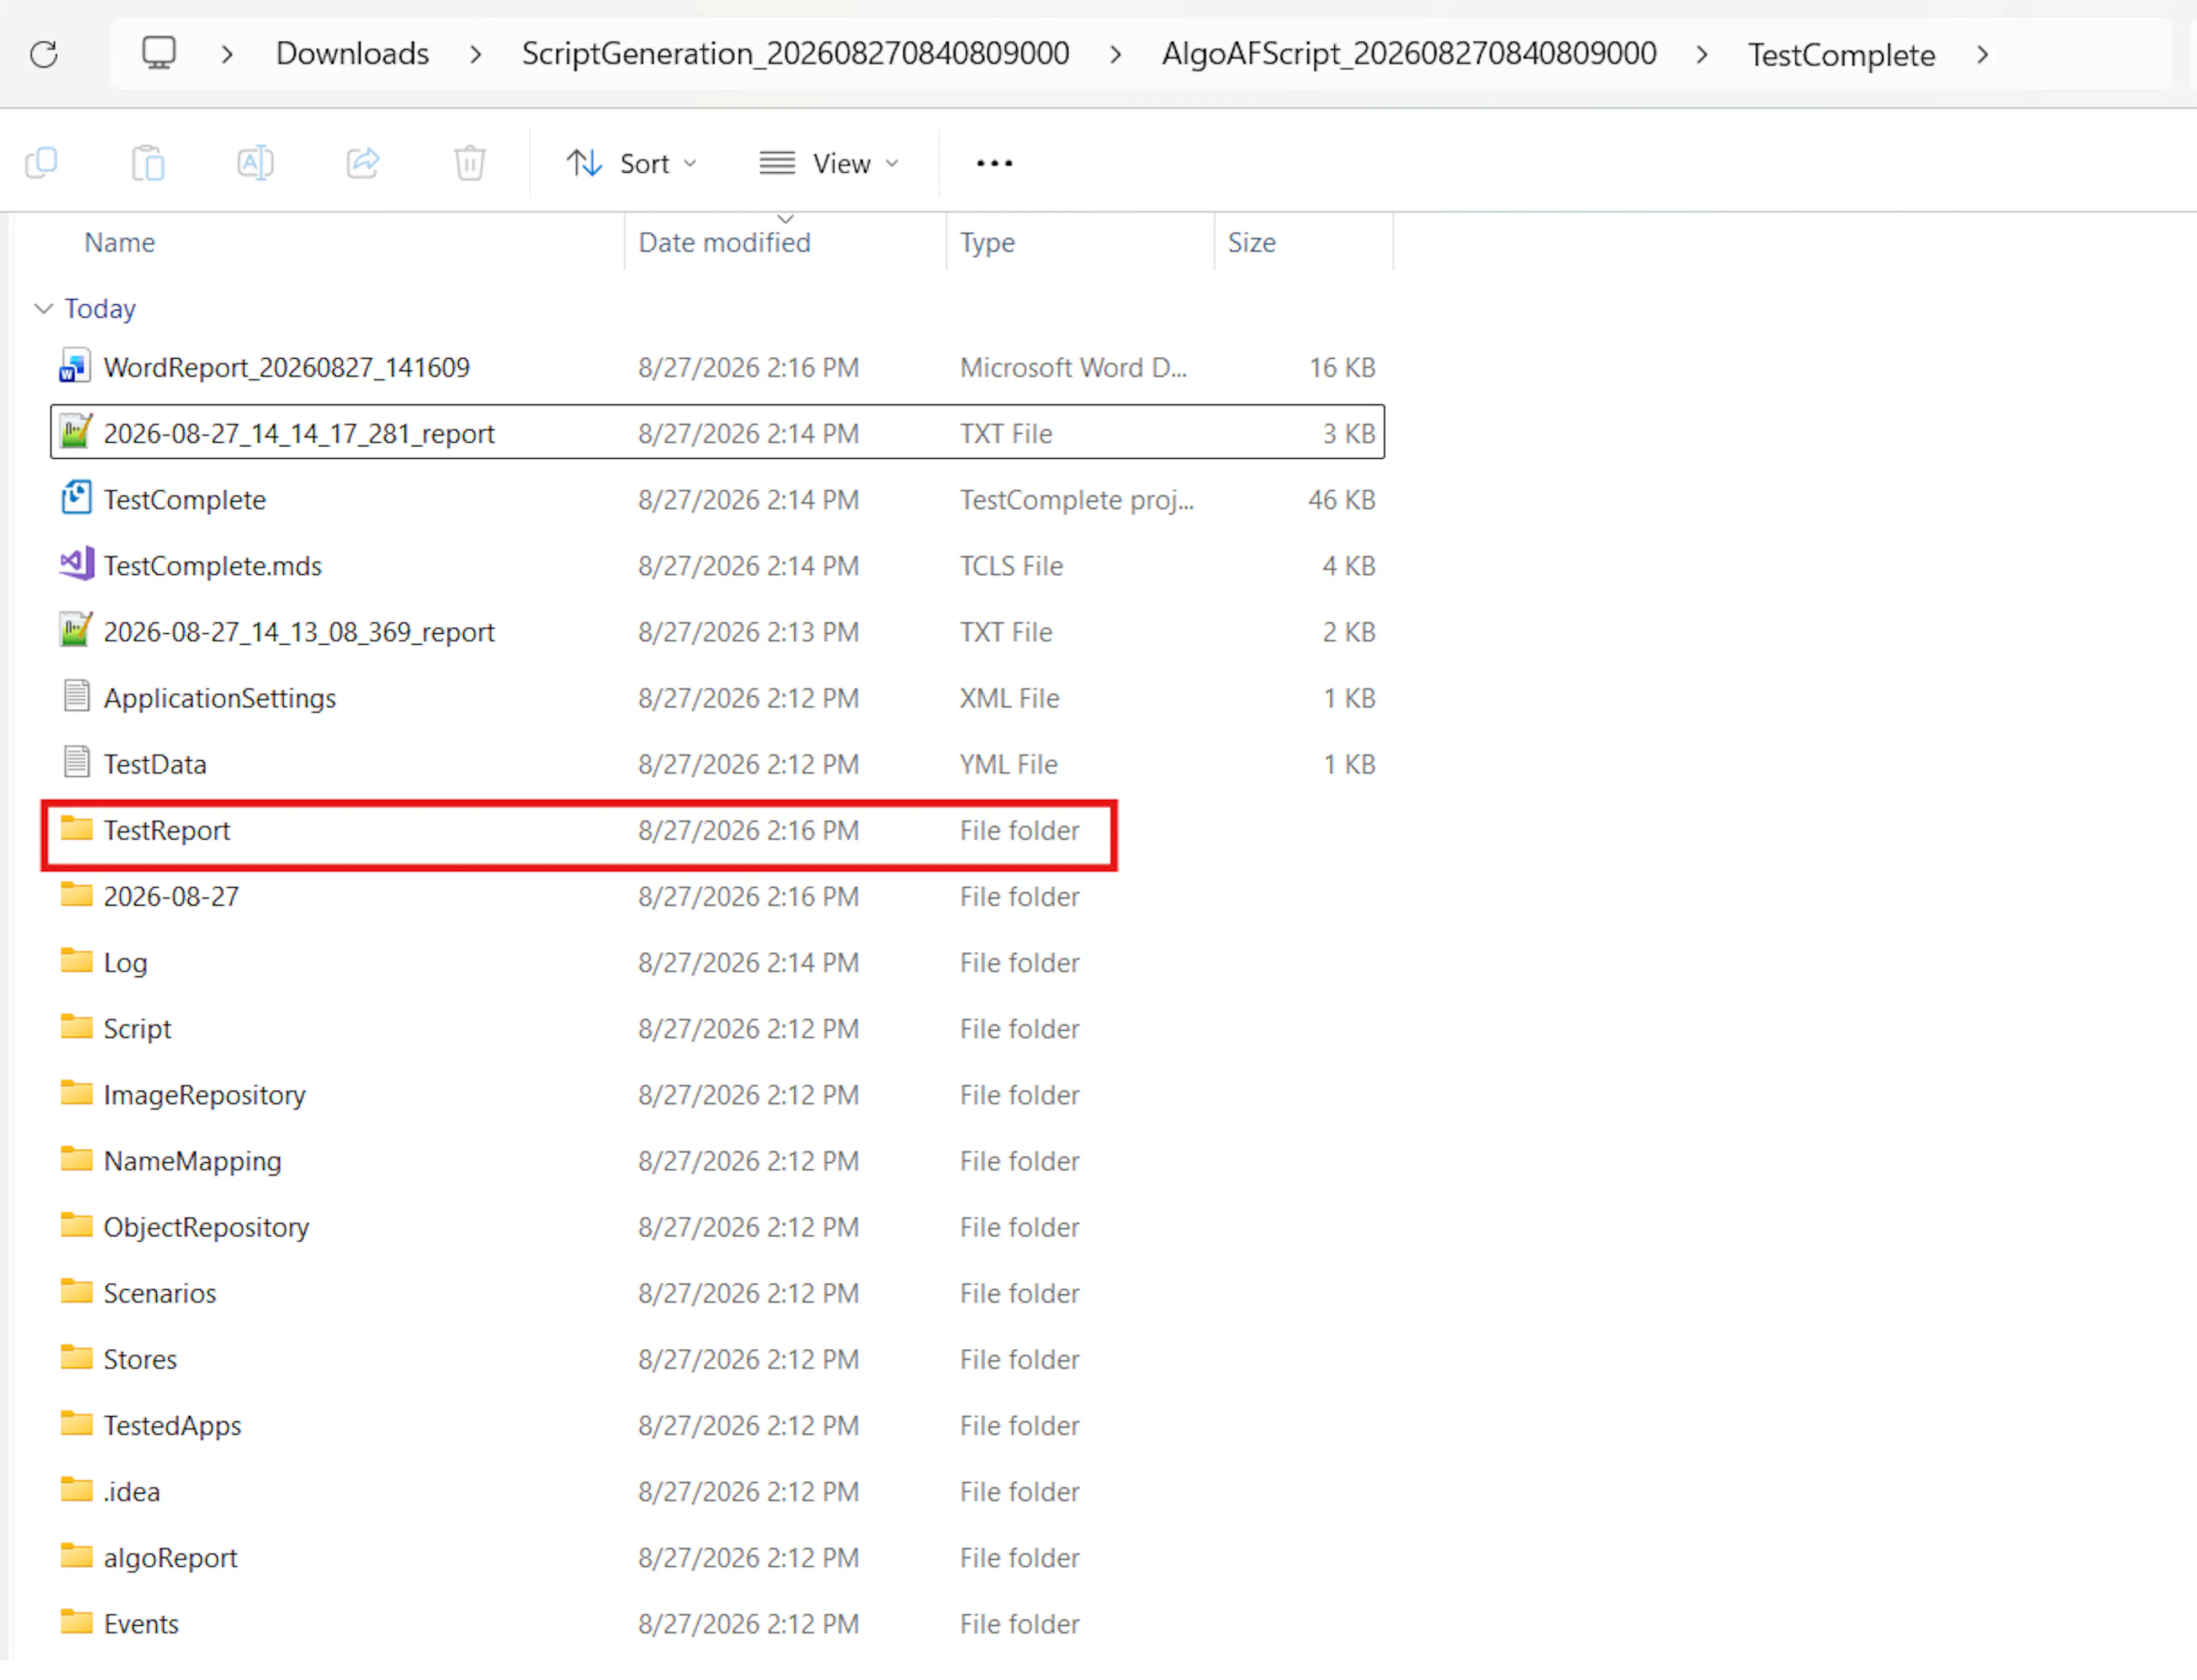
Open the Test Report folder and navigate to the timestamp folder. The HTML report is available there.
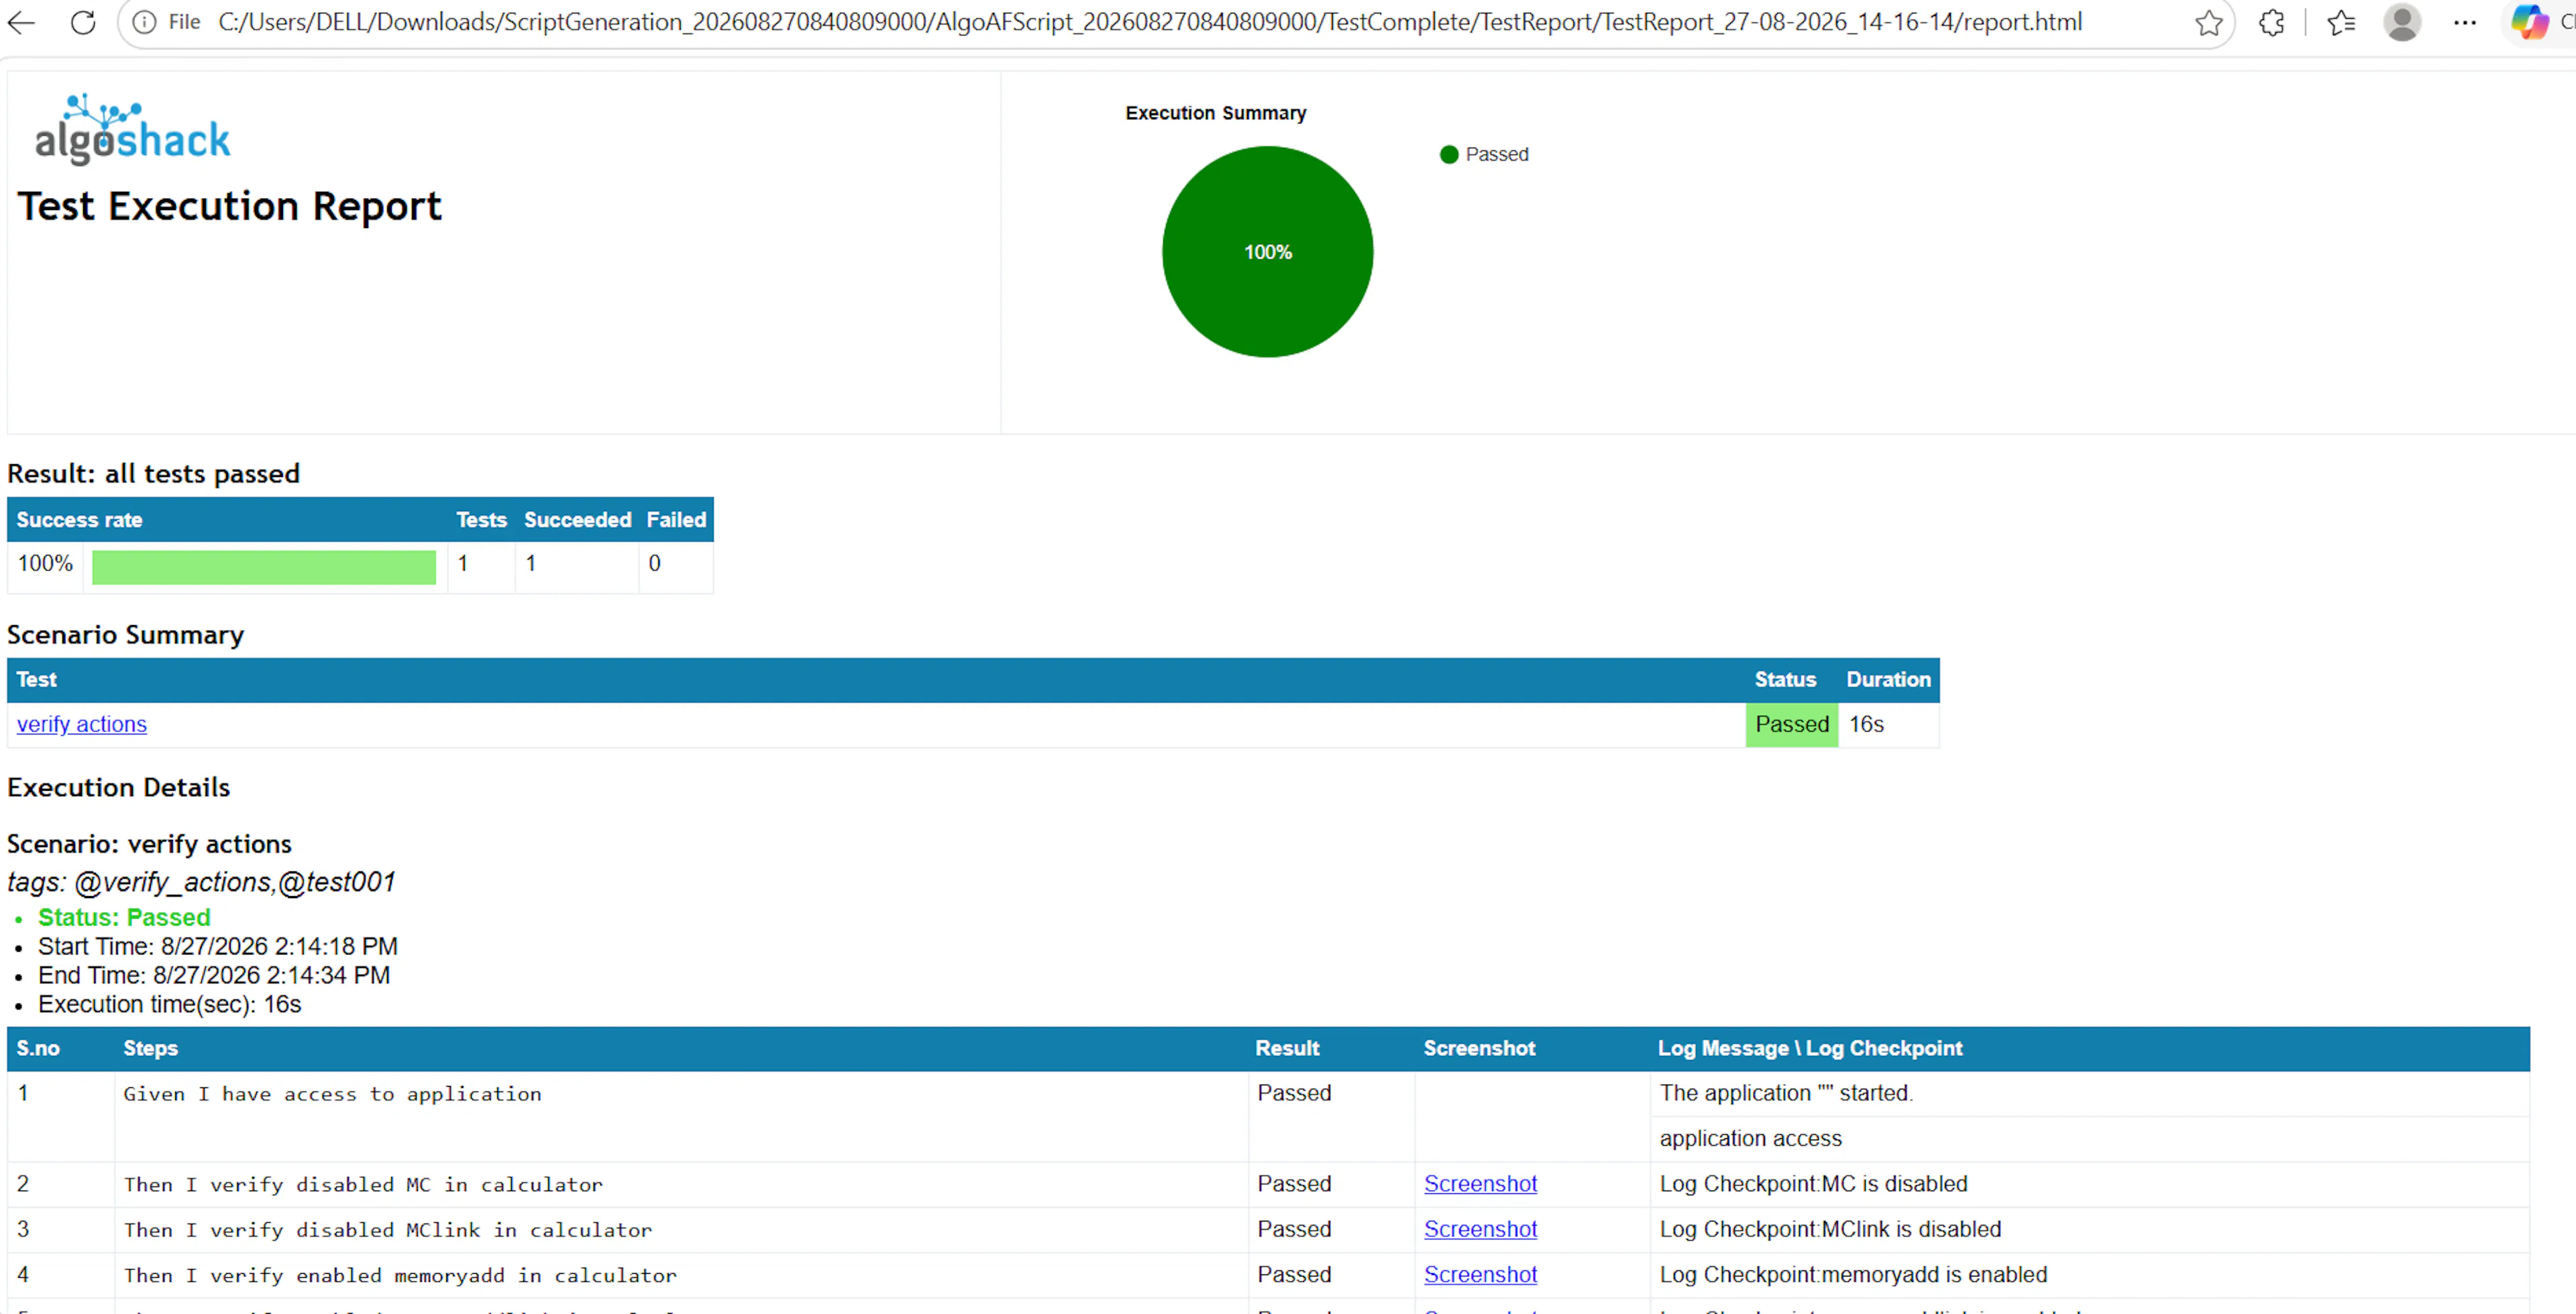
For all default verify actions without parameters, Log Message is replaced with Log Checkpoint. This change applies to the following default verify actions:
- Verify Disabled
- Verify Enabled
- Verify Text
- Verify Image
- Verify Not Displayed
- Verify Checked
- Verify Unchecked
- Verify Displayed