The Appium Setup dialog box appears. Click "Install".
Wait for the process to complete.
After completing the process, click "Finish".
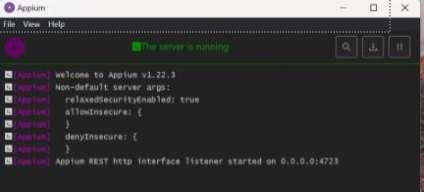
Next, launch Appium and click the Start Server button, as shown:
The server starts running.
Installation steps for Appium through command prompt
Download the latest Node and npm tools from the link: Node.JS and add the following path to the environment variables:
Under Path Variable:
C:\Program Files
odejs\
Run the following commands in the Command Prompt to install the following:
Install Appium
npm install -g appium
Install appium-installer
npm install -g appium-installer
Install Appium Server
Run 'appium-installer'Select the 'appium server' in the listClick Enter.
Install uiautomator2 driver
Run 'appium-installer' in the Command PromptSelect 'Appium Driver' in the listSelect 'uiautomator2' by pressing the SpacebarPress EnterRun the Appium server through the Command Prompt using the 'appium' command
Run the .exe file and enable the "Add Python 3.7 to PATH" checkbox. This automatically adds the environment variables during installation. Select "Install Now".
Wait for the process to complete and Click "Close".
Install the Python Packages by running the following commands in the command prompt.
Open the Command Prompt and type "pip install Package Name".
For example, in the Command Prompt window, type 'pip install allure-behave'.
Launching the Emulator
Perform the following:
In the Android Studio Screen, click the Device Manager icon as shown:
Click the Plus icon to choose a virtual device.
Click Create Virtual Device.
Choose the device model as "Pixel 8 Pro" or any other model you want to simulate and click Next.
Select the System Image as "API 35" corresponding to the Android version you want to use and click Next.
A system image is a file that contains the operating system (OS) for a specific version of Android that is used to run an Android Virtual Device (AVD) in the Android Emulator.
In the AVD pop-up window, click Finish.
The virtual device (emulator) is added to the Device Manager. Click the play icon to launch the device.
The emulator is launched, as shown:
To set the Appium Settings
Perform the following:
Open the Appium desktop app and click the "Start Server v1.13.0" button.
The server is launched. Click the search icon to start an Inspector Session.
To configure the desired capabilities in the Appium Inspector, click Custom Server and click Desired Capabilities.
To set the desired capabilities, add the following data along with the App Package, App Activity, and device name in the Appium Inspector. To add the App Package and App Activity, see How to Fetch App Activity and App Package.
To get the connected emulator details, run adb devices -l in the Command Prompt.
NAME                      Value
  "platformName":      "Android",
  "automationName": "Appium",
  "deviceName":       "generic_x86",
  "browserName":      "Chrome
After saving the Appium desired capabilities, click "Start Session" to initiate the session.
Click the Start Session button.
Prepare your Android phone as an emulator.
Start the session > Appium is launched in the Chrome browser. This indicates that the emulator is successfully connected.
To verify that your Appium server is running, look for the Appium icon, similar to the one shown in the following image: