
API Automation using Java Karate Framework
Automate API testing with the Java Karate framework in algoQA — install prerequisites, configure API nodes, generate test cases and scripts, and execute them to view detailed reports.
The Java Karate framework enables API test automation within algoQA using Gherkin-based syntax. This guide covers installing prerequisites, configuring API nodes, generating test cases and scripts, and executing them to view reports.
Prerequisites
Installations
Install Java and Maven by following the steps described in Configuring Web Applications Using Java Selenium Framework.
Adding dependencies in the POM file
Perform the following:
Navigate to the algoQA script generated folder structure.
Click the POM file.

Make sure to create a Maven Project if it has not been created earlier and add the following dependencies in the POM file:
<dependency>
  <groupId>com.intuit.karate</groupId>
  <artifactId>karate-core</artifactId>
  <version>1.4.0</version>
</dependency>
<dependency>
  <groupId>com.intuit.karate</groupId>
 <artifactId>karate-apache</artifactId>
 <version>0.9.6</version>
 <scope>test</scope>
</dependency>
<dependency>
 <groupId>com.intuit.karate</groupId>
 <artifactId>karate-junit4</artifactId>
 <version>1.3.1</version>
 <scope>test</scope>
</dependency>
API Test Automation Leveraging algoQA
This section describes how to automate an API by leveraging the algoQA platform.
Example
Consider the following examples to log in, create a profile, and delete a profile for a user using the following Feature names and HTTP Methods:
| Feature Names | HTTP Methods to call API |
|---|---|
| Login | POST |
| Create a profile | POST |
| Delete a profile | DELETE |
In this automation, configure the nodes, corresponding features, and UI elements as described in the following steps:
Perform the following:
Navigate to the Canvas.
Add node and enter 'User management' as the name.
Add Login, Create Project and Delete Project features in Test Design.
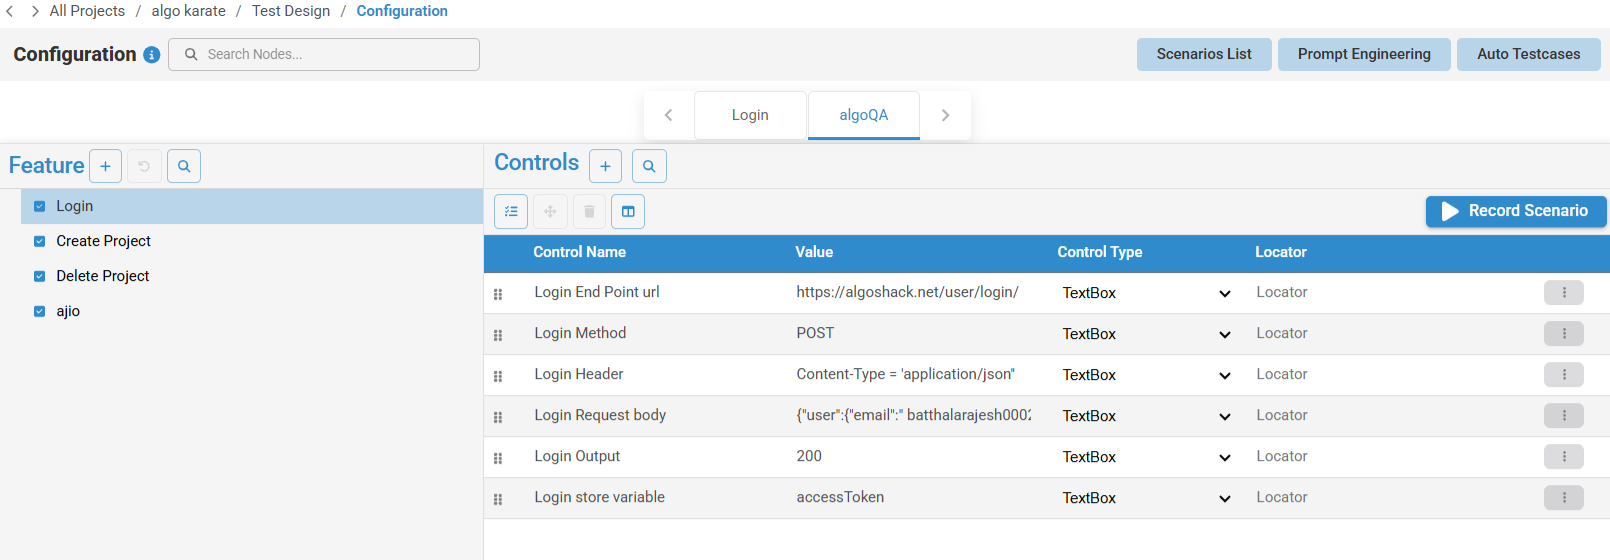
Click the Login feature and add the following control names and control values as shown in the following table.
Ensure to select Text Box as the Control Type for all the UI elements that you are providing:
| Control/UI element Name | Control Values |
|---|---|
| Login End Point url | "https://algoshack.net/user/login/" |
| Login Method | POST |
| Login Header | Content-Type = 'application/json' |
| Login Request body | {"user":{"email":"<username>@gmail.com", "password":"encrypted format"}}. Here, replace "<username>@gmail.com" with the actual user's email ID and "encrypted format" with the actual user's encrypted password. |
| Login Output | 200 |
| Login store variable | <accessToken> Here, replace with an actual variable. |
Sample screenshot:
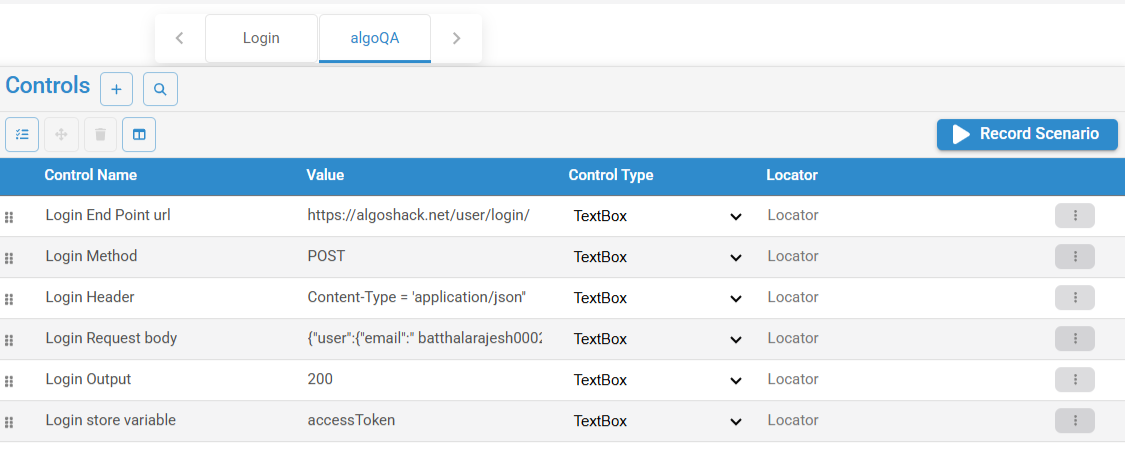
Similarly, enter the appropriate UI elements and corresponding control values for Create Project and Delete Project.
Record a scenario using Offline Recorder and generate Test Cases.
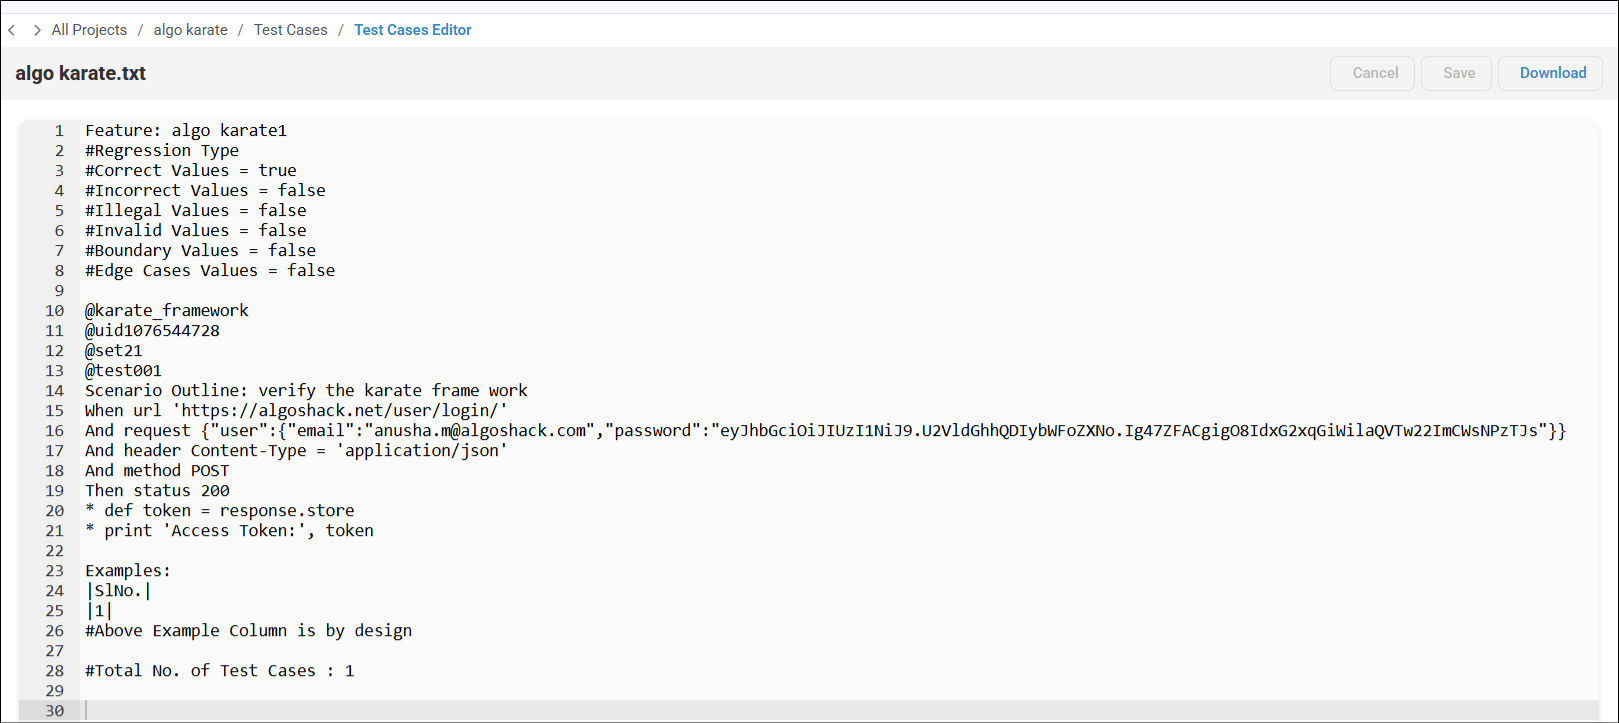
Test cases are generated in the Test Cases tab. For more information, see Record a Scenario using Offline Recorder article. The feature file can be viewed in Test Cases and a unique ID will be generated for each test case.
Selecting Test Step Settings options in the Scenario Steps List
Perform the following:
Navigate to Scenarios List>>Scenario Steps List>>Edit Step Form secondary screen by clicking the Edit icon of the first GWT step arranged in the sequence, select the 'no precondition' option from the Test Step Settings dropdown list and save (Login End Point url in this case).
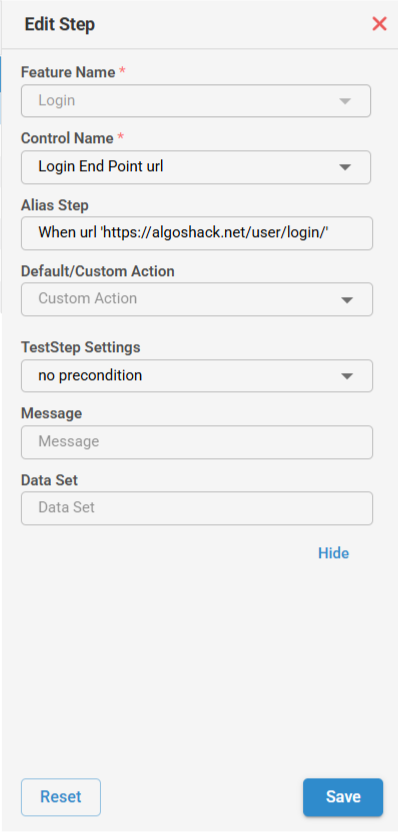
For the last step, select the 'no postcondition' option (in this case- Delete_Project_output) from Test Step Settings dropdown list.
In the Scenario Steps List, clear the Gwt Input contents if it exists for all the GWT steps.
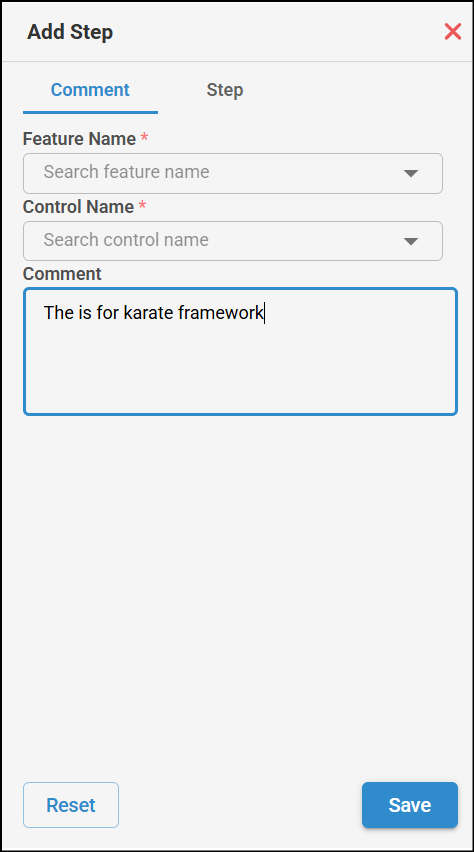
You can add specific comments in the Comment textbox, which is specifically used for this framework.
Click the '+' icon beside the GWT step and click Comment to view the comment space. Add a comment and click Save.
Generating Test Cases and Test Scripts
Perform the following:
-
Click Generate from the Scenario List screen and generate scripts either from test case generation pop-up window or from test cases tab.
-
Navigate to Test Cases, click Generate Script and select the generated Feature File and XLS file.
Scripts generation pop-up appears from where you can view and download the scripts.
For more information on generating scripts, refer to the Generate Test Cases and Test Scripts article.
Executing the Scripts
Download the generated script to your local folder.
Extract the contents to your local drive.
Open the command prompt from the same folder where you have extracted the script.
Run the following command to execute the script:
mvn test -Dkarate.options="--tags @test001"
You can view the respective report once the script is executed.
