
Settings For API Automation
The Settings page allows you to configure and manage settings for your project, including Project Information, Backup & Restore, and Business Rule Settings. Select a project and navigate to settings in the left pane.
Summary Description of Project Settings Page
Navigate to Settings > Configuration Settings to view the project settings.

The following table provides a summary of Project Settings fields:
| Field | Description |
|---|---|
| Project Name | Displays the Project name entered during project creation. |
| Automation Type | Displays the Automation type entered during creation of the project. By default, this textbox is not editable. |
| API Type | Displays the API type, you can select either REST API or SOAP API. |
The following table provides a summary of Backup and Restore Settings Fields:
| Field | Description |
|---|---|
| Daily Auto Backup | Auto-backup is enabled by default for all projects, and the auto-backup checkbox is disabled on the project settings page, if the project is assigned to you, these fields will not be available. |
Summary Description of Feature File Settings Page
Navigate to Settings > Configuration Settings to view the Feature File settings, available below the project settings.

The following table provides a summary of Feature File Settings Fields:
| Field | Description |
|---|---|
| Group By Module | Check this check box to generate a separate Module, folder structure, and update. For more information, see Generating separate Module in separate folder. |
| Remove Default Tags | Check this check box to Remove Default Tags from the generated Feature file and update, if you choose to add custom tags. The following screenshot represents the original Feature File with this option unchecked: 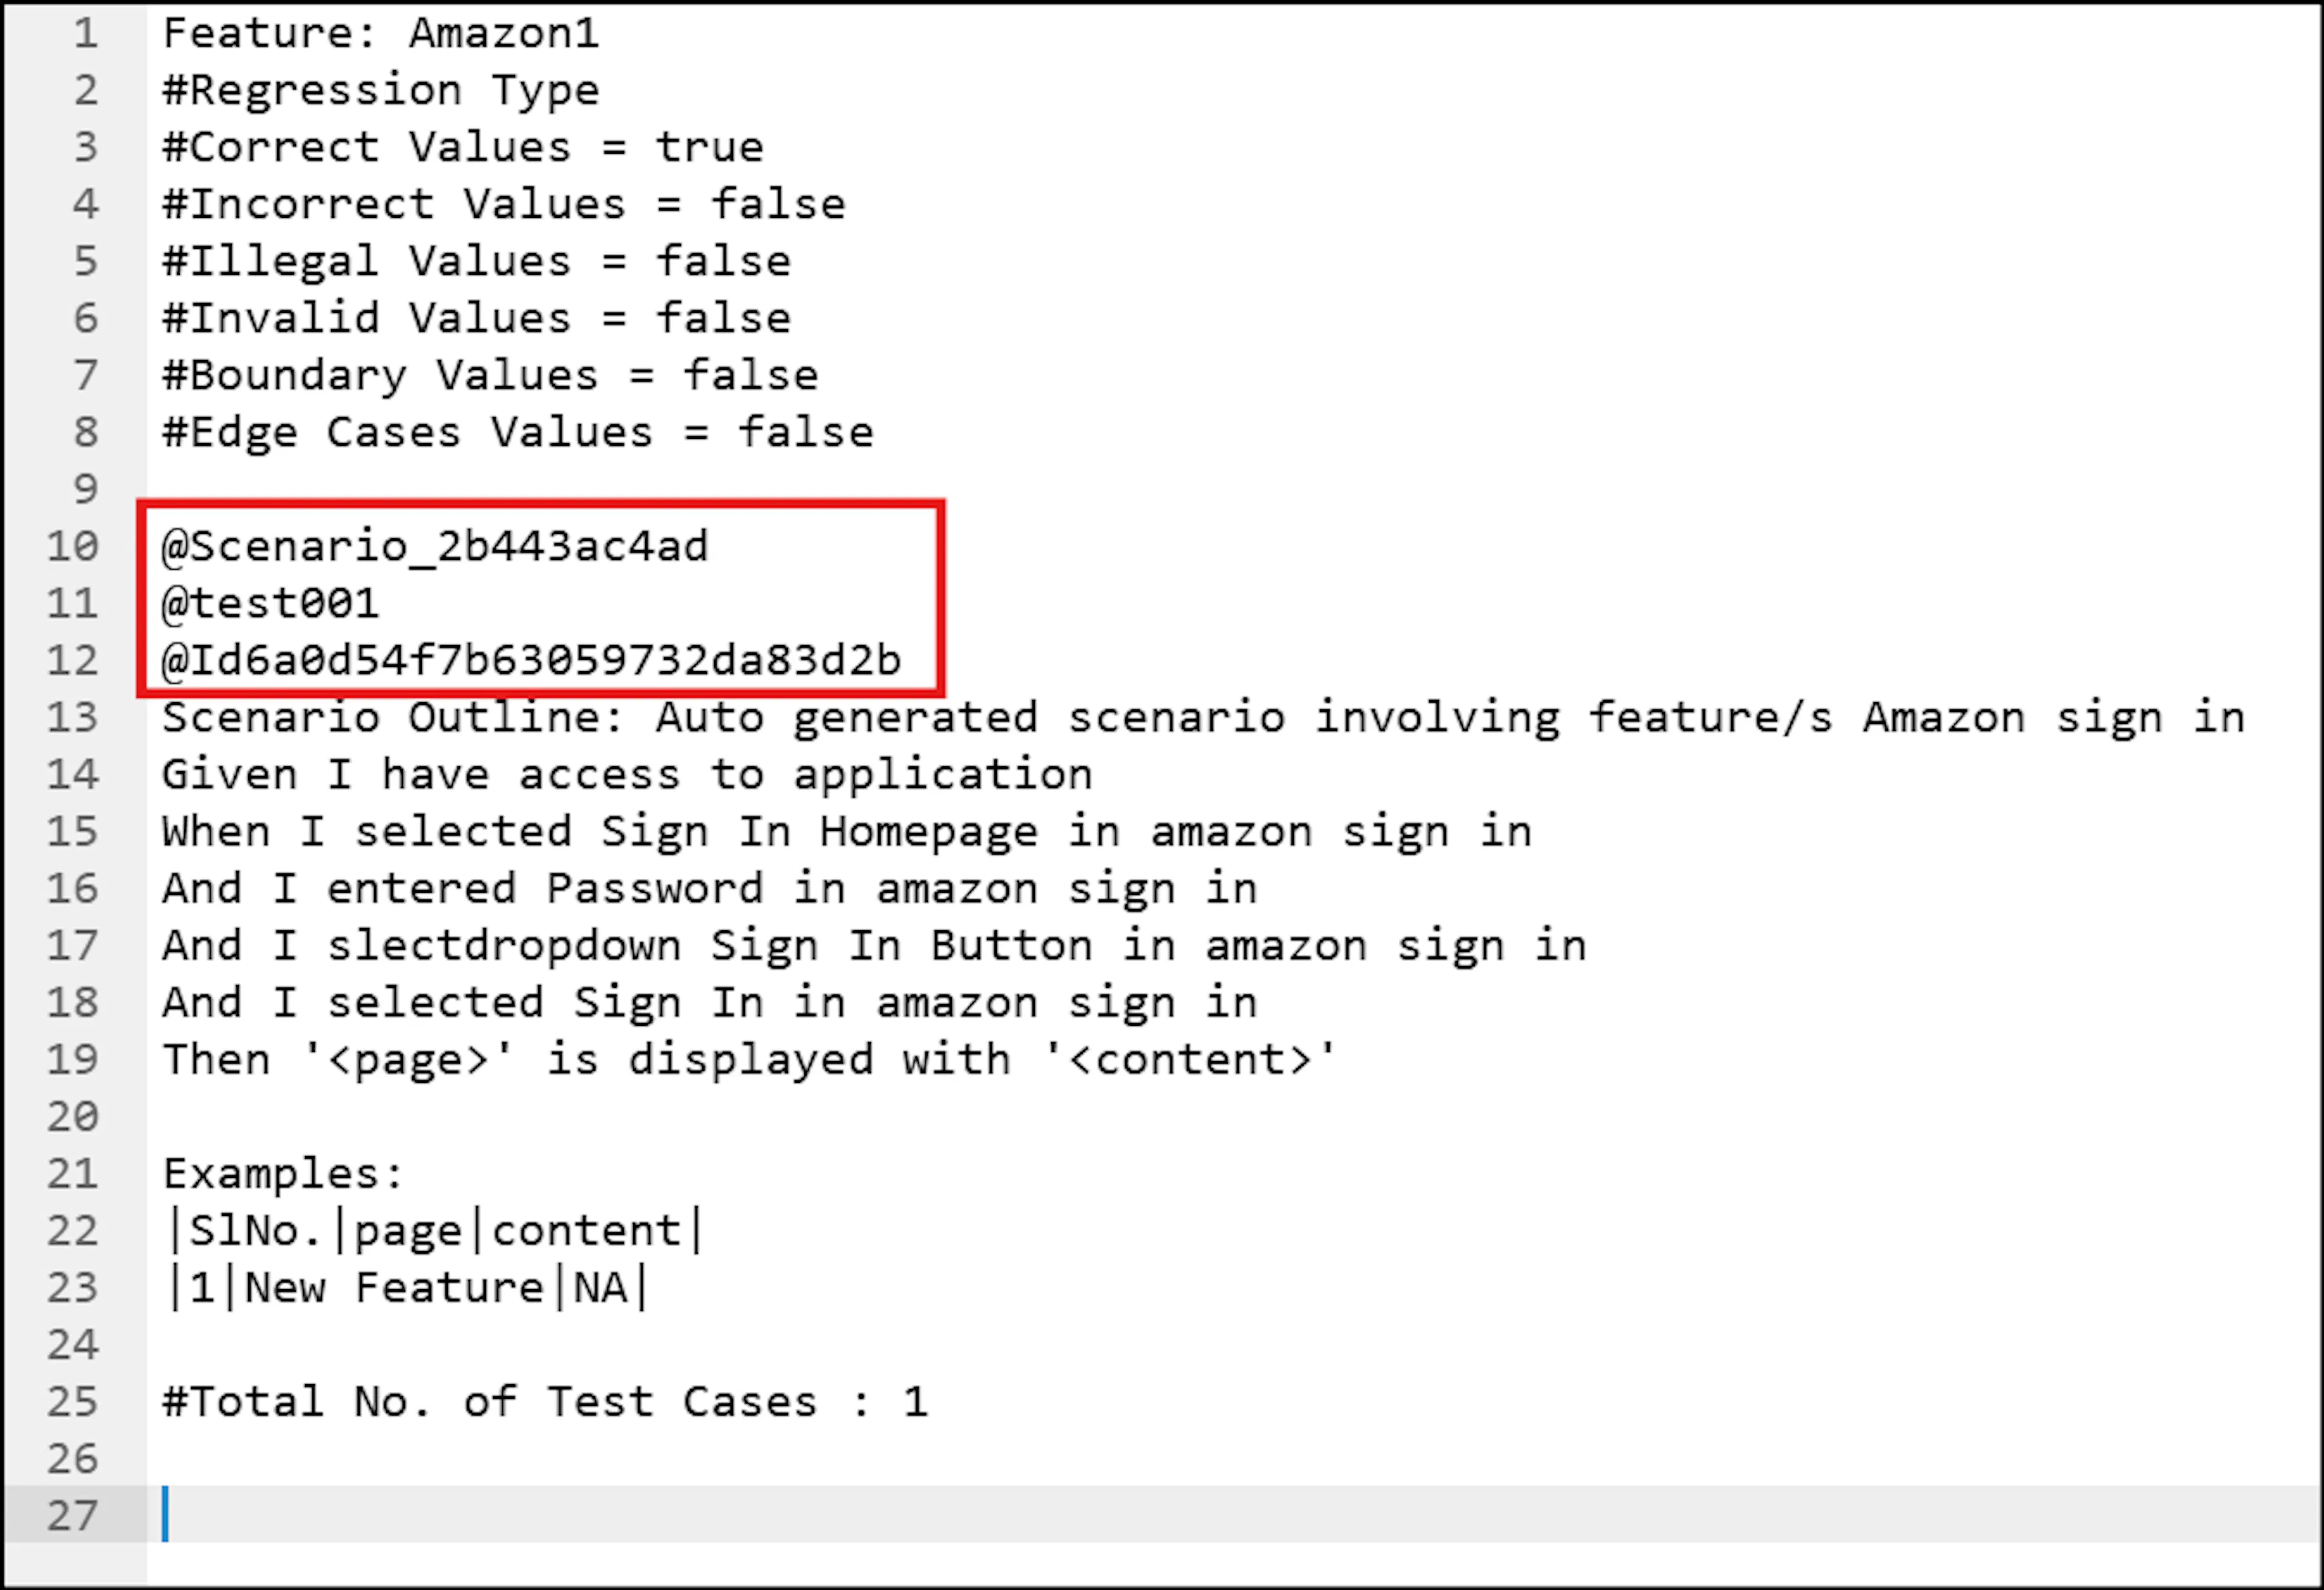 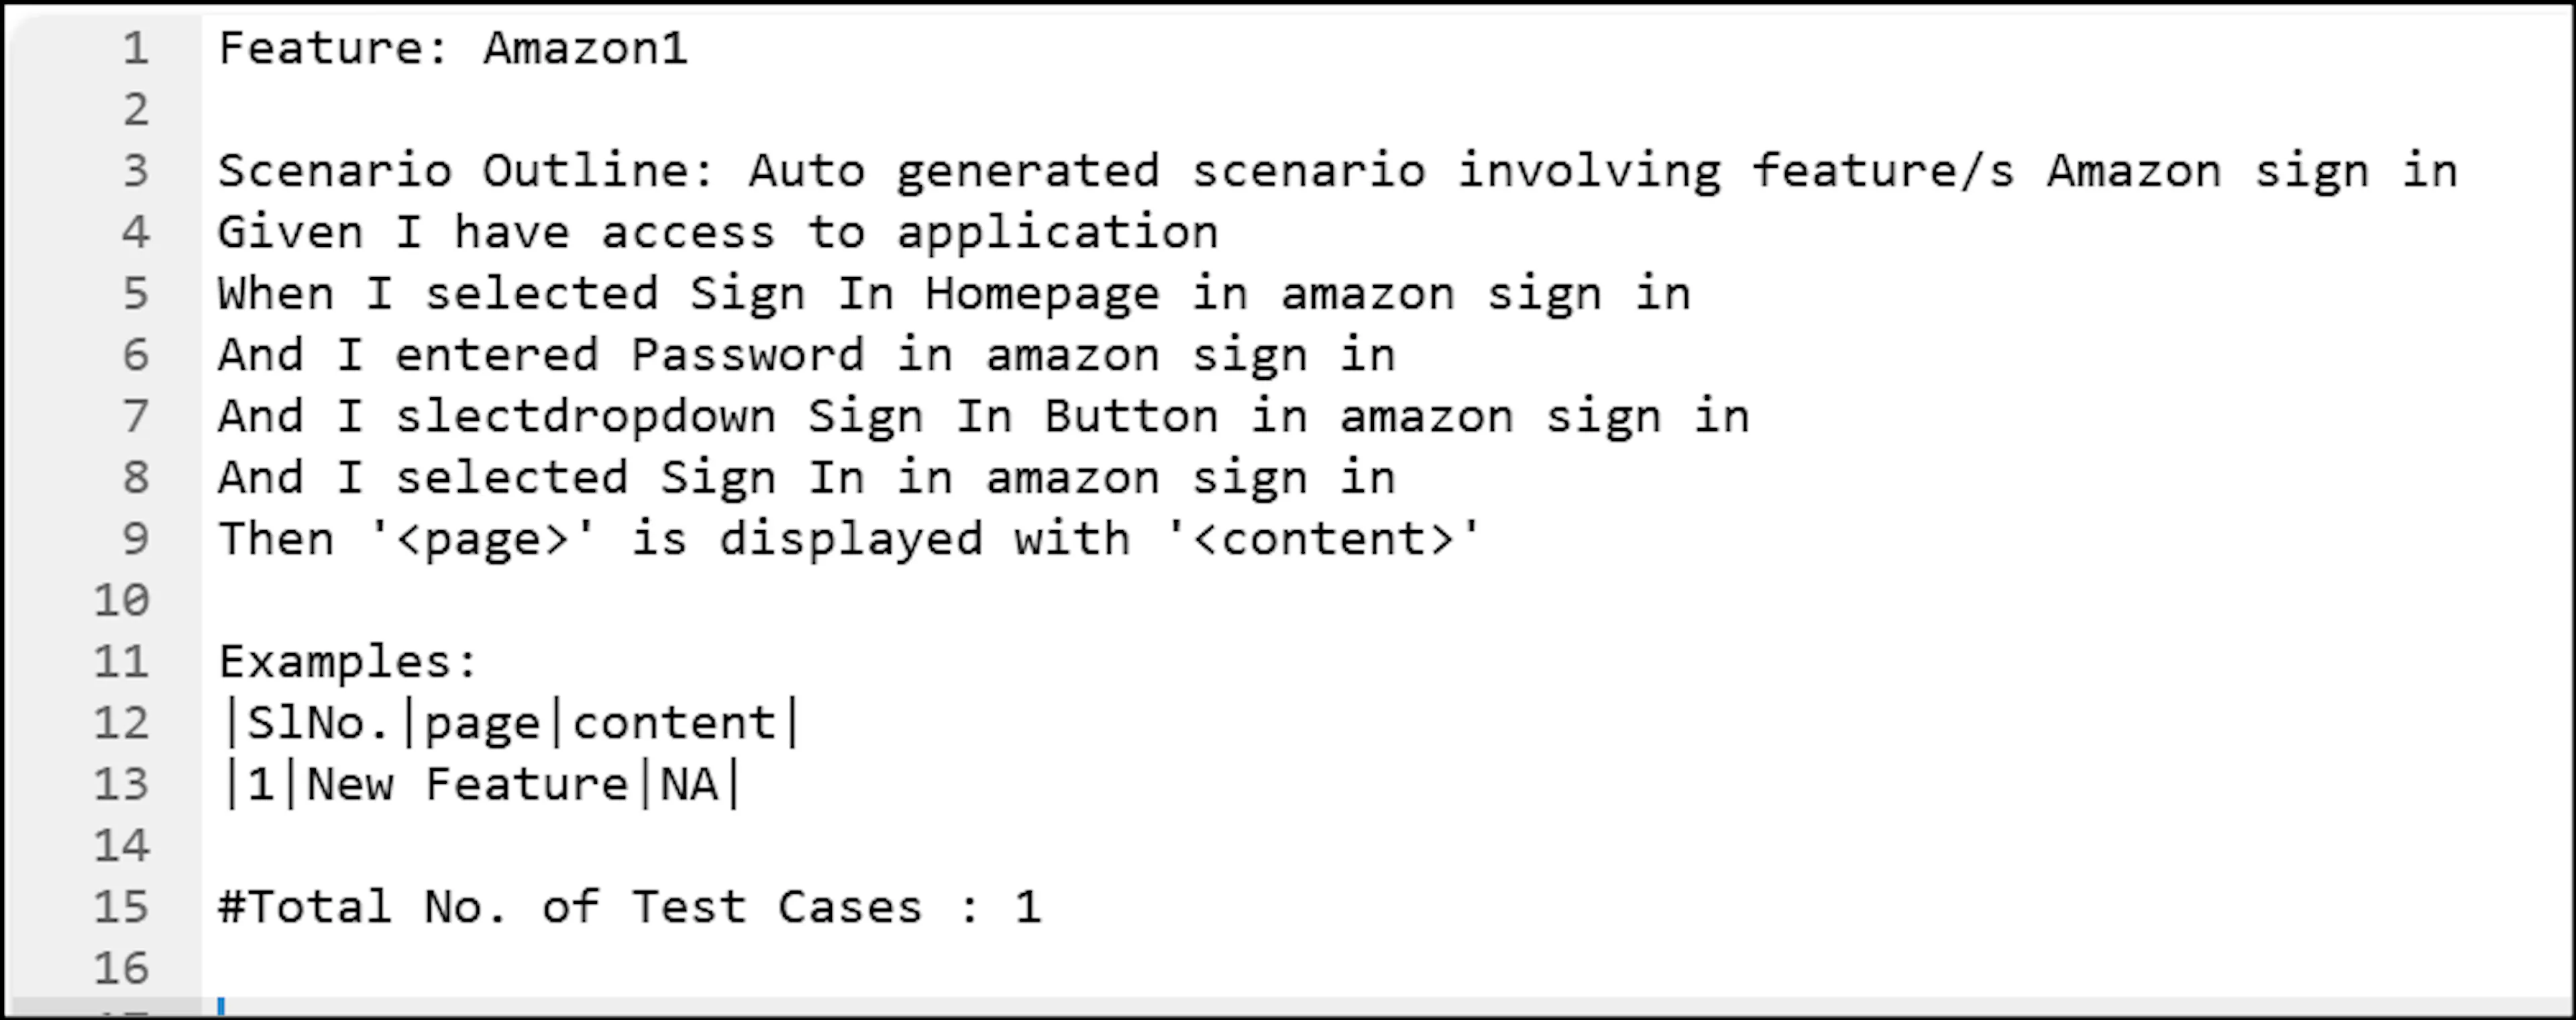 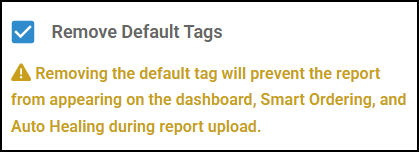 |
| Scenario Input | You can add input for the GWT line, which will be automatically applied across the project. |
Summary Business Rule Settings Page
Navigate to Settings > Business Rule Settings to view the Business Rule Settings screen.
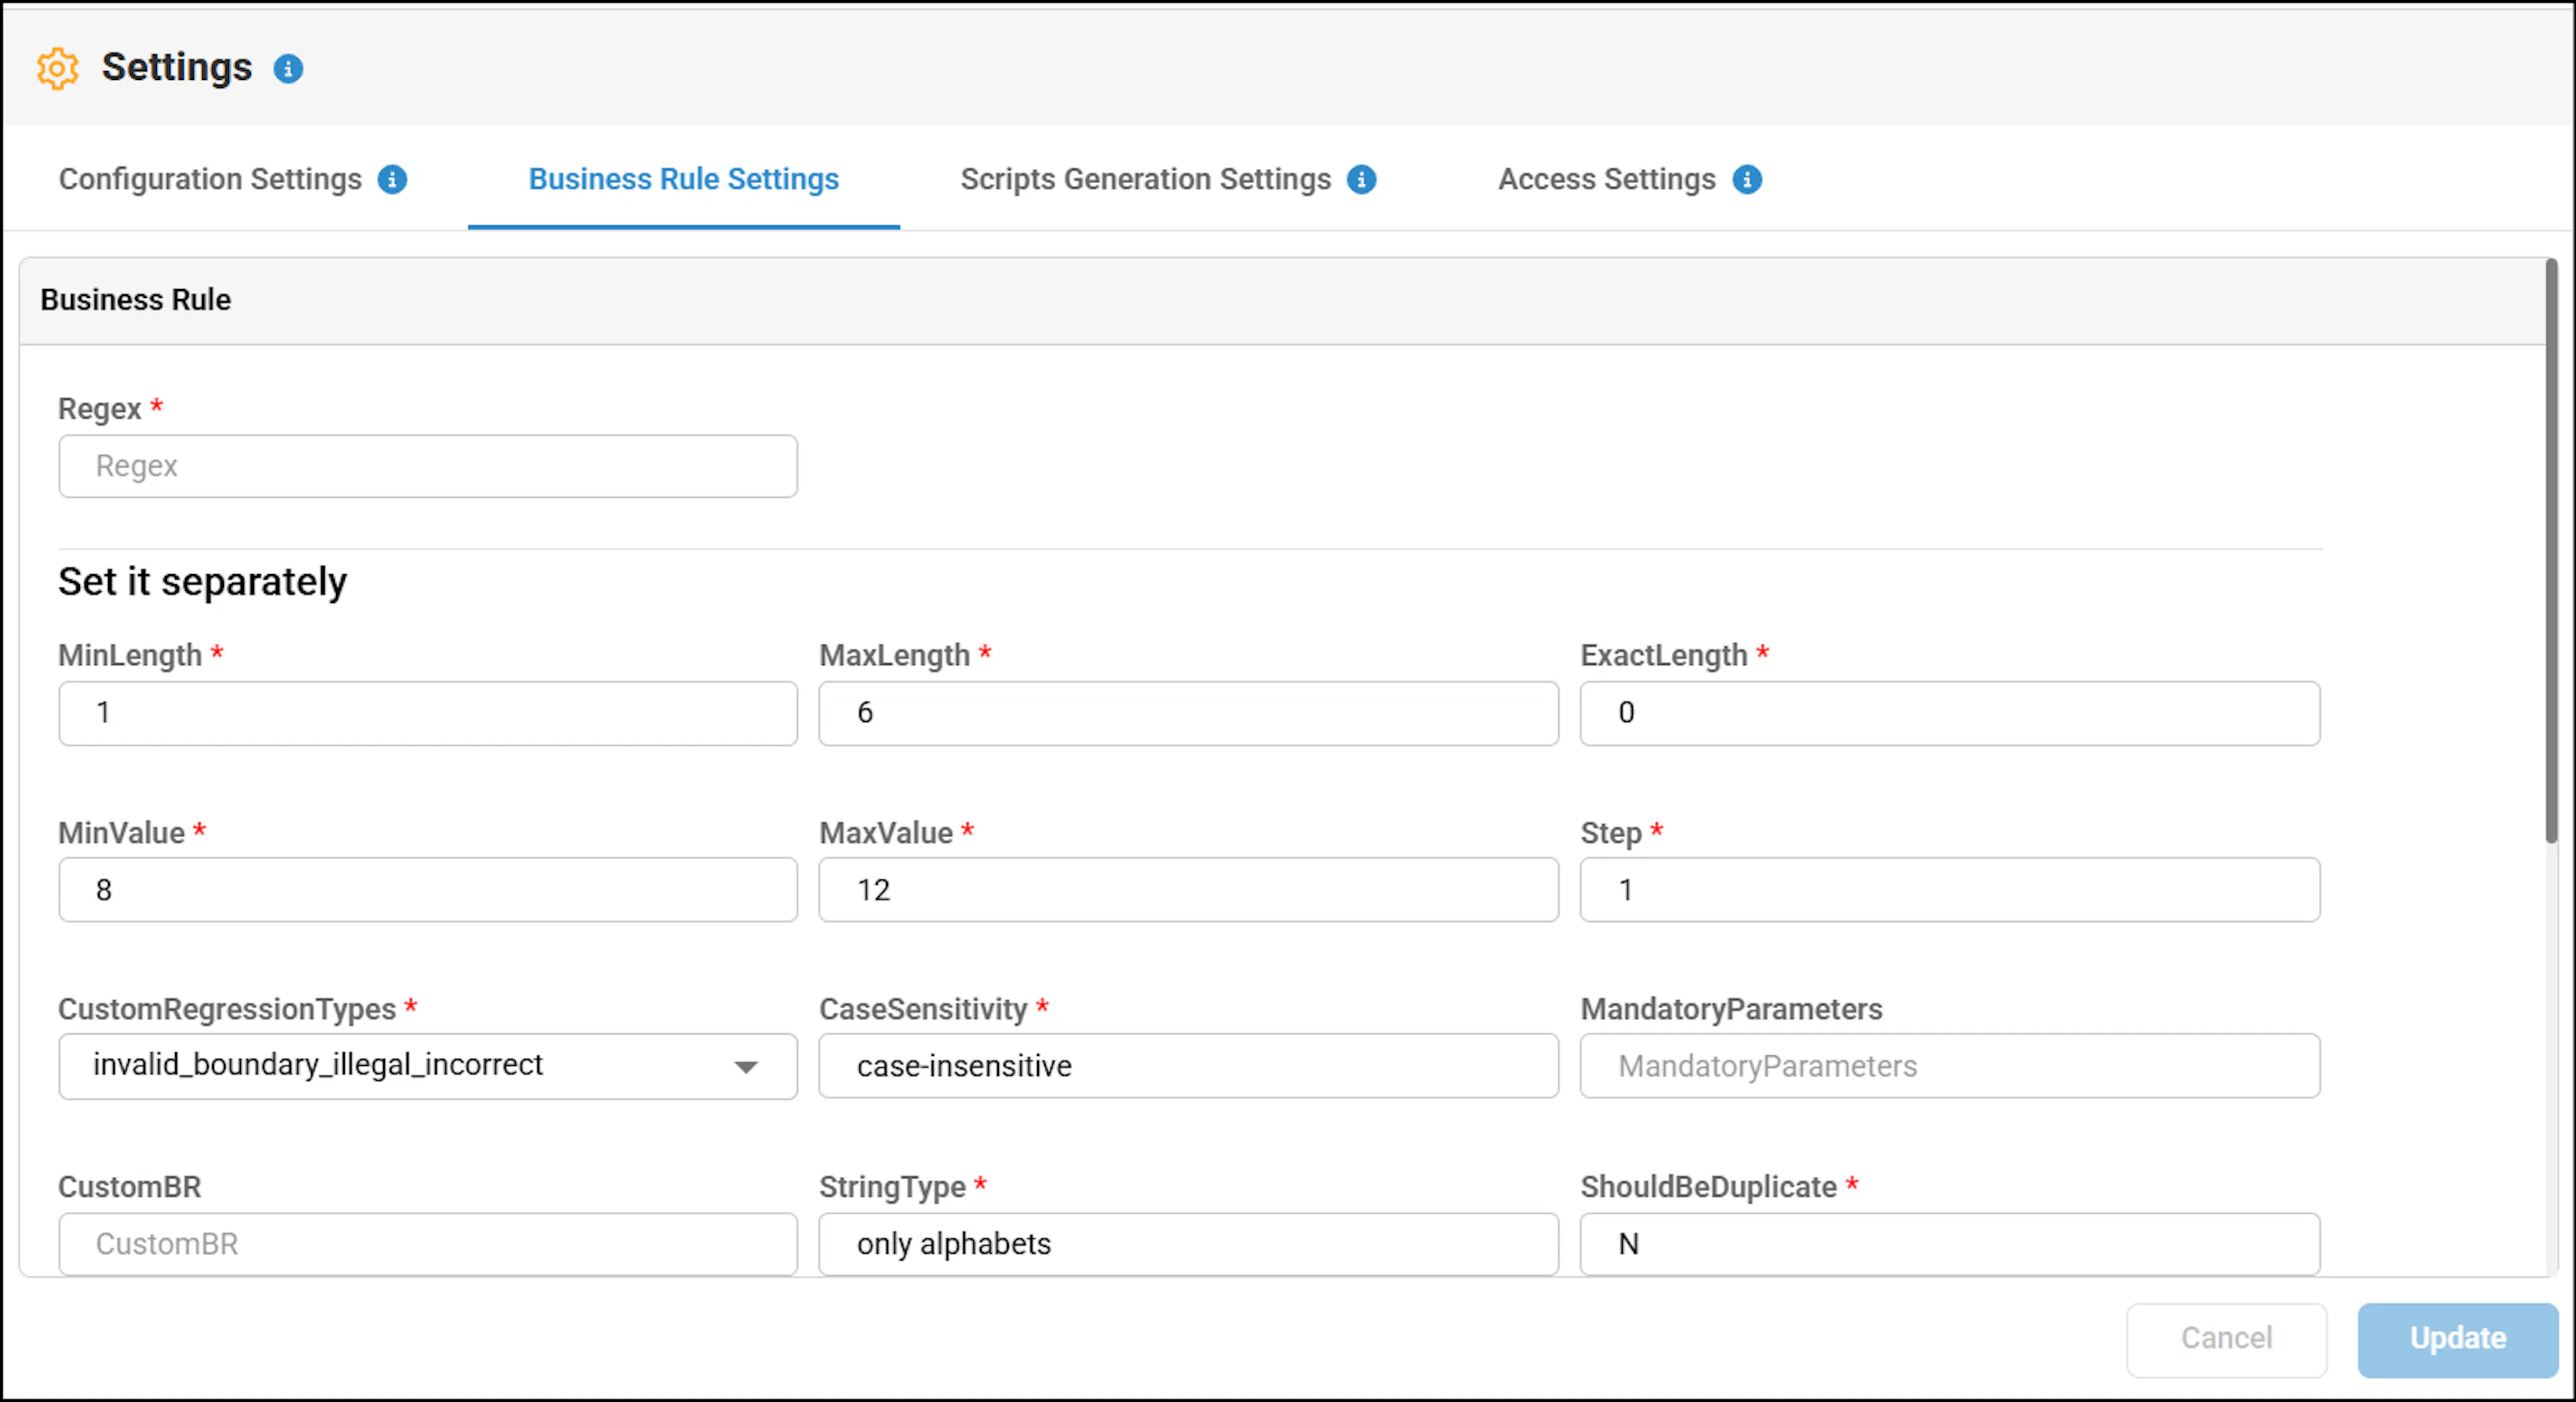
Business Rules contain parameters. Let us understand the parameters in Business Rules.
| Parameters | Description |
|---|---|
| Regex | Regex patterns are used to search for specific types of information within text. They help define rules for matching certain patterns, such as email addresses and phone numbers. For more information on Regex Patterns, see Troubleshooting guide. |
| minLen, maxLen, and exactLen | minLen, maxLen, and exactLen are the parameters used to set the minimum, maximum, and exact length of data to be generated, and are applicable only for string data. |
| minVal and maxVal | These parameters ensure numeric inputs stay within the defined range and follow the specified step. minVal and maxVal are used to define the minimum and maximum value of the textbox to be accepted. The step is used to generate the boundary values for minimum and maximum values. Select the Boundary values option in the Data Generation option. |
| Data Generation | By default, this option is set to Y. Data Generation determines whether the text field or text area requires a business rule. If the value is Y, then the combinational data set will be generated in the feature file. If the value is N, then the value is passed in the userfed input (test data or parameter) during Node Configuration that will be generated in the feature file. Ensure that you select all the values in the Data Generation option to generate negative test data. For more information, see Configuring Combinatorial Data Generation in algoQA. |
| Custom Regression Types | Here, you can generate test data using these values (invalid_boundary_illegal_incorrect) instead of selecting the appropriate checkboxes in the Data generation section. You can replace any value with NA if it is not applicable and generate test data. |
| Case-sensitivity | CaseSensitivity will generate the case-sensitive or case-insensitive test data as per the provided value. Case-sensitive will generate values as per the user-fed input. Case-insensitive will generate combinations of uppercase and lowercase letters. |
| String Type - Only Alphabets | Here let us generate different data types by using StringType Business Rule. Data can be generated in different ways such as only alphabets, only numeric, and alphanumeric. |
| ShouldBeDuplicate | ShouldBeDuplicate will generate duplicate values when the key value is Y and not generate the duplicate value when it is N. |
| CaseCondition | CaseCondition will generate the test data which contains at least one upper case or one lower case character or both in the string. |
| QuotesAroundString | QuotesAroundString will generate the string data enclosed with quotes. |
| SpecialCharacter | This will generate the test data which contains at least one special character in the string. |
| Date_Format | Here, you can generate test data for a date in the formats, such as NOT SELECTED /dd-mm-yyyy /mm-dd-yyyy /yyyy-mm-dd /yyyy-dd-mm |
| Message Categories | Message Categories are the fields used to verify the validation messages for the negative scenarios. For example: If a user clicks Continue without entering a username or email address, it will display a validation error message as "Enter your email or mobile phone number". To verify this kind of validation error messages, the user can update the message categories fields. |
Summary Description of Script Generation Settings Page
You can change the Script Generation settings by clicking the Settings > Script generation settings. You can change the language and framework for a particular automation type.
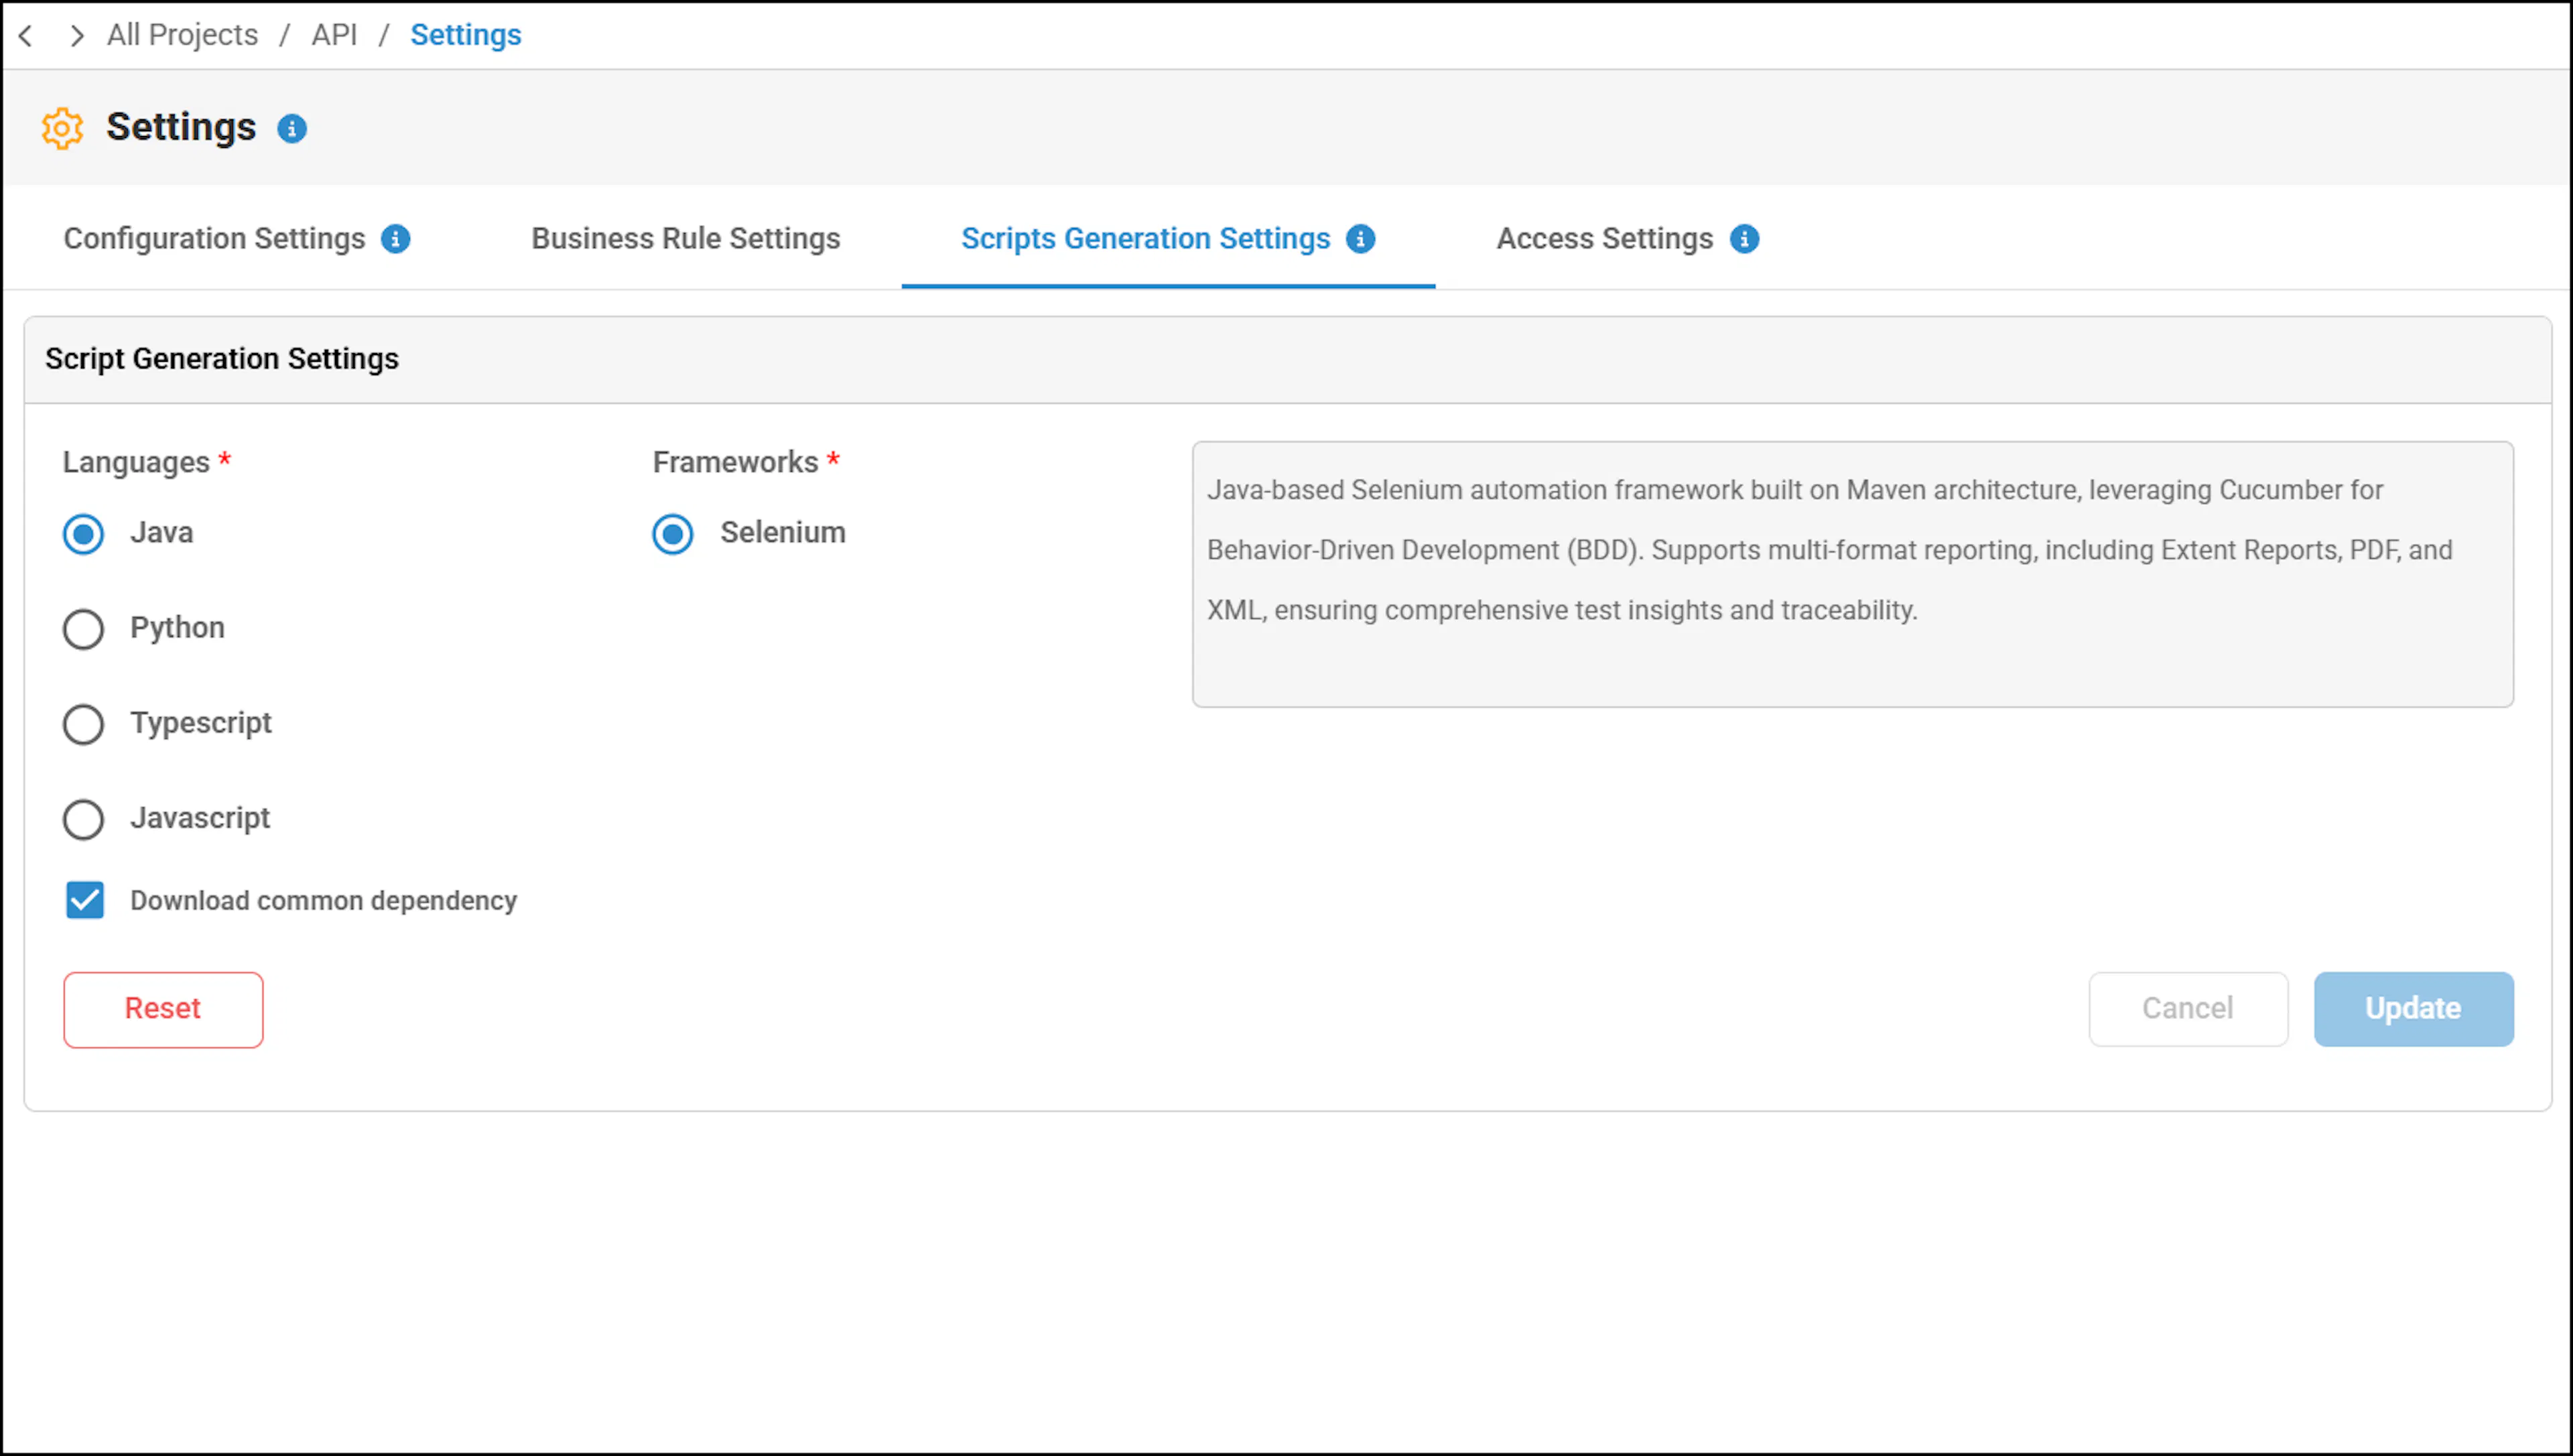
Perform the following:
Navigate to the Settings.
Click the Script Generation Settings.
In the Script Generation screen, you can update the language and frameworks of a specific automation type.
You can choose whether to include common dependencies when generating the script.
Before generating the script, select the Download Common Dependency checkbox to include them, or clear the checkbox if they are not required.
Click the Update button.
If you choose to revert to the original changes, then click the Reset button if you have already updated and click Cancel if not updated.
Application Settings for Script Generation
The Application Settings panel appears on the right side of the Script Generation Settings page. It groups settings into collapsible sections that control how the generated script runs.
Navigate to Settings > Script Generation Settings. In the Application Settings panel, click a section name to expand it, update the required settings, and click Update. To revert changes, click Reset (if already updated) or Cancel (if not updated). Use the Search field at the top to find a setting quickly, or the Expand/Collapse icon to toggle all sections.
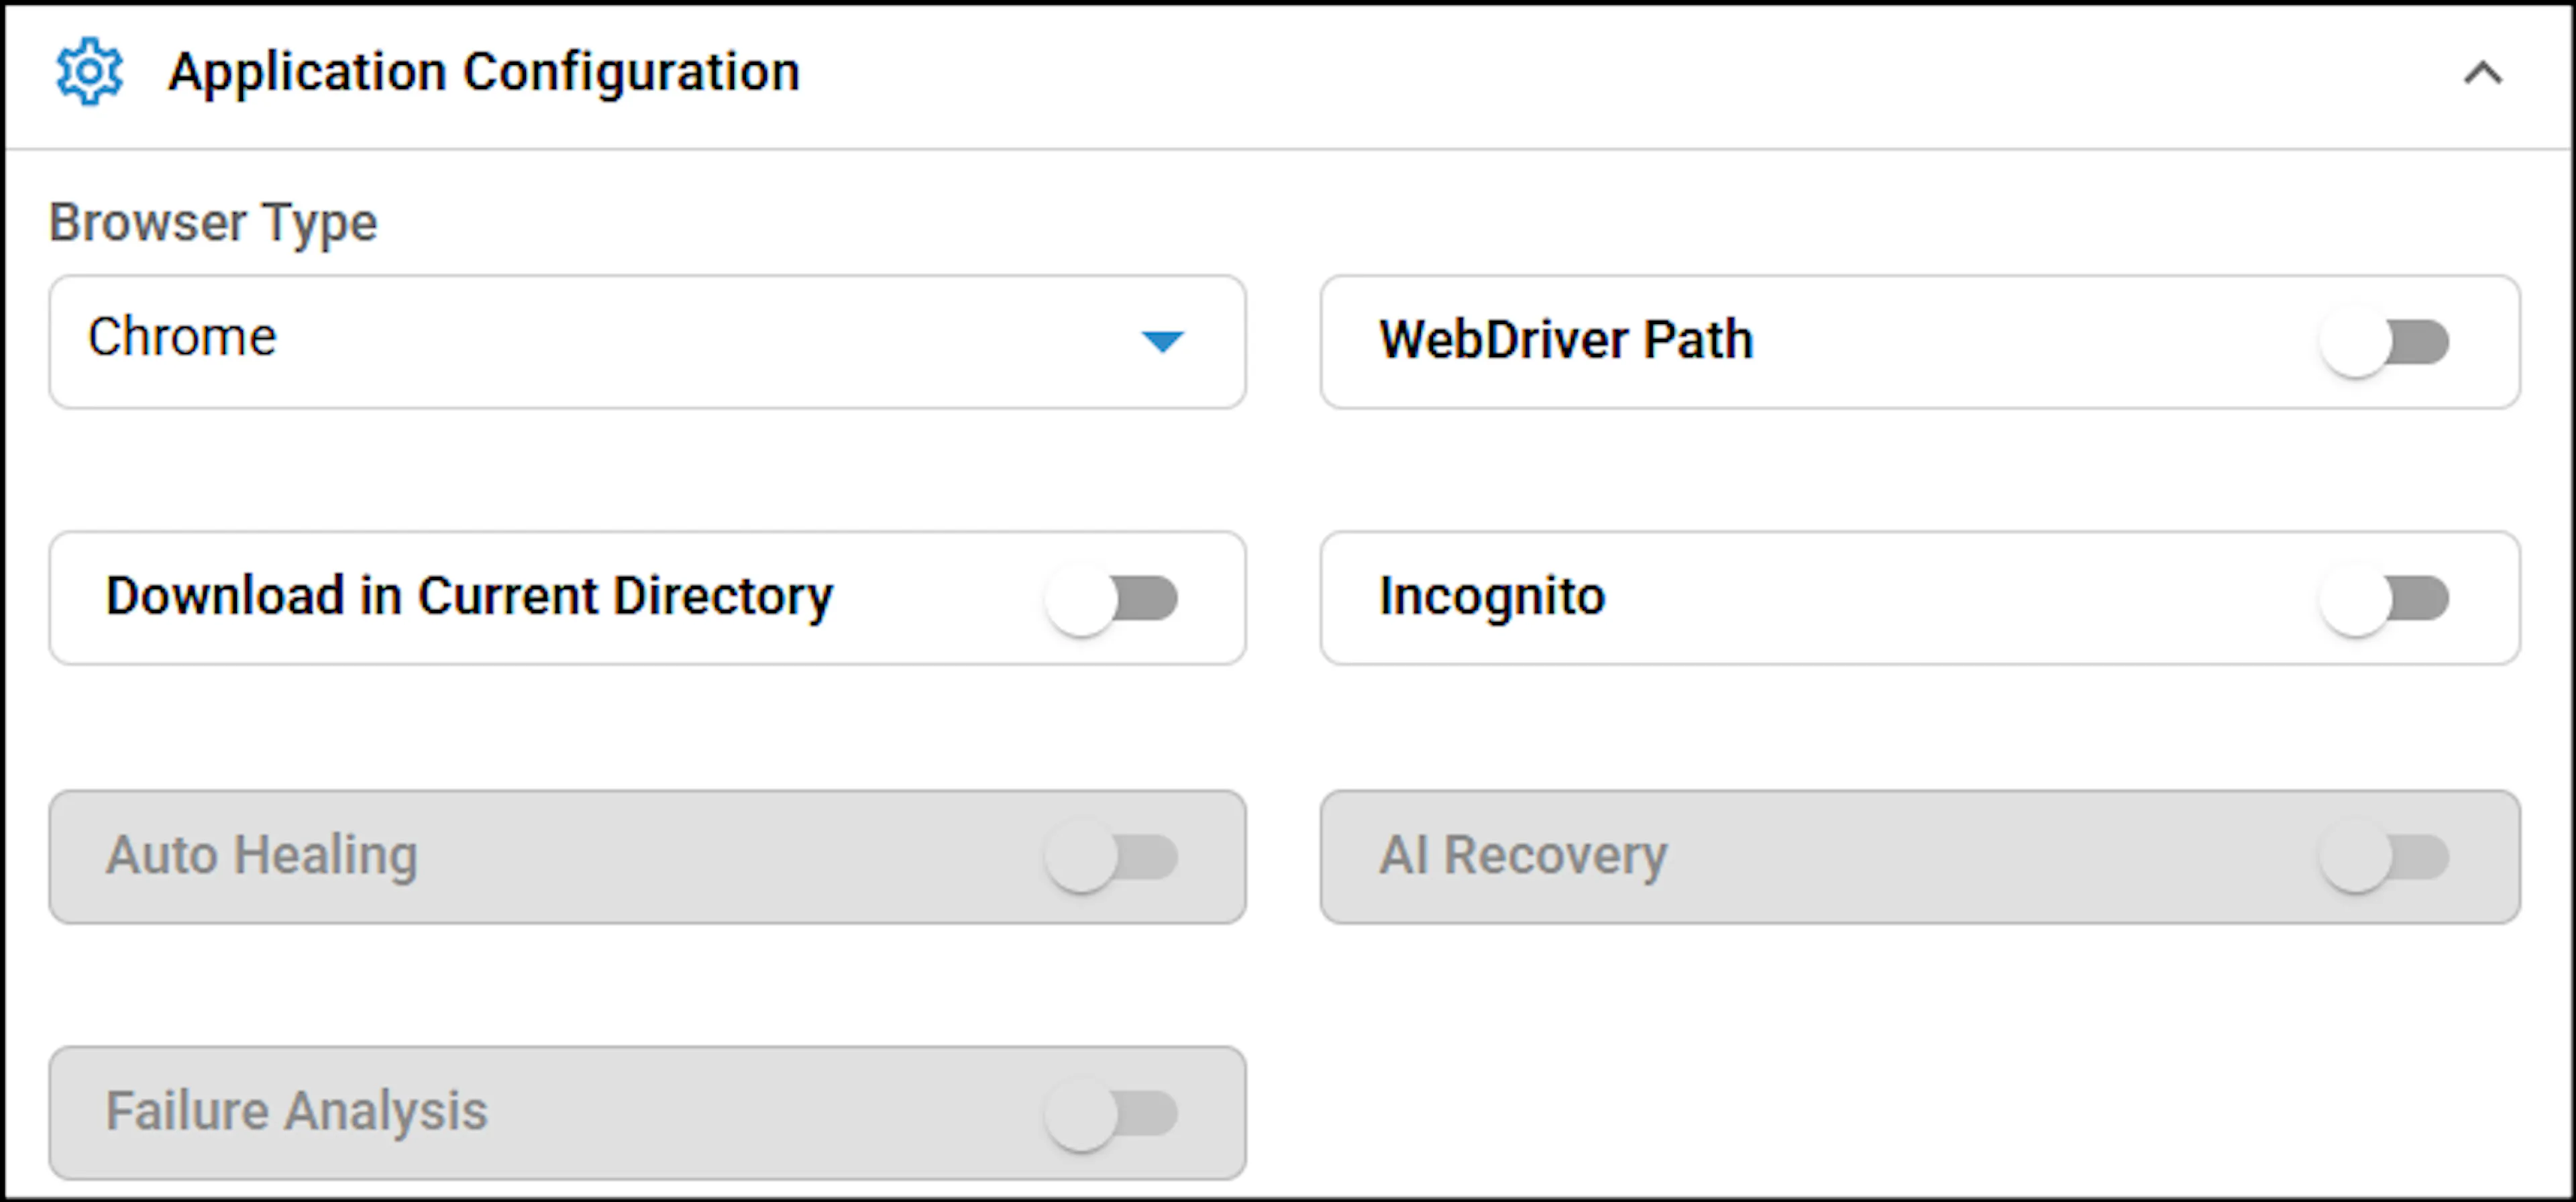
Application Configuration
| Field | Description |
|---|---|
| Browser Type | Select the browser used when the generated scripts launch a browser session, for example, Chrome. |
| WebDriver Path | Turn on this toggle to specify the location of the WebDriver executable instead of the default driver. |
| Download in Current Directory | Turn on this toggle to save files downloaded during execution in the current directory. |
| Incognito | Turn on this toggle to launch the browser in incognito mode so no cache, cookies, or saved sessions carry over between runs. |
Silicon Grid (Remote Execution)
Use these settings to run the script on a remote grid instead of your local machine.
| Field | Description |
|---|---|
| Remote URL | Enter the URL of the remote grid hub, for example, http://<host>:4444/wd/hub. |
| Grid Type | Select the type of grid, for example, Selenium Grid. |

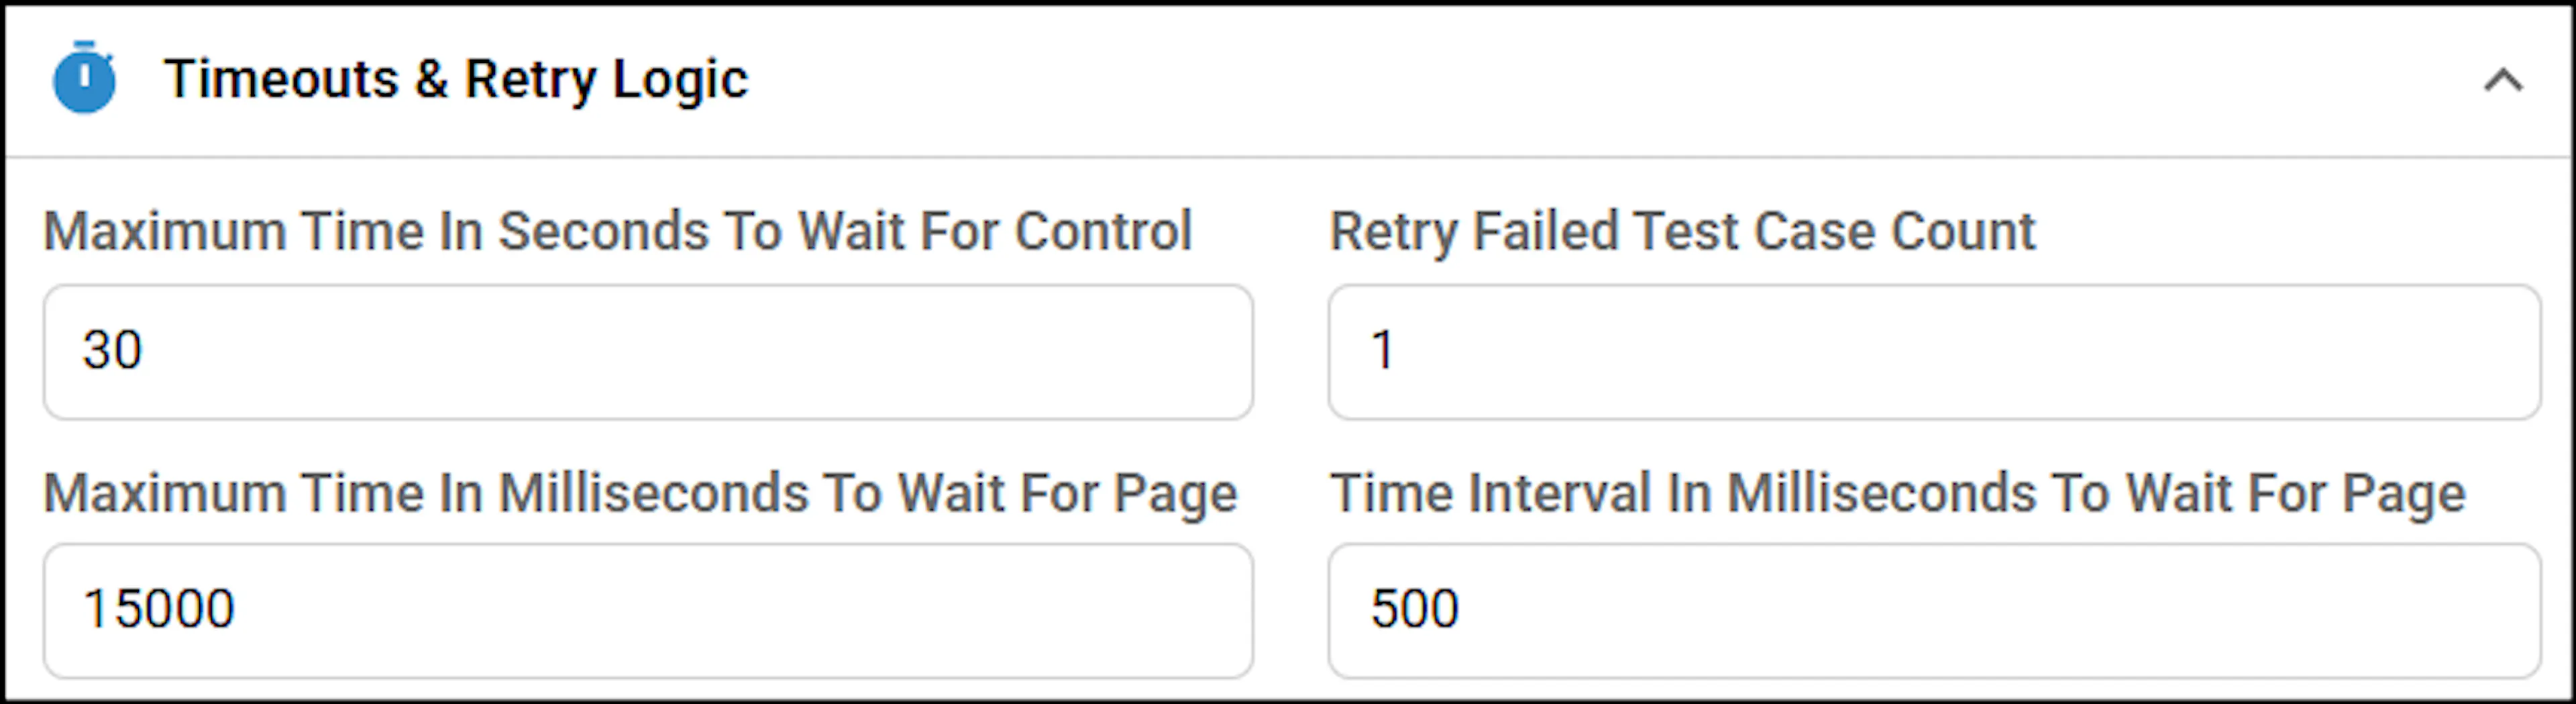
Timeouts and Retry Logic
| Field | Description |
|---|---|
| Maximum Time In Seconds To Wait For Control | The maximum time, in seconds, that the script waits for an element before the step fails, for example, 30. |
| Retry Failed Test Case Count | The number of times a failed test case is retried automatically, for example, 1. |
| Maximum Time In Milliseconds To Wait For Page | The maximum time, in milliseconds, that the script waits for a page to load, for example, 15000. |
| Time Interval In Milliseconds To Wait For Page | The interval, in milliseconds, at which the script checks whether the page has loaded, for example, 500. |
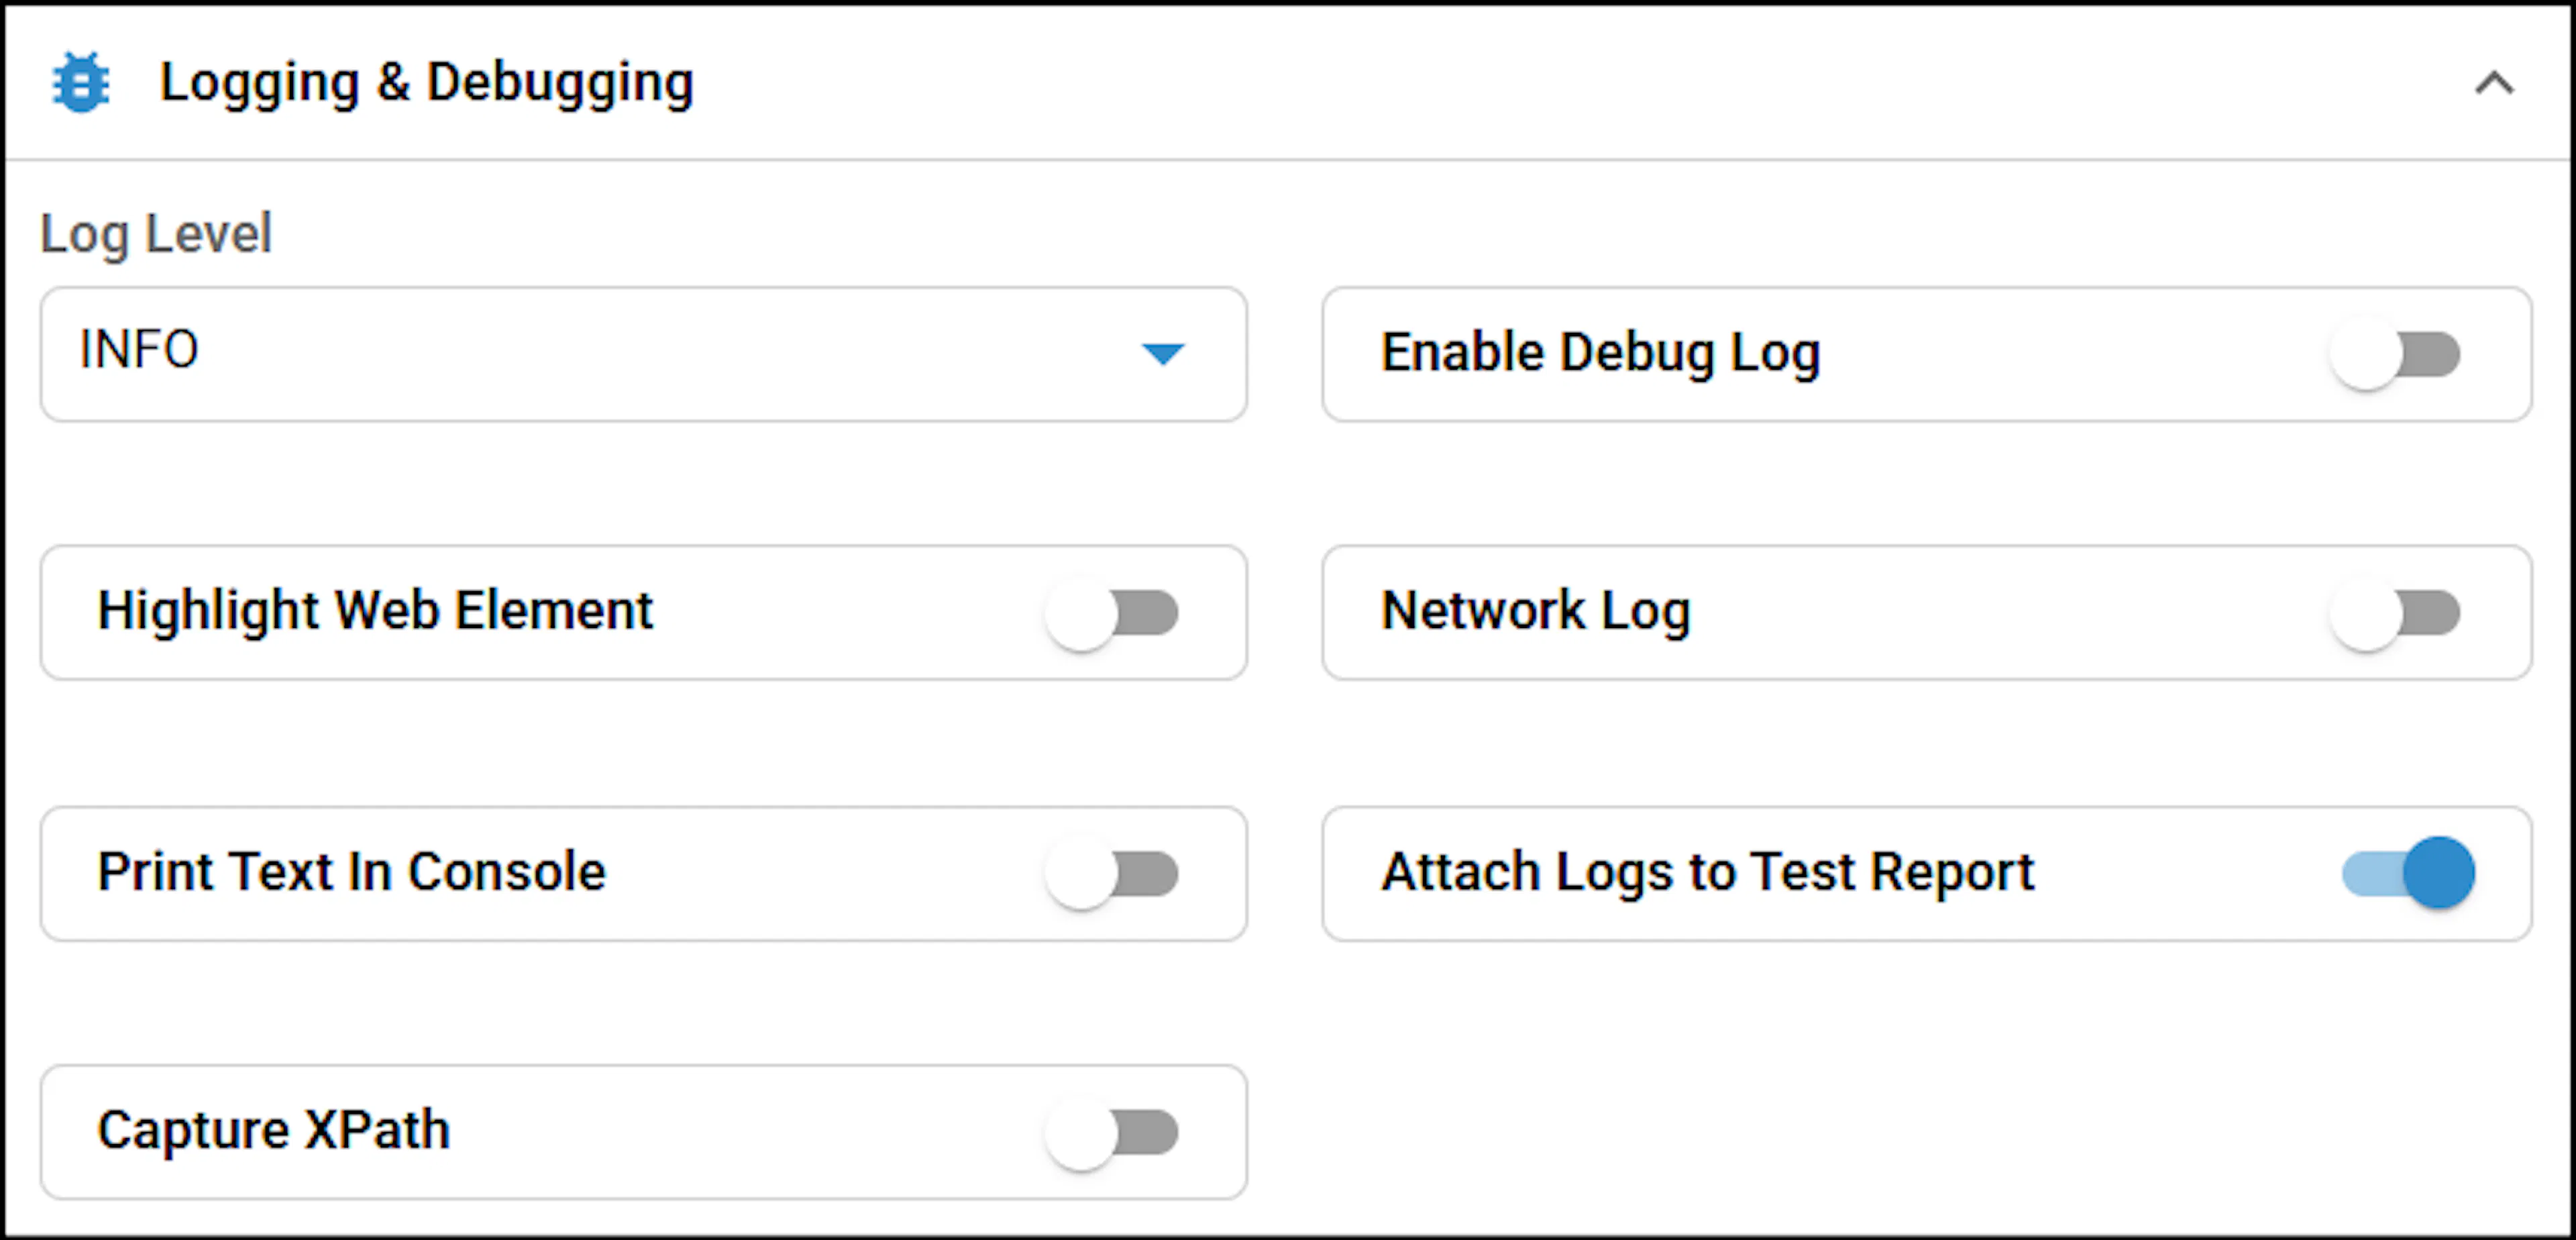
Logging and Debugging
| Field | Description |
|---|---|
| Log Level | Select the level of detail written to the execution log, for example, INFO. |
| Enable Debug Log | Turn on this toggle to capture detailed debug information in the log. |
| Highlight Web Element | Turn on this toggle to highlight each UI element in the browser as the script interacts with it. |
| Print Text In Console | Turn on this toggle to print log text in the console. |
| Attach Logs to Test Report | Turn on this toggle to attach execution logs to the test report. |
| Capture XPath | Turn on this toggle to capture the XPath of elements the script interacts with. |
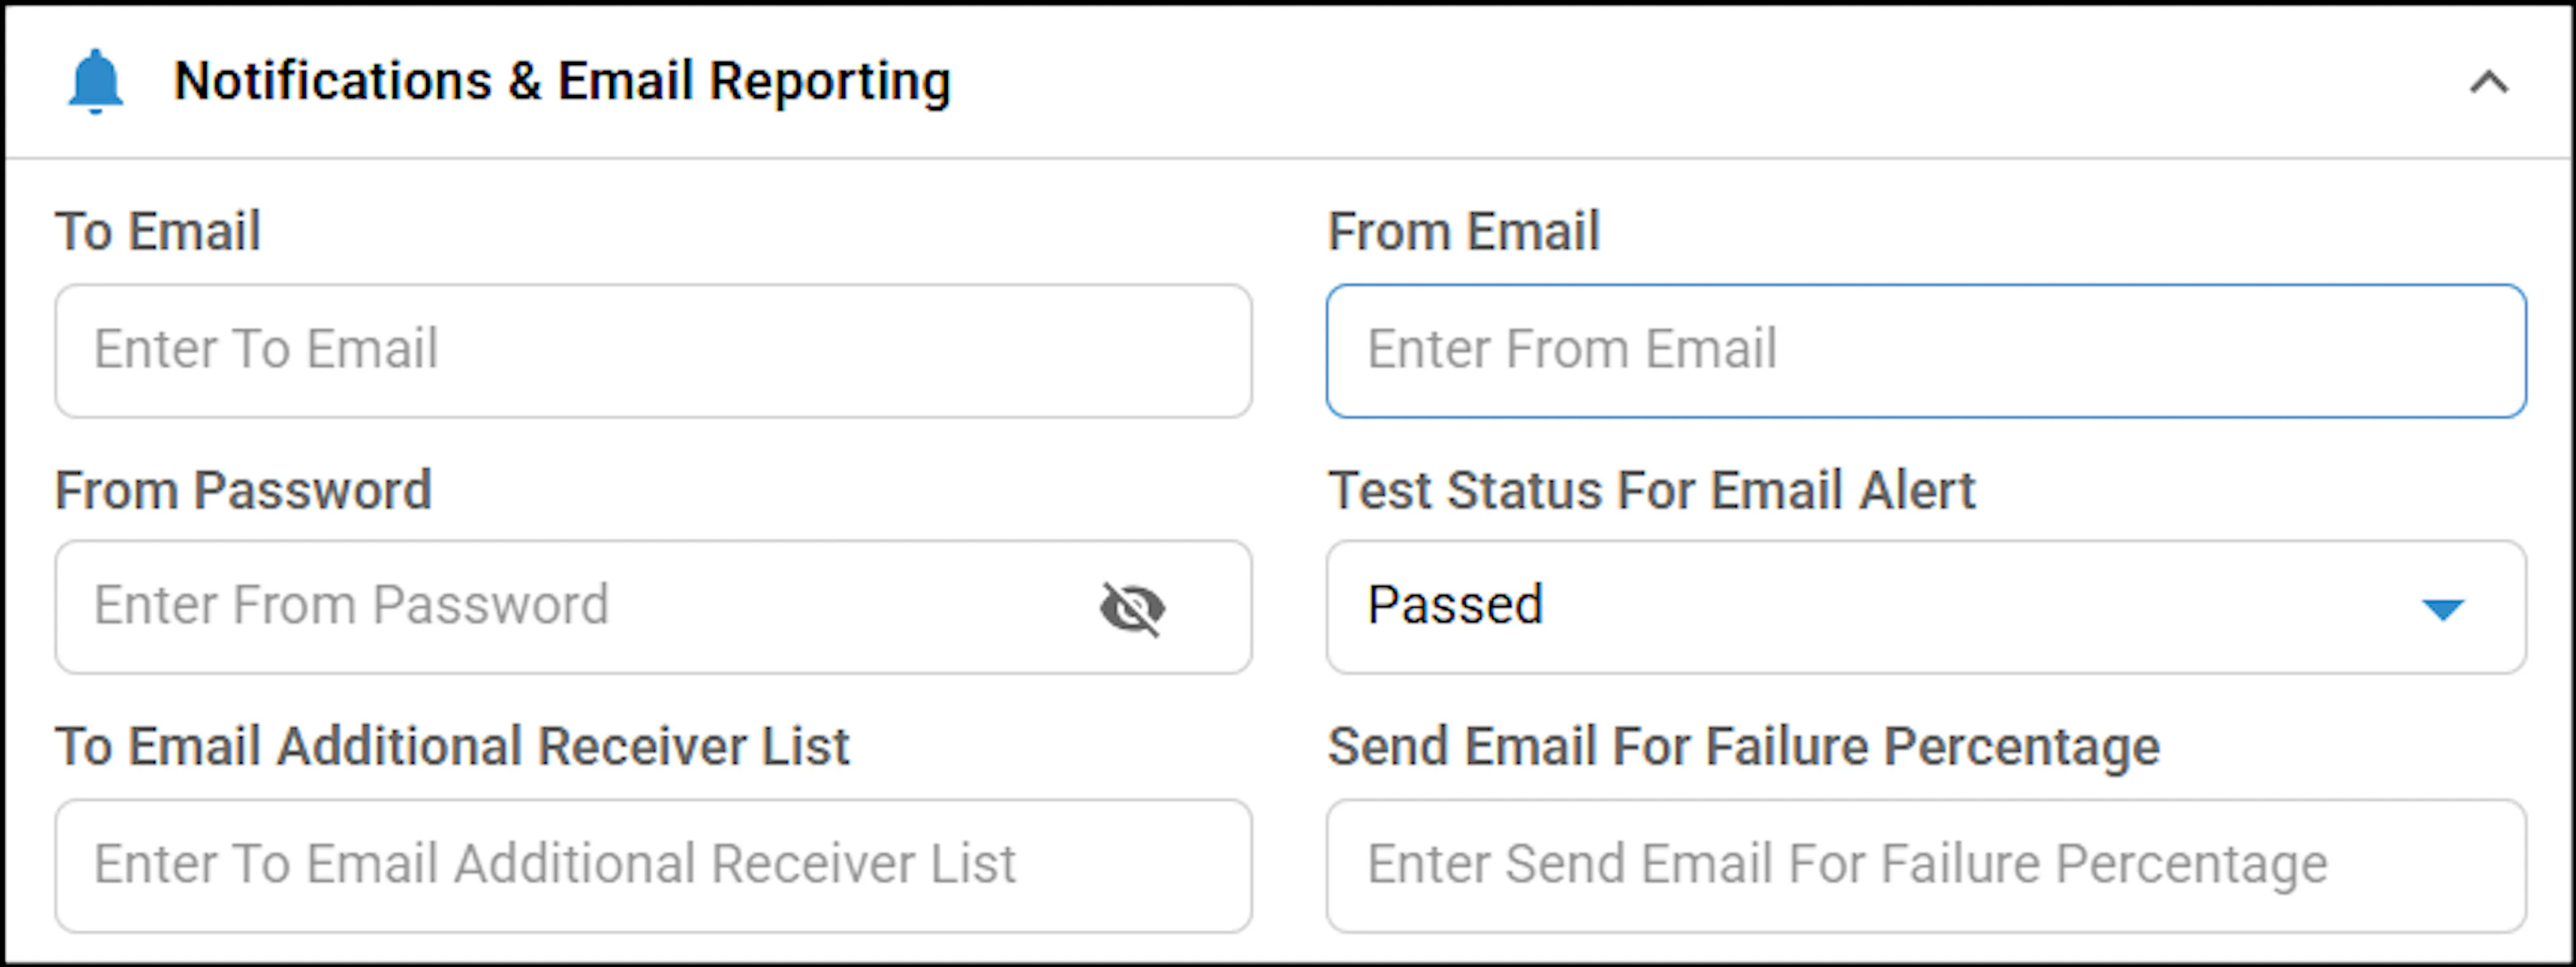
Notifications and Email Reporting
| Field | Description |
|---|---|
| To Email | Enter the email address that receives the execution report. |
| From Email | Enter the email address from which the report is sent. |
| From Password | Enter the password of the sender email account. The value is masked. |
| Test Status For Email Alert | Select the test status for which an email alert is sent, for example, Passed. |
Use a dedicated service account or app-specific password for the sender instead of a personal password.
Visual Validation and Assertions
| Field | Description |
|---|---|
| Enable Soft Assertion | Turn on this toggle to continue execution when an assertion fails. All failures are reported at the end instead of stopping at the first failure. |
| Enable Compare Image | Turn on this toggle to compare captured images with expected images. |
The Screenshots and Video Recording section is not available for API Automation.

External Integrations
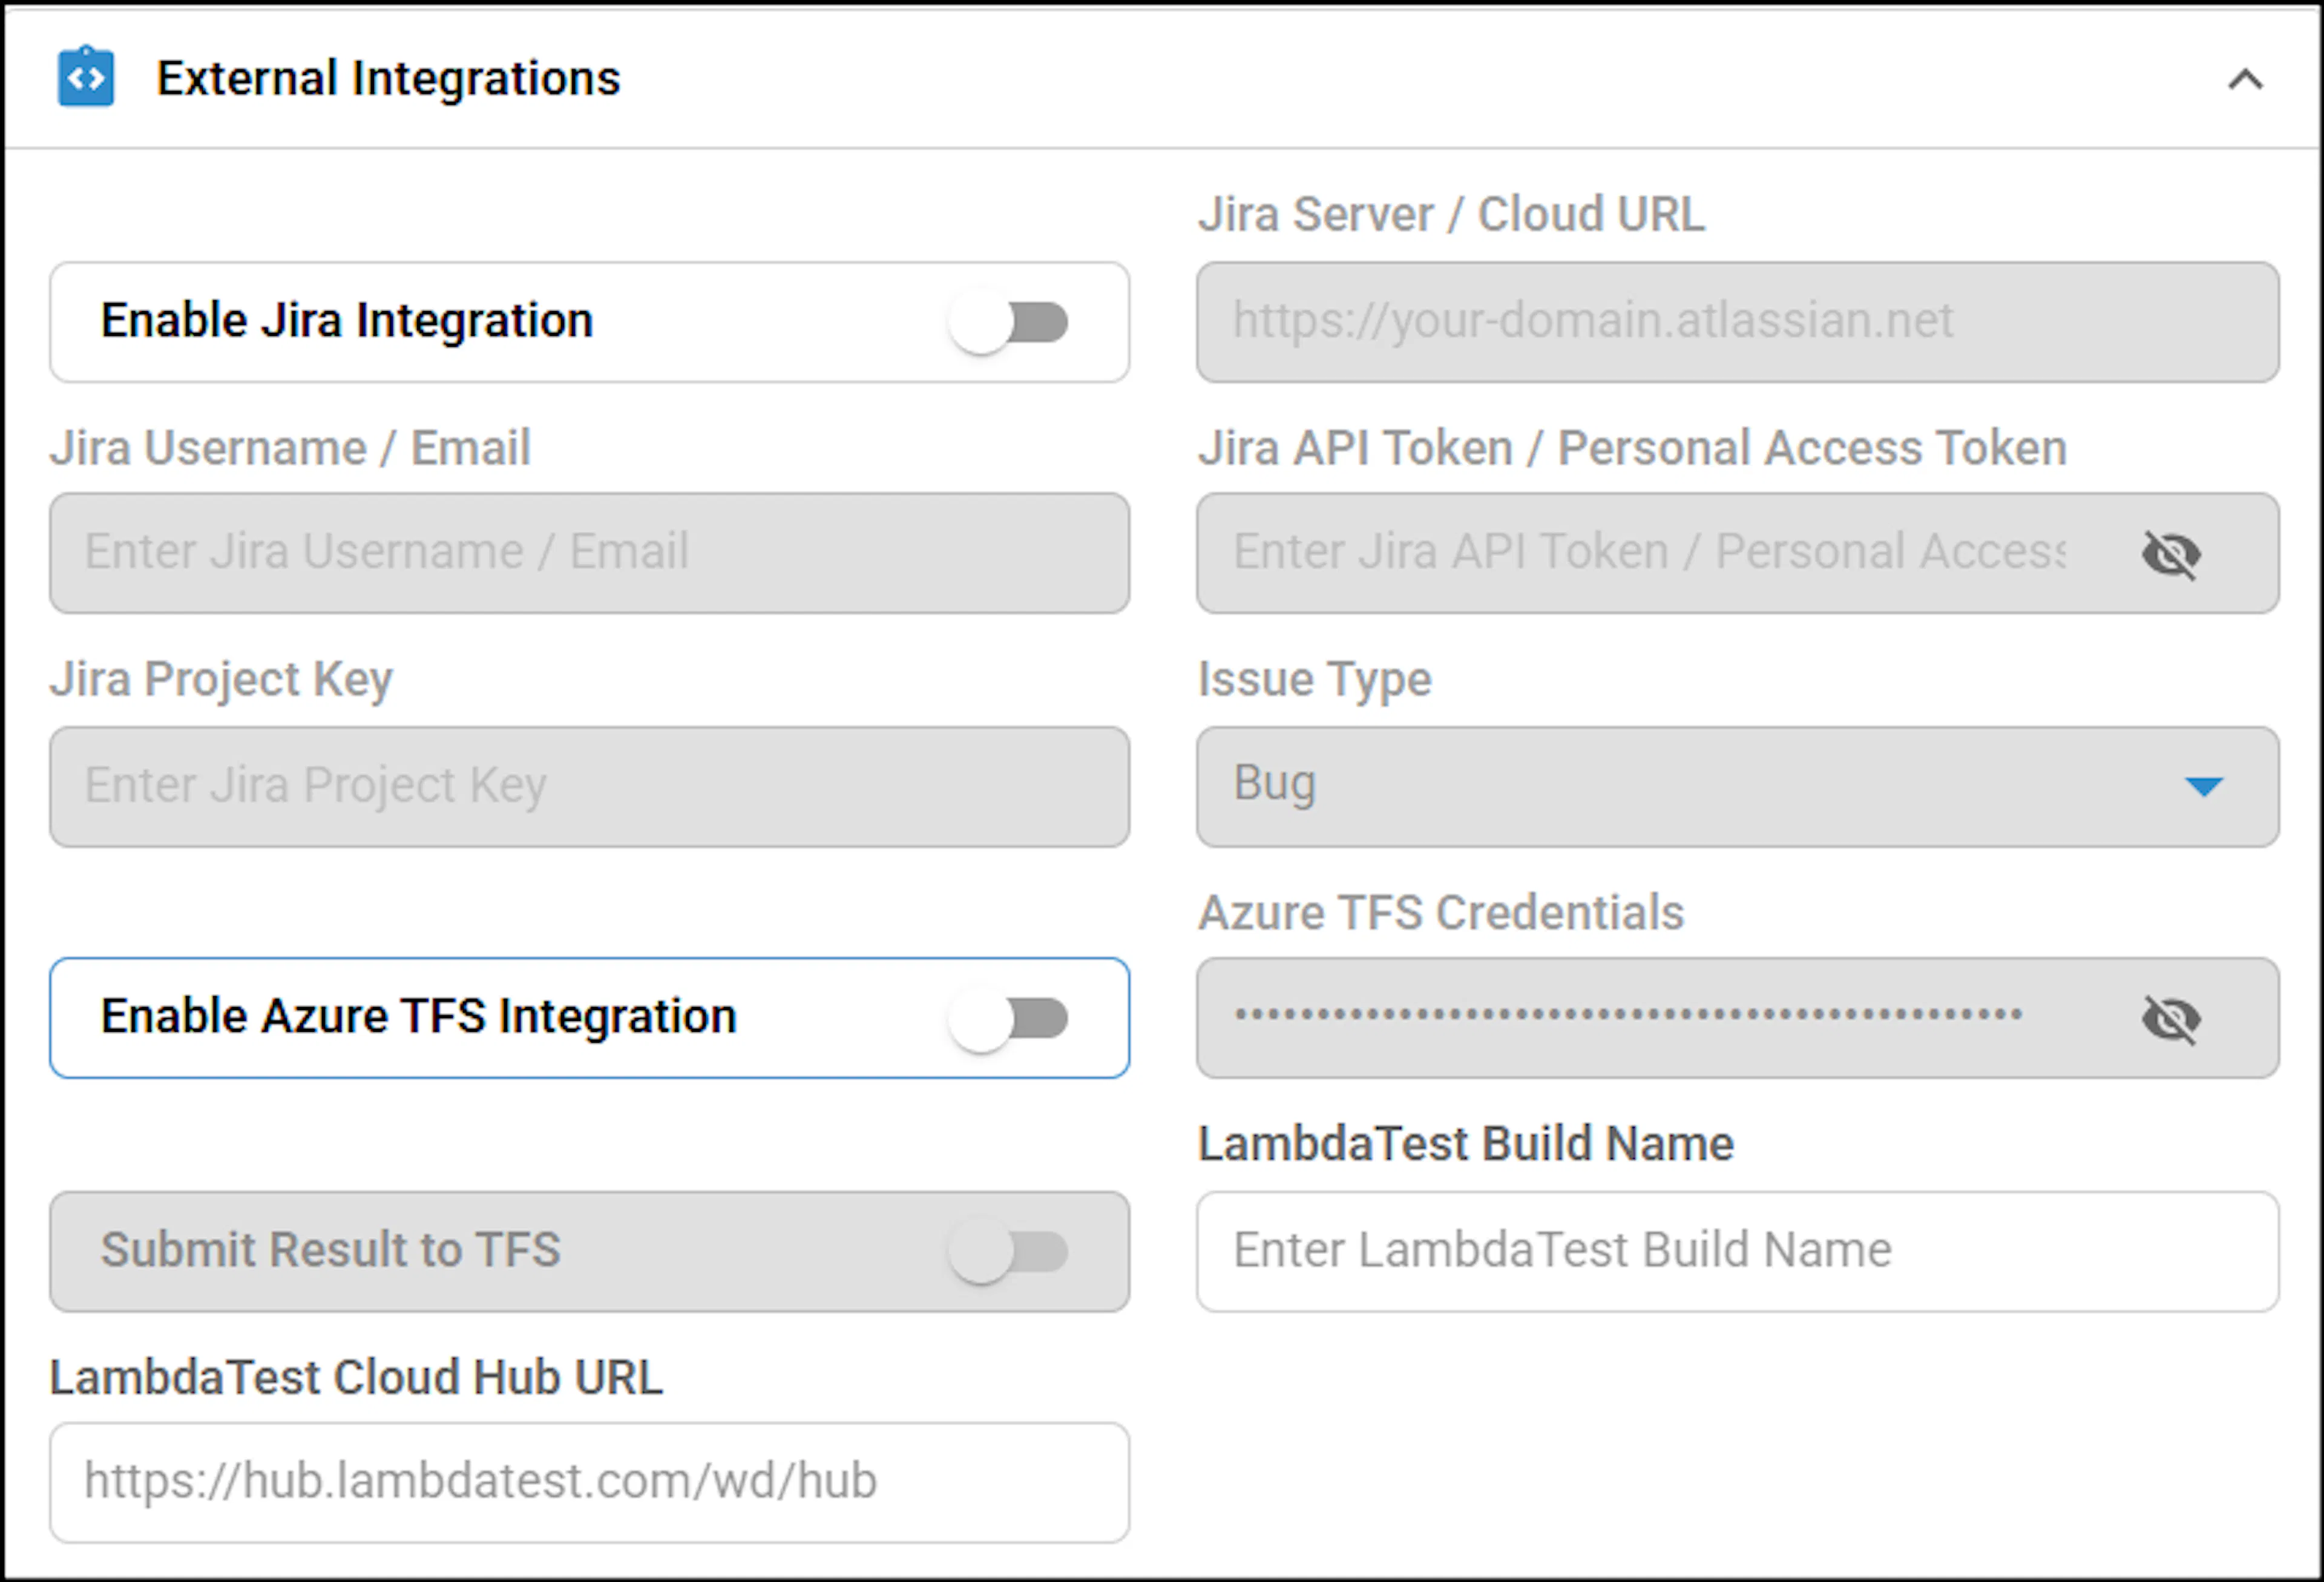
Use these settings to connect the script with Jira, Azure TFS, and LambdaTest.
Jira
| Field | Description |
|---|---|
| Enable Jira Integration | Turn on this toggle to integrate with Jira. The Jira fields below are available only when this toggle is on. |
| Jira Server / Cloud URL | Enter the URL of your Jira instance, for example, https://your-domain.atlassian.net. |
| Jira Username / Email | Enter the username or email address of the Jira account. |
| Jira API Token / Personal Access Token | Enter the API token or personal access token. The value is masked. |
| Jira Project Key | Enter the key of the Jira project. |
| Issue Type | Select the type of issue, for example, Bug. |
Azure TFS
| Field | Description |
|---|---|
| Enable Azure TFS Integration | Turn on this toggle to integrate with Azure TFS. |
| Azure TFS Credentials | Enter the credentials used to connect to Azure TFS. The value is masked. |
| Submit Result to TFS | Turn on this toggle to submit execution results to Azure TFS. Available only when Azure TFS integration is enabled. |
LambdaTest
| Field | Description |
|---|---|
| LambdaTest Build Name | Enter the build name under which the run appears in LambdaTest. |
| LambdaTest Cloud Hub URL | Enter the hub URL of the LambdaTest cloud grid, for example, https://hub.lambdatest.com/wd/hub. |
User Authentication and Security
| Field | Description |
|---|---|
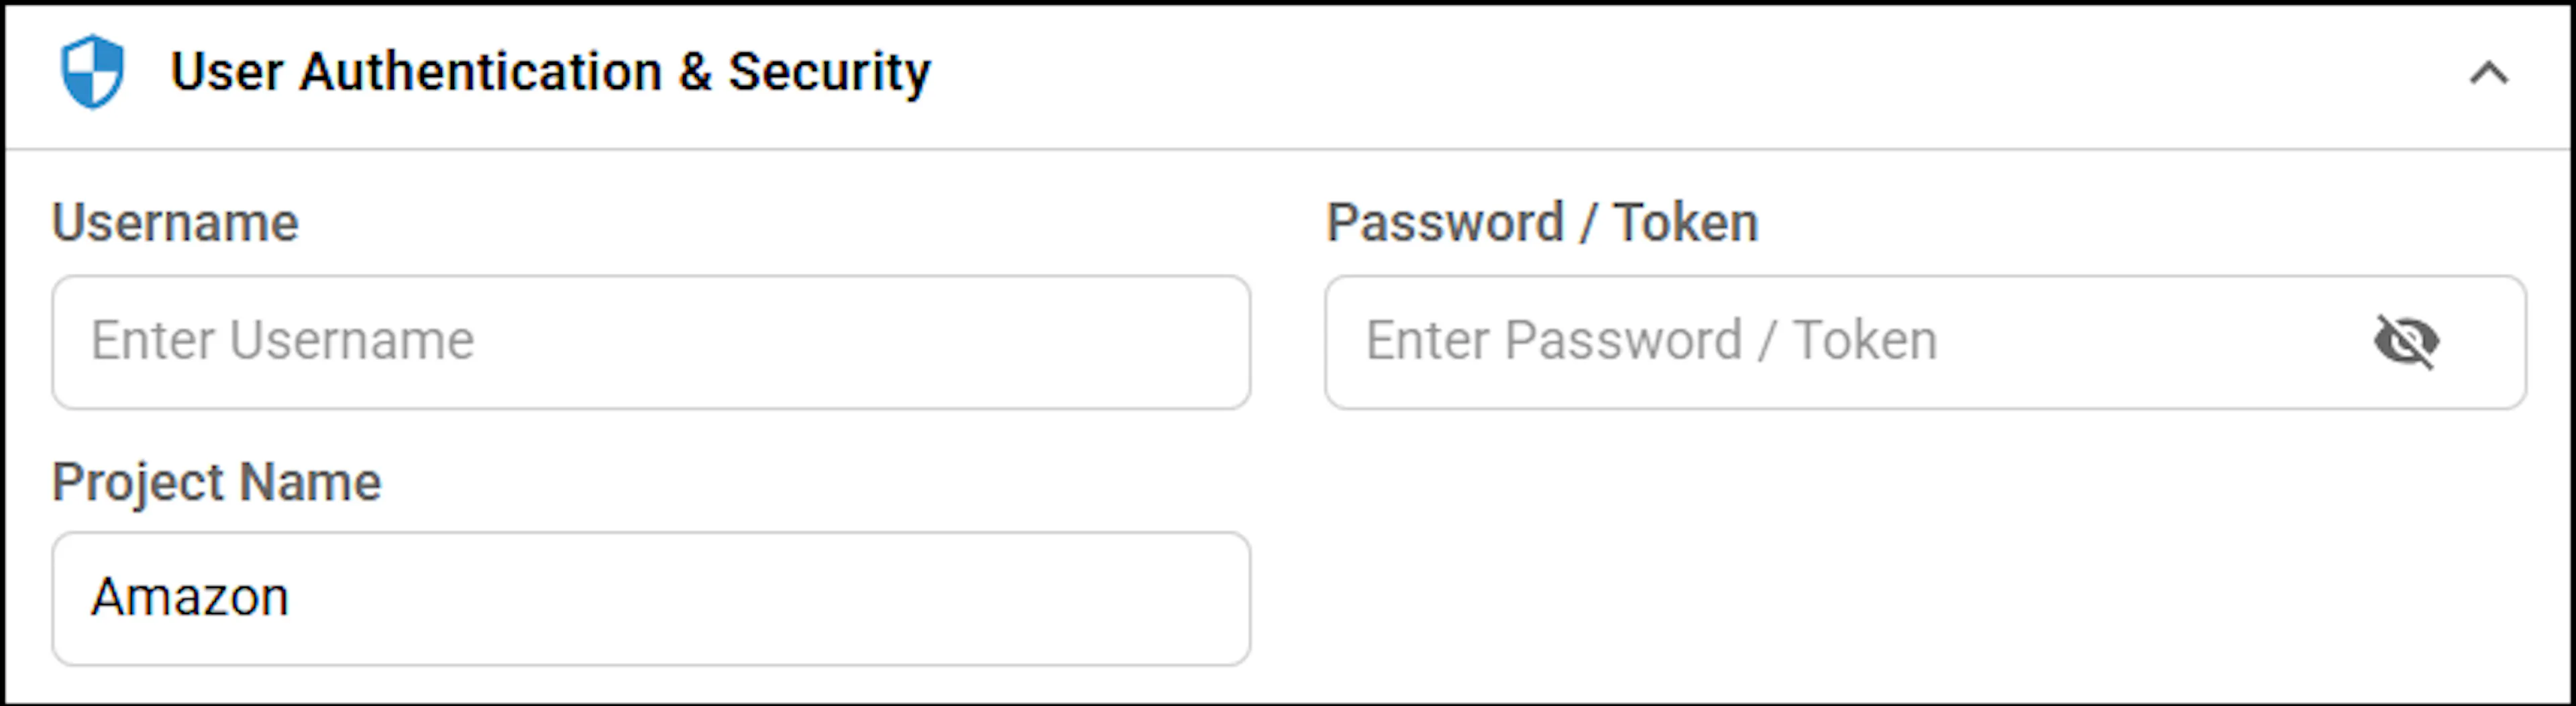
| Username | Enter the username used for authentication. |
| Password / Token | Enter the password or token. The value is masked. |
| Project Name | Enter the name of the project, for example, API. |
Custom Inputs
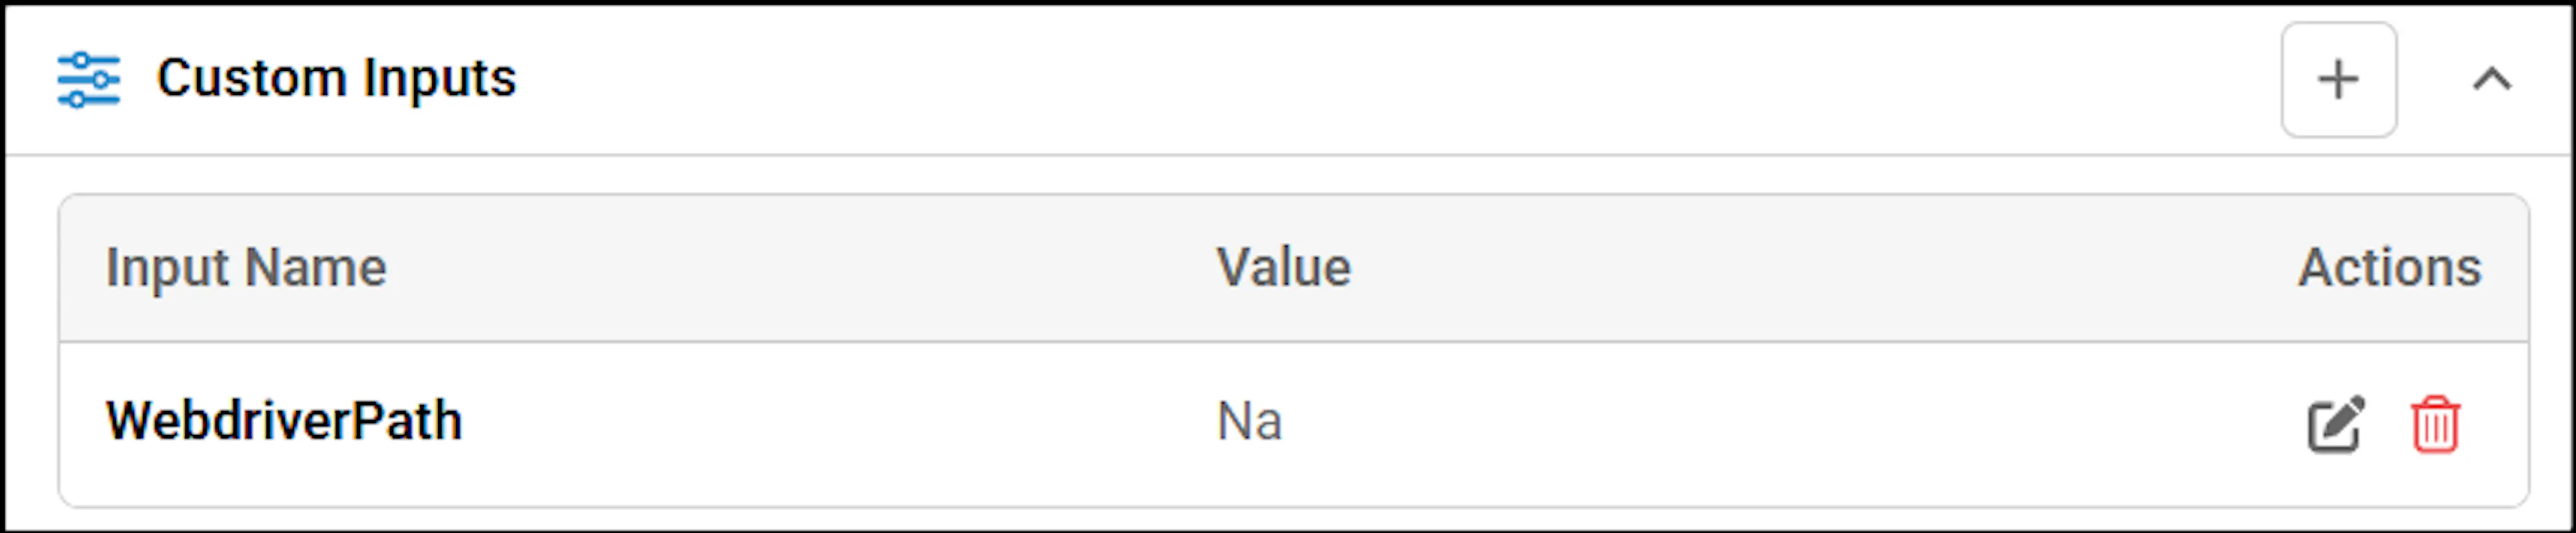
Use Custom Inputs to add your own name-value pairs (for example, a base URL, environment name, or API key) that the generated scripts can read at run time.
| Column | Description |
|---|---|
| Input Name | The name of the custom input. |
| Value | The value of the custom input. |
| Actions | Edit or delete the custom input. |
Click the plus icon (Add Input) next to Custom Inputs to create a new entry, enter the Input Name and Value, and use the edit and delete icons in the Actions column to modify or remove an entry.
Summary Description of Access Settings Page
In Access Settings, as an admin, you can assign permissions to users to perform the tasks.
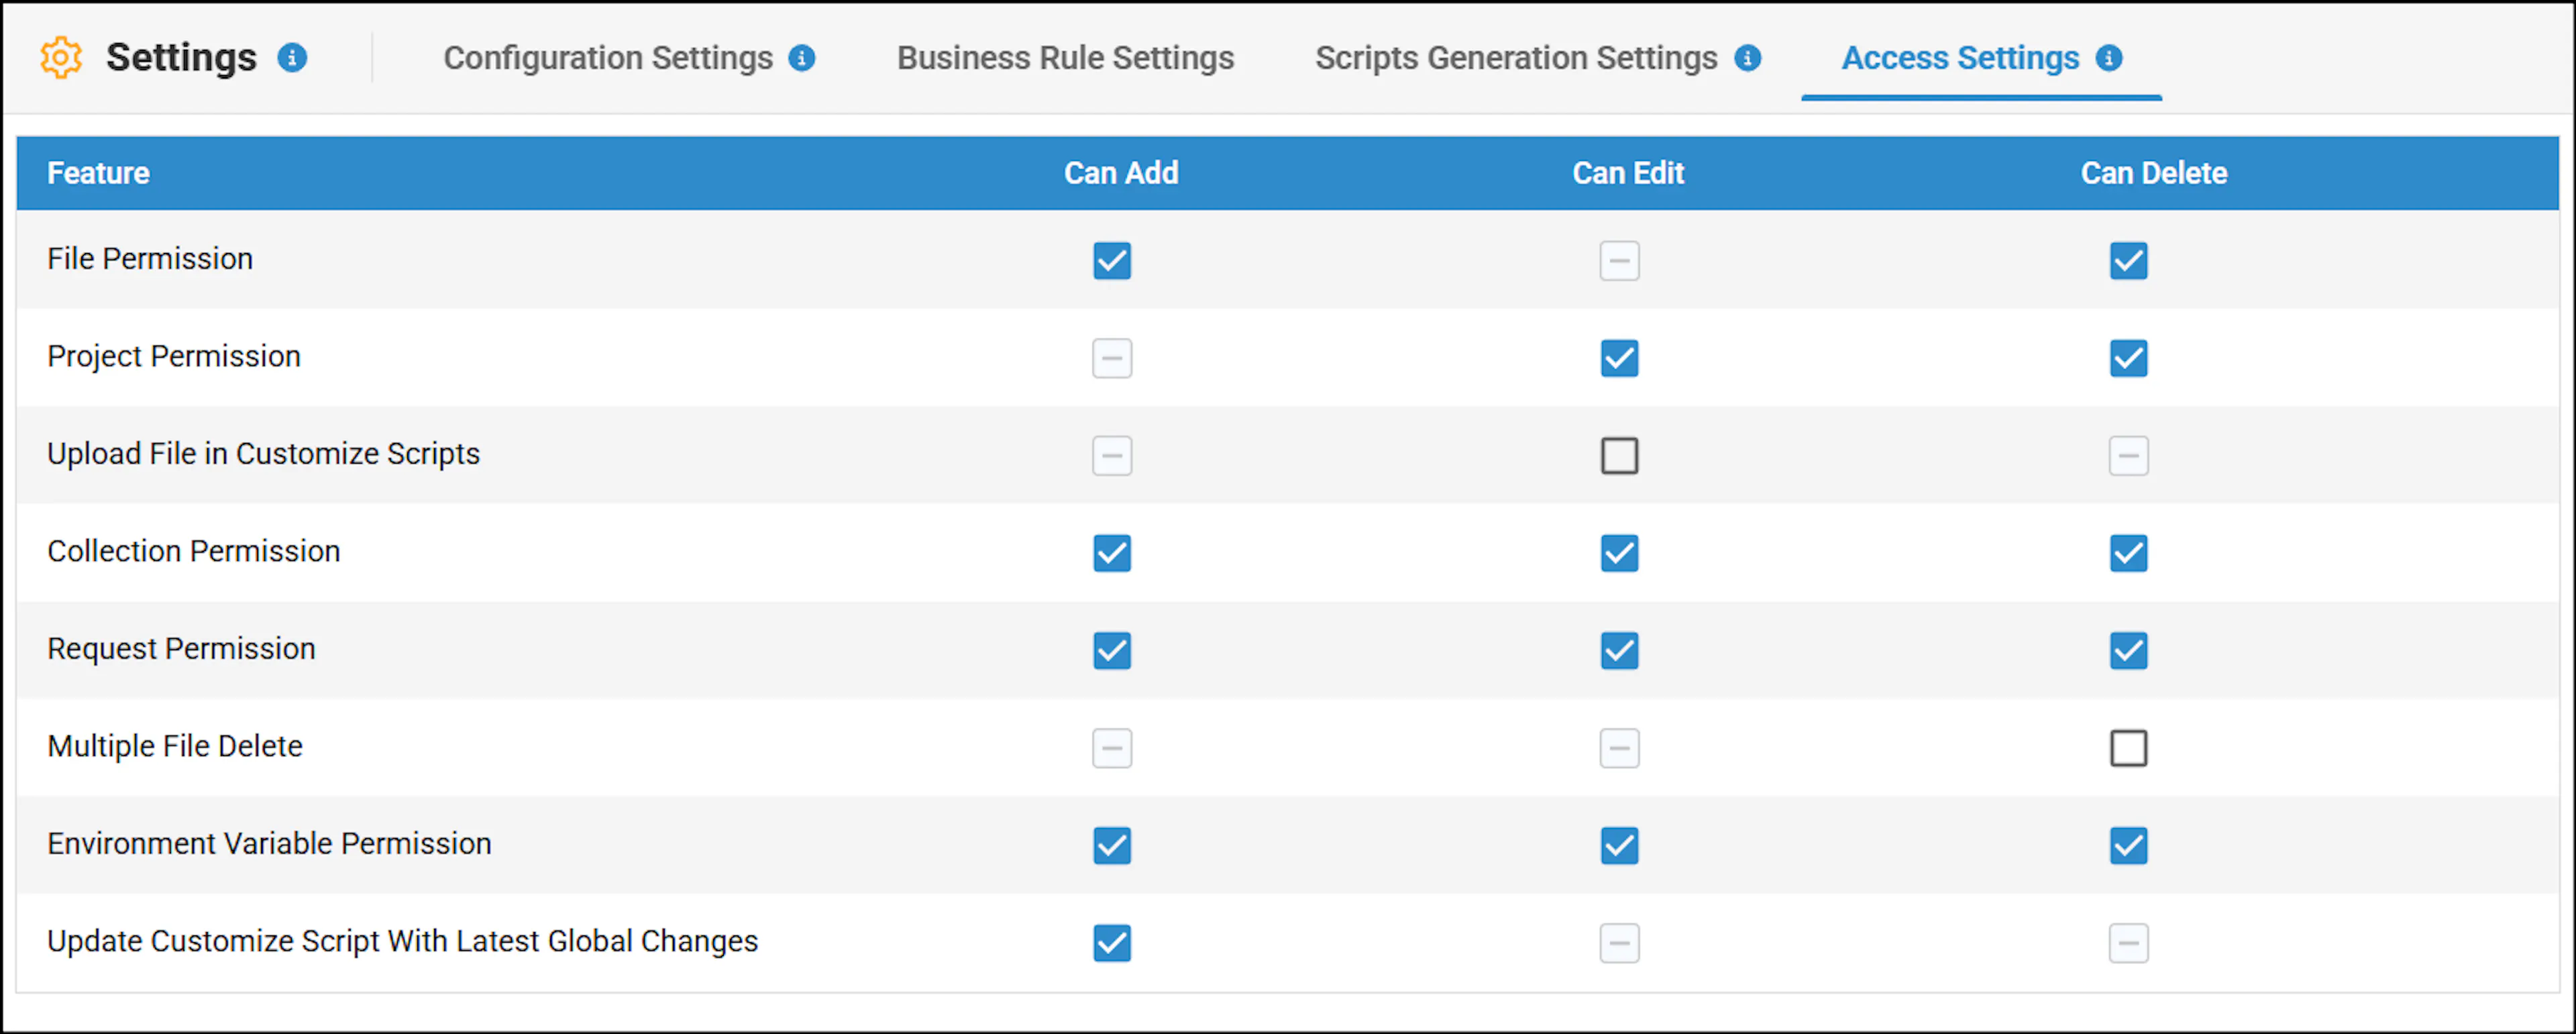
Perform the following:
Select a project created by you and navigate to the settings.
Select the Access Settings.
In this Access Settings page, you can assign permissions to add, edit and delete the capabilities by selecting the relevant checkbox.
For example, as an admin, if you uncheck the permissions for generating Auto Generate Test Cases, then the team member will not have access to use Auto Generate Test Cases feature.
The following table provides the available access settings options that an administrator can assign to a user:
This applies to API automation.
| Access Settings option | Description | |
|---|---|---|
| File Permission | As an admin, you can remove access to a user to upload or create any file. Upload file or create file option will be disabled for a particular project. As a user, you will be still be able to edit and delete an uploaded or created file. Additionally, as an admin, you can also restrict the access to edit and delete a file by removing access to edit and delete options. | |
| Project Permission | As an admin, you can remove access to a user to delete a created project. Delete button will be disabled when you access as a user. Also as an admin, you can remove access to a user to edit a project. Update button of project settings will be disabled when you access as a user. | |
| Upload Script Permission | As an admin, you can grant a user access to edit the generated scripts for a specific project. | |
| Collection Permission | As an admin, you can assign access to a user to Add, Edit, and delete API collections from API project. | |
| Request Permission | As an admin, you can assign access to a user to Add, Edit, and delete API Request from API project. | |
| Multiple Files Delete Permission | As an admin, you can assign access to a user to delete multiple files from the project folder. By default, Delete all option will be disabled to prevent any unintended file deletion from a user. | |
| Environment Variable Permission | As an admin, you can assign access to a user to Add, Edit, and delete Environment variable from API project. | |
| Update Customize script with latest Global Changes | Allows users to compare a project's customized script with the latest global script, review differences, and selectively apply updated sections or add missing files. |