
Create an Offline Model
Create an offline model of a web application in algoQA by configuring nodes, features, and UI elements using a scraped file or by configuring the nodes manually.
How to Create a Project and Build an Offline Model
Perform the following:
- Log in to algoQA using your credentials.
- Navigate to Projects and click the '+' icon to create a project. In the Create Project window, enter the appropriate project name and select the automation type from the Automation drop-down list.
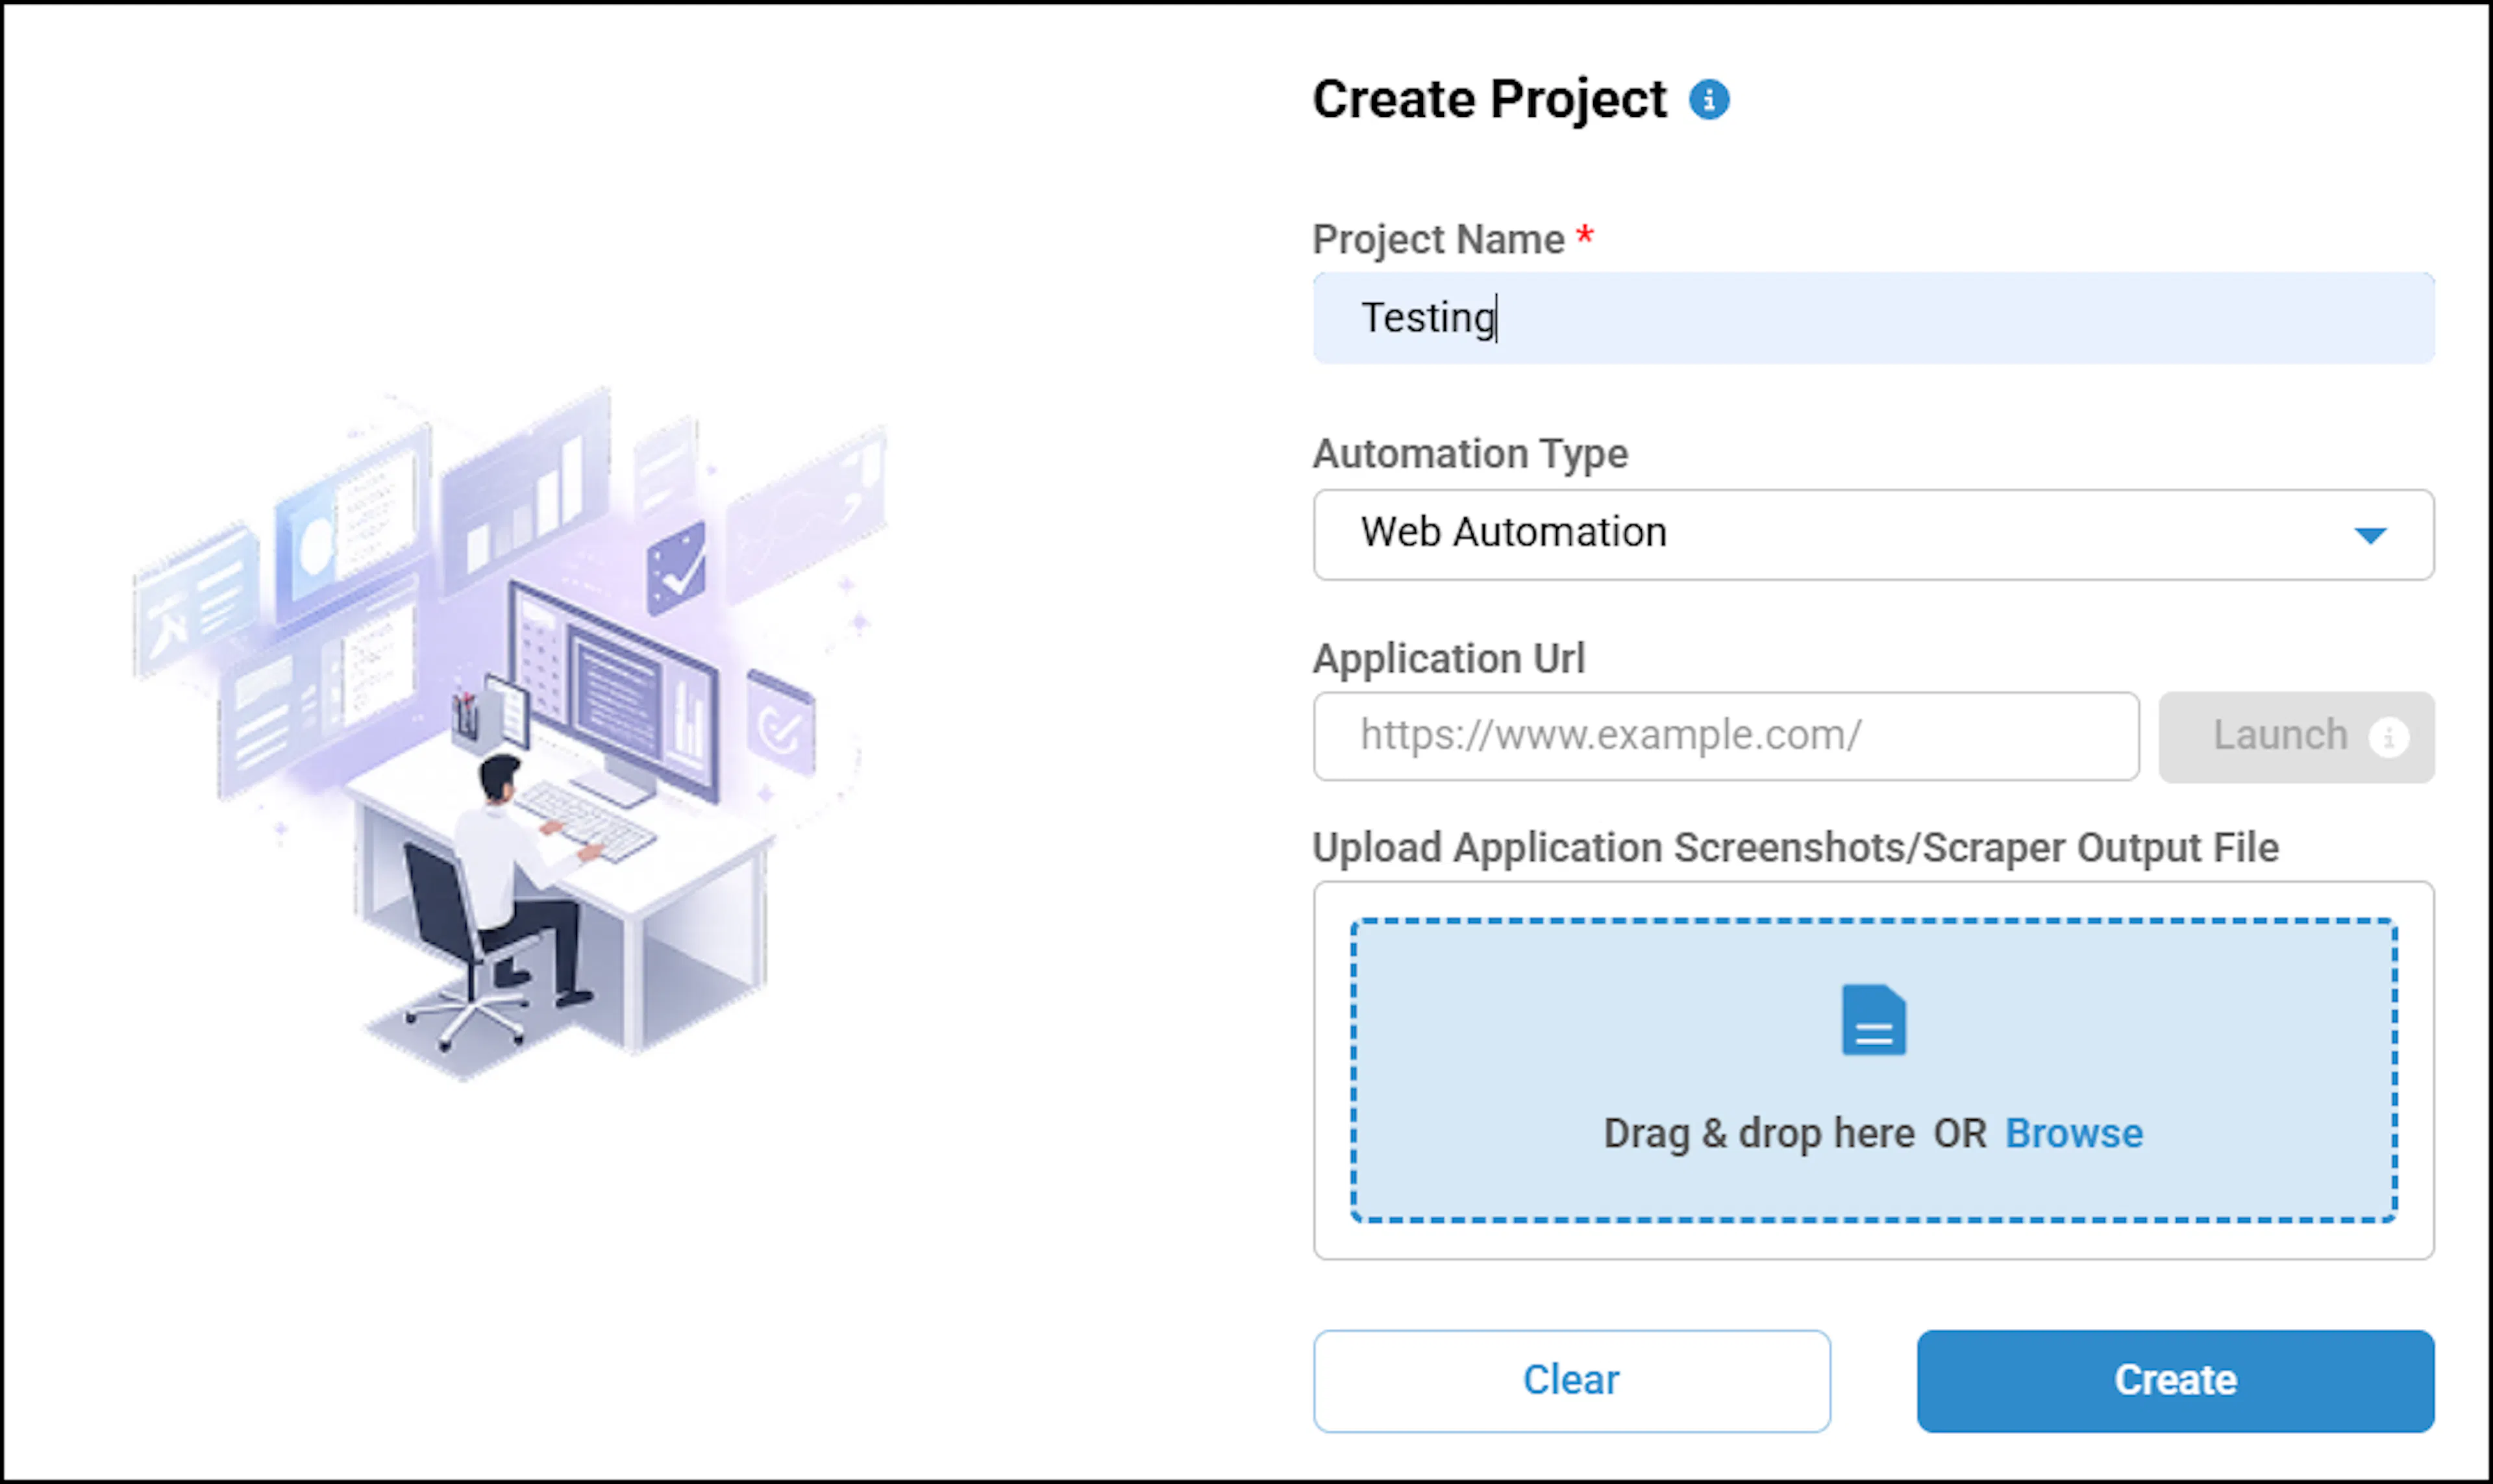
- Click the Create button for the project to be created.
- Alternatively, you can either browse for the scraped file in .json format or drag-and-drop it to view the automatic placement of nodes. Click the "Browse files or drag them here" button or the cloud icon to upload the file.
- Click the Add First Node to add a node to the canvas.
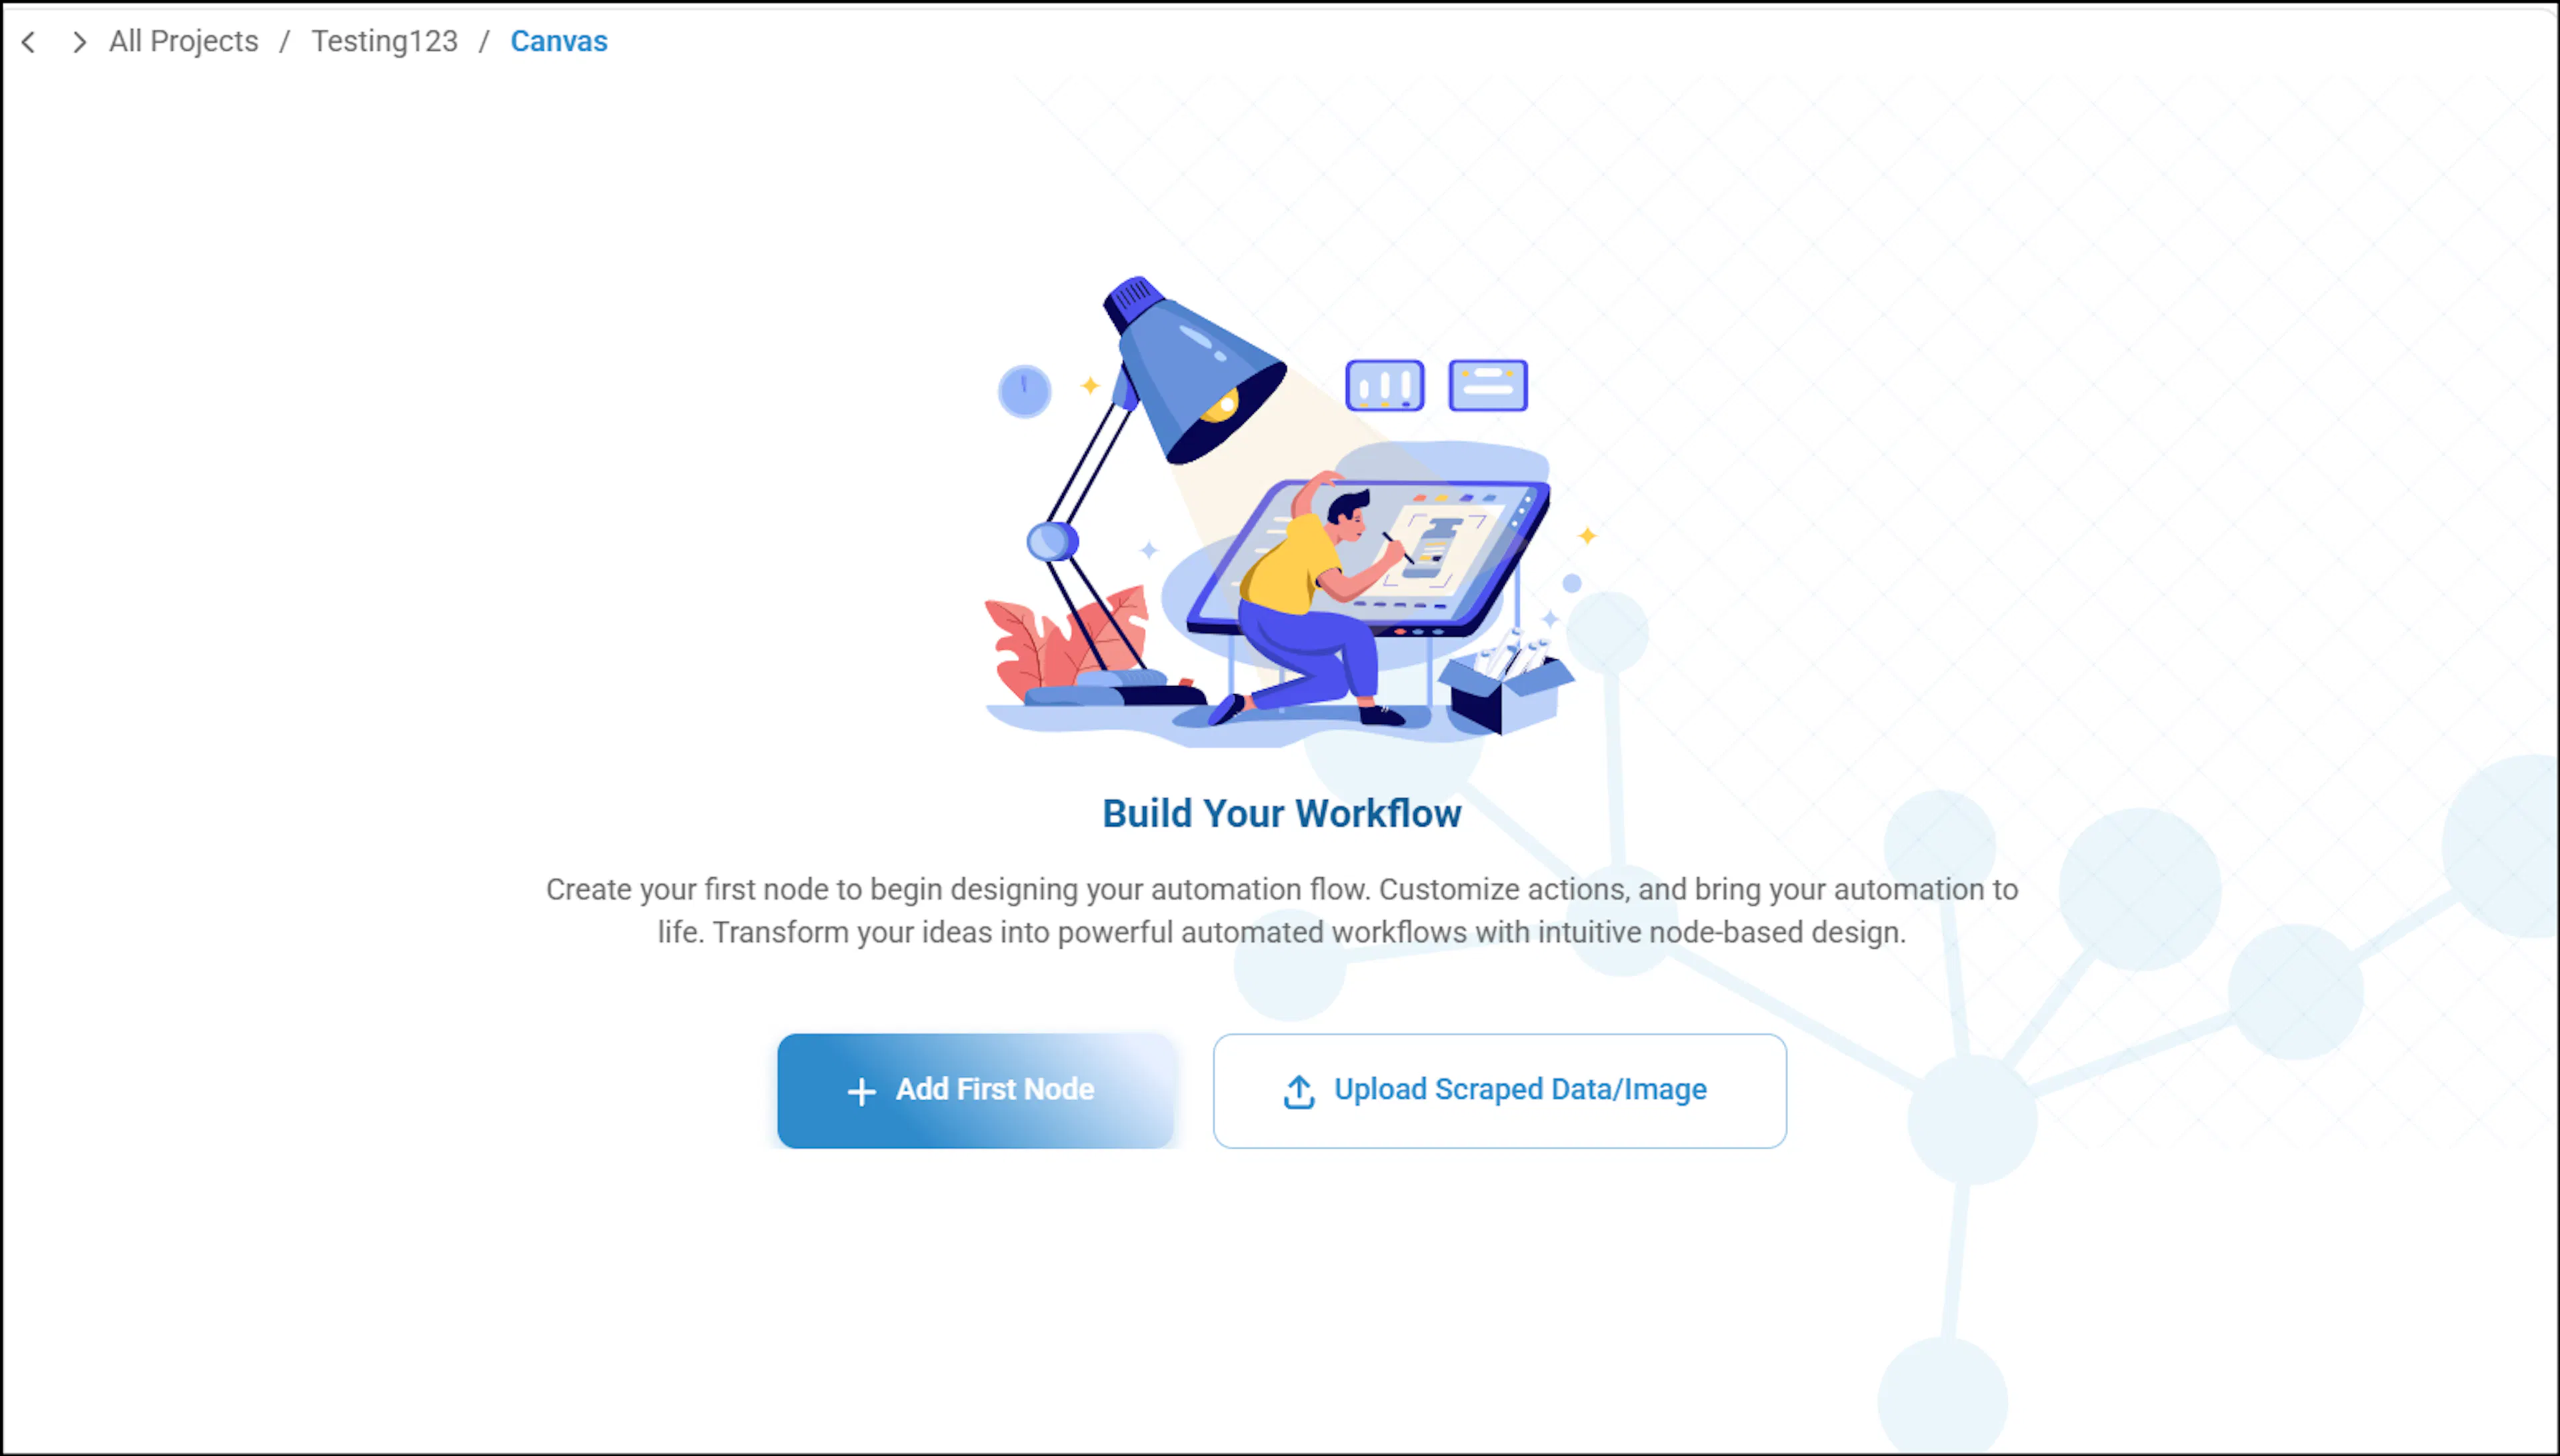
- Click each node to edit. In the Node Name text box, enter the same name as the page name. Similarly, add the appropriate node names for the remaining nodes. Node Name can accept alphanumeric characters, a single space between words, and underscores, starting with an alphabet and click on Save.
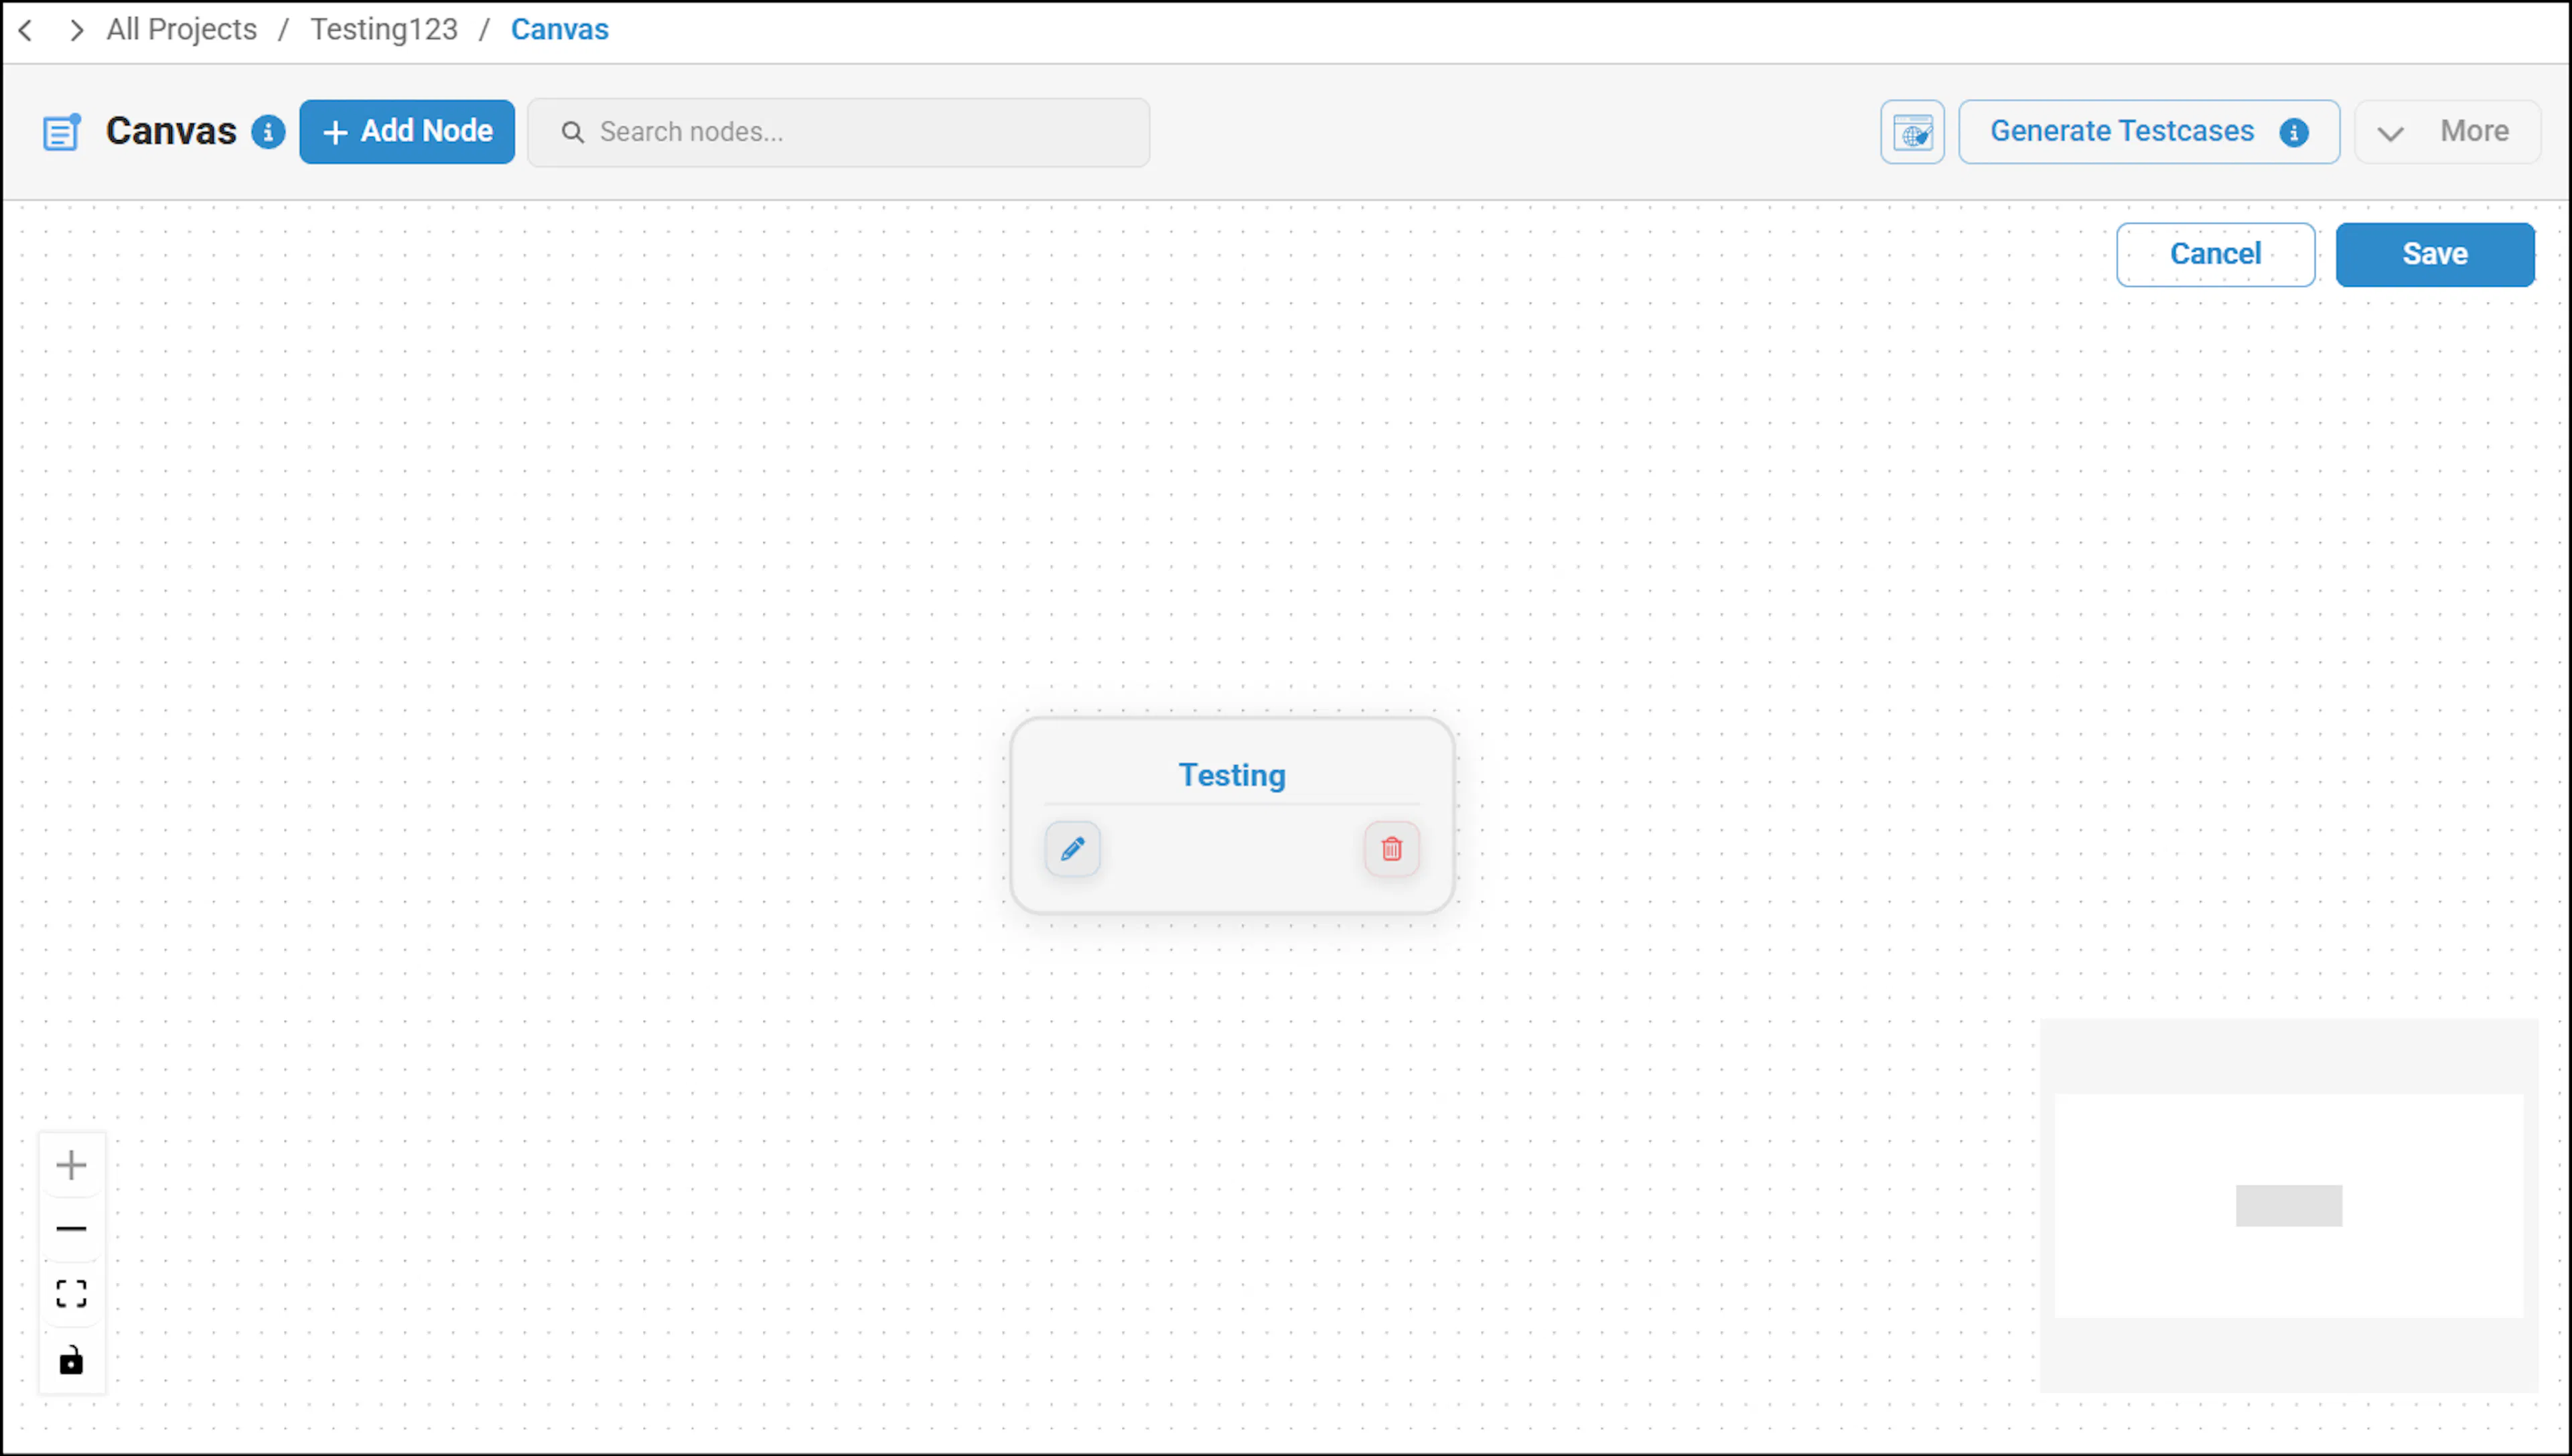
- Ensure you provide a unique node name. If you don't provide a unique name, an error message will be displayed saying "Node name already exists."
- Note that when you are configuring the node, make sure to enter a unique feature name to avoid duplicates. This is necessary when configuring a nested feature or entering a feature name for different nodes or the same node within a scenario.
- Upon successful node configuration, in the Test Design screen you can see all the UI elements within the feature. By default, one feature will be configured.
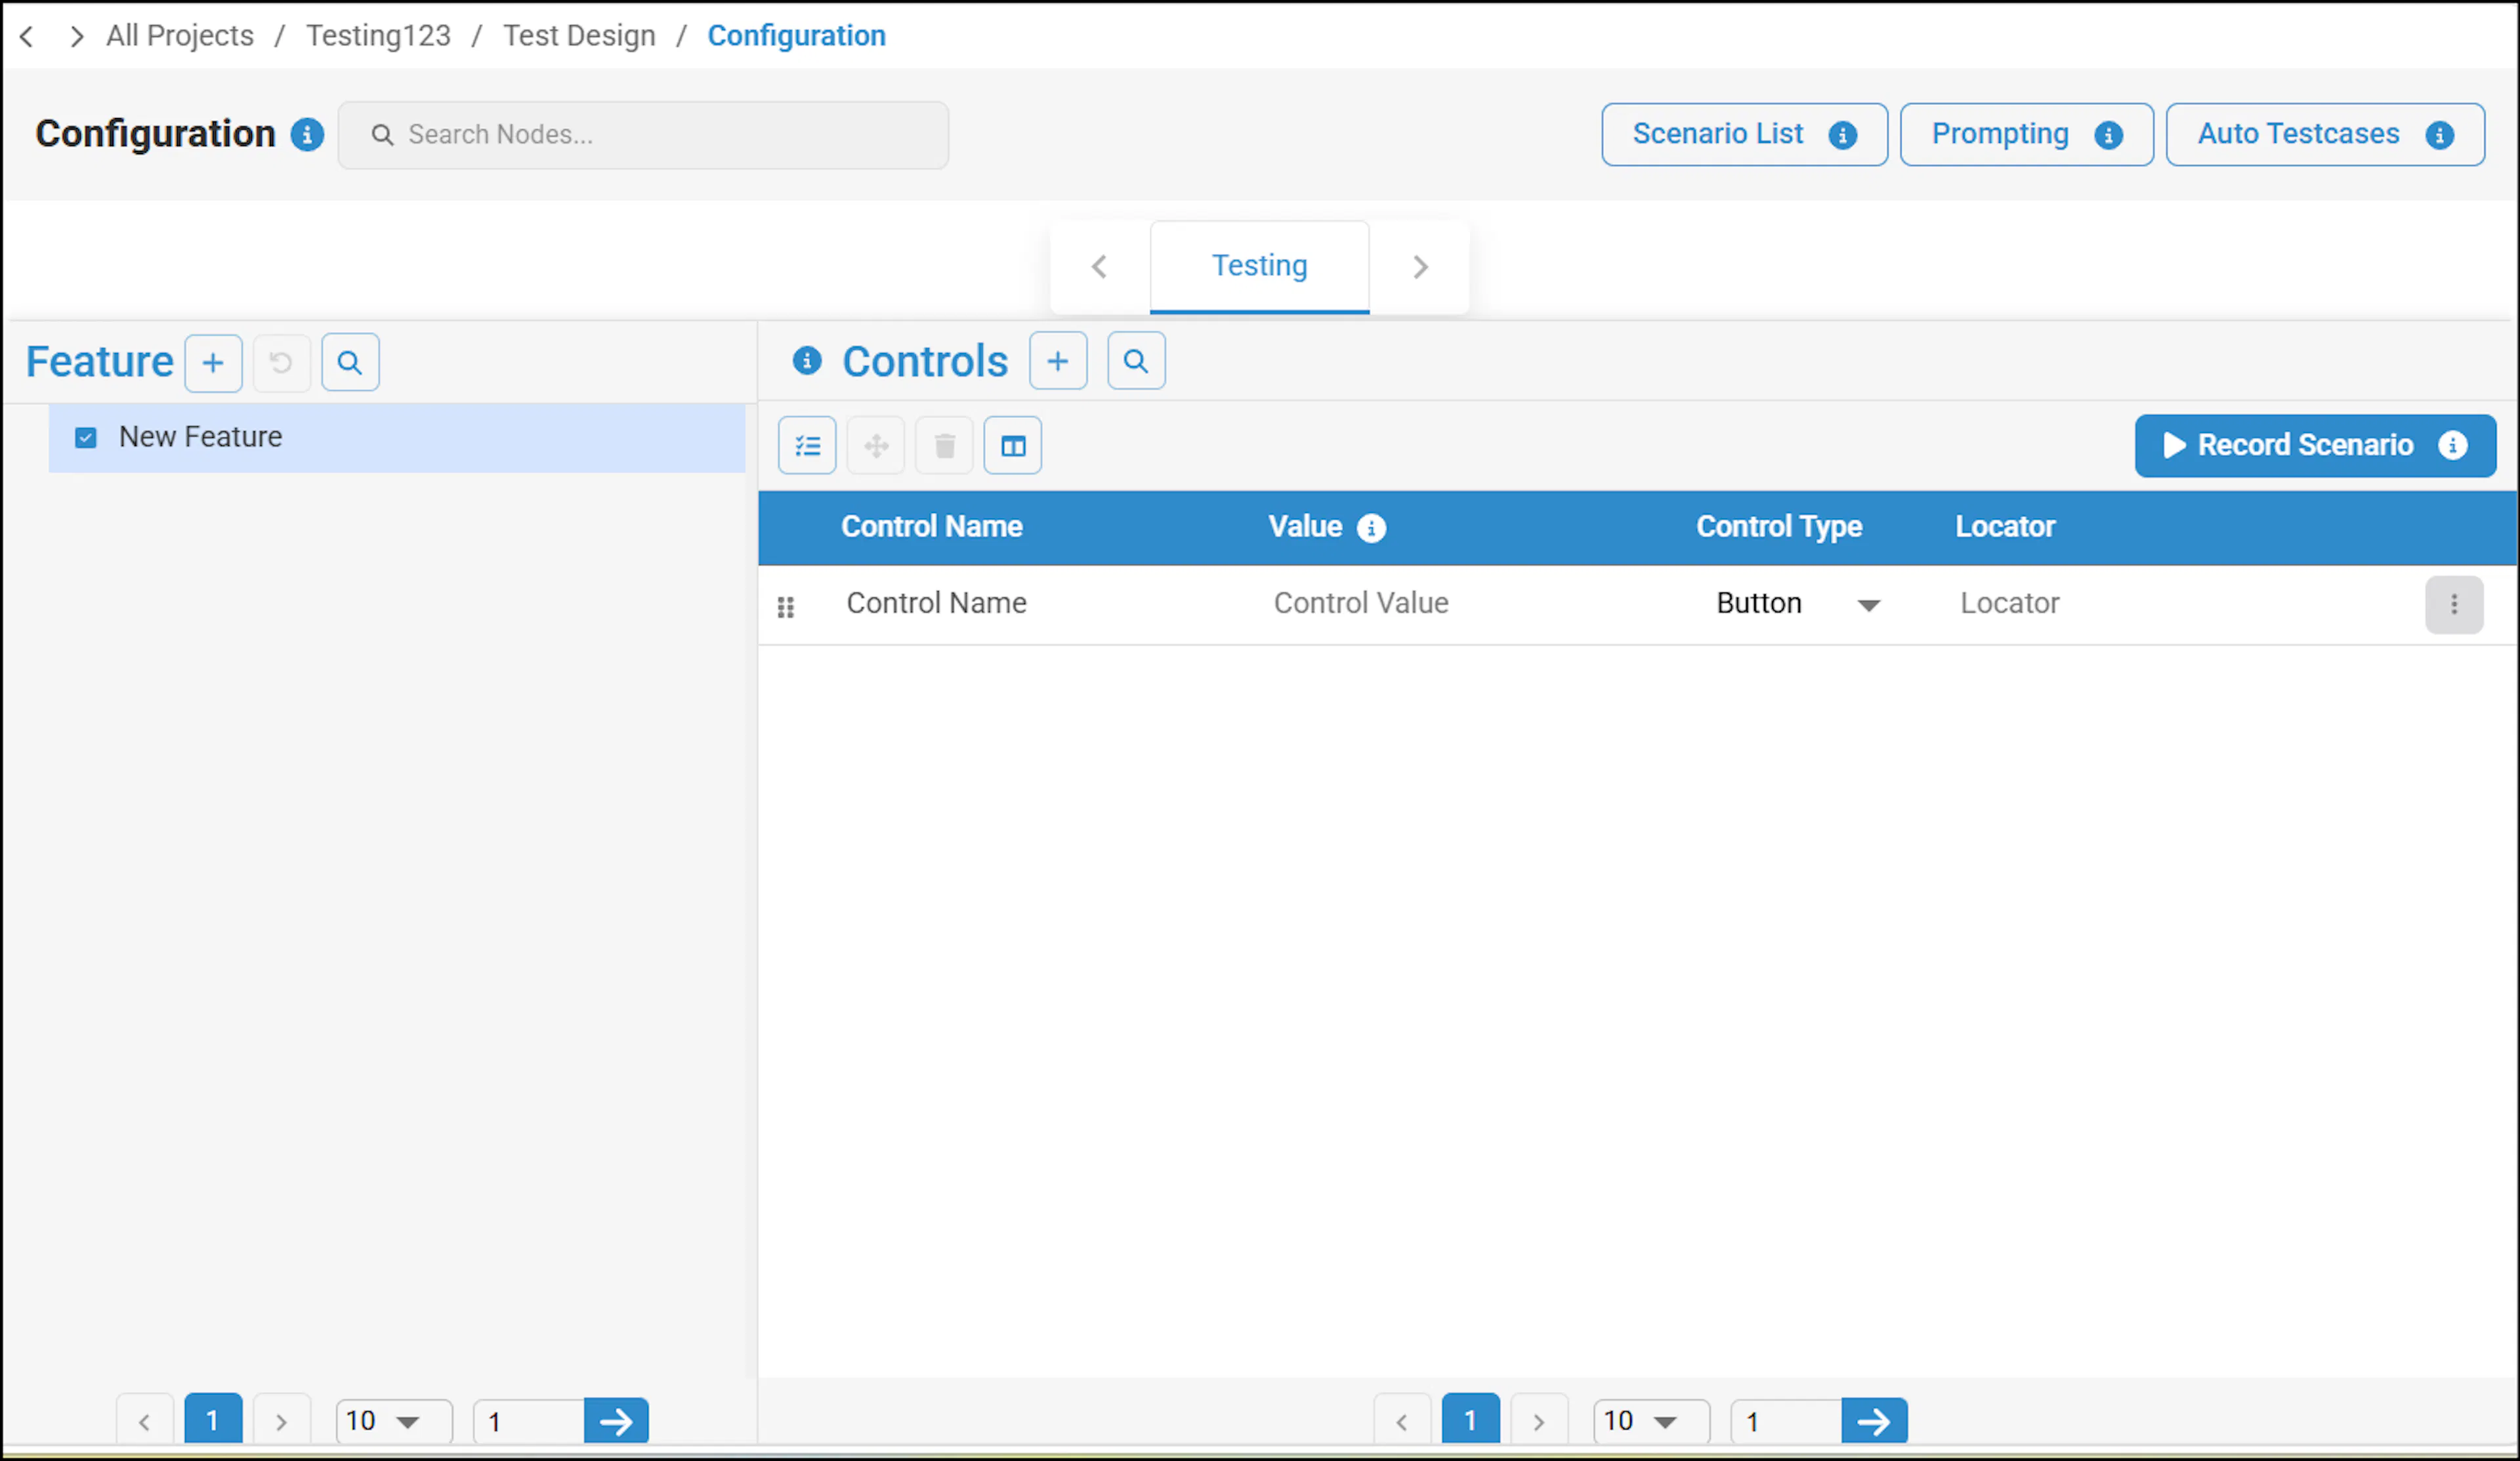
- In the required feature, update the attributes of the UI element, such as control name, control value, assertion, business rules, test data or control value, and locator. Similarly, repeat the step to update the attributes for all other UI elements and click Submit for the scenario to be created.
Was this page helpful?