
Auto Healing
The auto healing feature helps in addressing locator issues caused by changes in the application being tested (AUT). When the application being tested changes, the scripts may face issues locating specific elements. If this happens, the script might fail to execute. However, with algoQA's auto healing feature is enabled, it automatically identifies and fixes these issues with broken or changed elements. Make sure that necessary prerequisites (Java and Maven) are installed.
For information on scraping UI elements, refer to the article - algoScraper as an Extension Tool for Web Users and to automate Web Applications, refer to the article - How to Automate Web Applications?
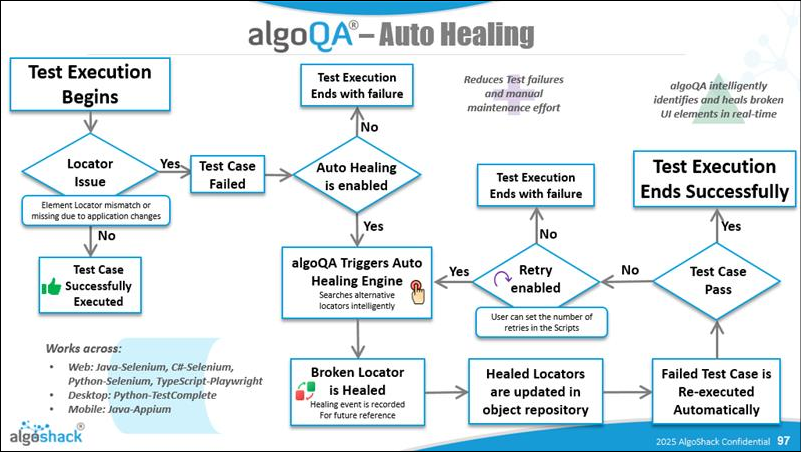
For example, consider a scenario where the web application is updated with its login process. Initially, there is a "Login" button labeled with the ID "loginButton".
<button id="loginButton">Login</button>
Later, the button ID is changed to "signInButton":
<button id="signInButton">Sign In</button>
When the auto healing feature is enabled in a test scenario, the script searches for the element with the ID "loginButton". If it fails to find it, the test will result in failure. Then the feature recognizes that despite the change in ID to "signInButton", the button's functionality remains the same. It adjusts its search criteria to locate the "signInButton", ensuring the test can proceed without any issues.
The auto healing feature uses Large Language Models (LLMs) along with the Document Object Model (DOM) of the web page to suggest locators when the original locator becomes invalid. How it works:
- This feature will be triggered while all the test cases are being executed in a test run. Once the test cases are auto healed, they are re-executed in the same test run.
- The retry mechanism can be used only to rerun the failed test case in the previous test run. For example, if there are 10 test cases being executed and the second one fails due to a locator issue, auto healing will be triggered only after the 10th test case has been completed. In this case, retry mechanism is used only to rerun the second test case.
Enabling the Auto Healing feature in Application Settings File
Perform the following:
After generating the script, download it to your local folder.
This folder must contain the script file that you have generated.
Open the folder where you downloaded the script.
For example, if your script is located at AlgoAFScript_202402121131\src\test\java, then navigate to this folder. ApplicationSettings.xml file will be available in the Java folder.
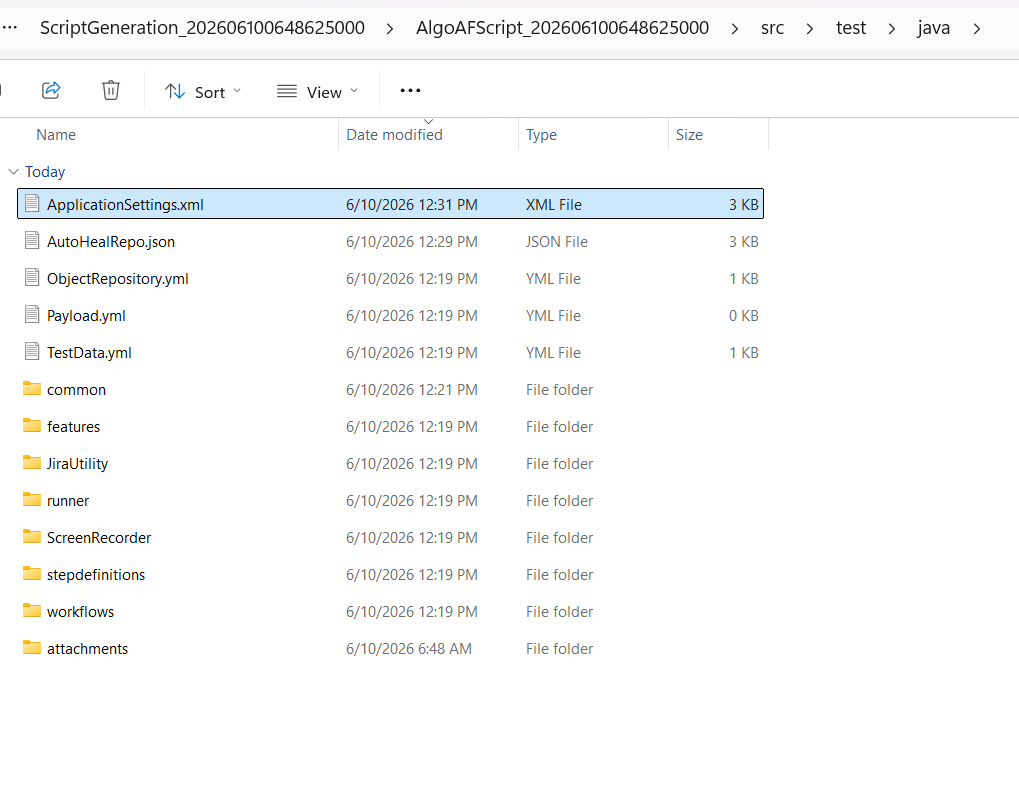
Open the ApplicationSettings.xml file and locate the setting related to the auto healing feature.
Set AutoHealing parameter to True to enable auto healing feature.
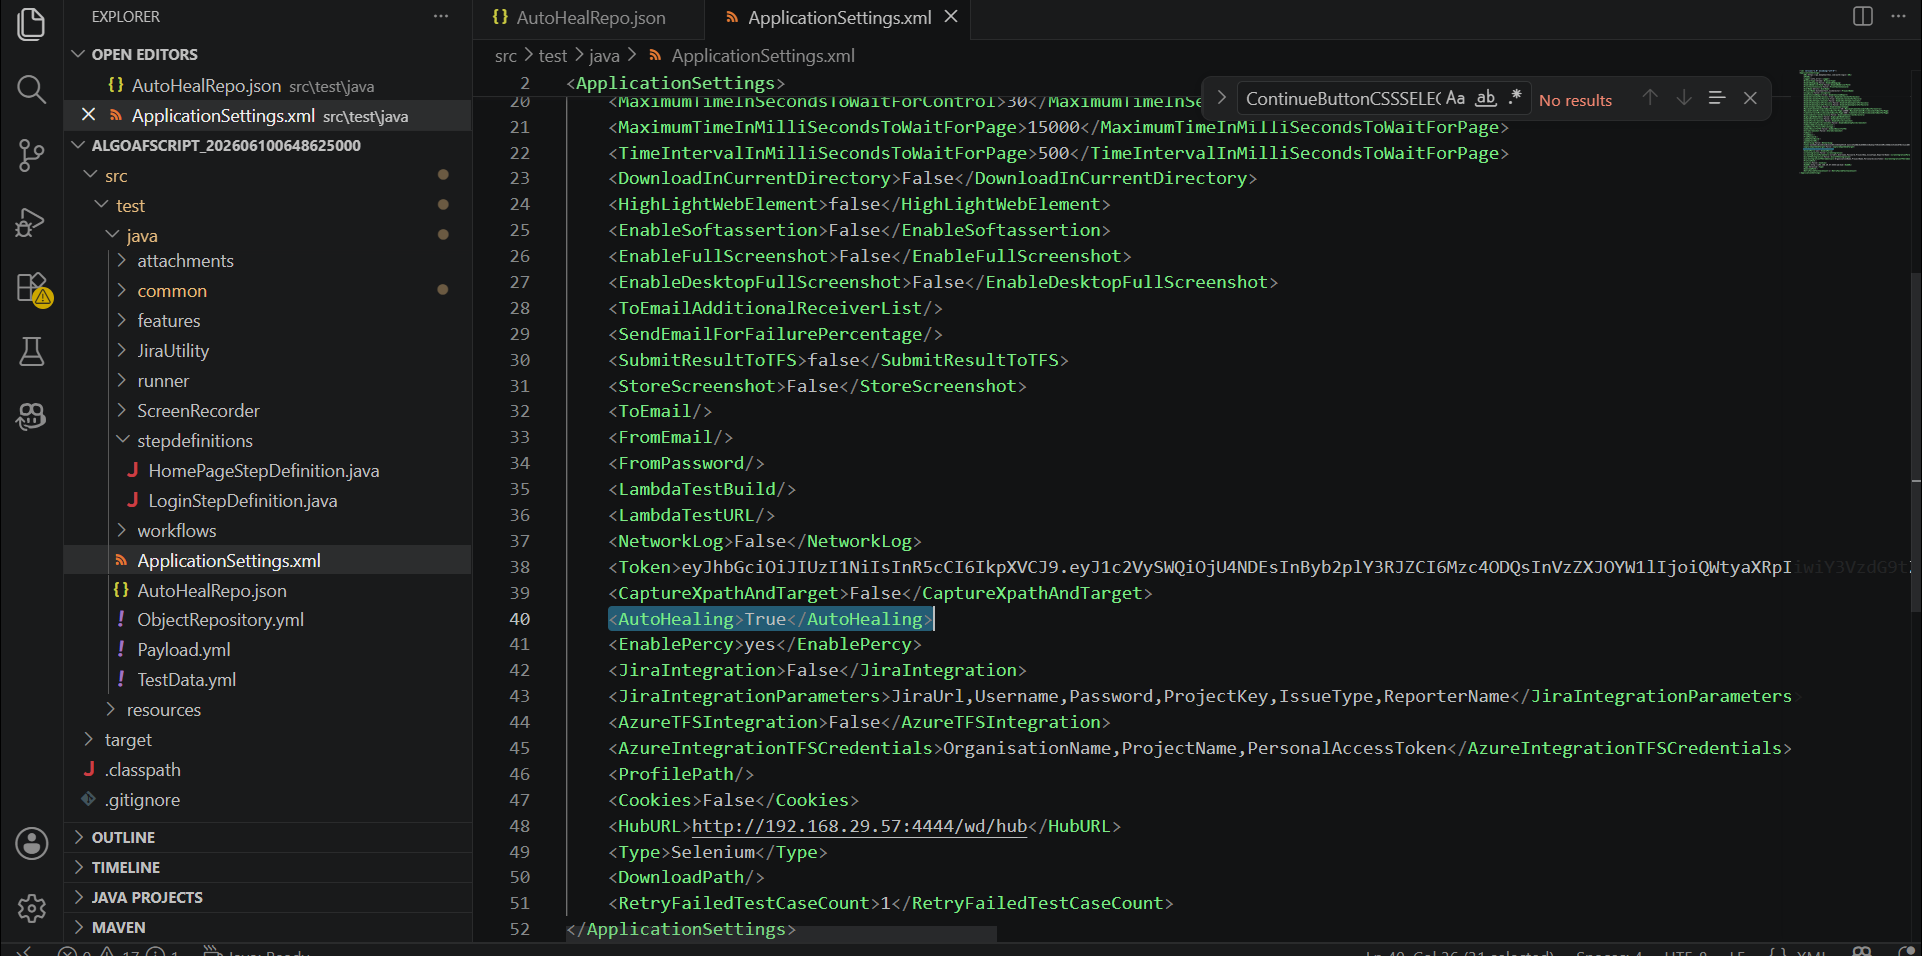
After setting the AutoHealing parameter to True, save the changes you have made to the ApplicationSettings.xml file.
Note: Whenever there are UI changes due to DOM modifications or XPath updates, the Auto Healing feature will automatically identify and heal the affected XPath. The updated XPath will then be saved in ObjectRepository.yml, AutoHealRepo.json and algoQA.
It also Heals Absolute XPaths.
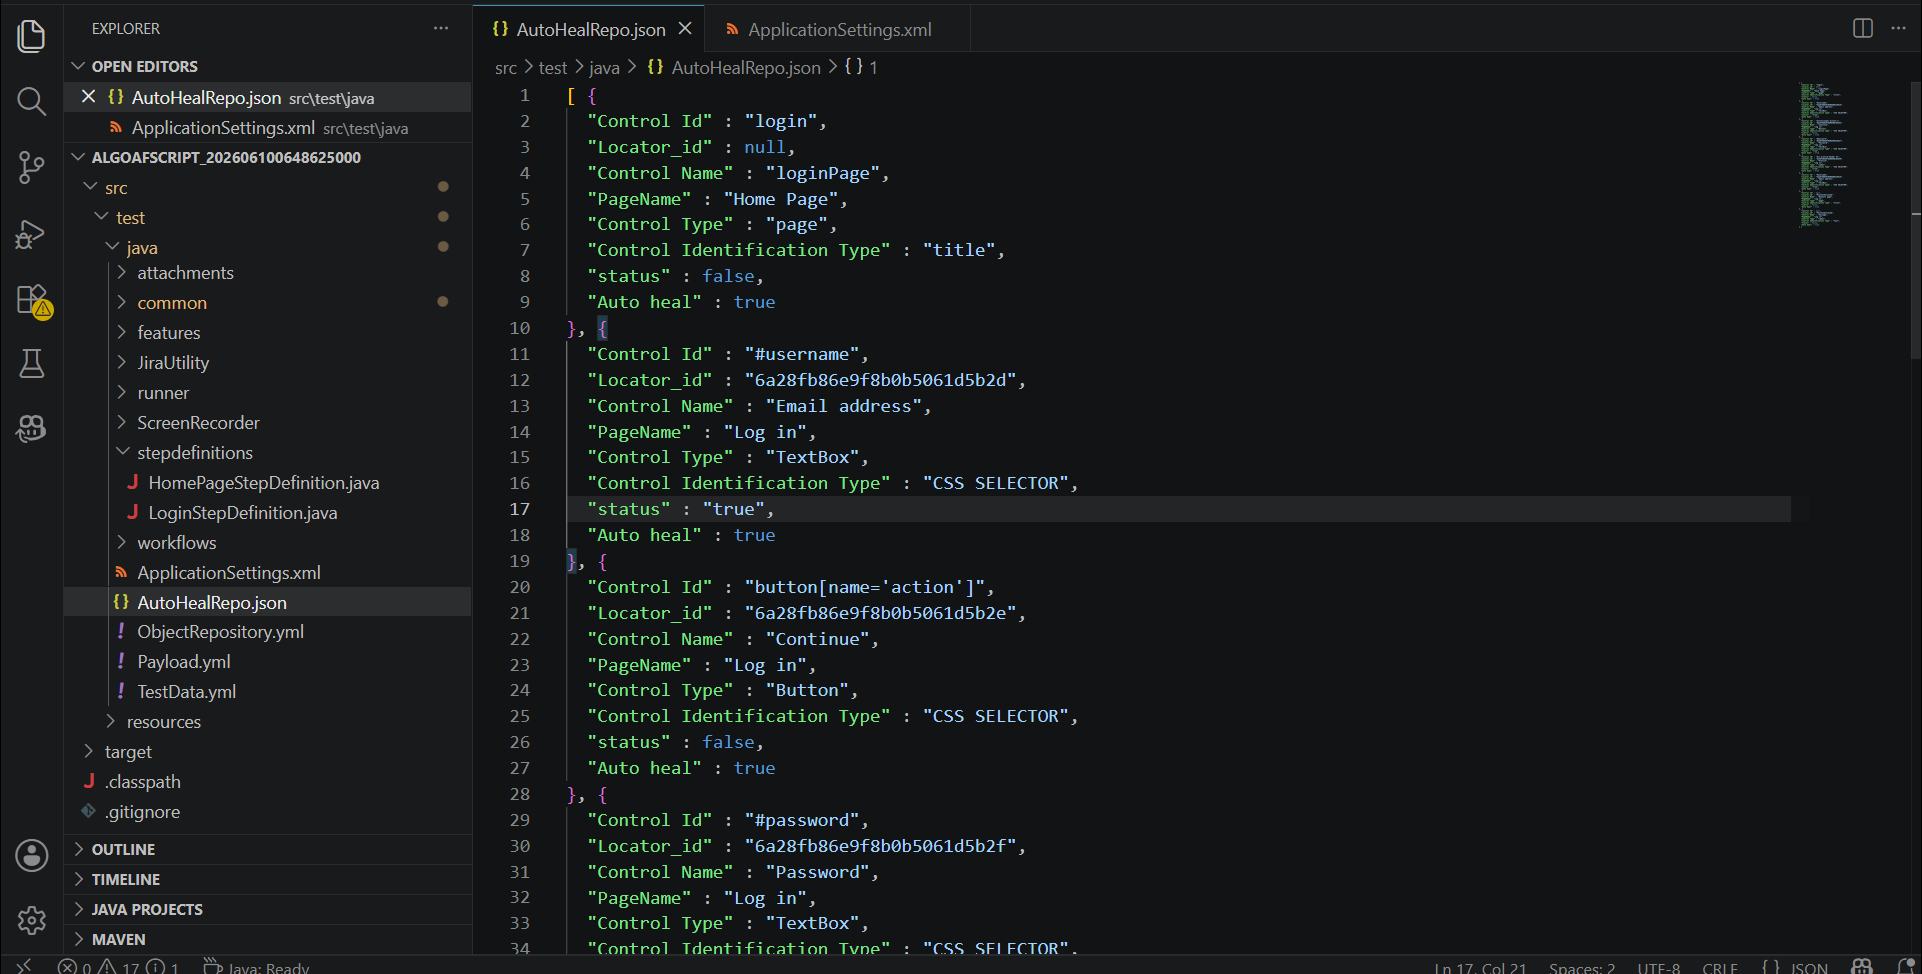
The AutoHealRepo.json file stores information such as Locator ID, Control Name, Page Name, Control Type, Control ID, and other Auto Healing details required for maintaining healed locators.
Open the command prompt within the script folder.
Execute the script using mvn command prompt.
The auto-healing feature is available for the following web automation frameworks:
- Python Selenium
- Java Selenium
- JavaScript Selenium
- Typescript Playwright
The auto-healing feature is available for additional frameworks and application types.
- For Web automation and Python Selenium framework, auto-healing will work even without scrapped data.
- The auto-healing feature is available for desktop automation using the Python TestComplete framework.
- The auto-healing feature is available for mobile automation using the Java Appium framework.
Updating Auto Healed XPaths in algoQA
Once auto-healing is completed for the scripts and local files, an Update icon appears in the Object Repository. Click the Update icon to apply the auto-healing changes.
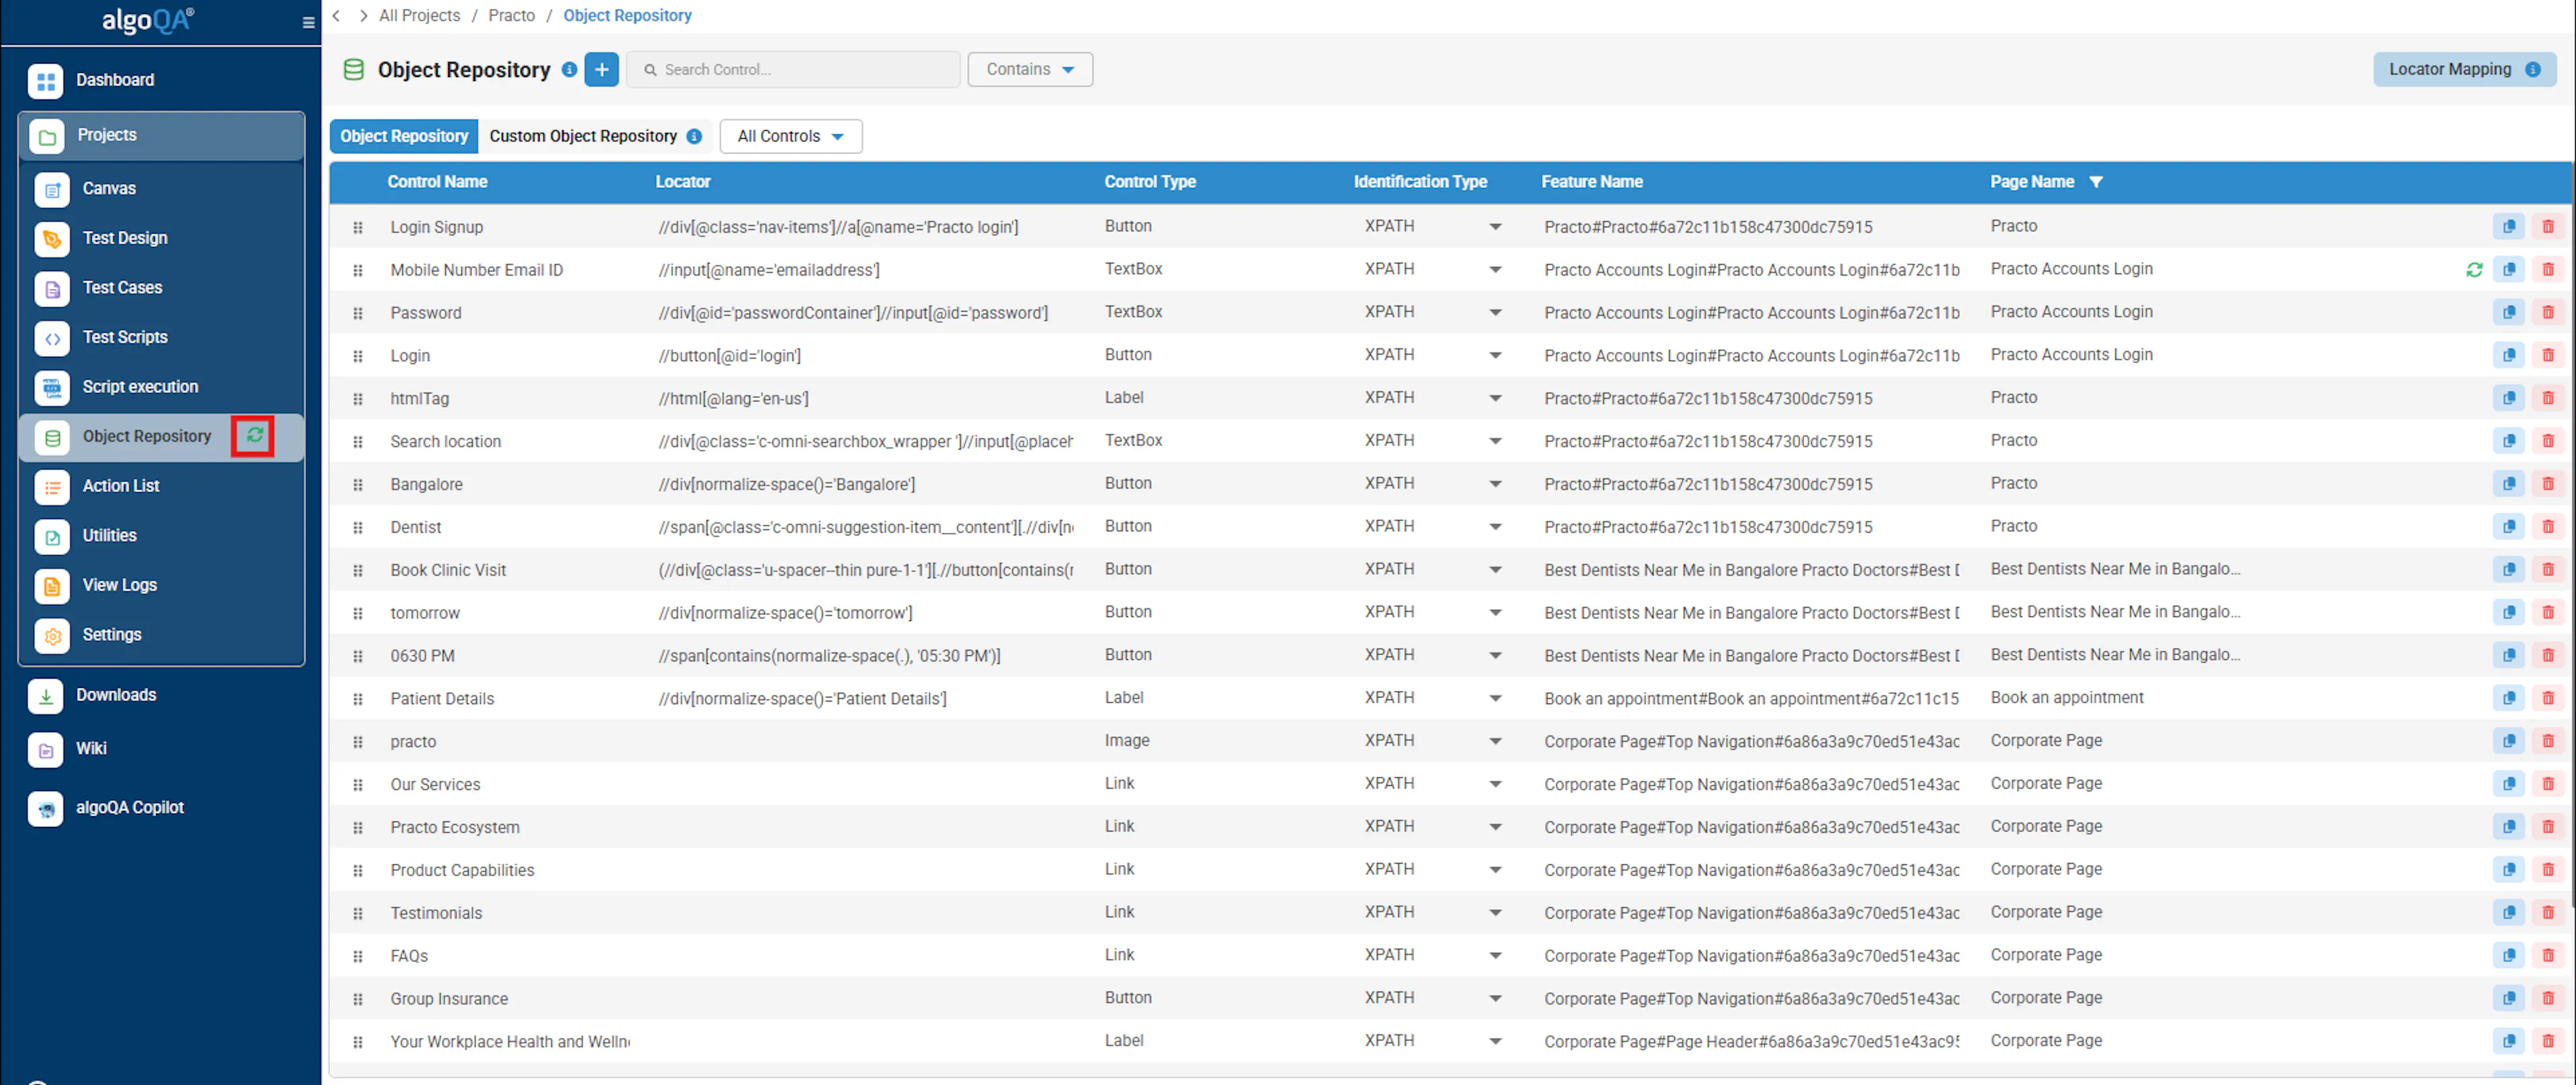
Click Update All to apply the auto-healing changes.
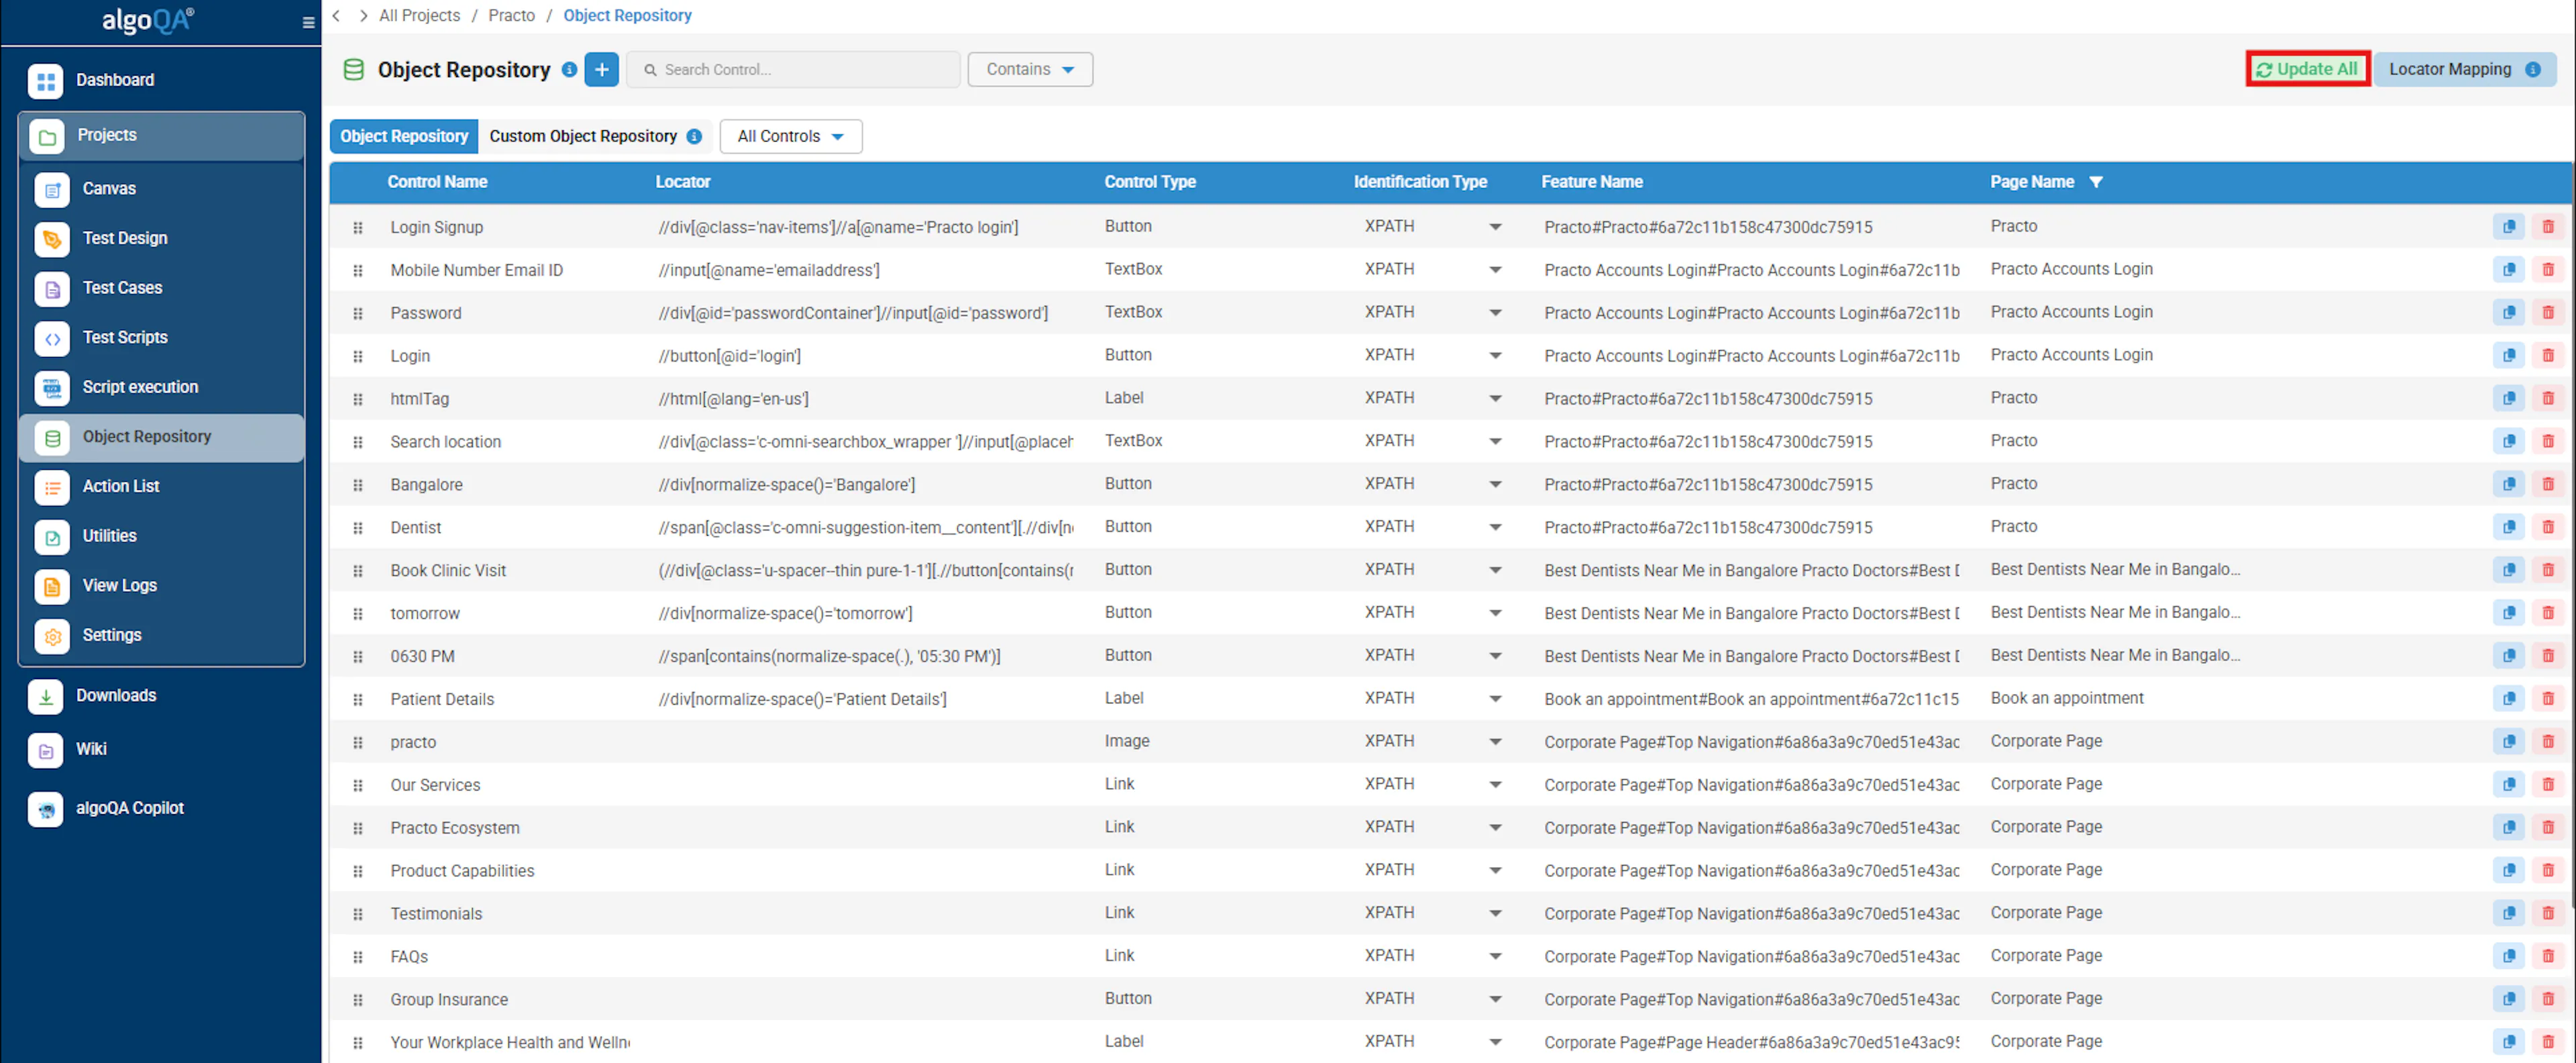
- Clicking this "Update All" button another pop-up will appear showing old and new locator.
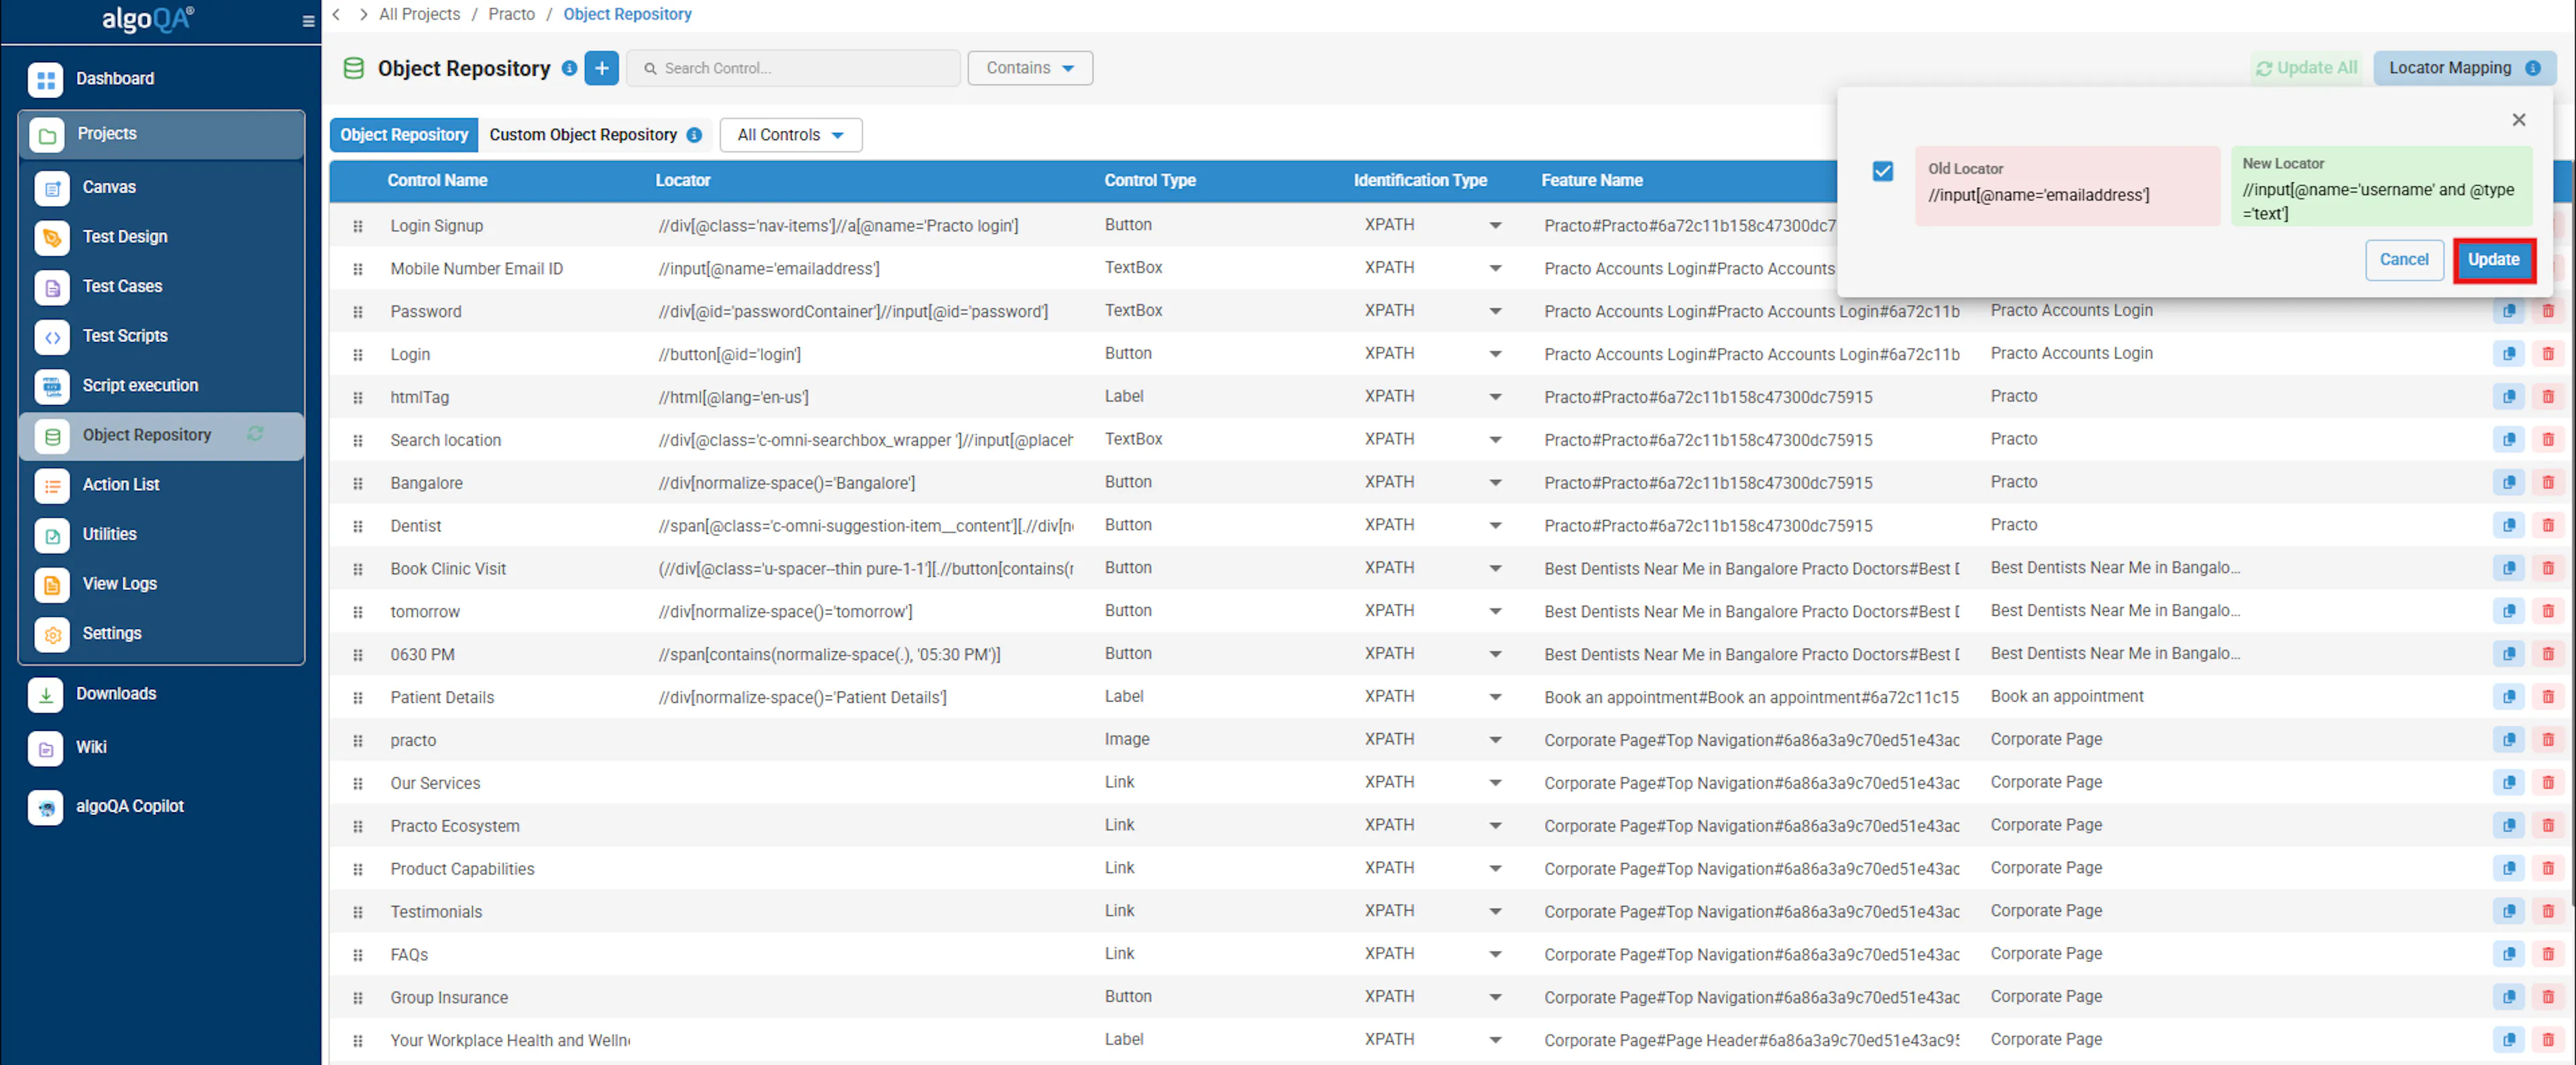
- Clicking on "Update" will reflect the updated XPath in the Object Repository.
The updated XPath will also be reflected in the Node Configuration.
Note: This feature is currently available only for the following Web automation frameworks: Java Selenium, Python Selenium, JavaScript Selenium, and TypeScript Playwright.
Auto-Healing Insights on the Dashboard
After executing scripts with auto-healing enabled, you can view auto-healing insights on the Dashboard. Click a batch in the Batch Execution Summary table to view the following:
- Auto-Healing accuracy in percentage
- Number of steps analyzed
- Number of steps passed and failed
- Total AutoHeal Test Case
- Manual review needed
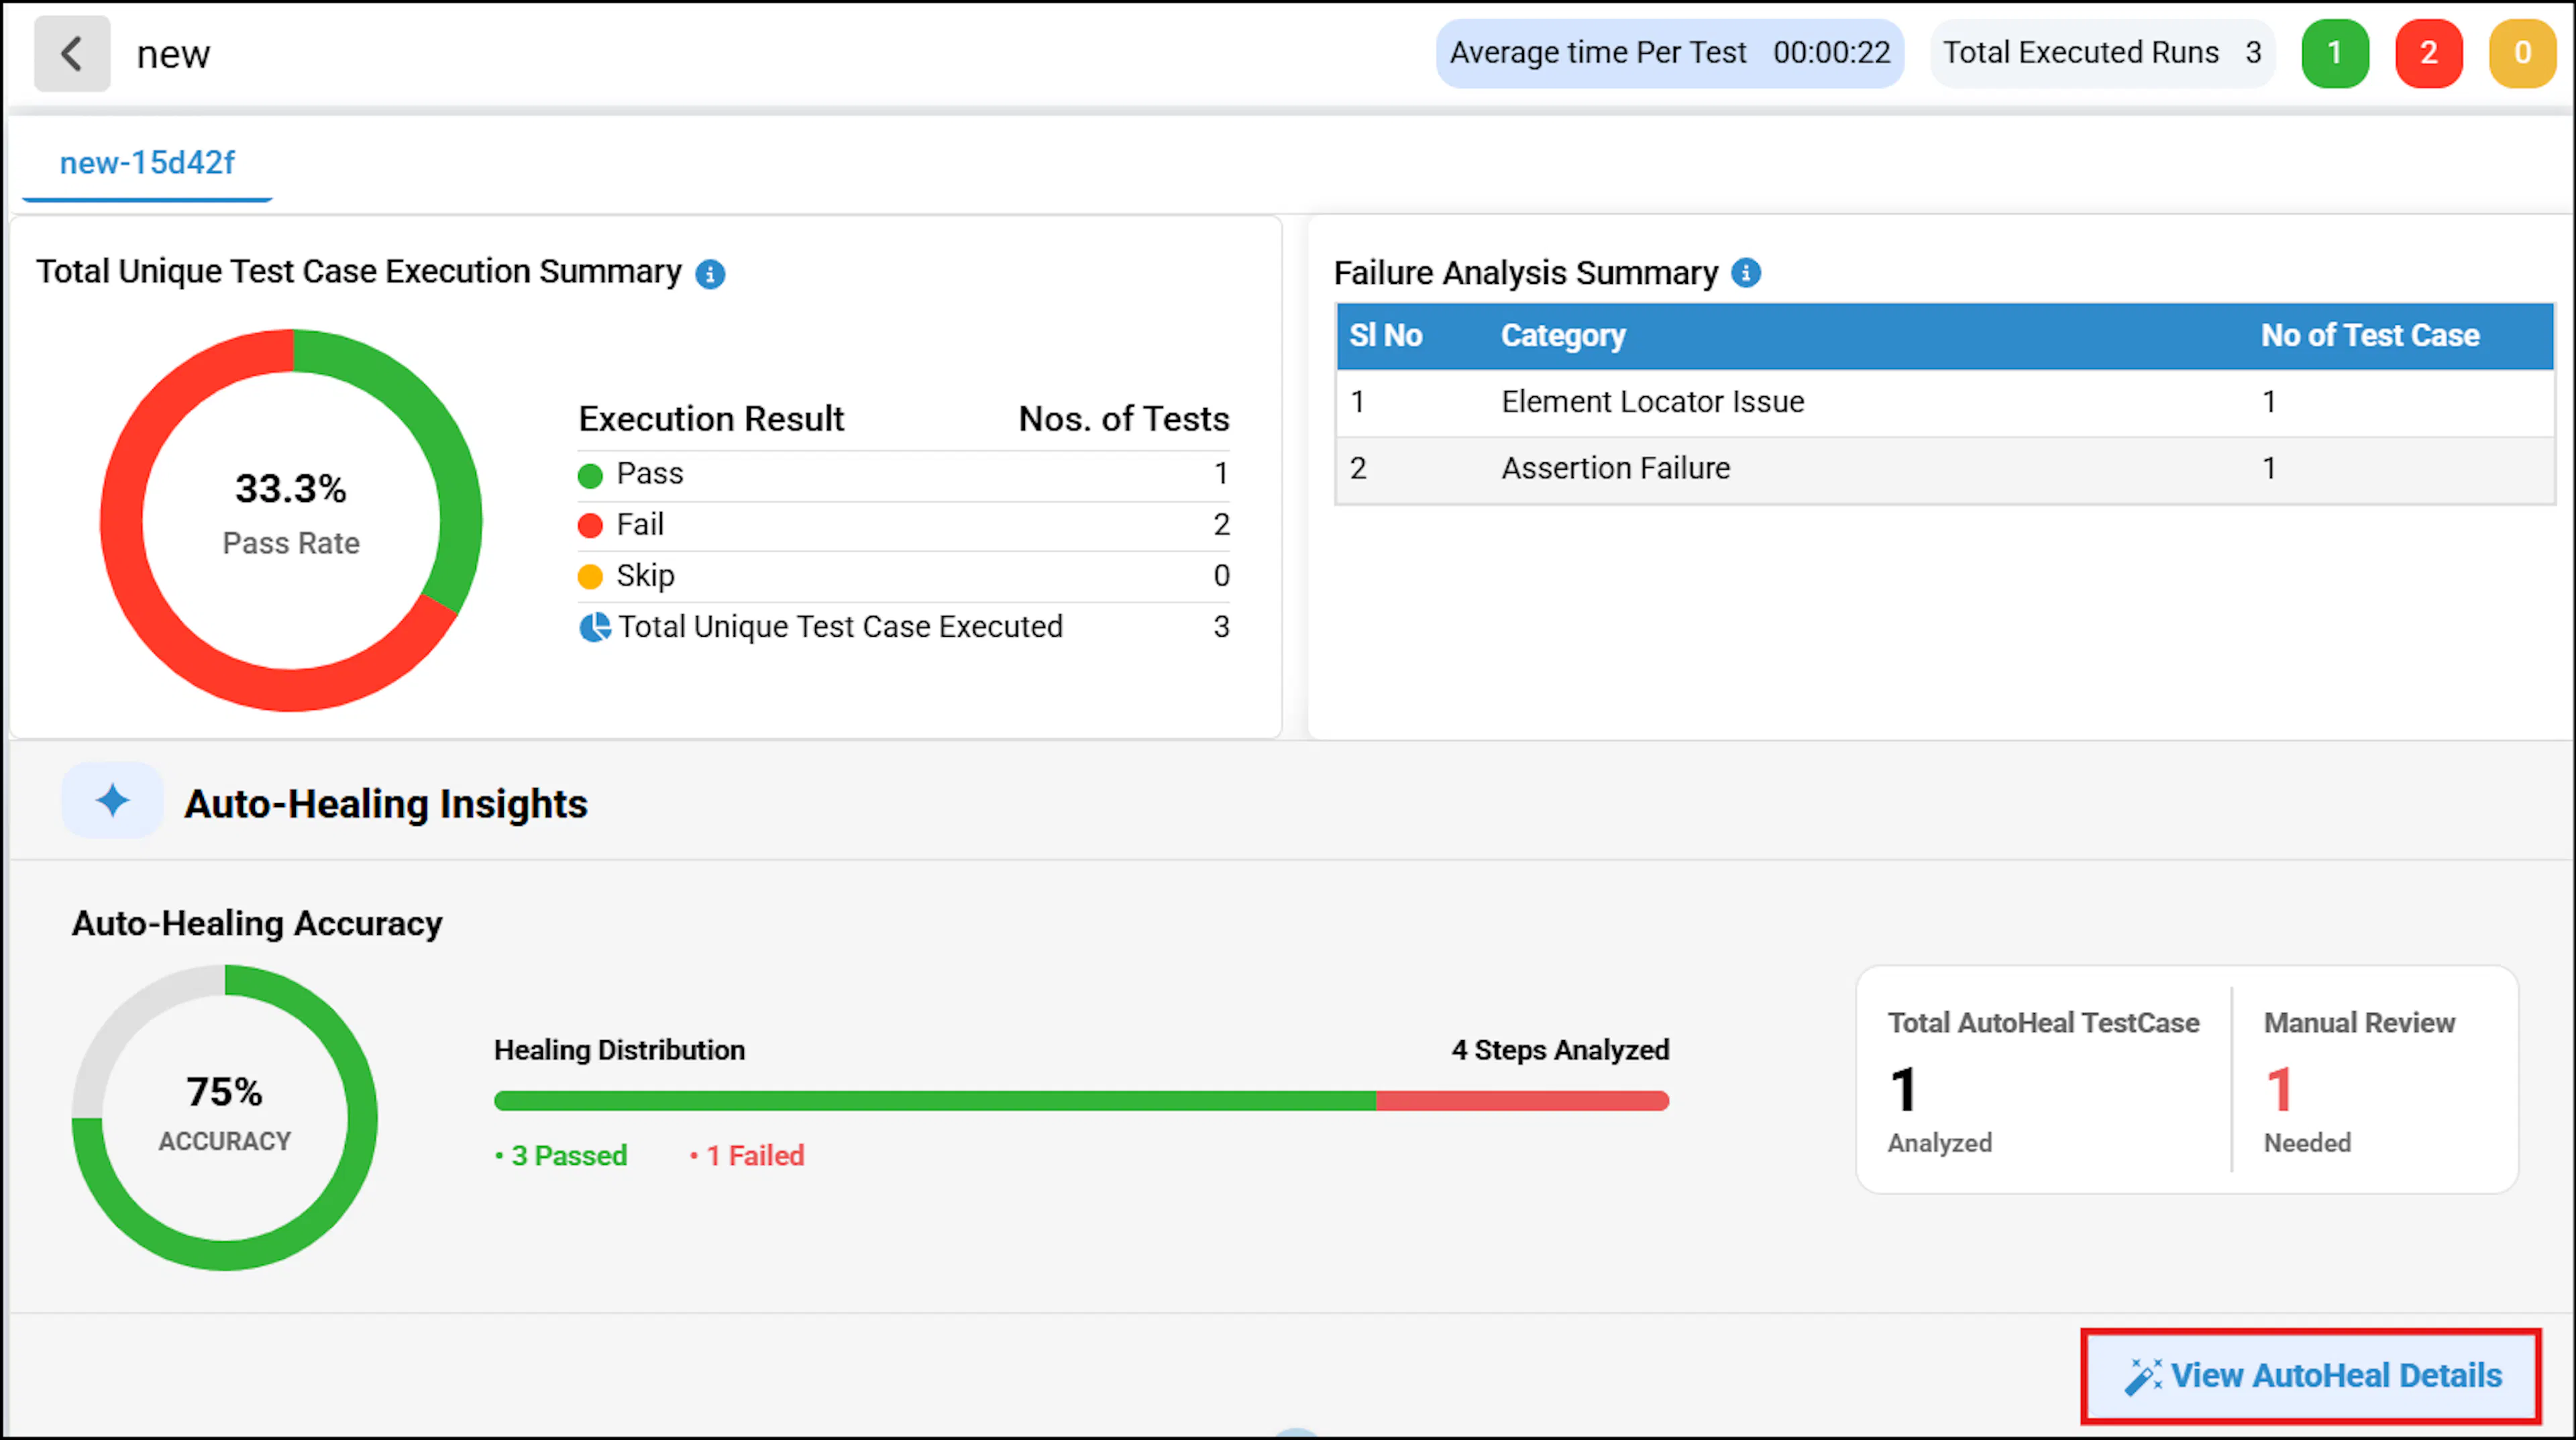
Click View AutoHeal Details to open the All TestCases table, which shows Scenario Id under Test Case Name, Tags used in the Test case, Total AutoHealed Steps, and Status.
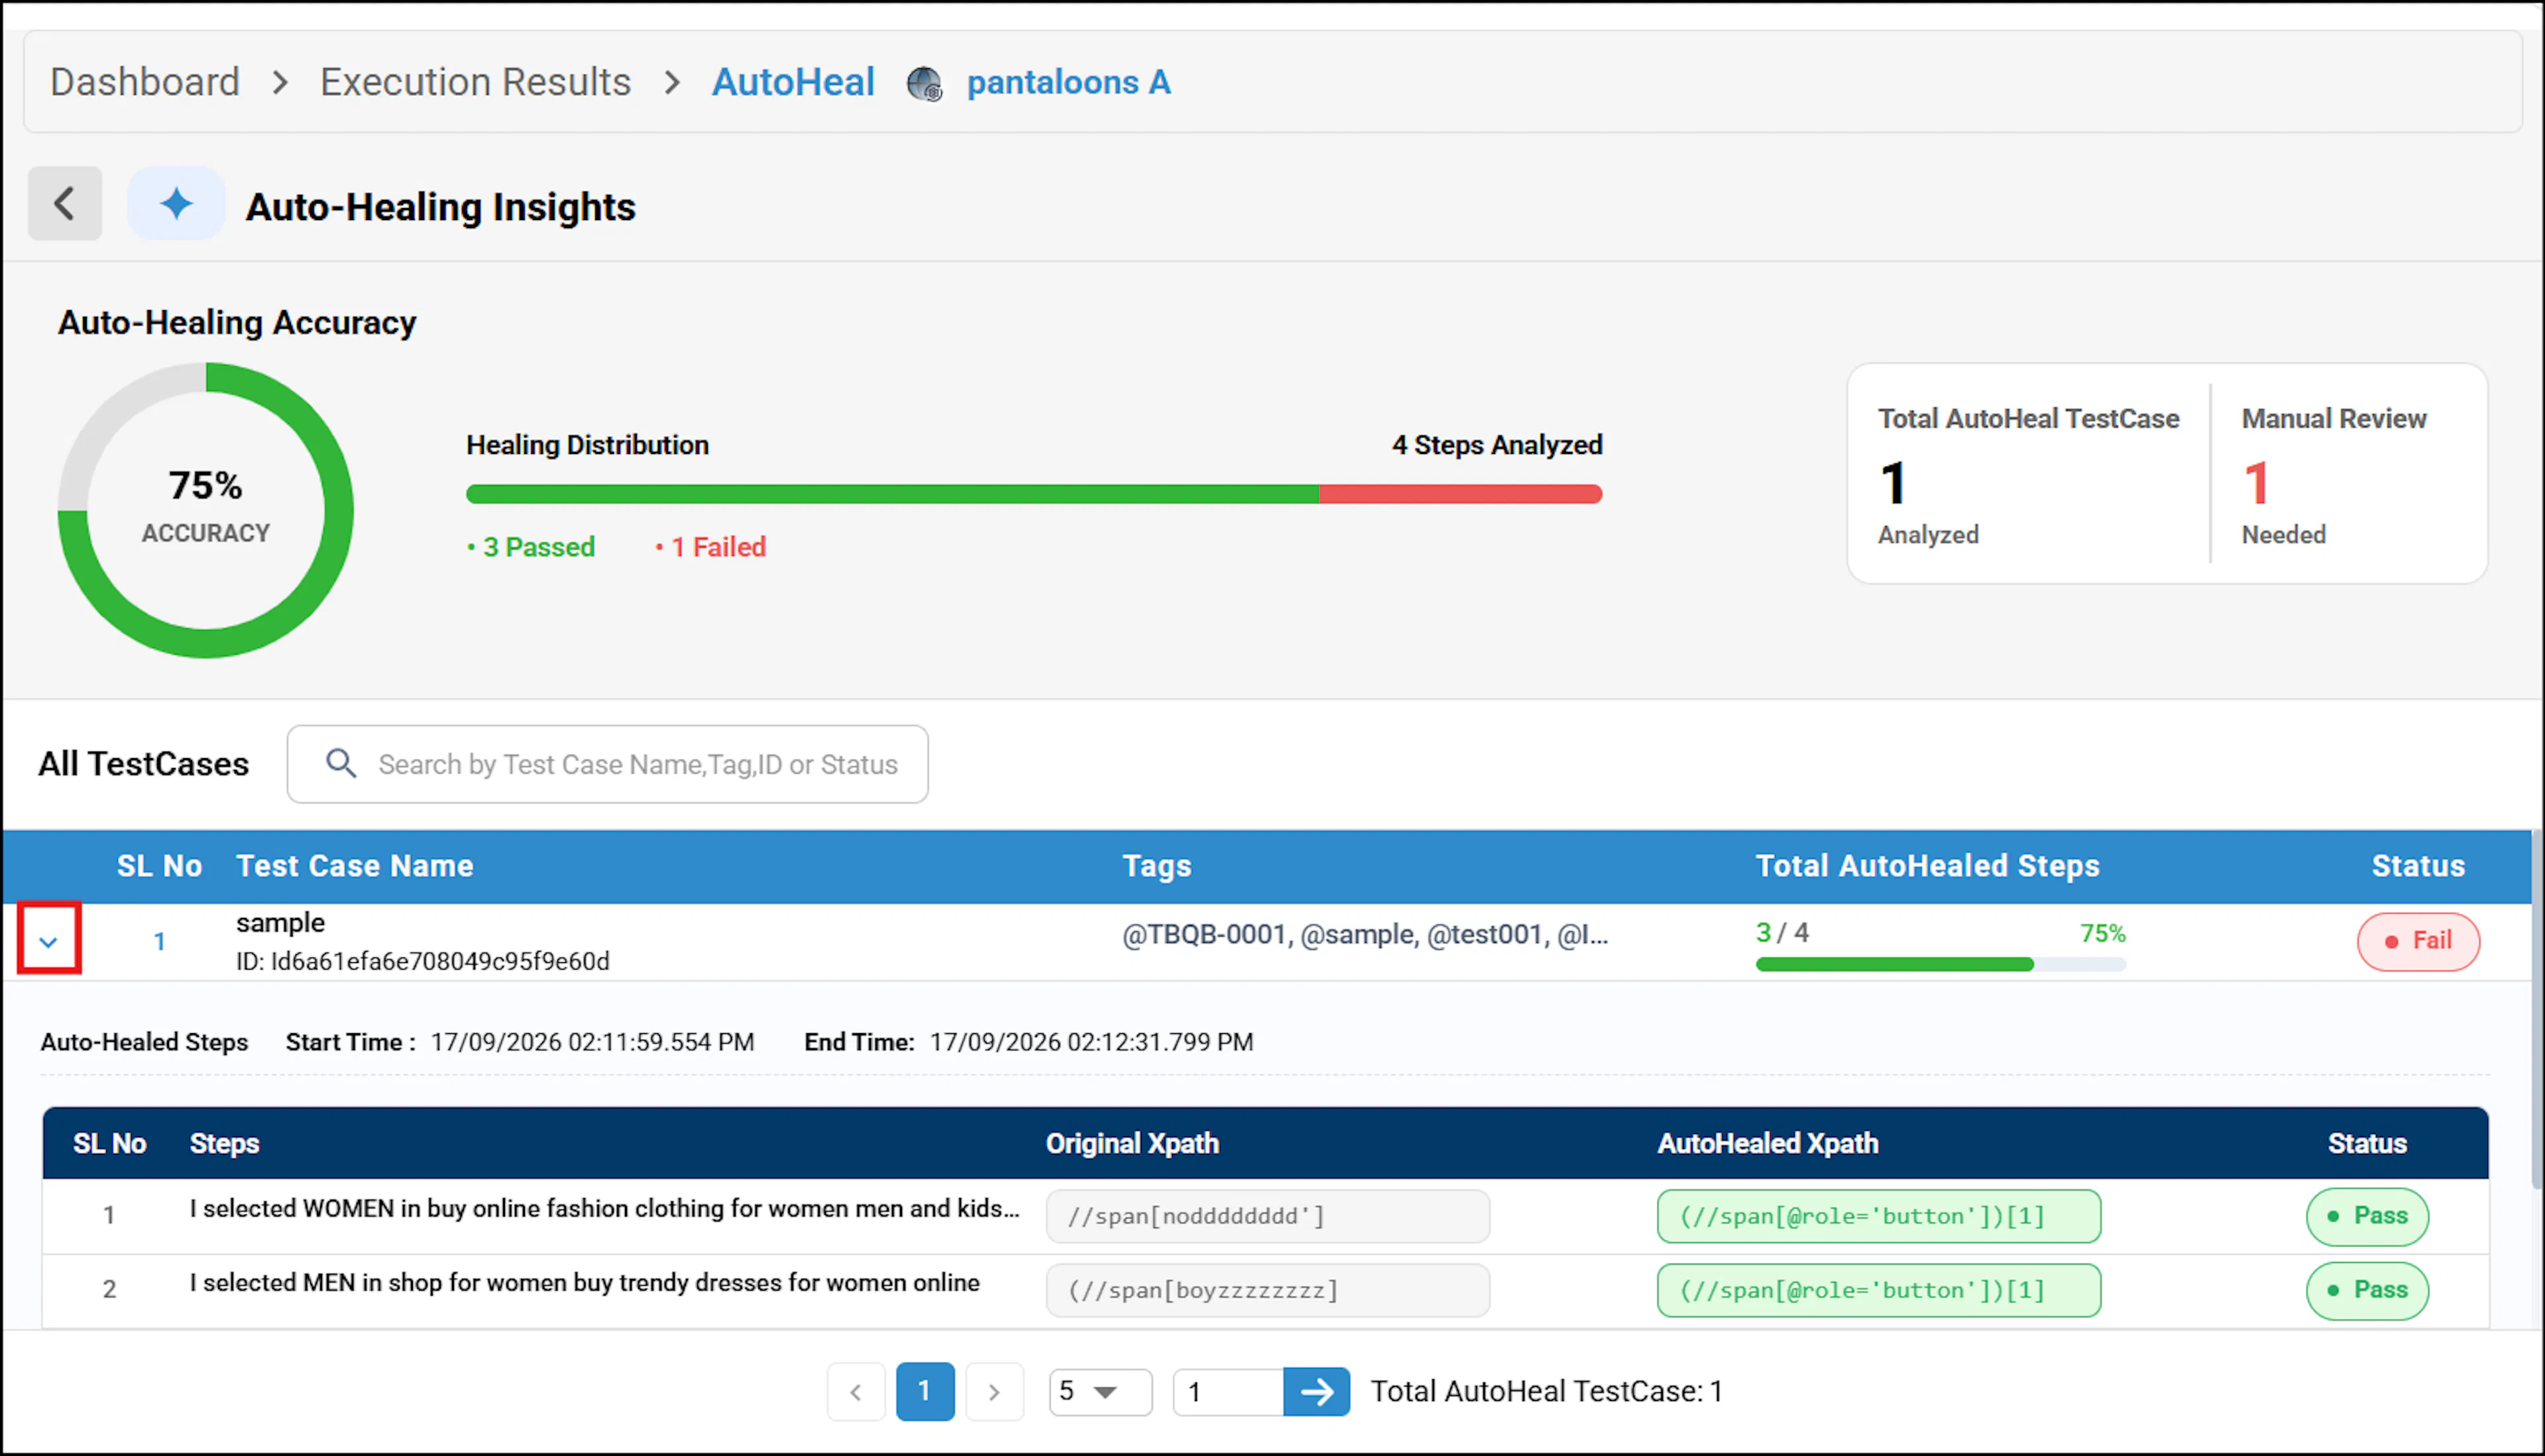
Click the dropdown icon beside the test cases to view Auto-Healed Steps Start Time and End Time, followed by a table with all the Steps, Original XPath, Auto-Healed XPath, and Status.