
Settings For Web, Mobile, Desktop and Hybrid Automation
Field by field reference for the Settings page of a web, mobile, desktop, or hybrid project. The Settings page allows you to configure and manage settings for your project, including Project Information, Backup & Restore, and Feature File Settings. Select a project and navigate to settings in the left pane.
Summary Description of Project Settings Page
Navigate to Settings > Configuration Settings to view the project settings.
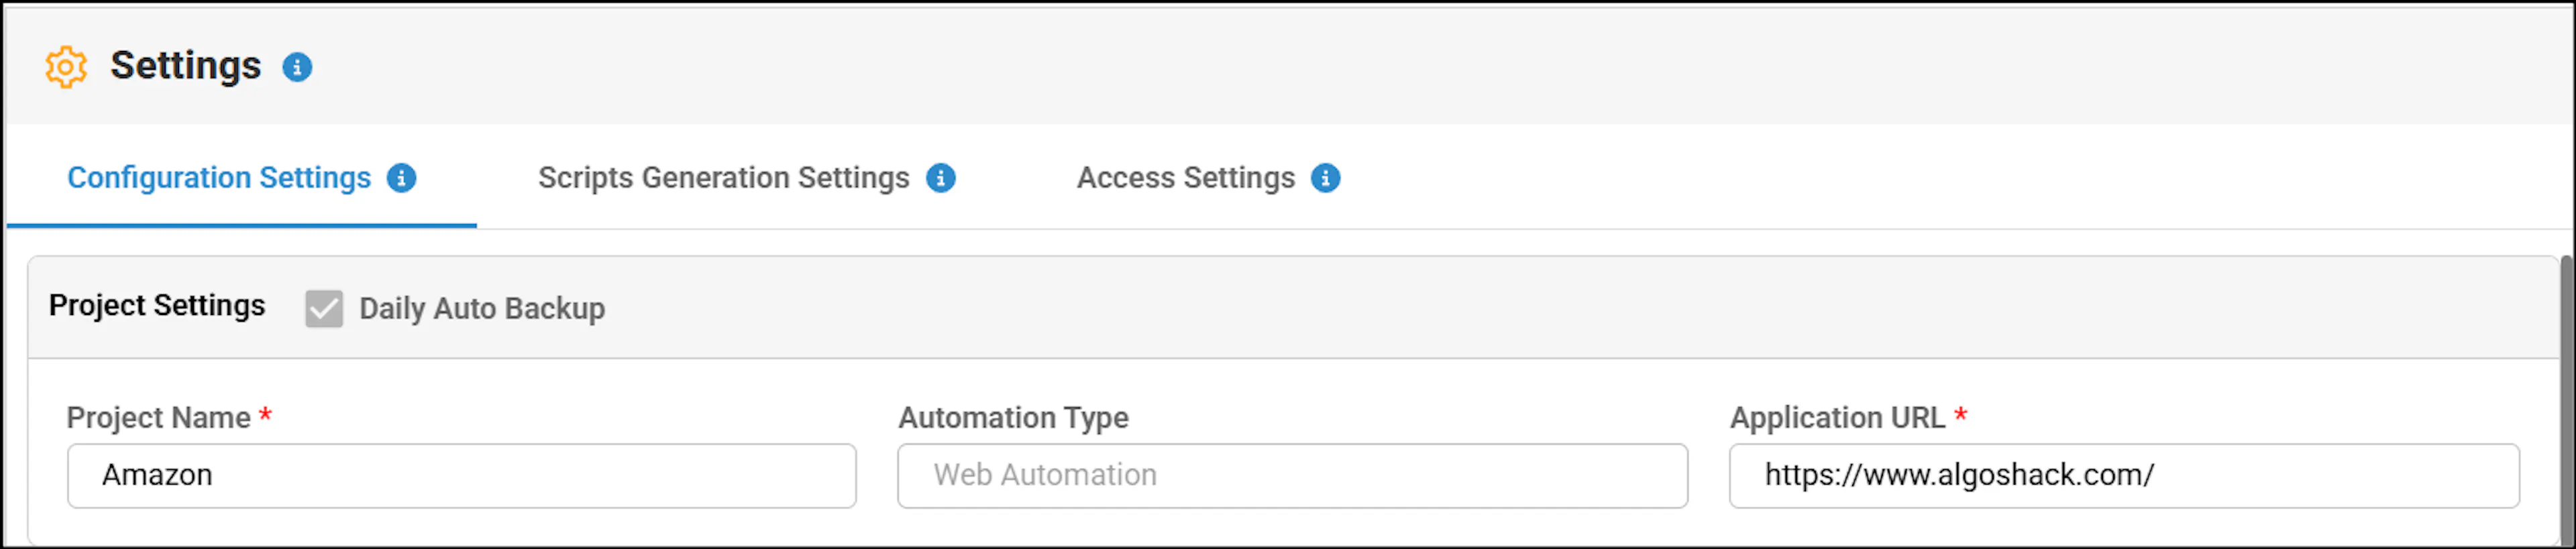
The following table provides a summary of Project Settings fields:
| Field | Description |
|---|---|
| Project Name | Displays the Project name entered during project creation. |
| Automation Type | Displays the Automation type entered during creation of the project. By default, this textbox is not editable. |
| Application URL | Displays the Application URL. You can modify the existing URL to access a specific application. |
The following table provides a summary of Backup and Restore Settings Fields:
| Field | Description |
|---|---|
| Daily Auto Backup | Auto-backup is enabled by default for all projects, and the auto-backup checkbox is disabled on the project settings page, if the project is assigned to you, these fields will not be available. |
Summary Description of Feature File Settings Page
Navigate to Settings > Configuration Settings to view the Feature File settings, available below the project settings.
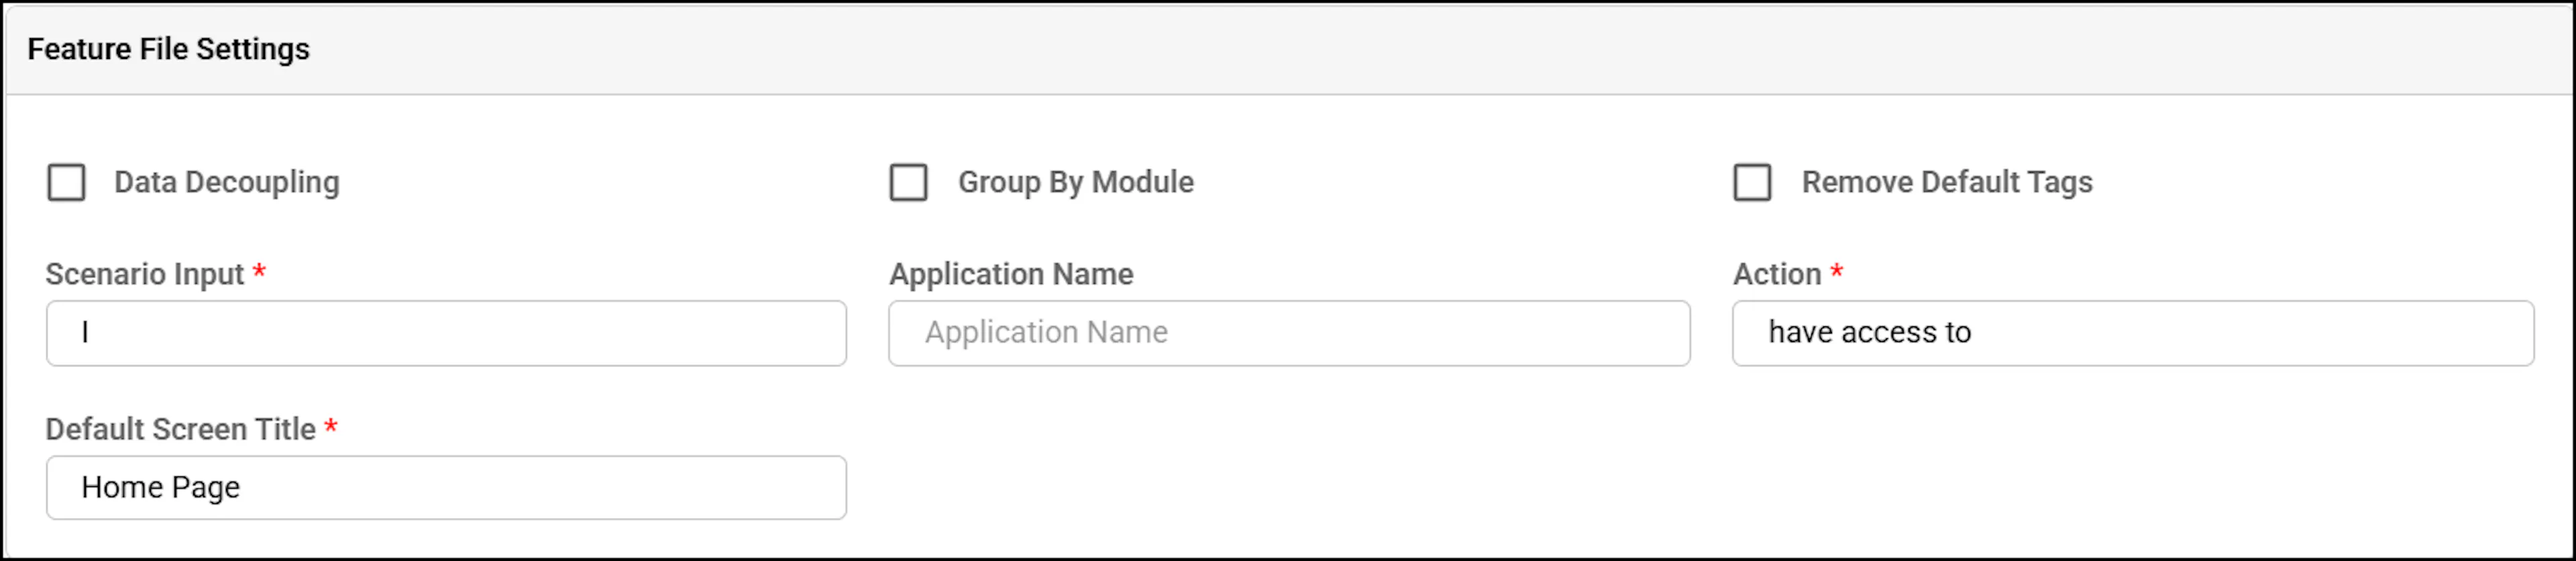
The following table provides a summary of Feature File Settings Fields:
| Field | Description |
|---|---|
| Group By Module | Check this check box to generate a separate module, folder structure, and update. For more information, see Generating separate Feature File in separate folder. |
| Remove Default Tags | Check this check box to Remove Default Tags from the generated Feature file and update, if you choose to add custom tags. The following screenshot represents the original Feature File with this option unchecked: 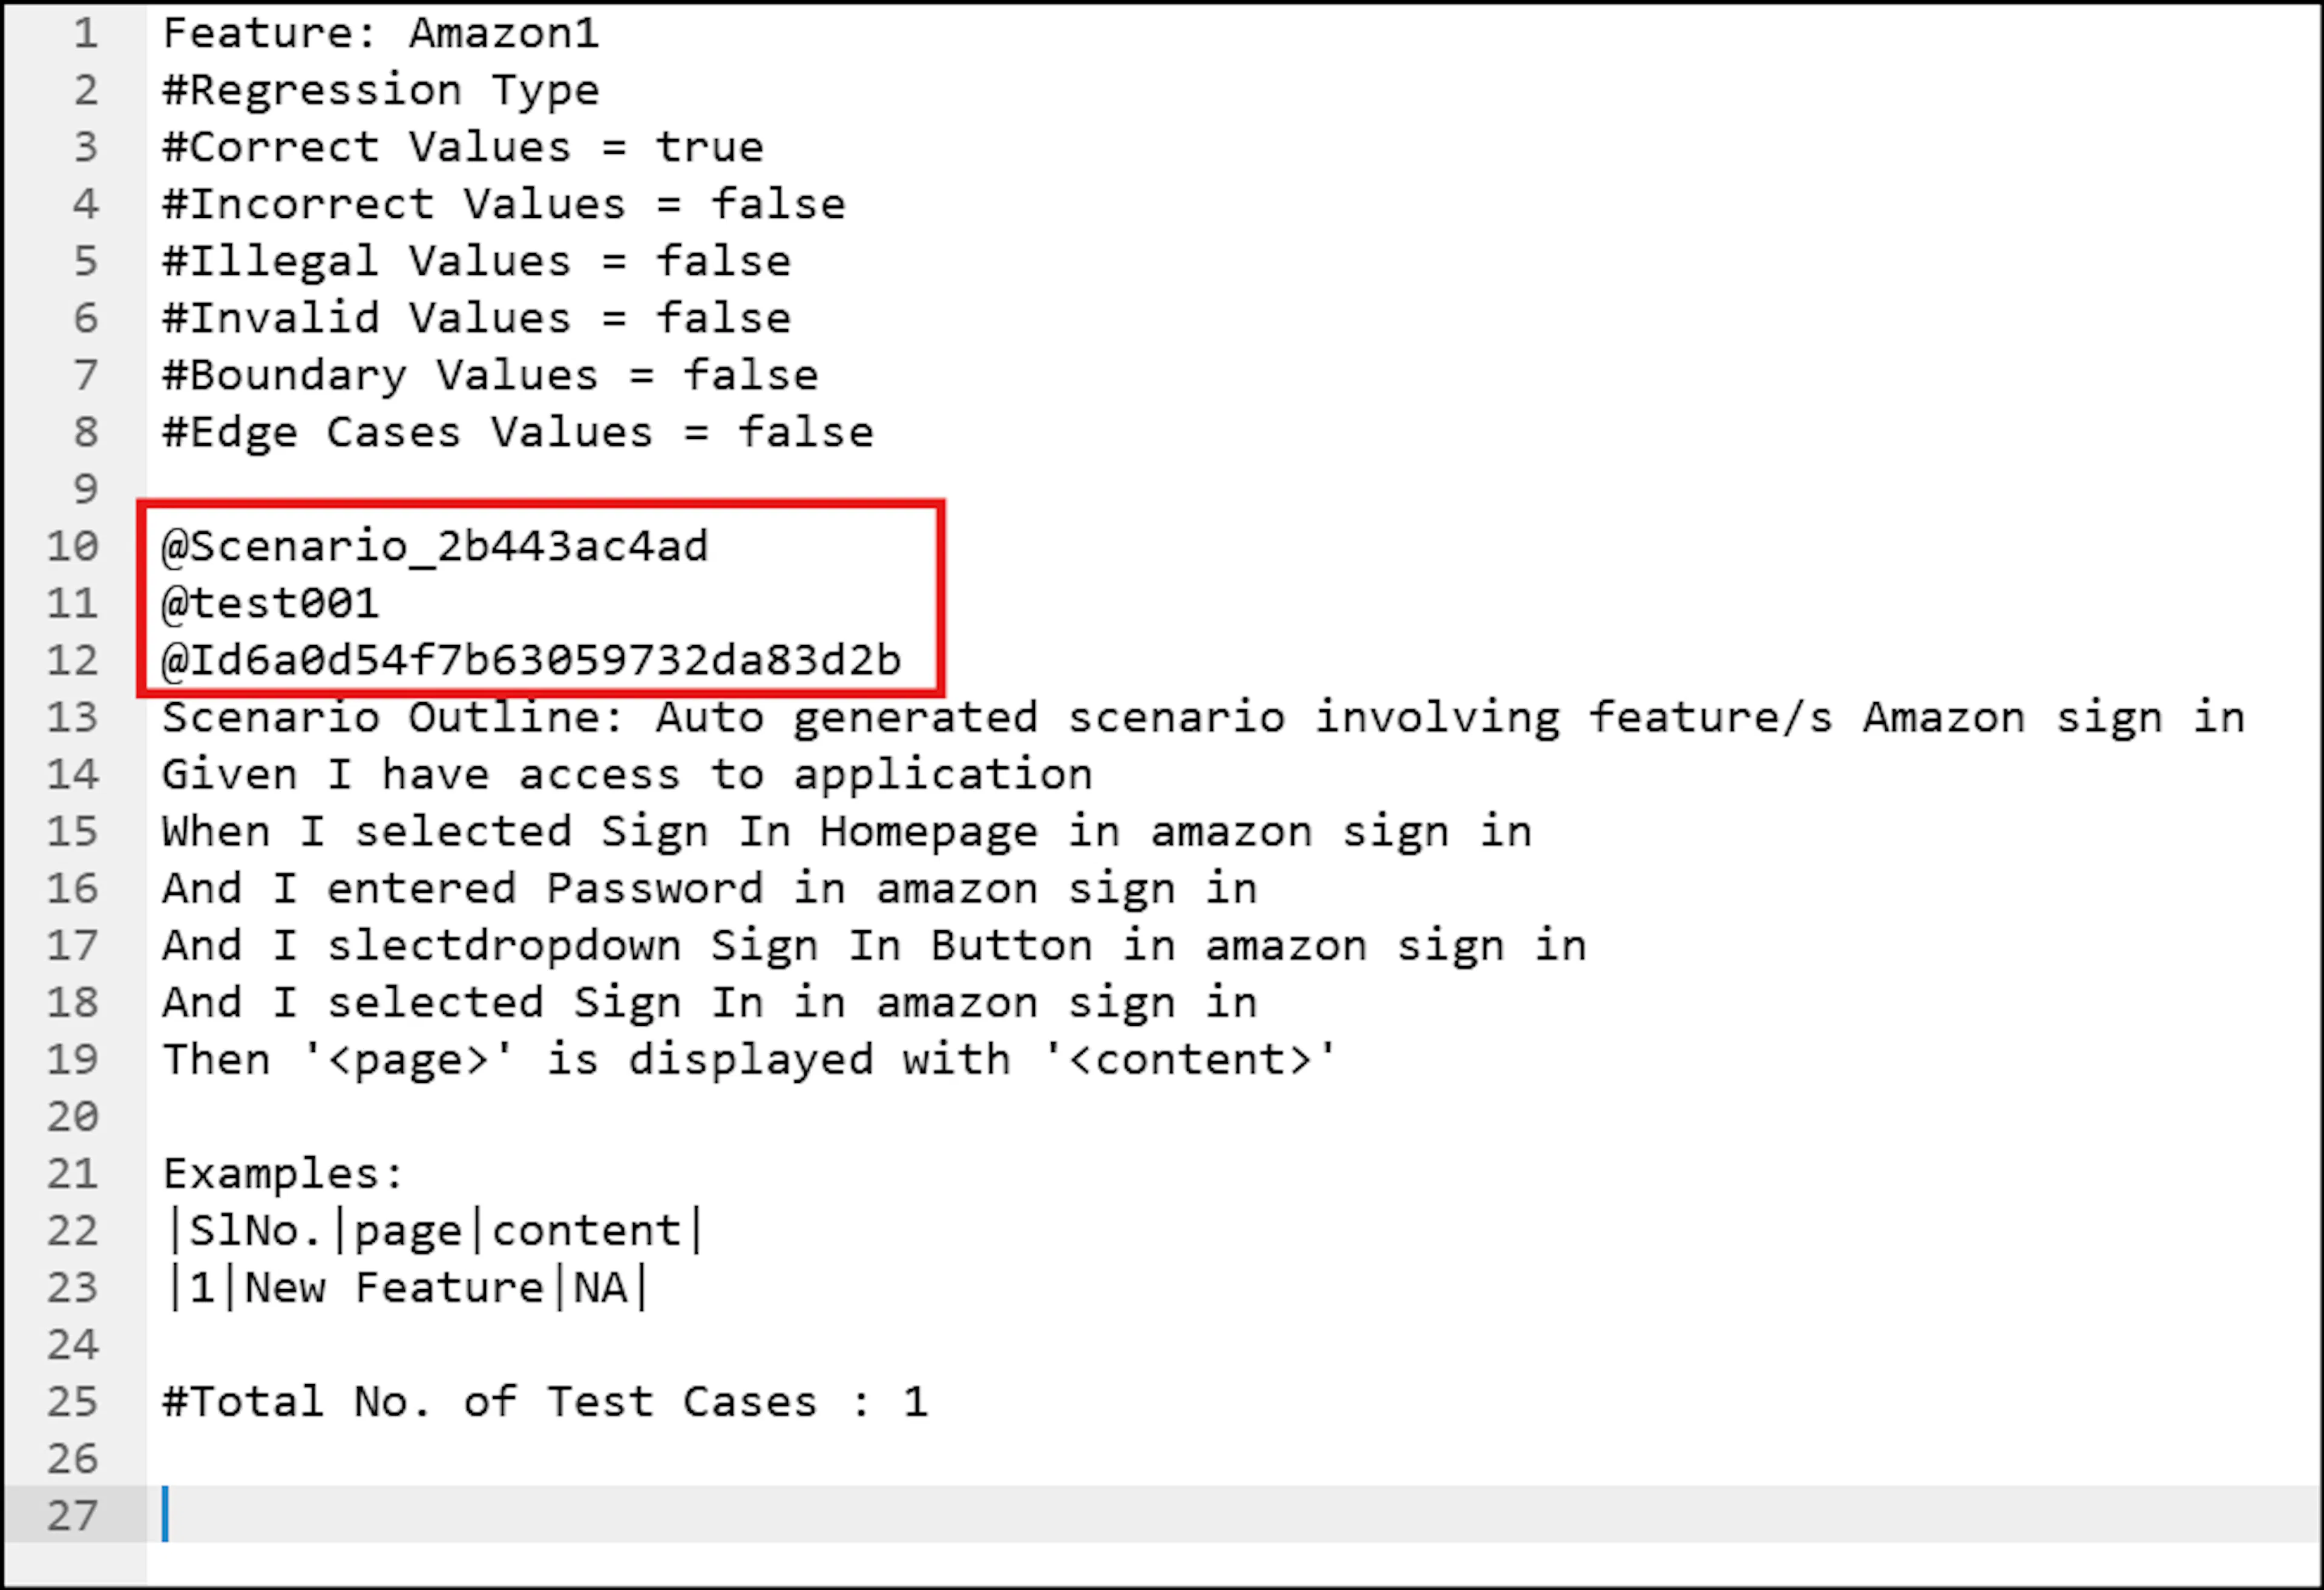 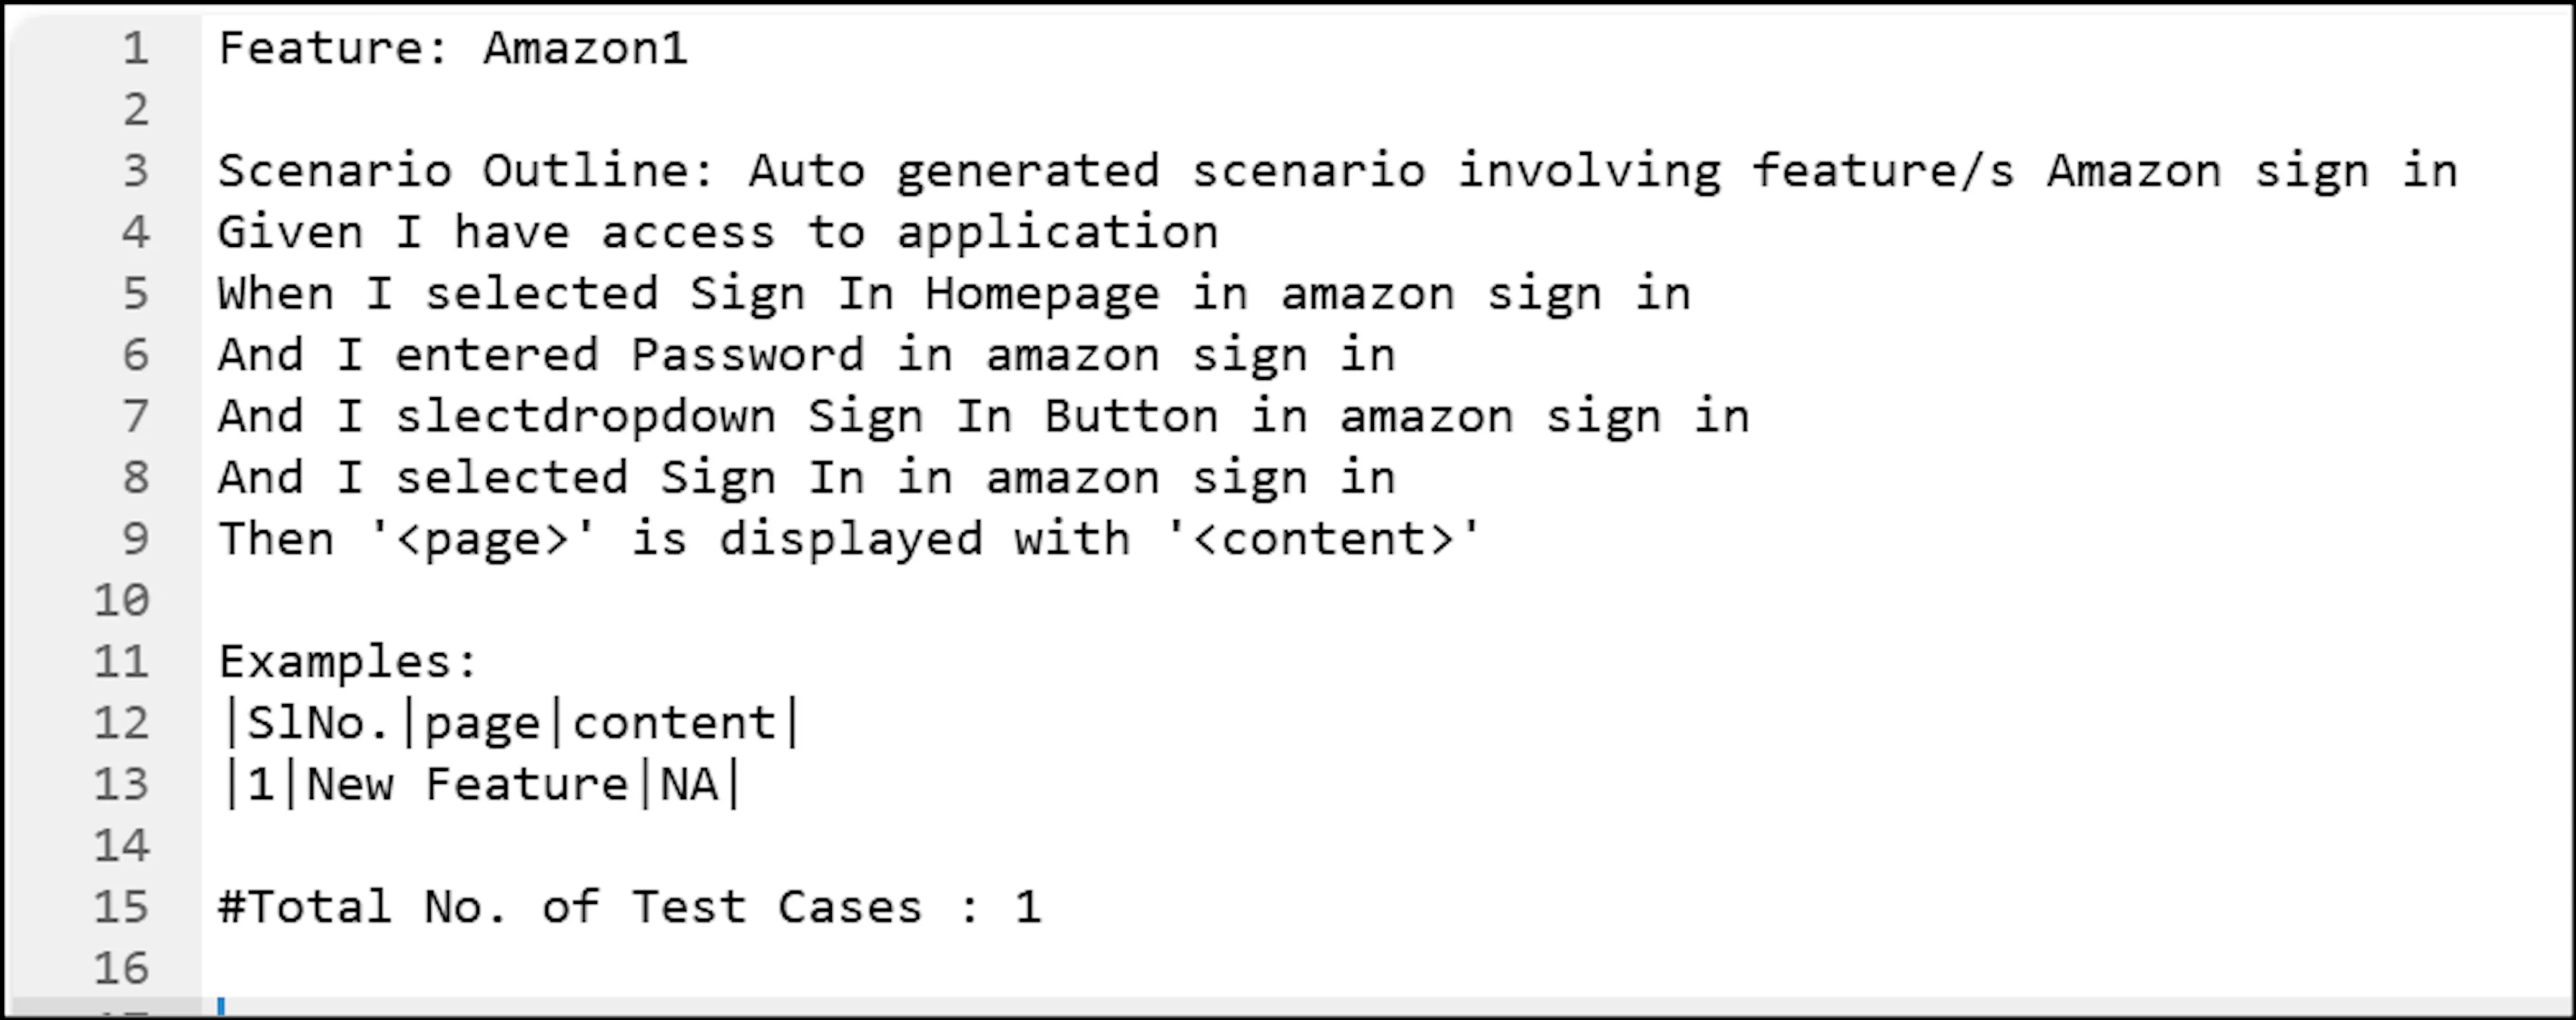 When the Remove Default Tags checkbox is enabled, a warning is displayed indicating that removing the default tags will prevent the report from appearing on the Dashboard, Smart Ordering, and Auto Healing during report upload. 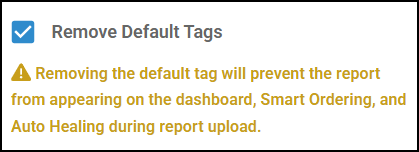 |
| Data Decoupling | Check this check box and update to generate a separate YAML file in the Test cases Folder. To access TestData.Yml file, navigate to the Test Cases, expand the appropriate folder to view the YAML file. |
| Application Name | You can enter a Given Application Name in this text box. After generating the test cases, Application Name will be available in feature file or .txt file |
| Action | You can enter an appropriate action for the Given condition. After generating the test cases, Action will be available in feature file or .txt file |
| Default Screen Title | You can enter or modify a Default Screen Title. After generating the test cases, the pre-condition will be available in _updated.xlsx. Note: The Default Screen Title field is mandatory. |
| Scenario Input | You can add input for the GWT line, which will be automatically applied across the project. |
Summary Description of Data Generation Settings Page
Navigate to Settings > Configuration Settings to view the Data Generation settings, available below the Feature File settings.

Correct Values is selected by default. Enable the rest of the required options and click Update.
| Field | Description |
|---|---|
| Correct Values | This checkbox is selected by default. To allow correct control values in the test design, keep this checkbox selected and update. |
| Incorrect Values | To allow incorrect control values in the test design, select this checkbox and update. |
| Illegal Values | To allow illegal values in the test design (e.g., no digits, no special characters, all uppercase, all lowercase, no spaces), select this checkbox and update. |
| Invalid Values | To allow invalid values in the test design (e.g., ends with space, starts with space, space only, or empty), select this checkbox and update. |
| Boundary values | To allow boundary values in the test design (e.g., maximum value +1, maximum value, maximum value −1, minimum value +1, minimum value, minimum value −1), select this checkbox and update. |
| Edge Cases | To allow edge cases in the test design, select this checkbox and update. |
| Full Object Repository | To include all controls in the Object Repository, select the Full Object Repository checkbox and click Update. |
You can set the value range for your project from Business Rules. To learn more, navigate to Business Rules.
Summary Description of Script Generation Settings Page
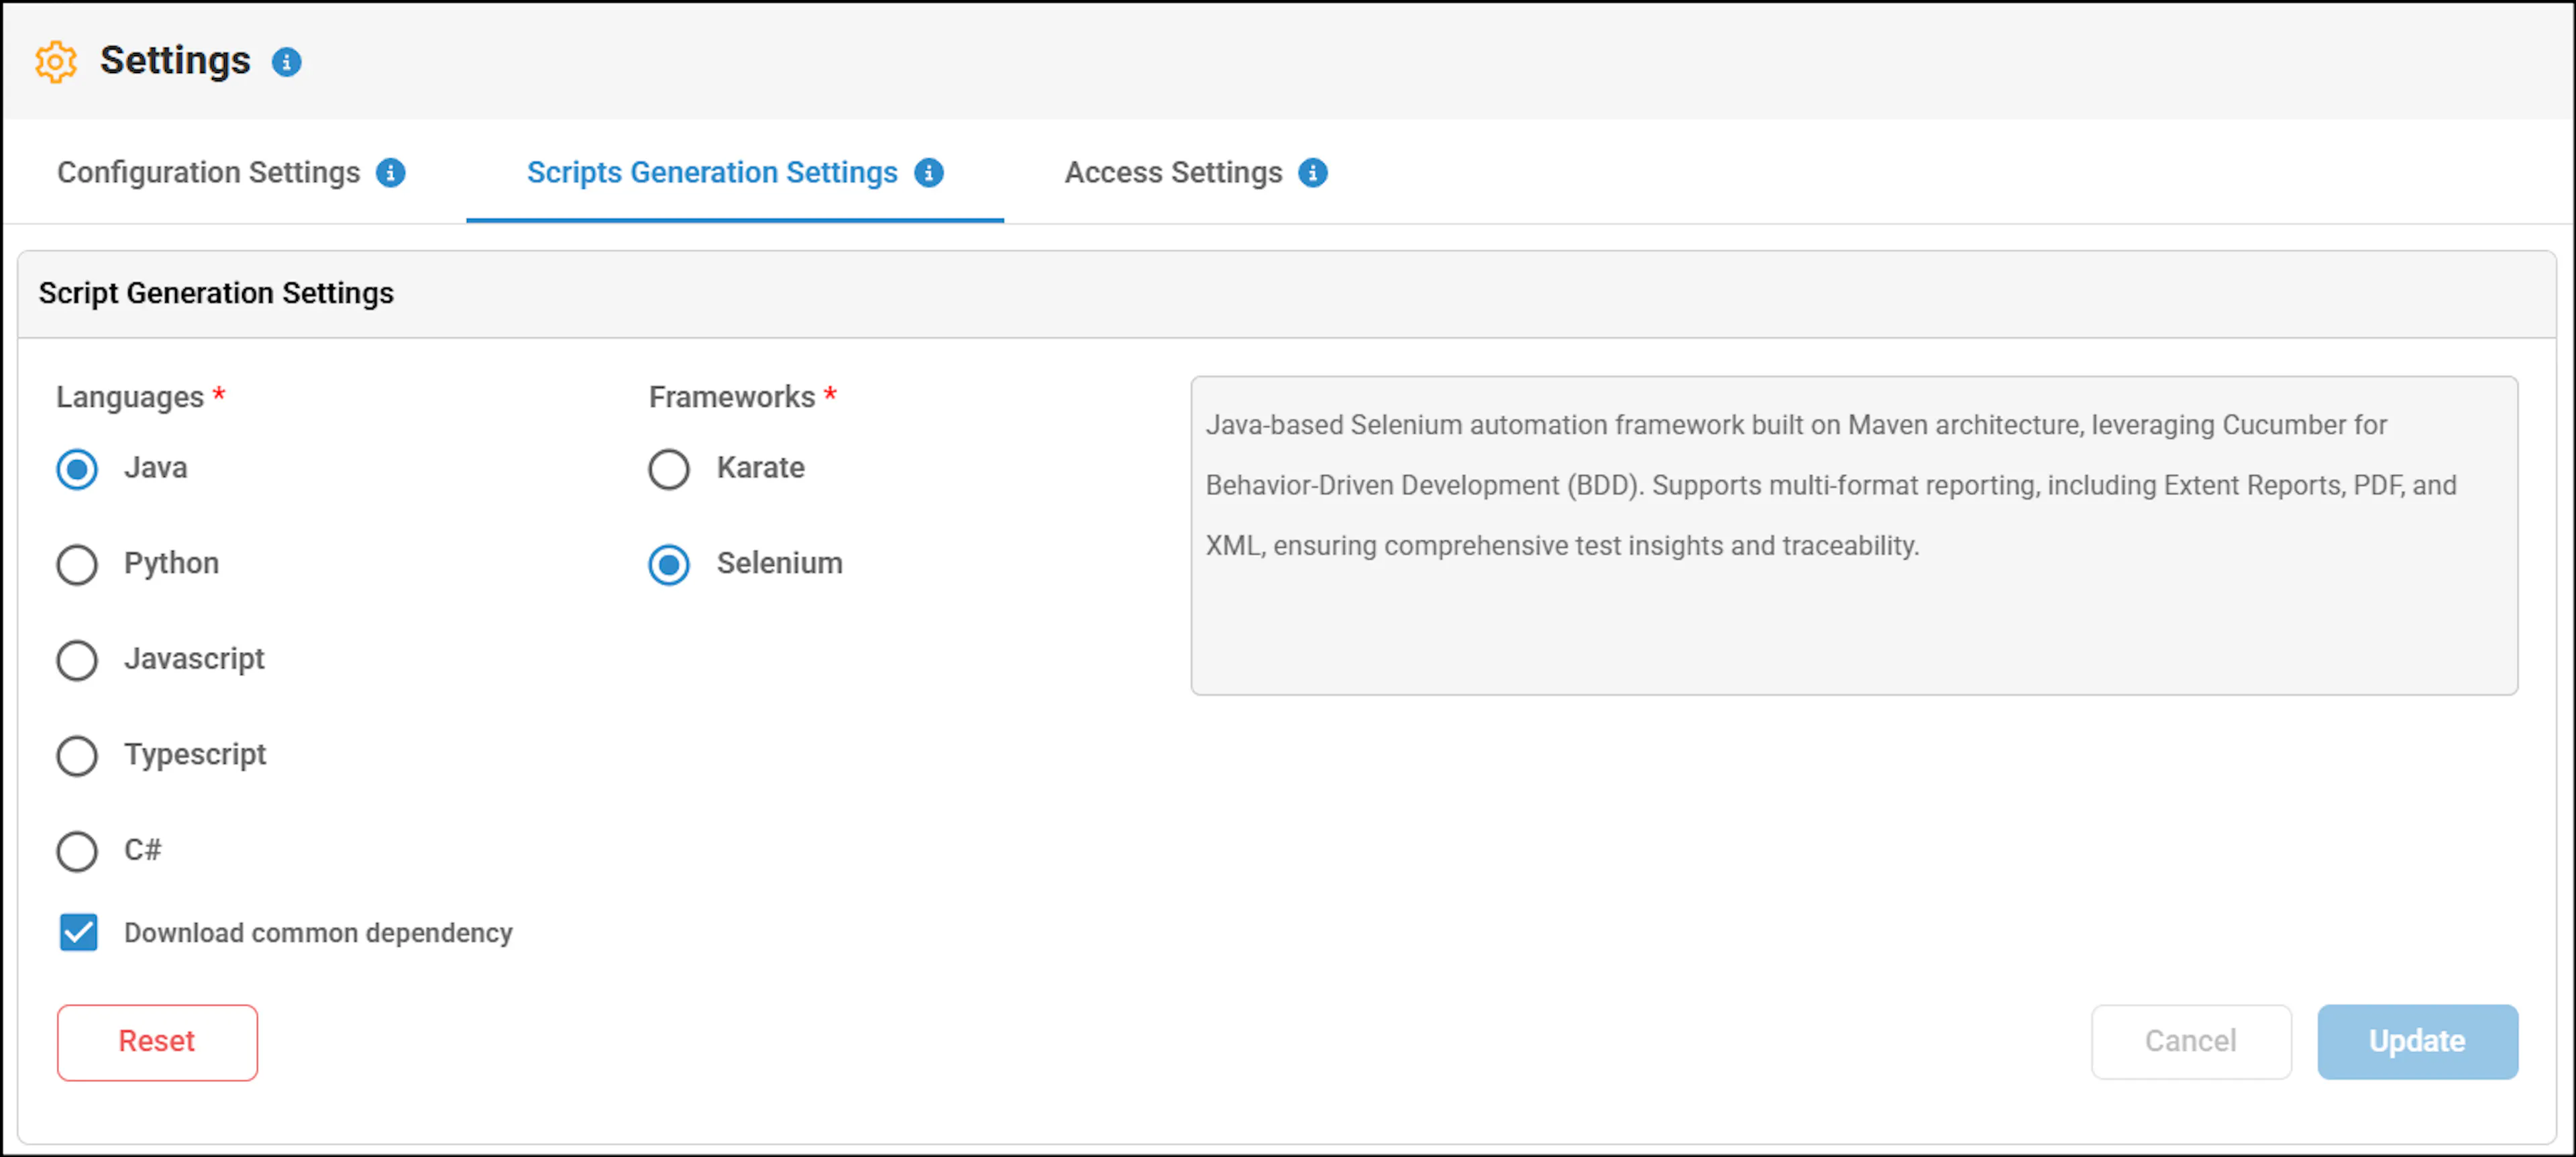
You can change the Script Generation settings by clicking the Settings > Script generation settings. You can change the language and framework for a particular automation type.
Perform the following:
Navigate to the Settings.
Click the Script Generation Settings.
In the Script Generation screen, you can update the language and frameworks of a specific automation type.
You can choose whether to include common dependencies when generating the script.
Before generating the script, go to Script Generation Settings and select the Download Common Dependency checkbox to include them, or clear the checkbox if they are not required.
Click the Update button.
If you choose to revert to the original changes, then click the Reset button if you have already updated and click Cancel if not updated.
Refer to the table below to know the frameworks for which Common Dependency Download support is available.
| Automation Type | Framework | Support Available | Checkbox Required |
|---|---|---|---|
| Web Automation | Java Selenium | Yes | Yes |
| Web Automation | Java Karate | Yes | Yes |
| Web Automation | Python Selenium | Yes | Yes |
| Web Automation | JavaScript Selenium | Yes | Yes |
| Web Automation | JavaScript Cypress | No | No |
| Web Automation | JavaScript WebdriverIO | Yes | Yes |
| Web Automation | TypeScript Playwright | Yes | Yes |
| Web Automation | C# Selenium | Yes | Yes |
| Mobile Automation | Java Appium | Yes | Yes |
| Mobile Automation | Python Appium | Yes | Yes |
| Mobile Automation | Playwright TypeScript | No | No |
| Hybrid Automation | Python Selenium Appium | Yes | Yes |
| Hybrid Automation | Java Selenium Appium | Yes | Yes |
| Hybrid Automation | Java Selenium WinAppDriver | No | No |
| Desktop Automation | All Frameworks | No | No |
| API Automation | All Frameworks | No | No |
Summary Description of Access Settings Page
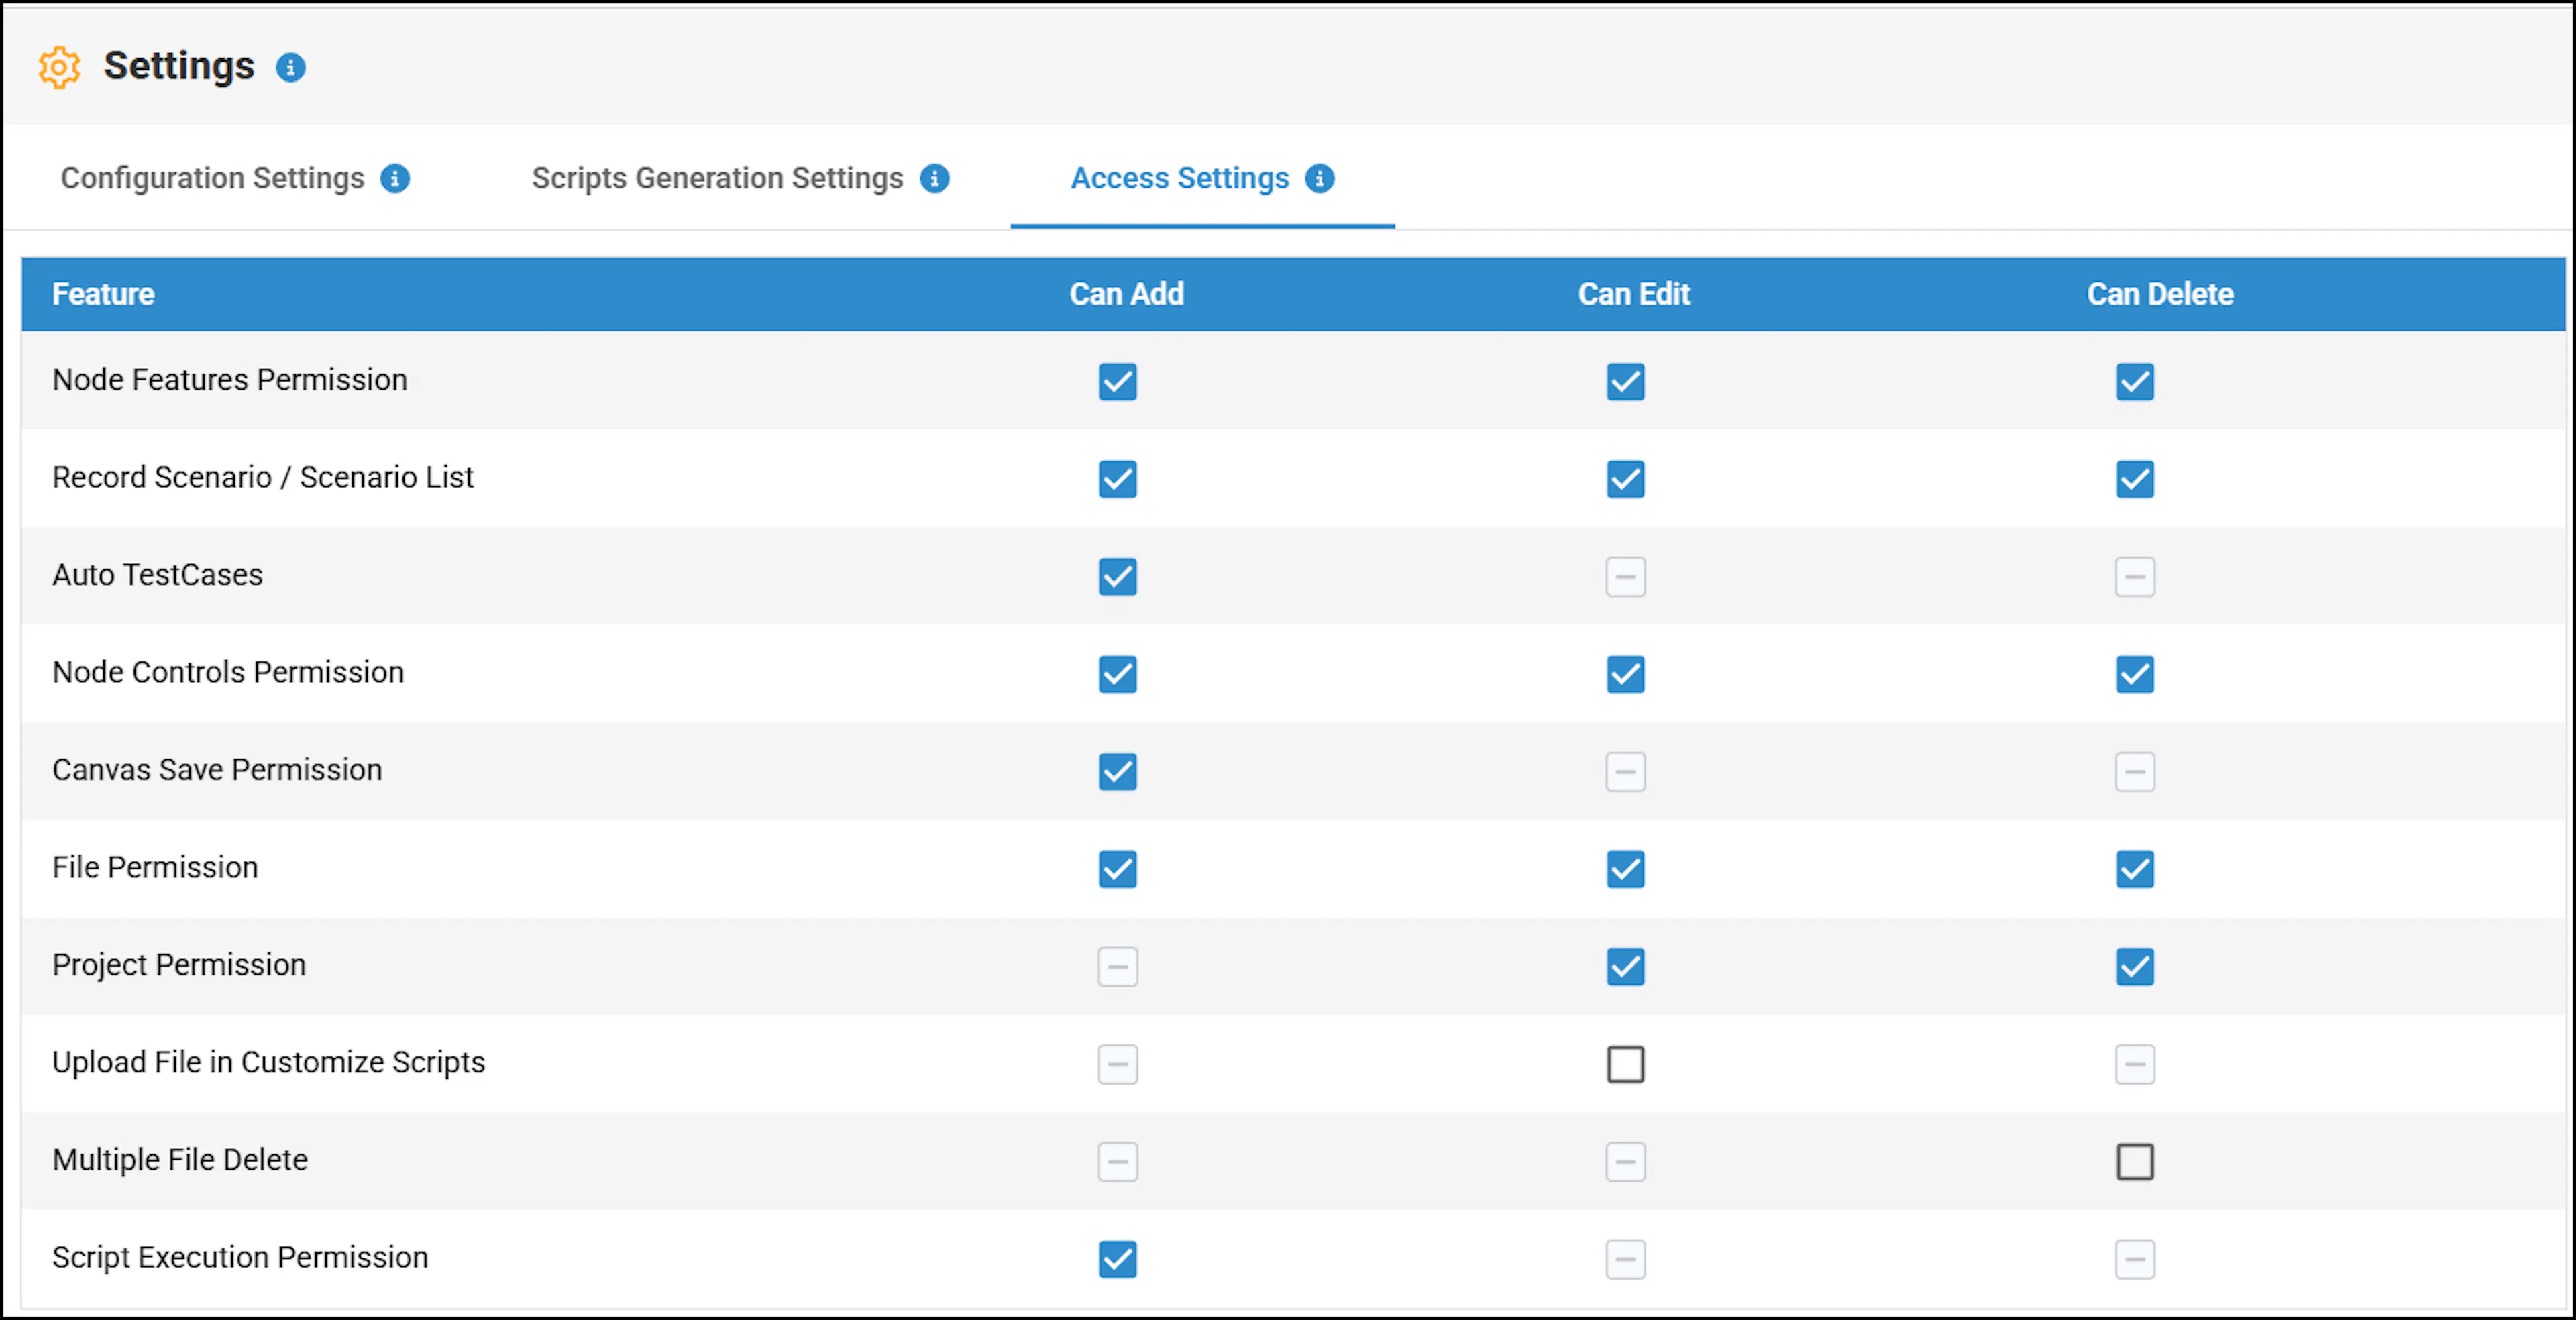
In Access Settings, as an admin, you can assign permissions to users to perform the tasks.
Perform the following:
Select a project created by you and navigate to the settings.
Select the Access Settings.
In this Access Settings page, you can assign permissions to add, edit and delete the capabilities by selecting the relevant checkbox.
For example, as an admin, if you uncheck the permissions for generating Auto Generate Test Cases, then the team member will not have access to use Auto Generate Test Cases feature.
The following table provides the available access settings options that an administrator can assign to a user.
This applies to web and mobile automation:
| Access Settings option | Description |
|---|---|
| Node Feature Permission | As an admin, you can assign access to the user to add, edit, and delete a feature associated with a node. As a user, when the admin removes access to add a node, the Add Features button will be disabled, preventing you from adding new features. However, you will still be able to modify existing features. Similarly, when access to edit or delete is removed, you will be restricted from performing those actions. |
| Record Scenario/Scenario List | As an admin, you can assign access to the user to record a scenario by selecting or unselecting the 'Can add' checkbox. By doing this, Record Scenario button is enabled or disabled in the Main Canvas. Additionally, you can provide access to the user to add, edit and delete a test case in the Edit Scenario window. |
| Auto Test Cases | As an admin, you can assign or unassign access to the user to use Auto Generate Test cases feature by enabling and disabling this feature. |
| Node Controls Permission | As an admin, you can assign access to a user to add, edit and delete a UI element (control) associated to a feature. |
| Canvas Save Permission | As an admin, you can assign or unassign access to a user to save the modifications made in Canvas. |
| File Permission | As an admin, you can remove access to a user to upload or create any file. Upload file or create file option will be disabled for a particular project. As a user, you will be still be able to edit and delete an uploaded or created file. Additionally, as an admin, you can also restrict the access to edit and delete a file by removing access to edit and delete options. |
| Project Permission | As an admin, you can remove access to a user to delete a created project. Delete button will be disabled when you access as a user. Also as an admin, you can remove access to a user to edit a project. Update button of project settings will be disabled when you access as a user. |
| Upload File in Customize Script | As an admin, you can grant a user access to edit the generated scripts for a specific project. |
| Multiple Files Delete Permission | As an admin, you can assign access to a user to delete multiple files from the project folder. By default, Delete all option will be disabled to prevent any unintended file deletion from a user. |
| Script Execution Permission | As an admin, you can grant a user access to Execute the generated scripts for a specific project. |