Test Authoring Agent
Use the Test Authoring Agent to run end-to-end web tests on a live application from a single natural-language prompt, the same way you would prompt a tool like ChatGPT or Claude. Describe the scenario you want test (including the target URL), and the agent explores the application, plans the steps, performs the actions itself in a real browser, and verifies the outcome — all without any pre-existing script. Currently supports web automation only.
What It Can Do
- Accepts a single natural-language prompt describing one or more test scenarios (e.g., "Log in using this username and password, add an item to the cart, and verify the cart").
- Automatically splits a prompt into separate scenarios and runs them one after another.
- Can generate its own scenarios for a URL it hasn't seen before — for example, if asked to "generate 5 scenarios," it will crawl the site, gather the available information, and form scenarios based on what it finds.
- Performs all actions itself in a real browser (clicking, typing, navigating) — no manual actions or pre-written scripts are involved.
- Automatically verifies logical steps even if verification isn't explicitly requested — for example, it will confirm it has correctly landed on the main page after logging in.
- Captures a screenshot after each logical step as visual proof that the test was performed.
- Records every action it performs (via the algoScraper running in the background) and lets you download the resulting scenario as a JSON file or a BDD feature file.
- Supports login flows in two ways:
- Automatic login — provide the username and password in the prompt, and the agent logs in by itself.
- Manual login — if you have security concerns about sharing credentials, ask the agent to pause and you can log in manually; it will resume automatically afterward.
- Works entirely within your own infrastructure or environment — the underlying LLM does not send data outside your environment.
Limitations
- Works only for web automation — a valid URL is mandatory in the prompt for any scenario.
- Cannot process vague or incomplete instructions. If the input isn't structured as a clear test scenario, the agent will not proceed and will instead ask you to rephrase it.
- Does not require a rigid prompt format — plain natural language is fine, but the instructions must be clear and understandable, not ambiguous.
- Works best with precise instructions (e.g., specific button or field names). If instructions are imprecise, the agent will still attempt the task and find a way through, but results are more reliable with clear, specific steps (similar to Given-When-Then style instructions).
How It Works
The agent uses a multi-agent framework (built on LLMs and a graph-based agentic architecture) made up of the following internal agents:
- Recon Agent — does an initial, high-level pass over the live application or URL to understand it.
- Scout Agent — goes deeper into the URL, retrieving the DOM and the accessibility tree to understand what actions are possible on the page.
- Planner Agent — takes the information gathered by the Recon and Scout agents (plus screenshots of the page, for visual context) and converts your prompt into a structured, step-by-step test plan
Once the plan is generated, the agent performs the actions using browser automation tools (via a Playwright-based MCP integration), including navigation, clicking, typing, taking screenshots, handling tabs, and more. A snapshot tool plays a key role here — it captures the semantic structure of the page (not just the raw DOM) so the underlying model can reliably understand each element and interact with it correctly. - Executor Agent — carries out the test against the live application, performing and verifying each step, and is built to handle real-world behaviour like shifting elements, overlays, and file uploads.
Around these, the run manages its own session end to end. It launches and prepares the browser, pauses for your approval of the plan and for a manual sign-in when you have asked for one, keeps a single continuous recording across every scenario in a request, and produces the final report at the end.
During execution the agent interacts with the application the way a tester would, handling navigation, clicking, typing, scrolling, file uploads, and new tabs. It reads the page as a structured interface rather than as raw markup, which is what allows it to work on modern web applications without hand-written selectors, including many custom components that selector-based tools struggle with.
Throughout the run, the algoScraper records every action the agent performs just as it would for a manual tester, so the full flow can later be exported as a test artifact..
Step-by-Step: How to Use the Test Authoring Agent
Step 1: Launch the algoQA Agents Extension
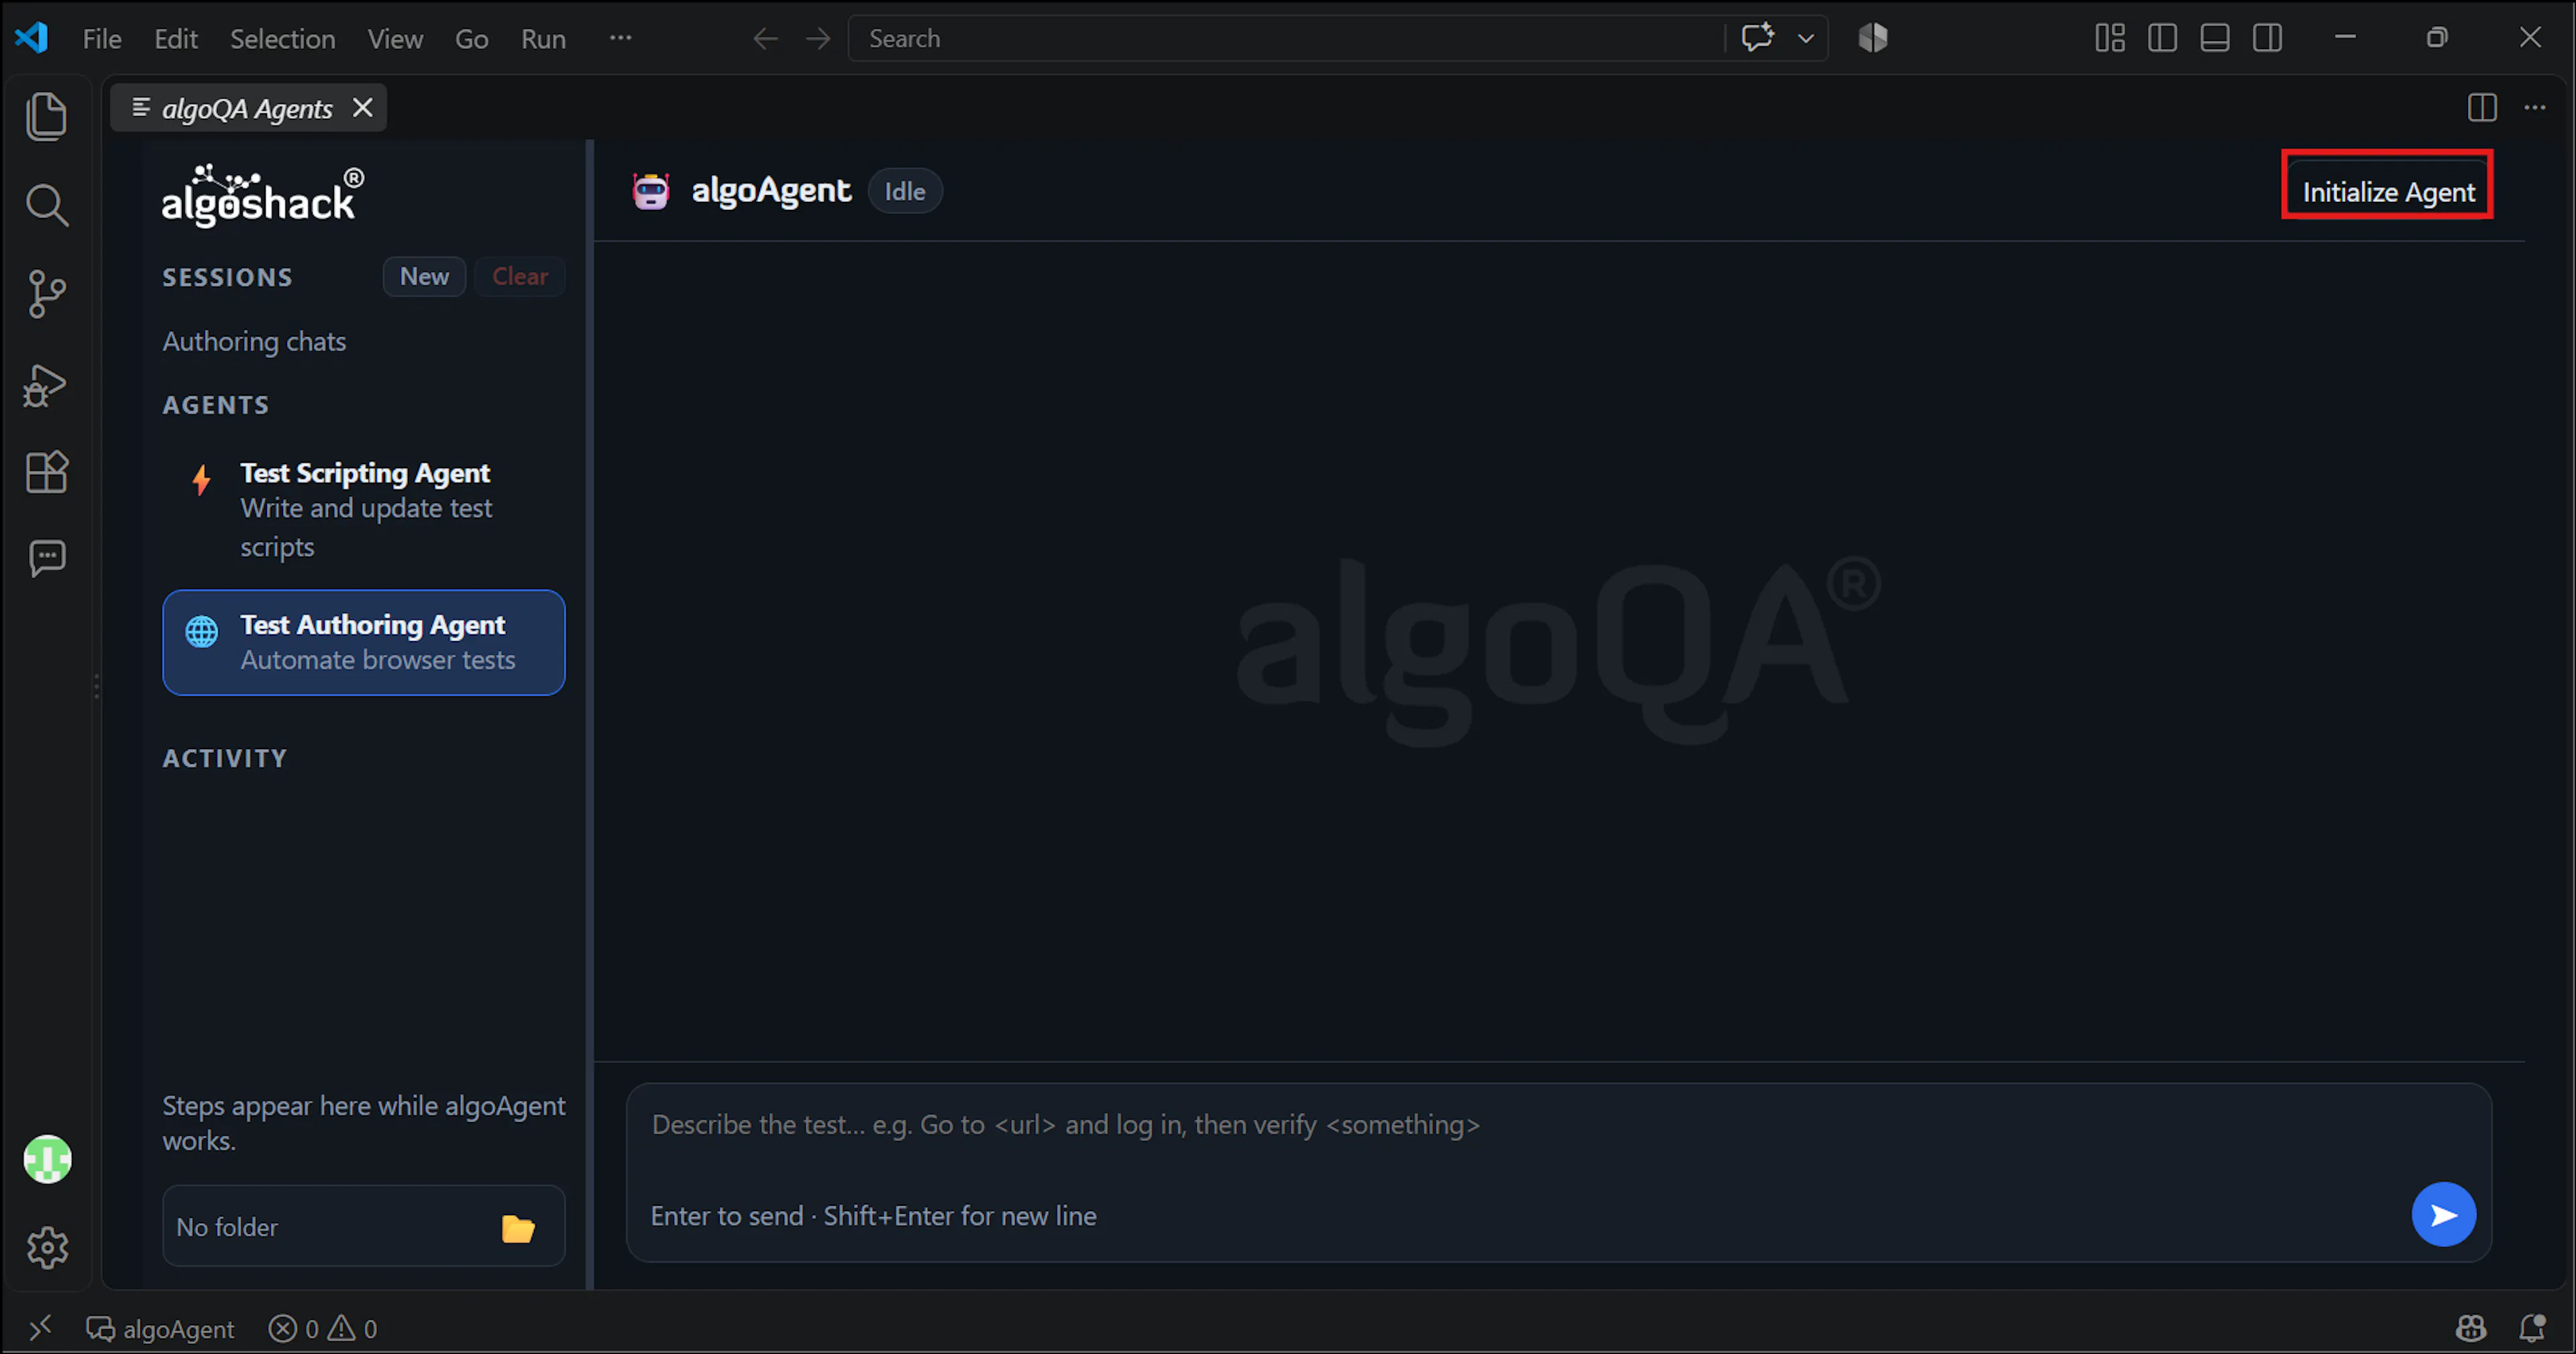
Open the algoQA Agents Extension and select Test Authoring Agent from the list of available agents. Click Initialize Agent before giving the prompt.
Step 2: Write Your Prompt
Describe your test scenario(s) in plain, natural language, including:
- The target URL (mandatory) — this can be given with or without
https://. - The actions to perform (e.g., log in, search for an item, add to cart, verify the result).
- Login credentials, if you want the agent to log in automatically — or a note that you will log in manually.
Example prompt:
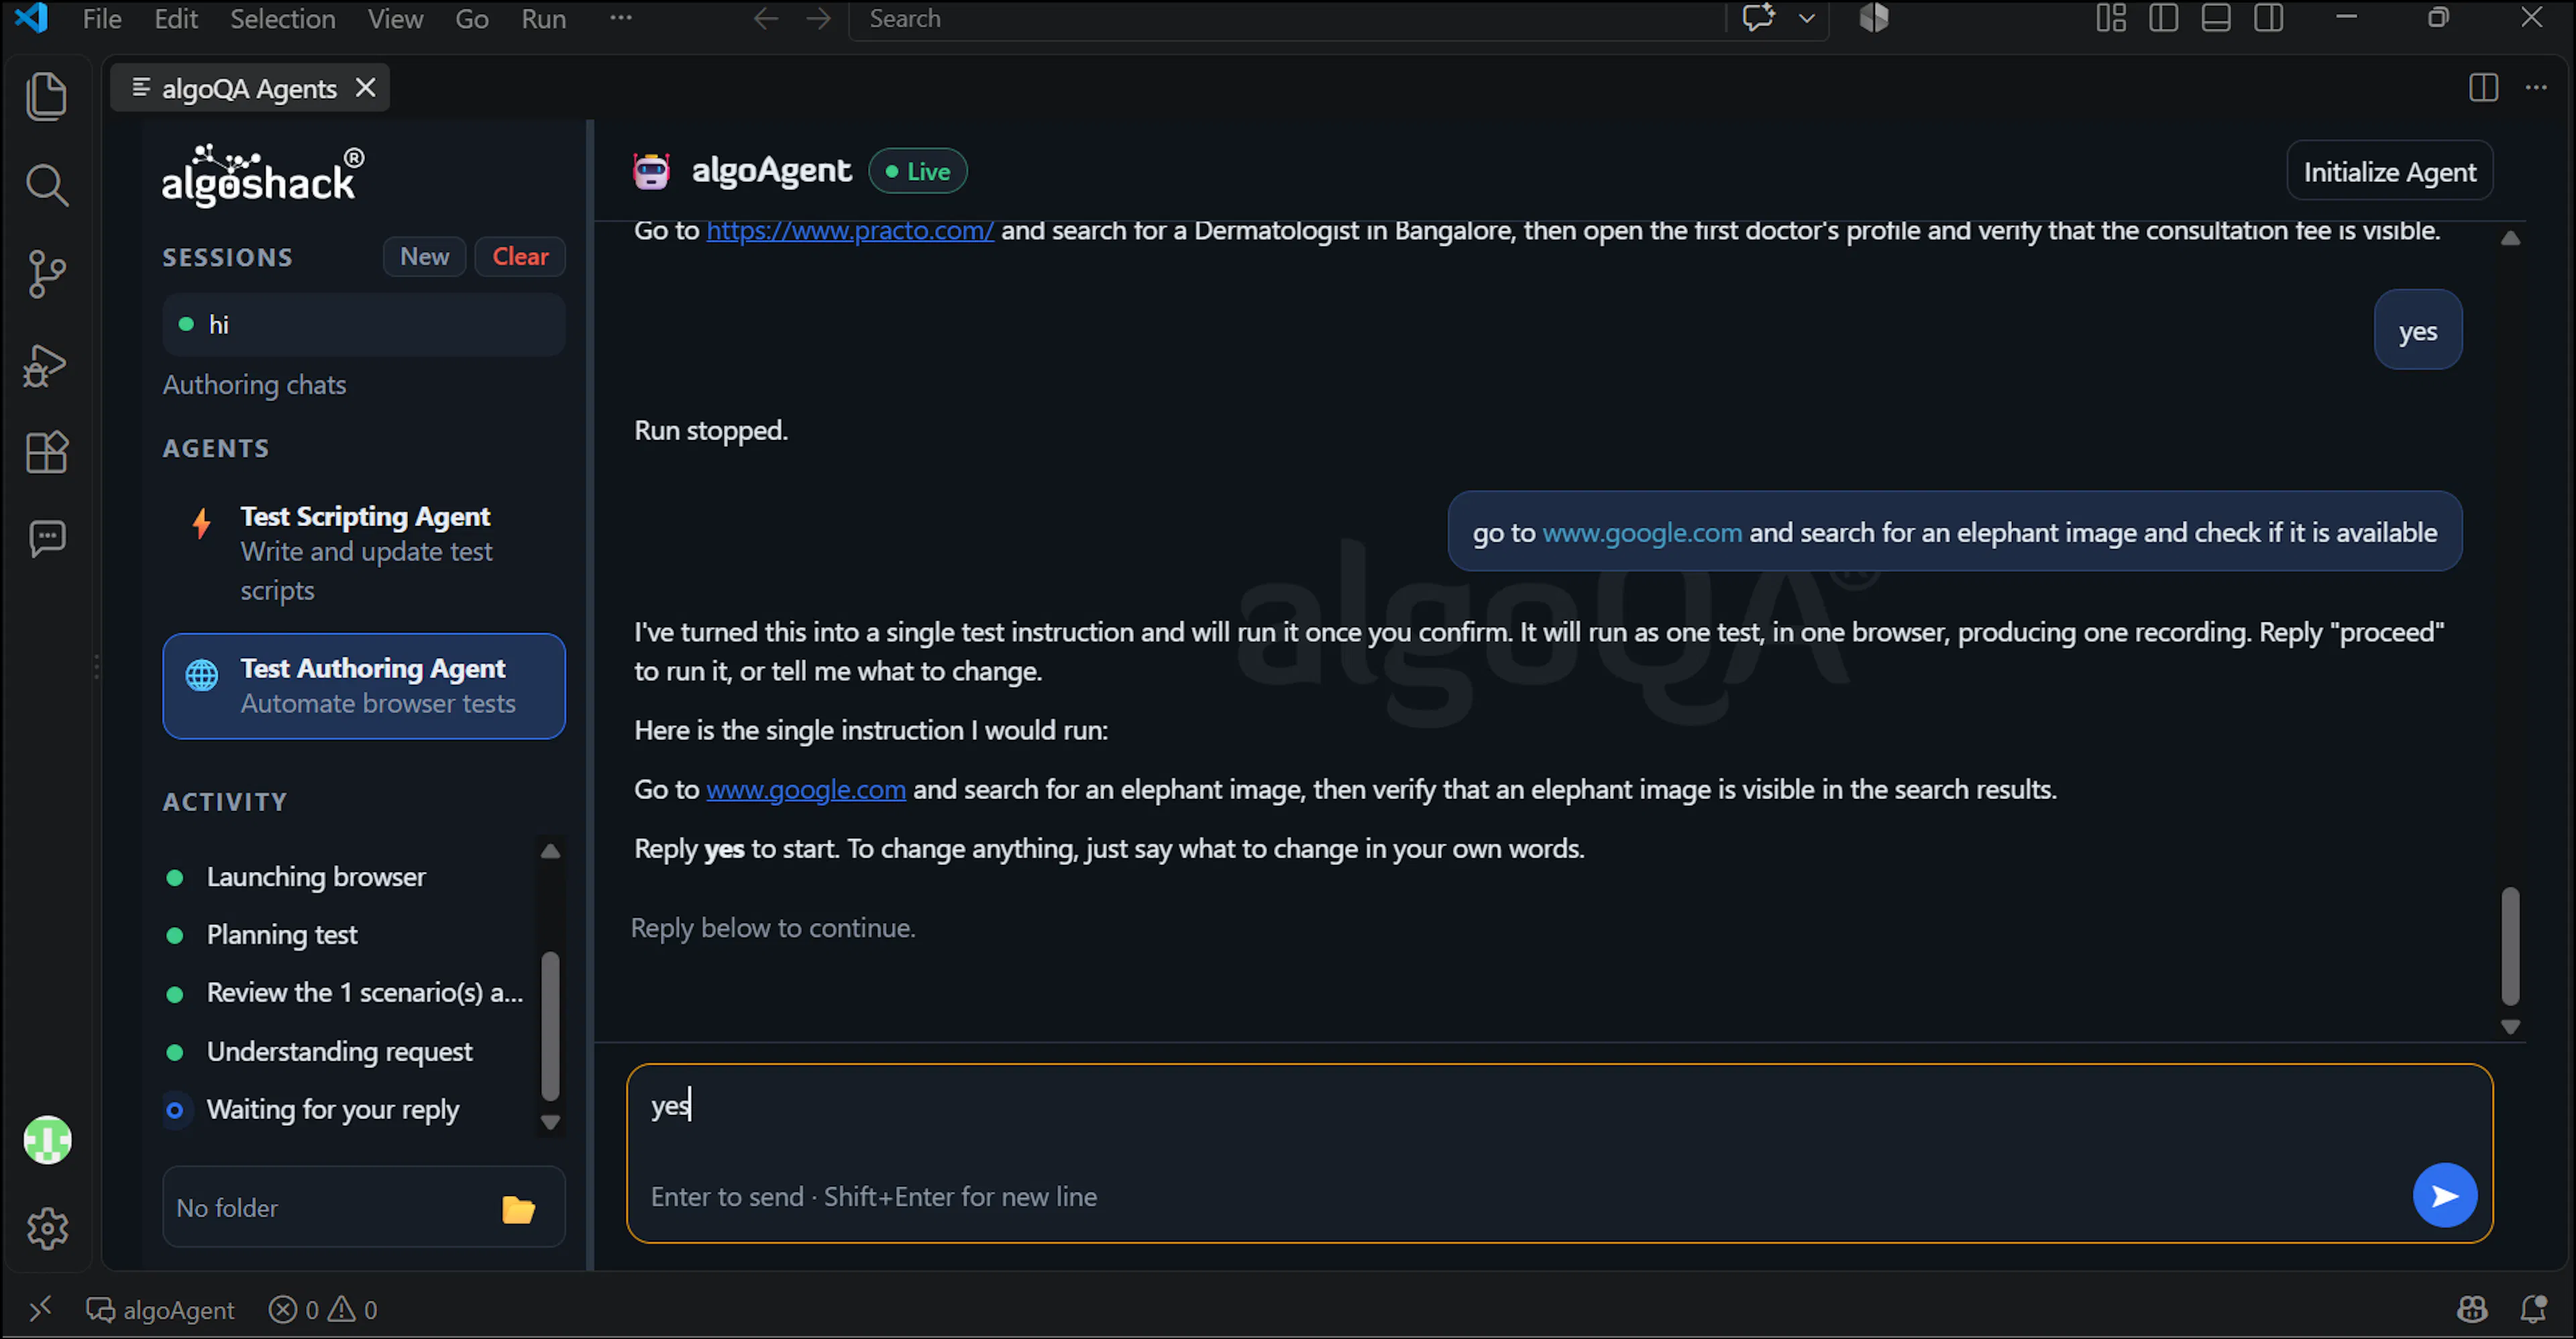
Go to www.google.com and search for an elephant image, then verify that an elephant image is visible in the search results.
You can also ask the agent to generate its own scenarios for a URL, e.g., "Generate 5 test scenarios for this URL."
Step 3: Review the Generated Instruction
A single test instruction will be generated based on your prompt. Review the instruction and enter Proceed if it is correct.
Step 4: Review and Approve the Generated Scenarios
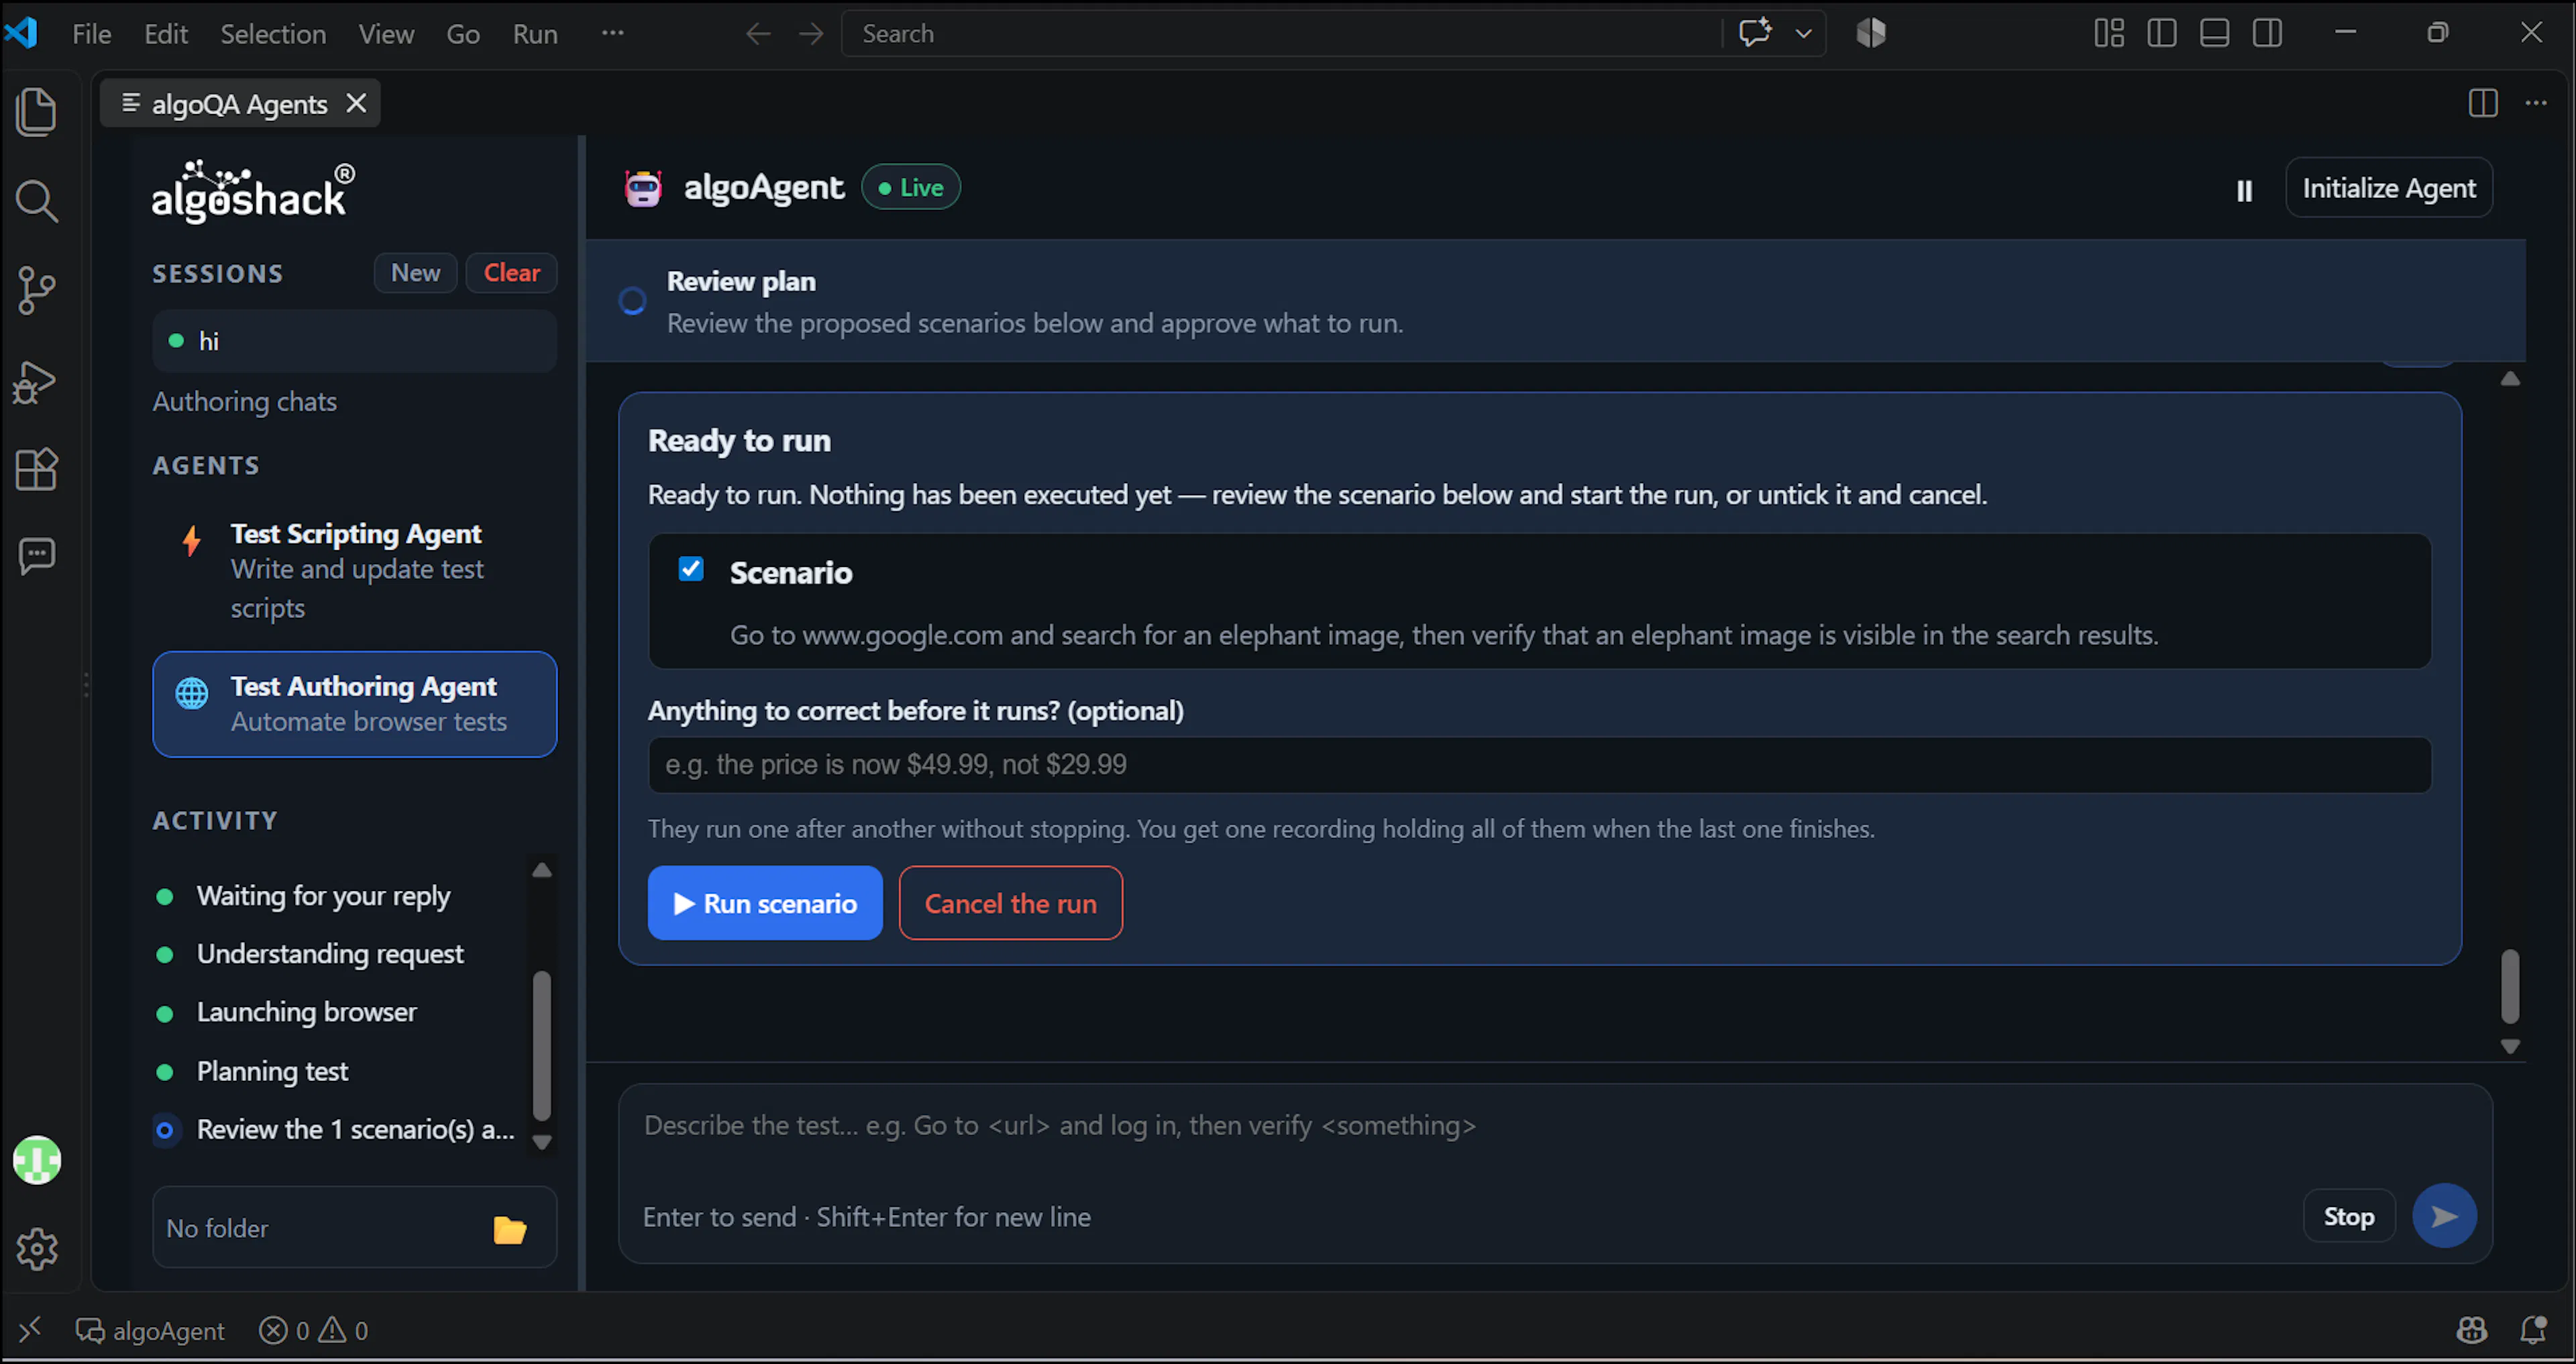
The agent will split your prompt into individual scenarios and display them for review. At this stage, you can:
- Click Run Scenario for all scenarios to proceed.
- Deselect any scenario you do not want to run (e.g., keep only the second scenario).
- Cancel the run.
- Make corrections.
Step 5: Let the Agent Execute the Scenarios
Once approved, the agent will:
- Launch a browser window (it stays closed until execution starts).
- Perform each action from the plan — typing into fields, clicking buttons, navigating pages — exactly as described in your prompt.
- Run each scenario in its own separate results box, one after another.
If you specified manual login, the agent will pause at the login step for you to log in yourself, then resume automatically.
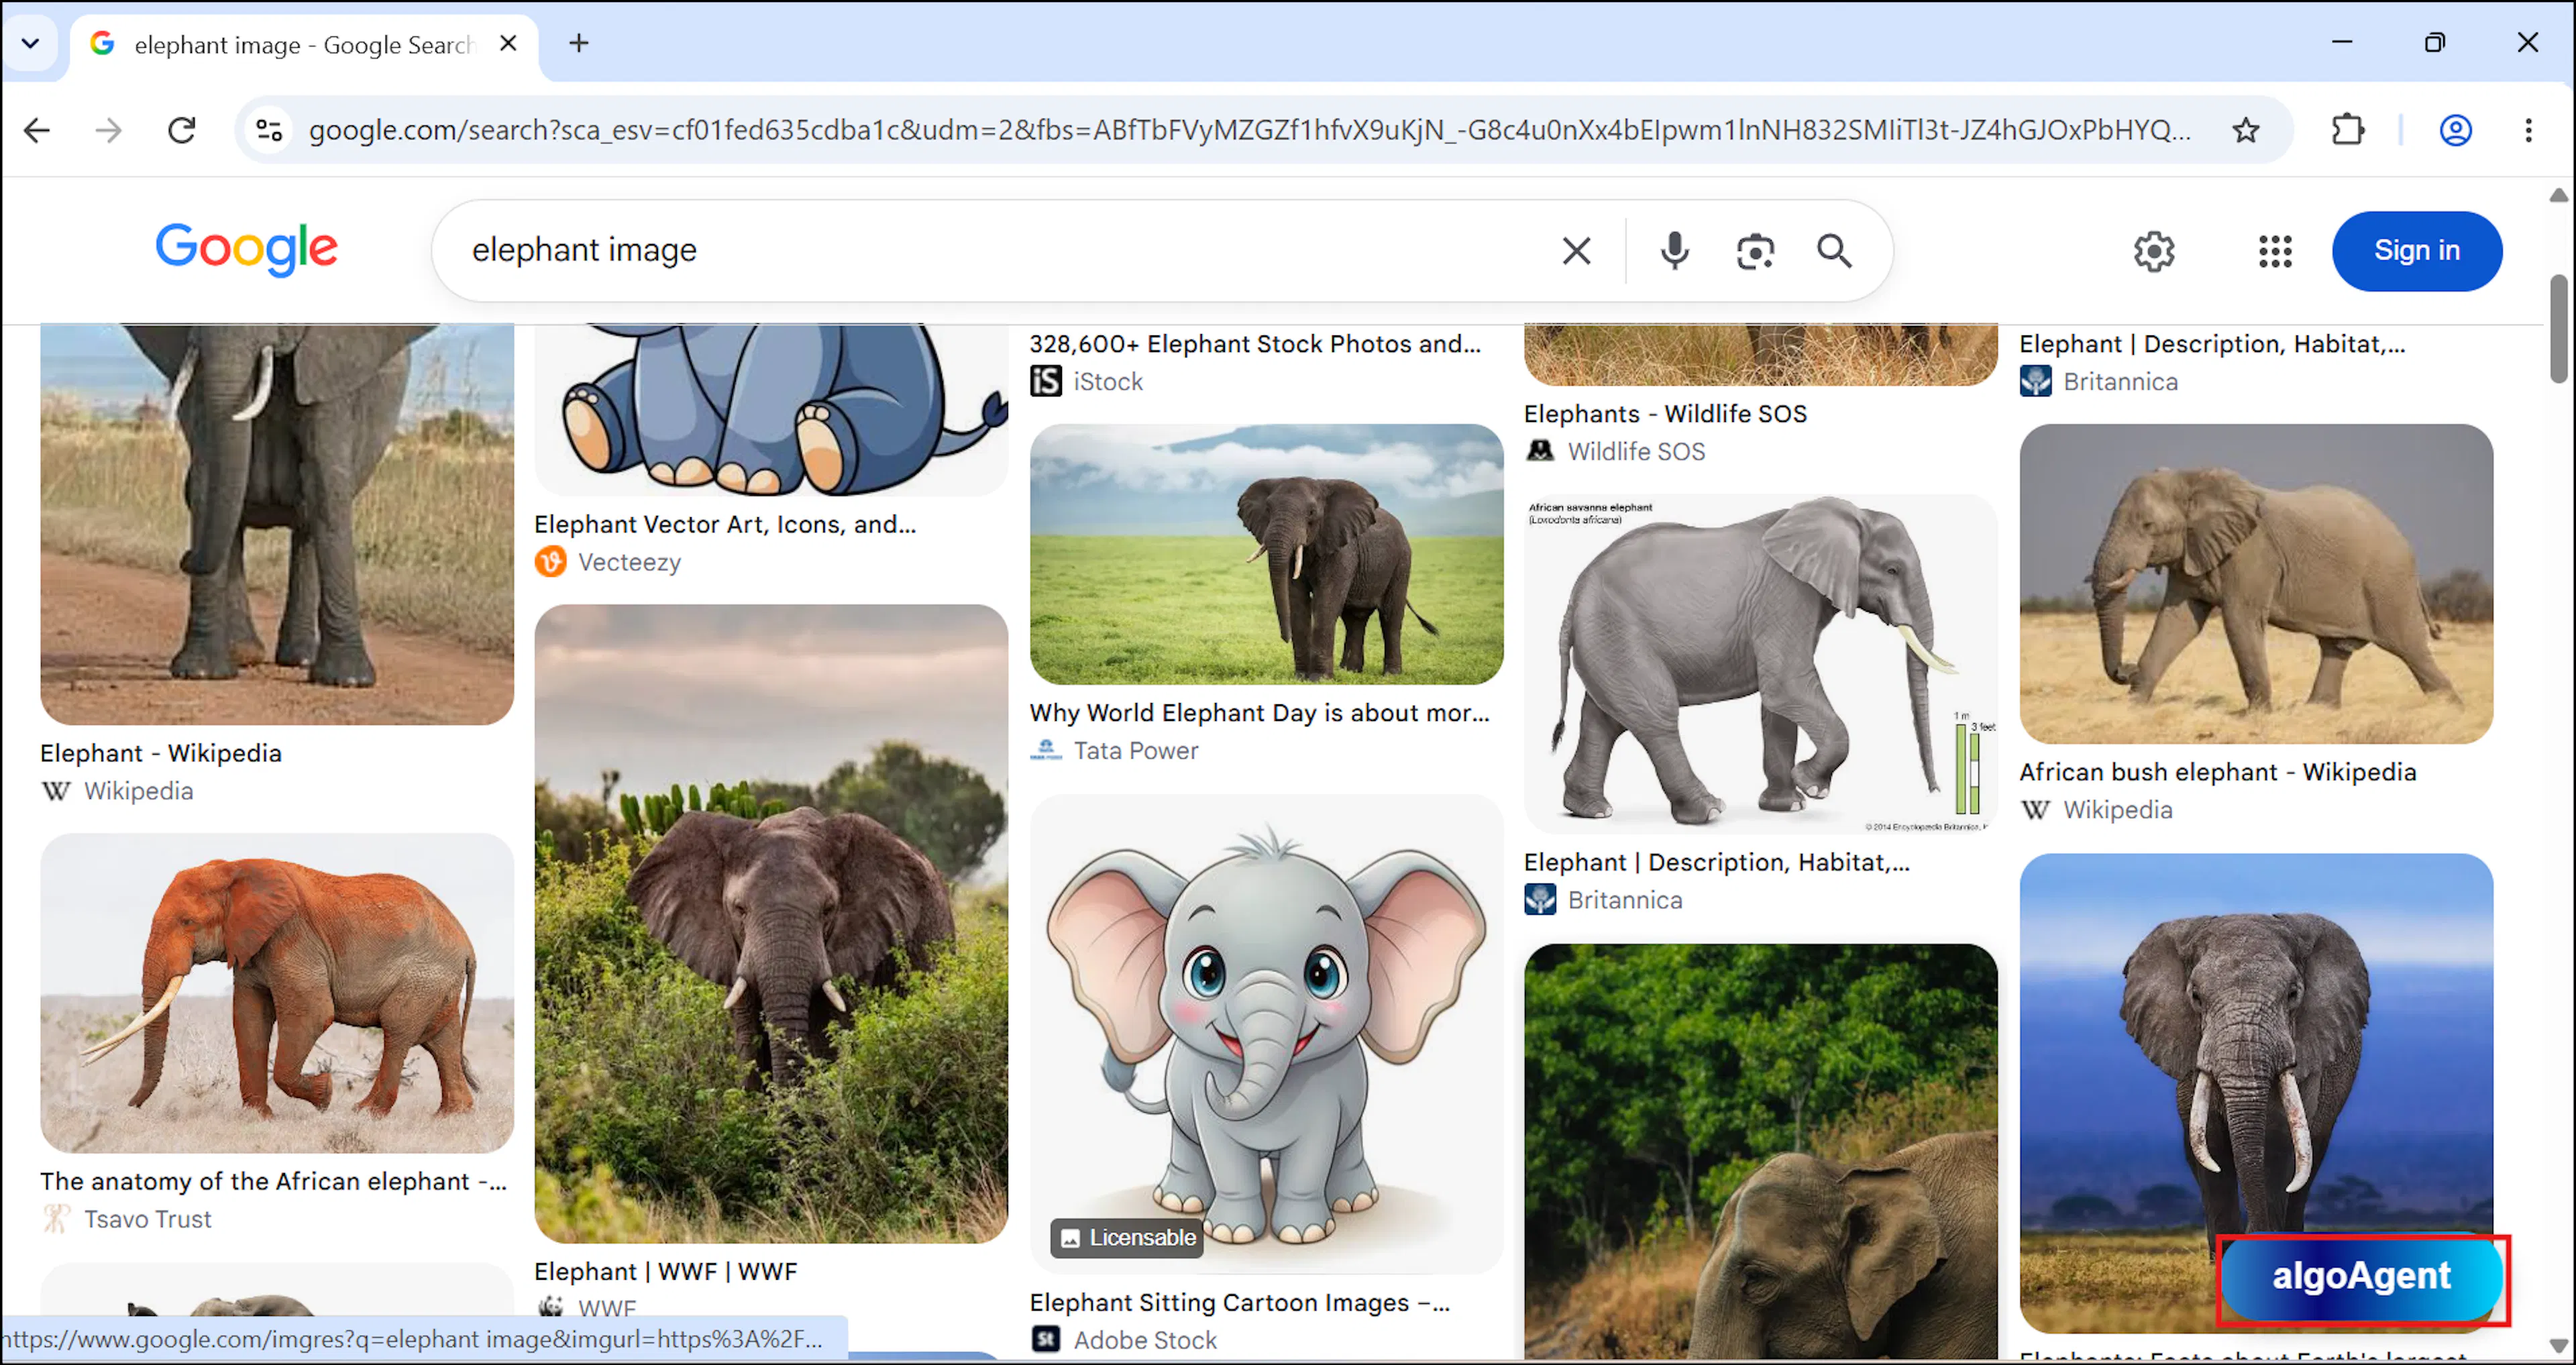
Step 6: Export the Scenario
Once execution completes, click the algoAgent button and a scraper popup will appear showing all the actions recorded during the run. From here, you can:
- Download the recording as a JSON file.
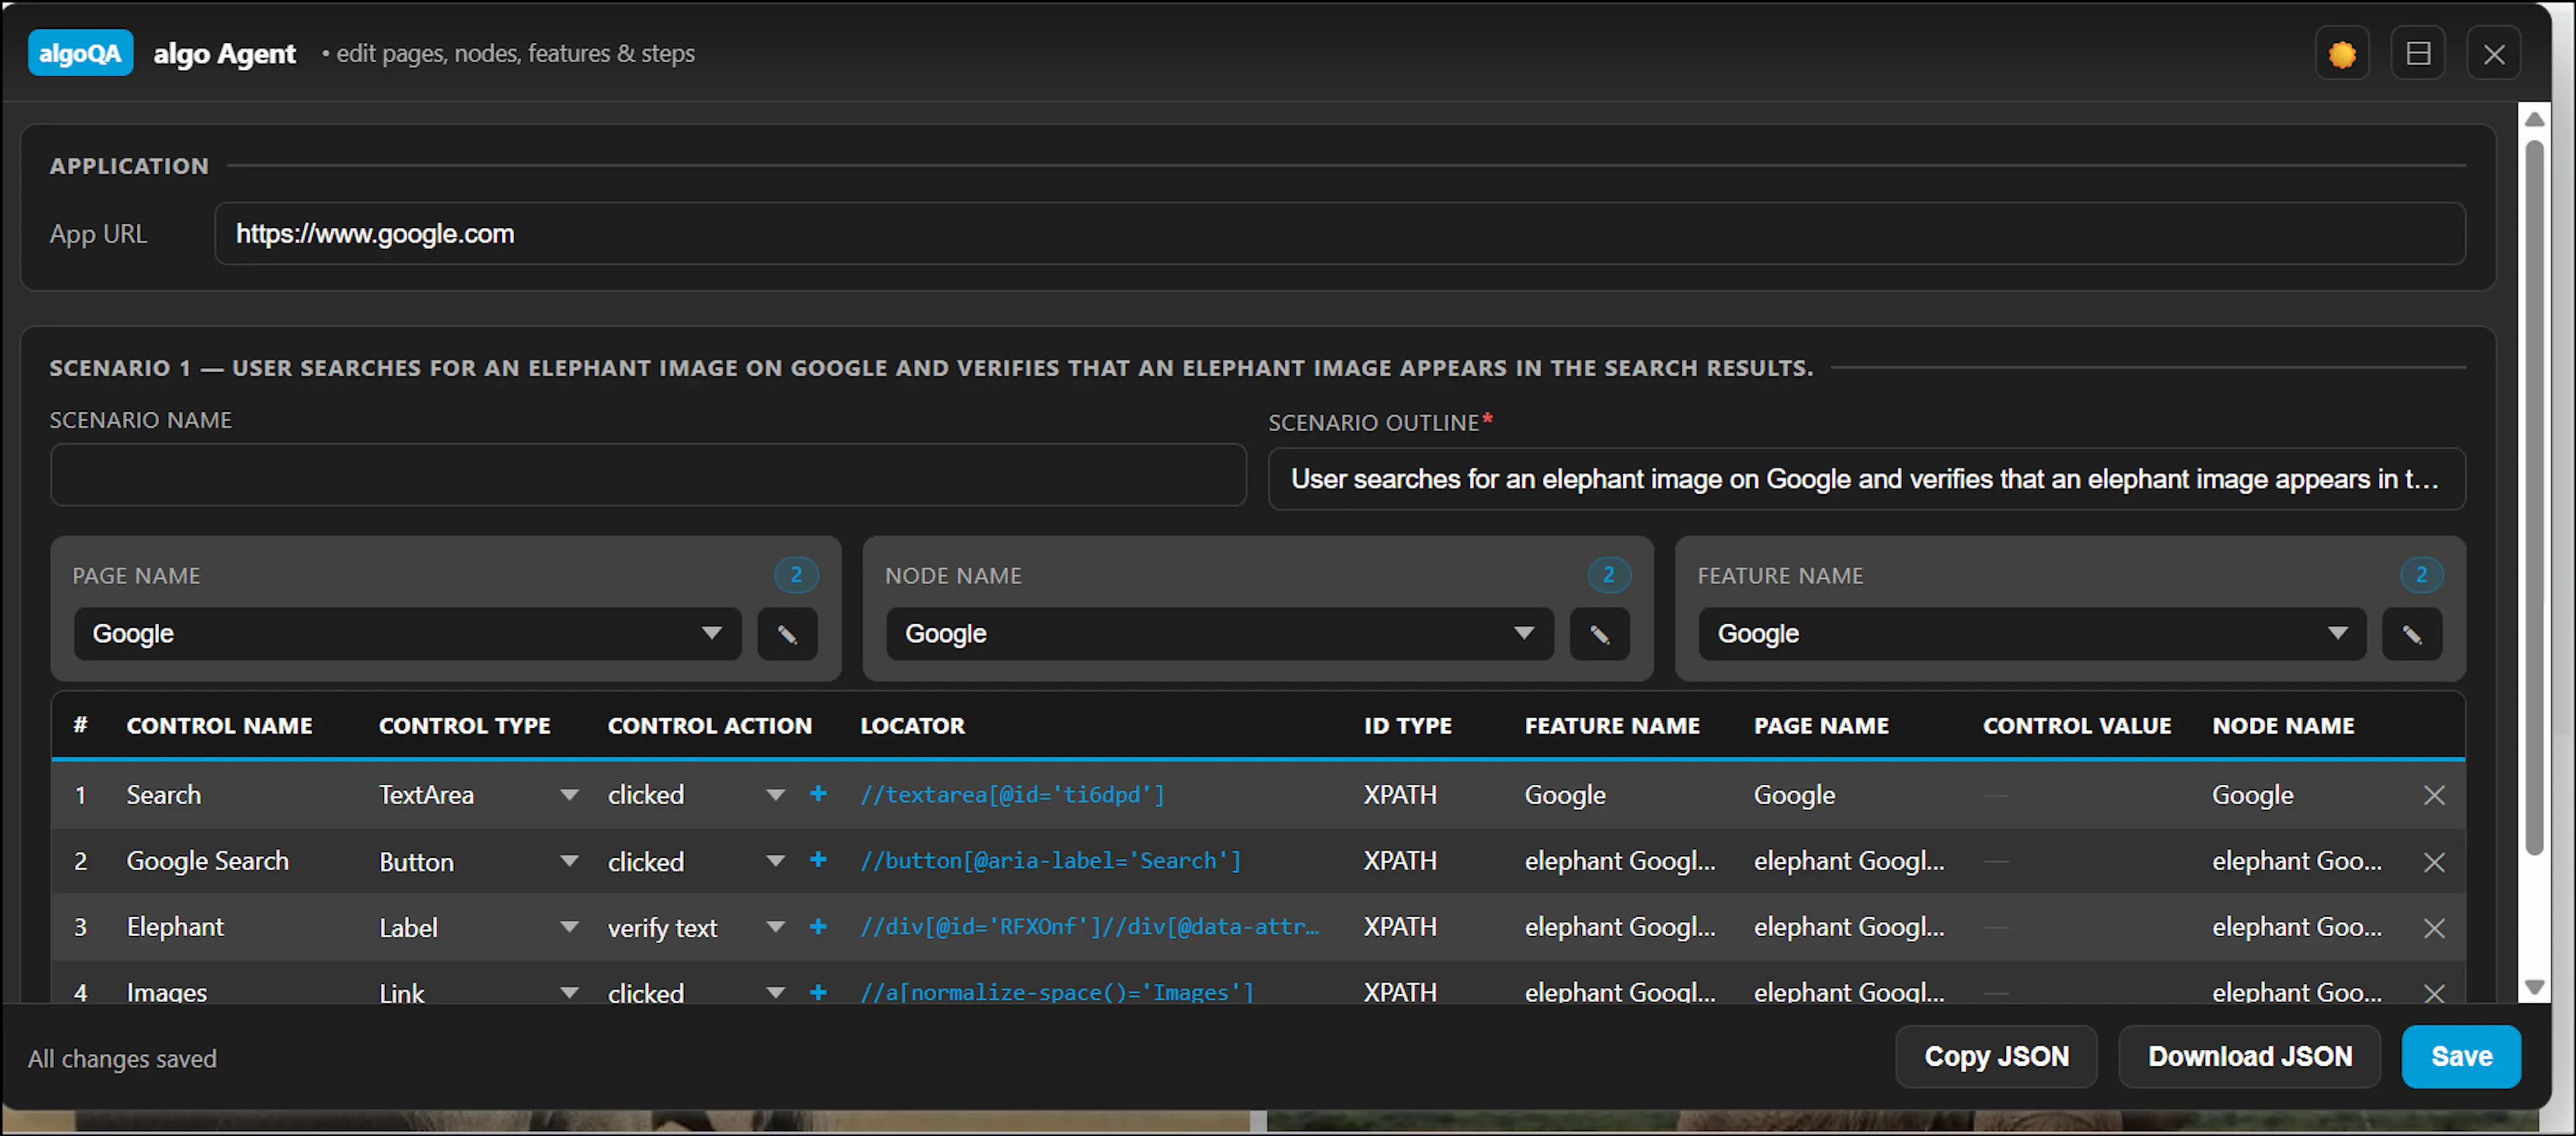
Step 7: View the Execution Report
After downloading, the execution will be completed and you can view the report.
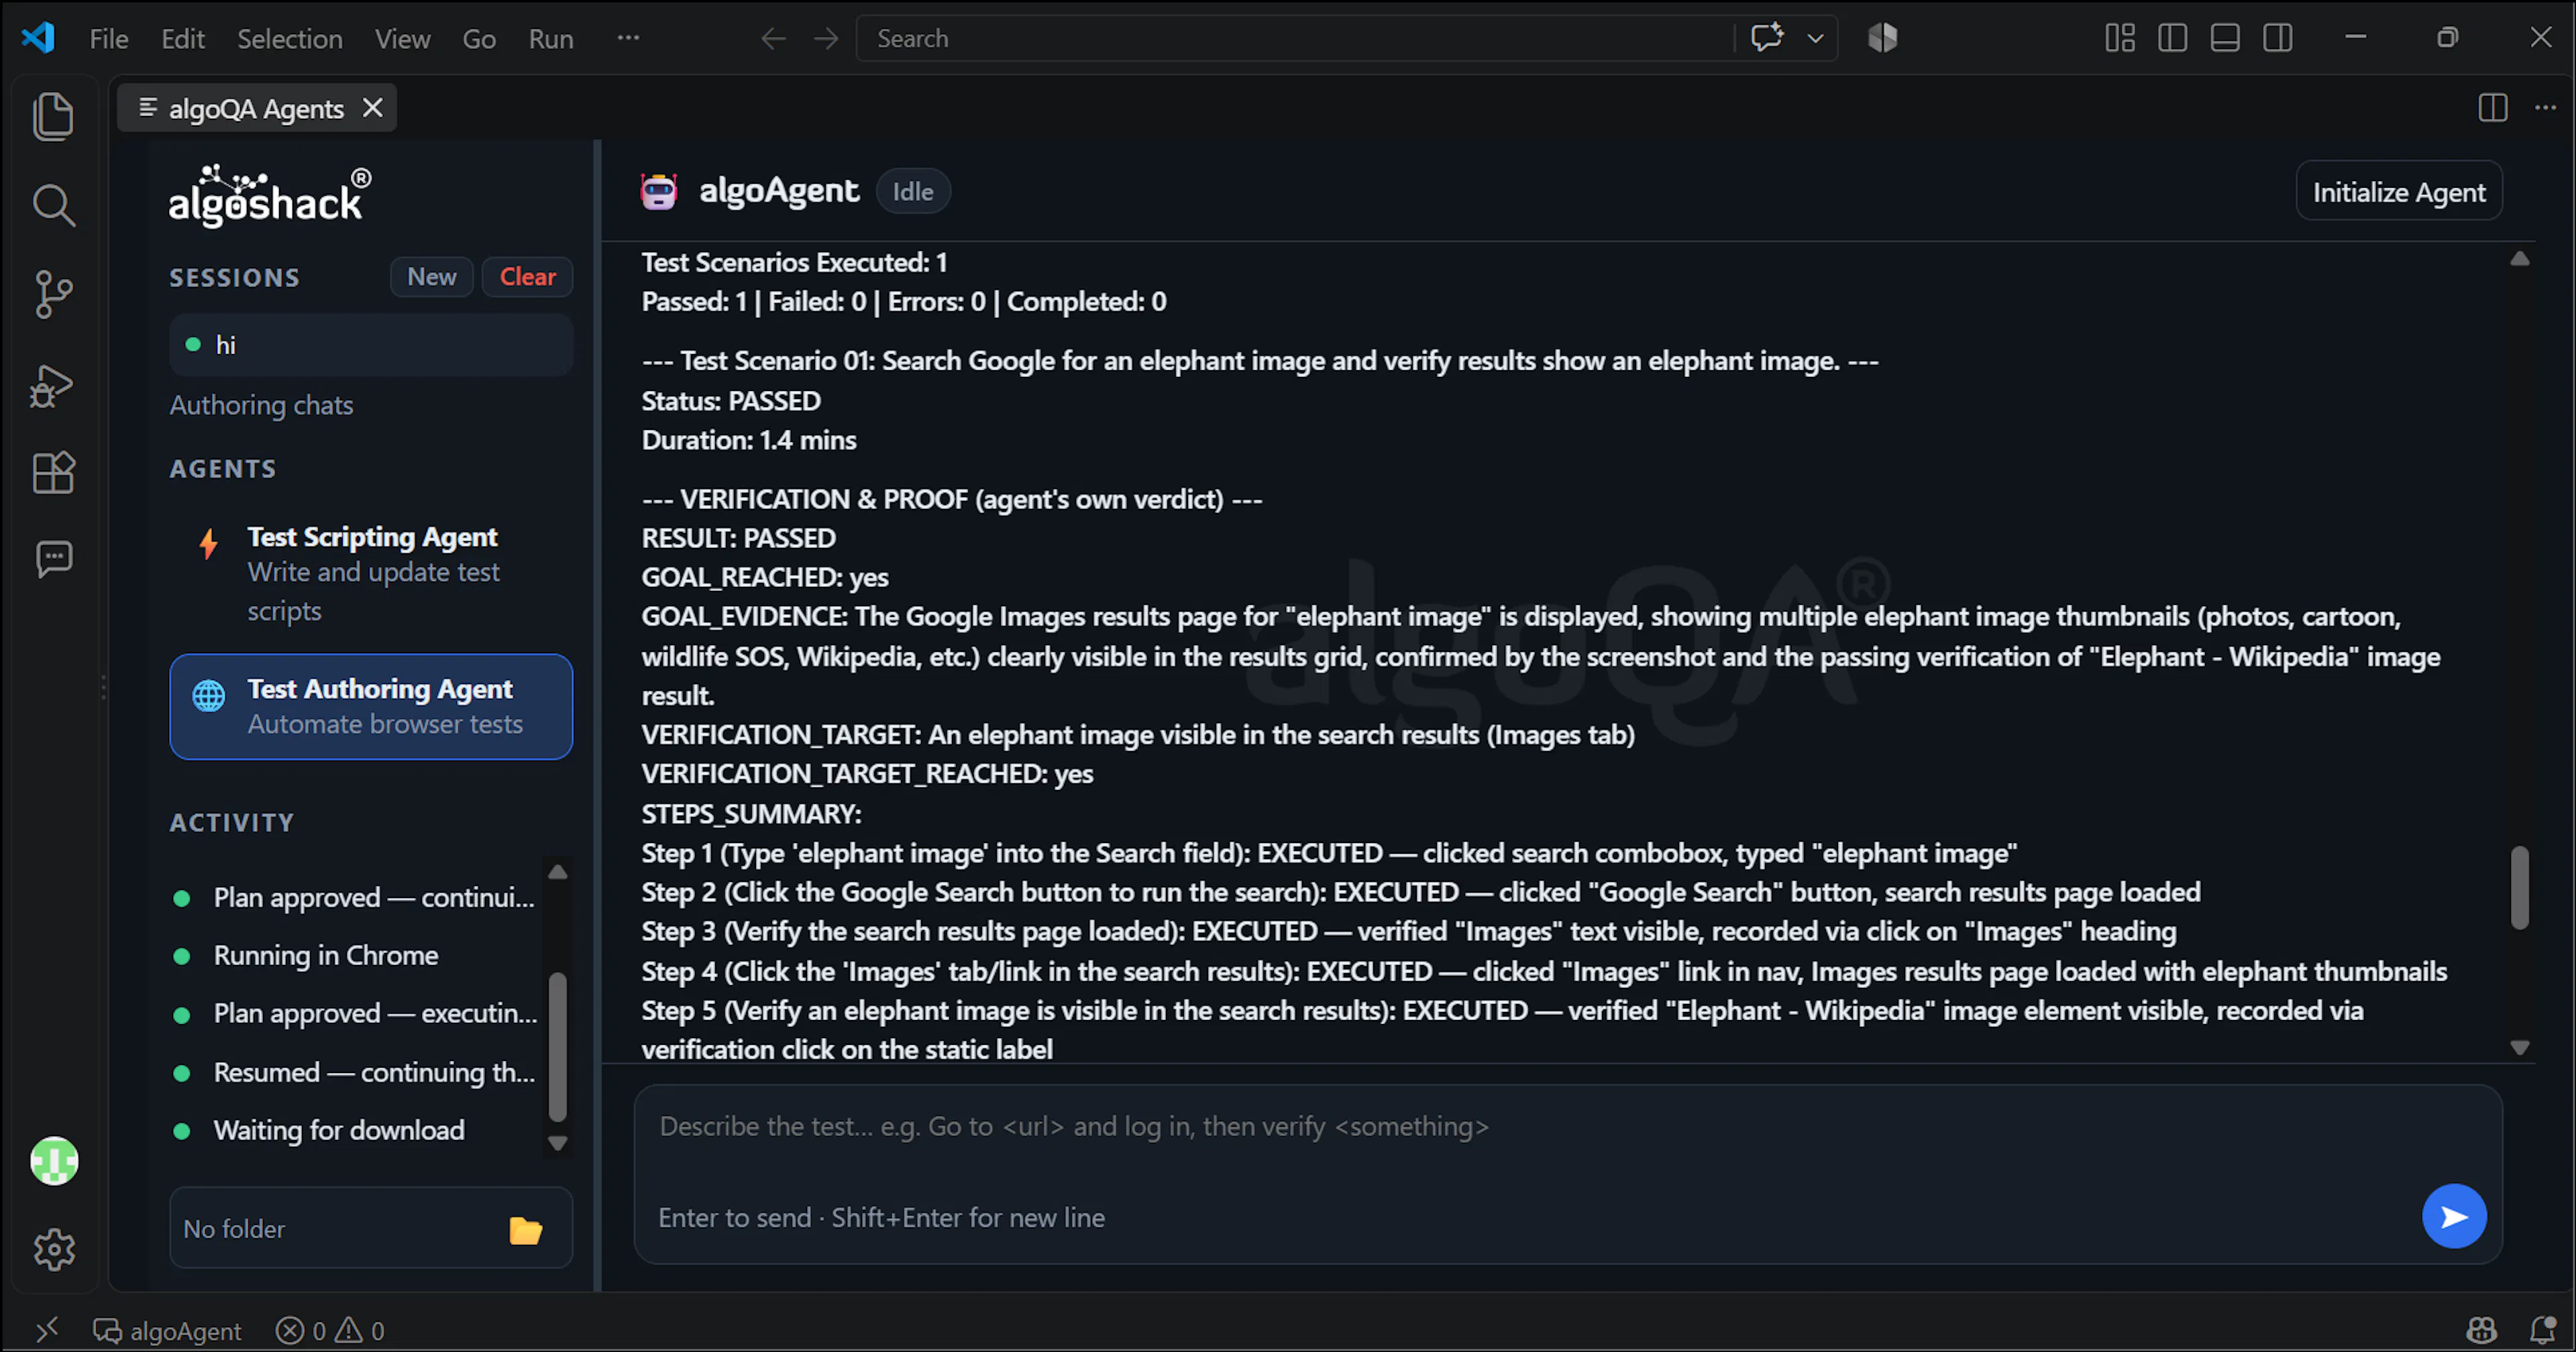
Step 8: Upload to algoQA
Upload the downloaded .json file into algoQA to generate scenarios and test case scripts from the agent's recorded run.
Who This Is For
This agent is designed so that a manual tester without any scripting or coding knowledge can generate full test automation simply by describing the test in natural language, the same way they would explain it to another person.
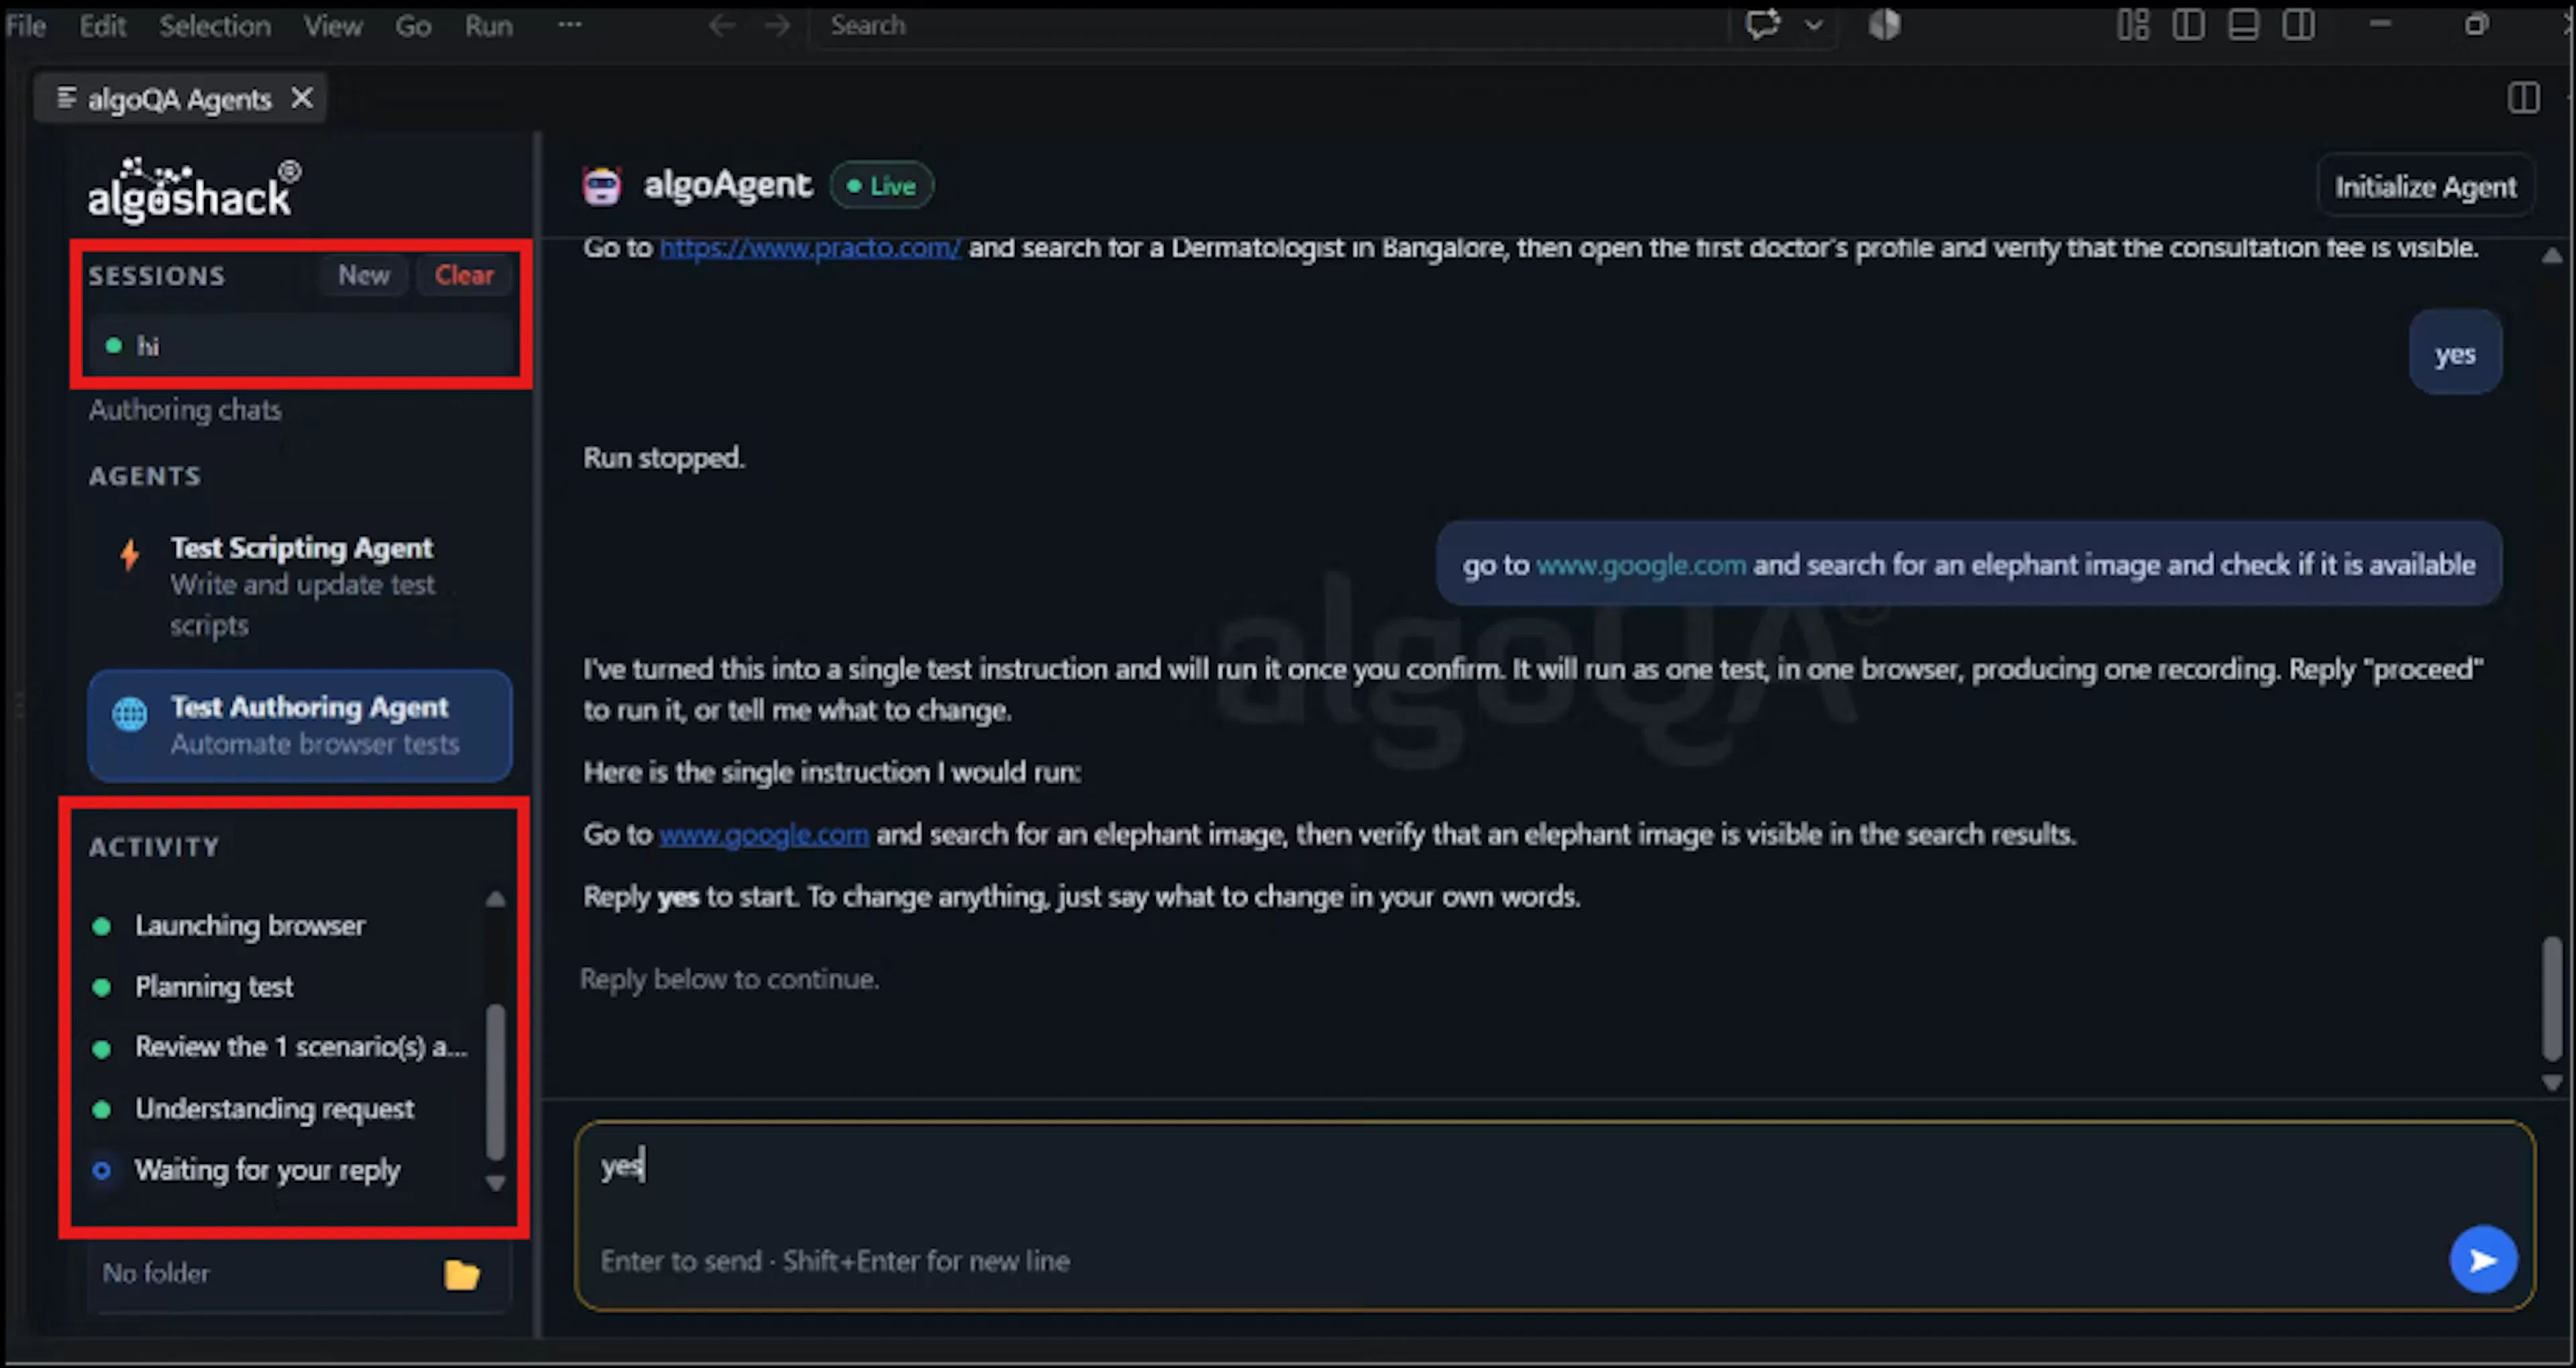
The session history and activity for your current session will be displayed on the left side.