Test Scripting Agent
Use the Test Scripting Agent to read, understand, and modify your existing automation test scripts through natural-language prompts. Upload a script, describe the changes in plain English, and the agent generates updated code that follows your project's existing conventions and framework. Supports Java Selenium, Java REST Assured, Python Selenium, TypeScript Playwright, Python TestComplete, and C# WinAppDriver frameworks.
What It Can Do
- Accepts your automation script as a
.zipfile and analyzes its entire folder structure. - Answers questions related to your uploaded script and framework.
- Adds new test scenarios or edits existing ones based on a plain English description of the desired flow.
- Reuses your existing components, utility classes, and framework conventions instead of introducing new patterns.
- Follows your script's existing naming and formatting conventions.
- Compiles the generated code changes and confirms whether the build succeeded.
- Generates a detailed
report.mdfile summarizing every change made. - Can produce the report in other formats (e.g., PDF, TXT) if you request it in your prompt, Markdown is used by default.
- Accepts follow-up prompts after the initial generation — for example, to add a real element locator, restrict changes to a single file, or recompile after further edits.
What It Cannot Do
- Cannot browse your live application to fetch real element locators (XPaths). It generates a skeleton using placeholder values, you will need to retrieve and insert the actual XPath.
- Cannot execute your test scripts. It only compiles the code and confirms the build succeeds; running the tests is done separately by you.
- Only works with what already exists in your uploaded script, it won't build entirely new frameworks or patterns.
- Only answers questions related to your uploaded script, general queries are out of scope.
Supported Frameworks
The Test Scripting Agent supports the following automation frameworks:
- Java Selenium
- Java REST Assured
- Python Selenium
- TypeScript Playwright
- Python TestComplete
- C# WinAppDriver
Step-by-Step: How to Use the Test Scripting Agent
Step 1: Launch the algoQA Agents Extension
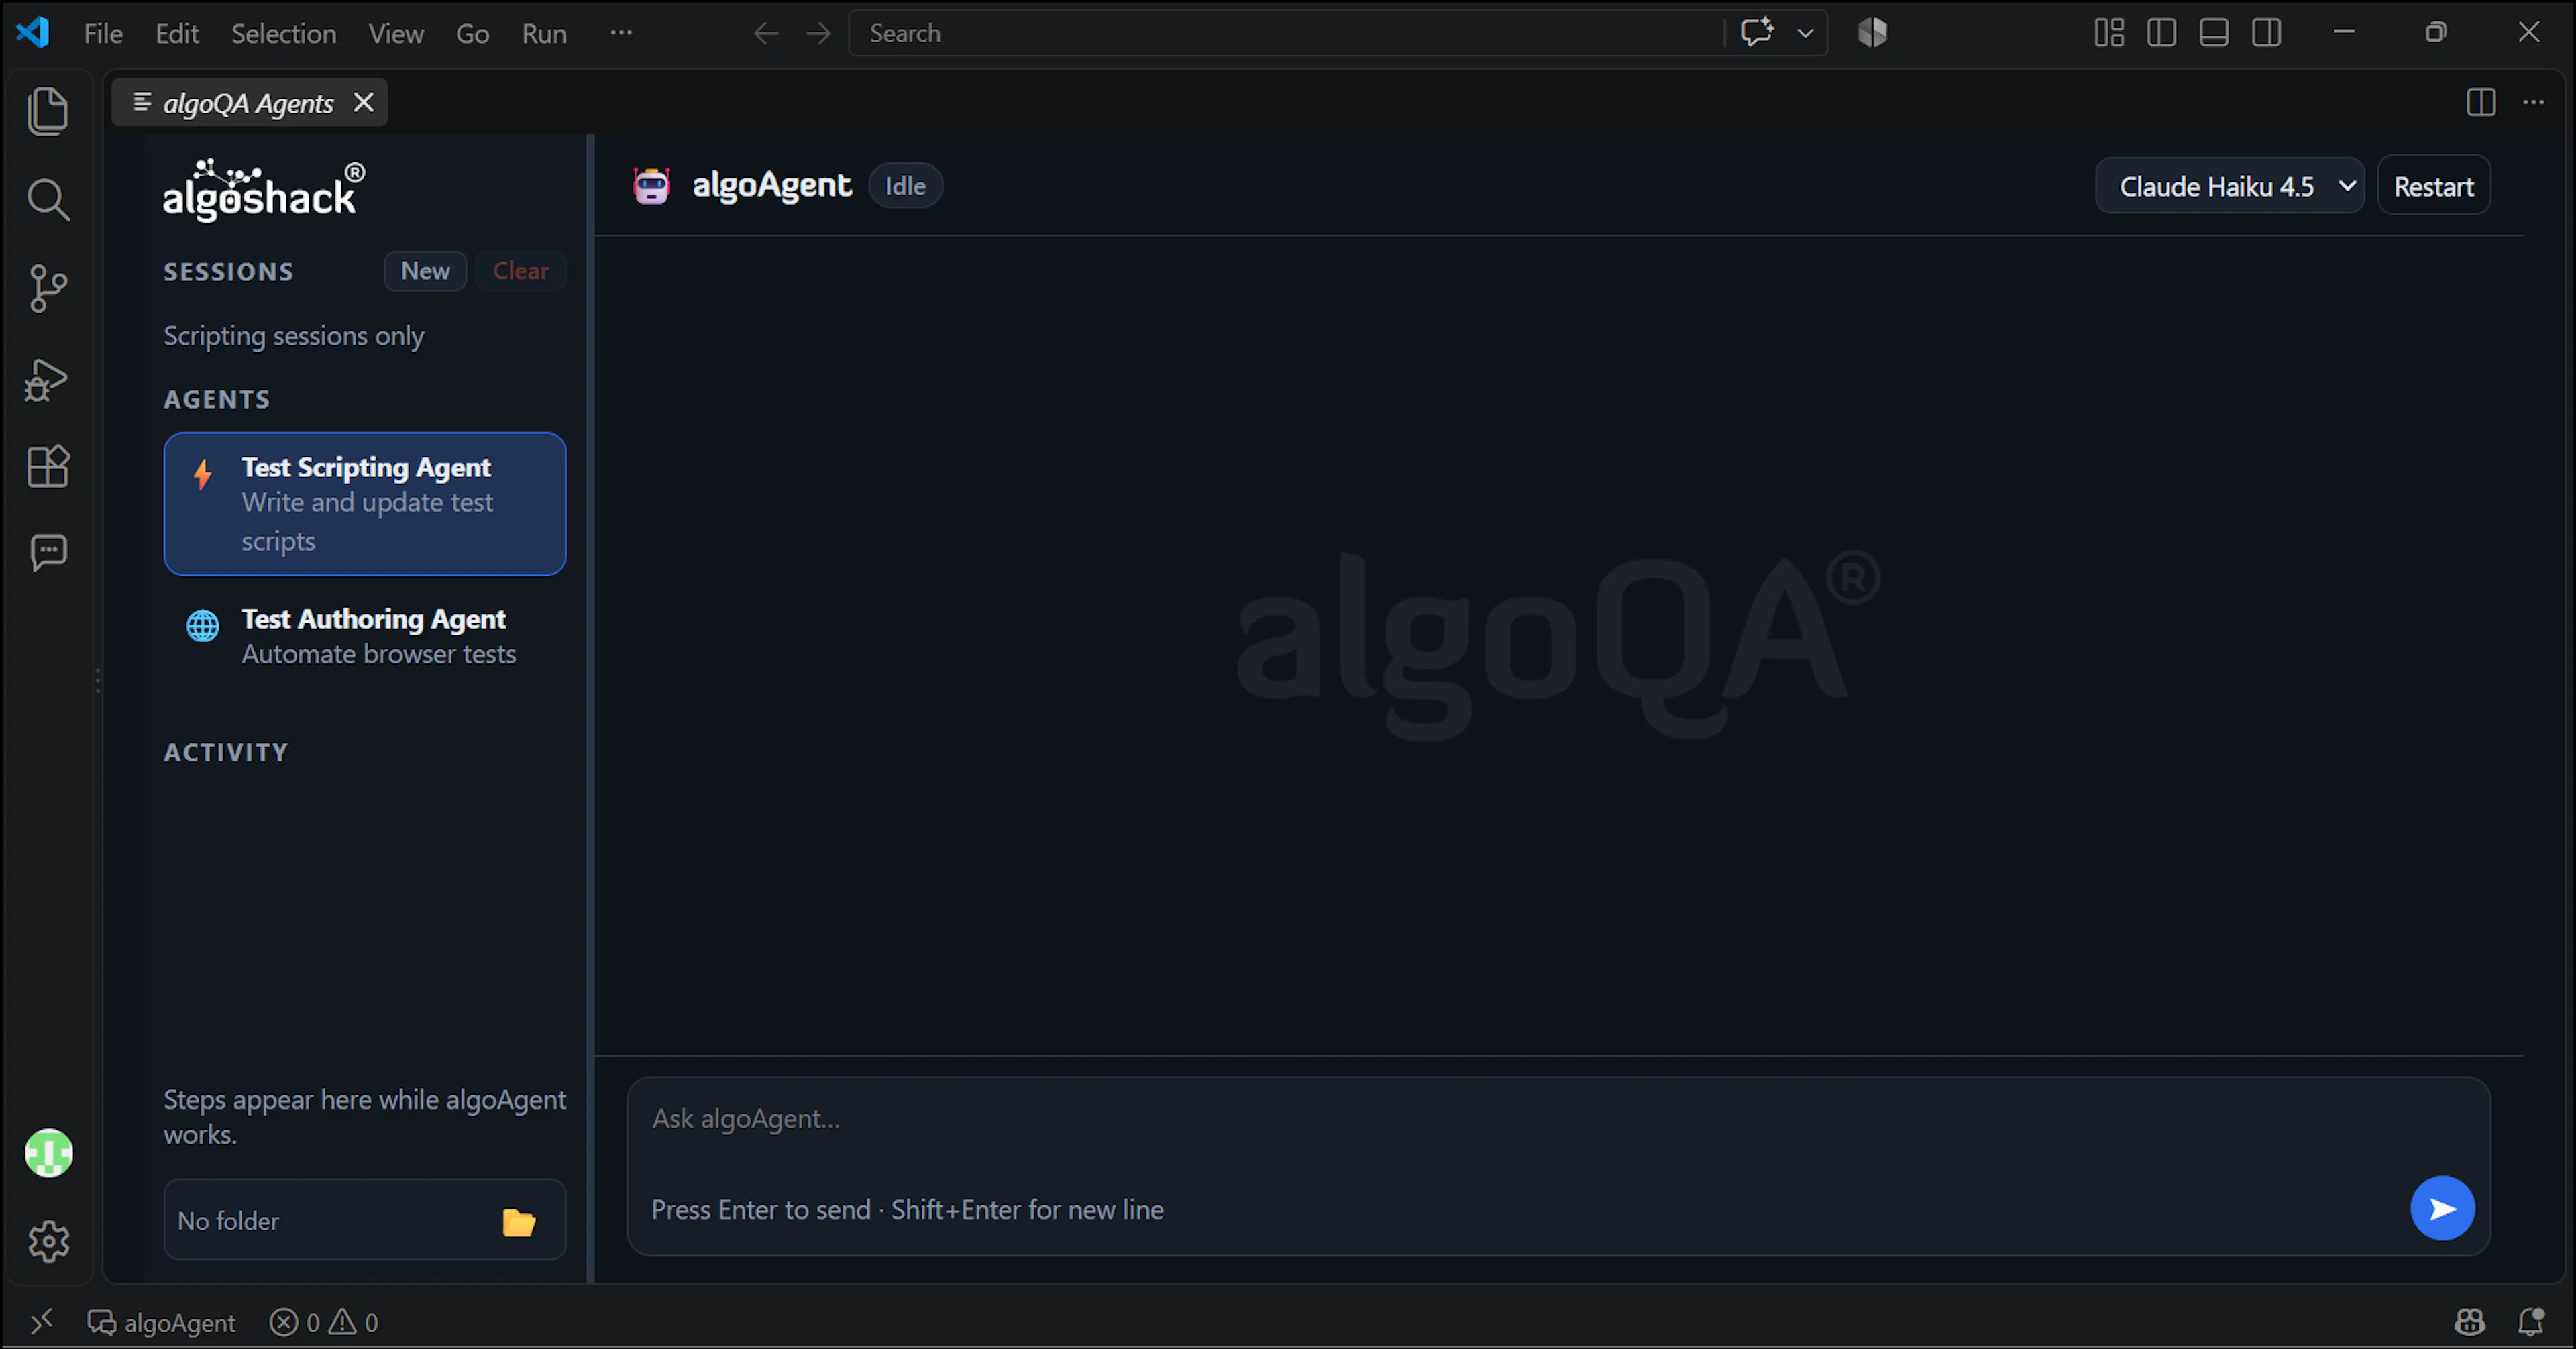
Open the algoQA Agents Extension and select Test Scripting Agent from the list of available agents.
Step 2: Upload Your Script
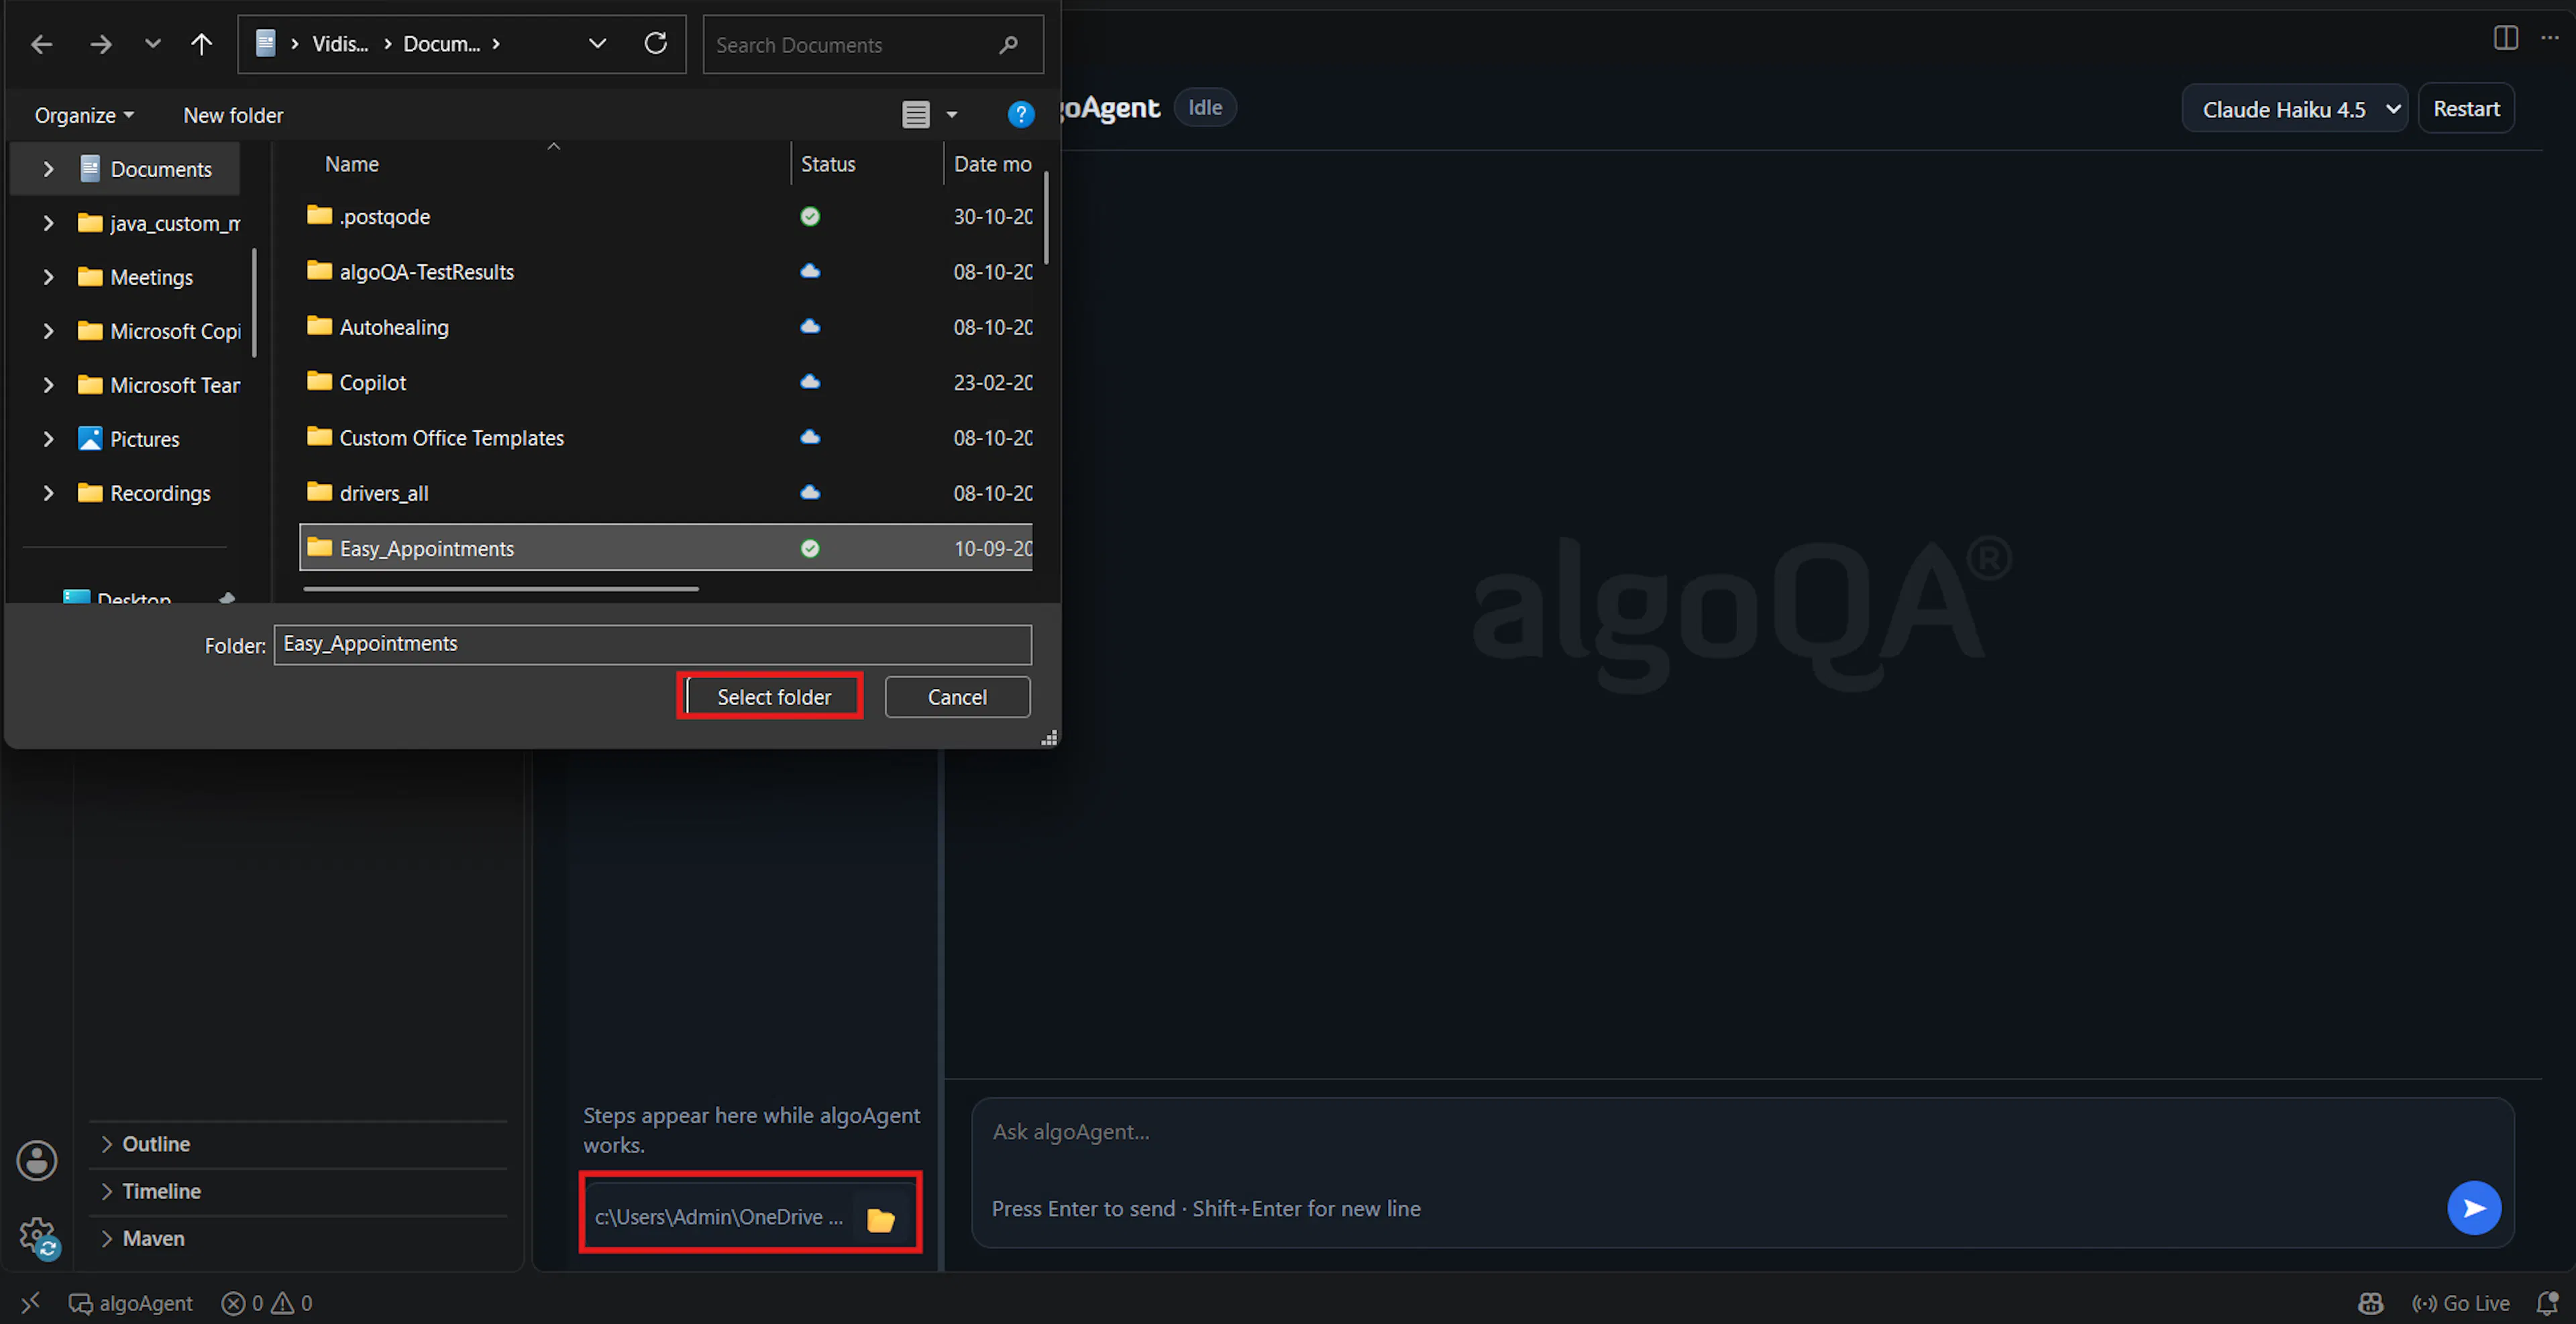
Click on Open Target Folder to upload your existing automation script as a .zip file. The agent extracts it into a new project folder and works on a copy, your original script is never modified directly.
Step 3: Enter Your Prompt
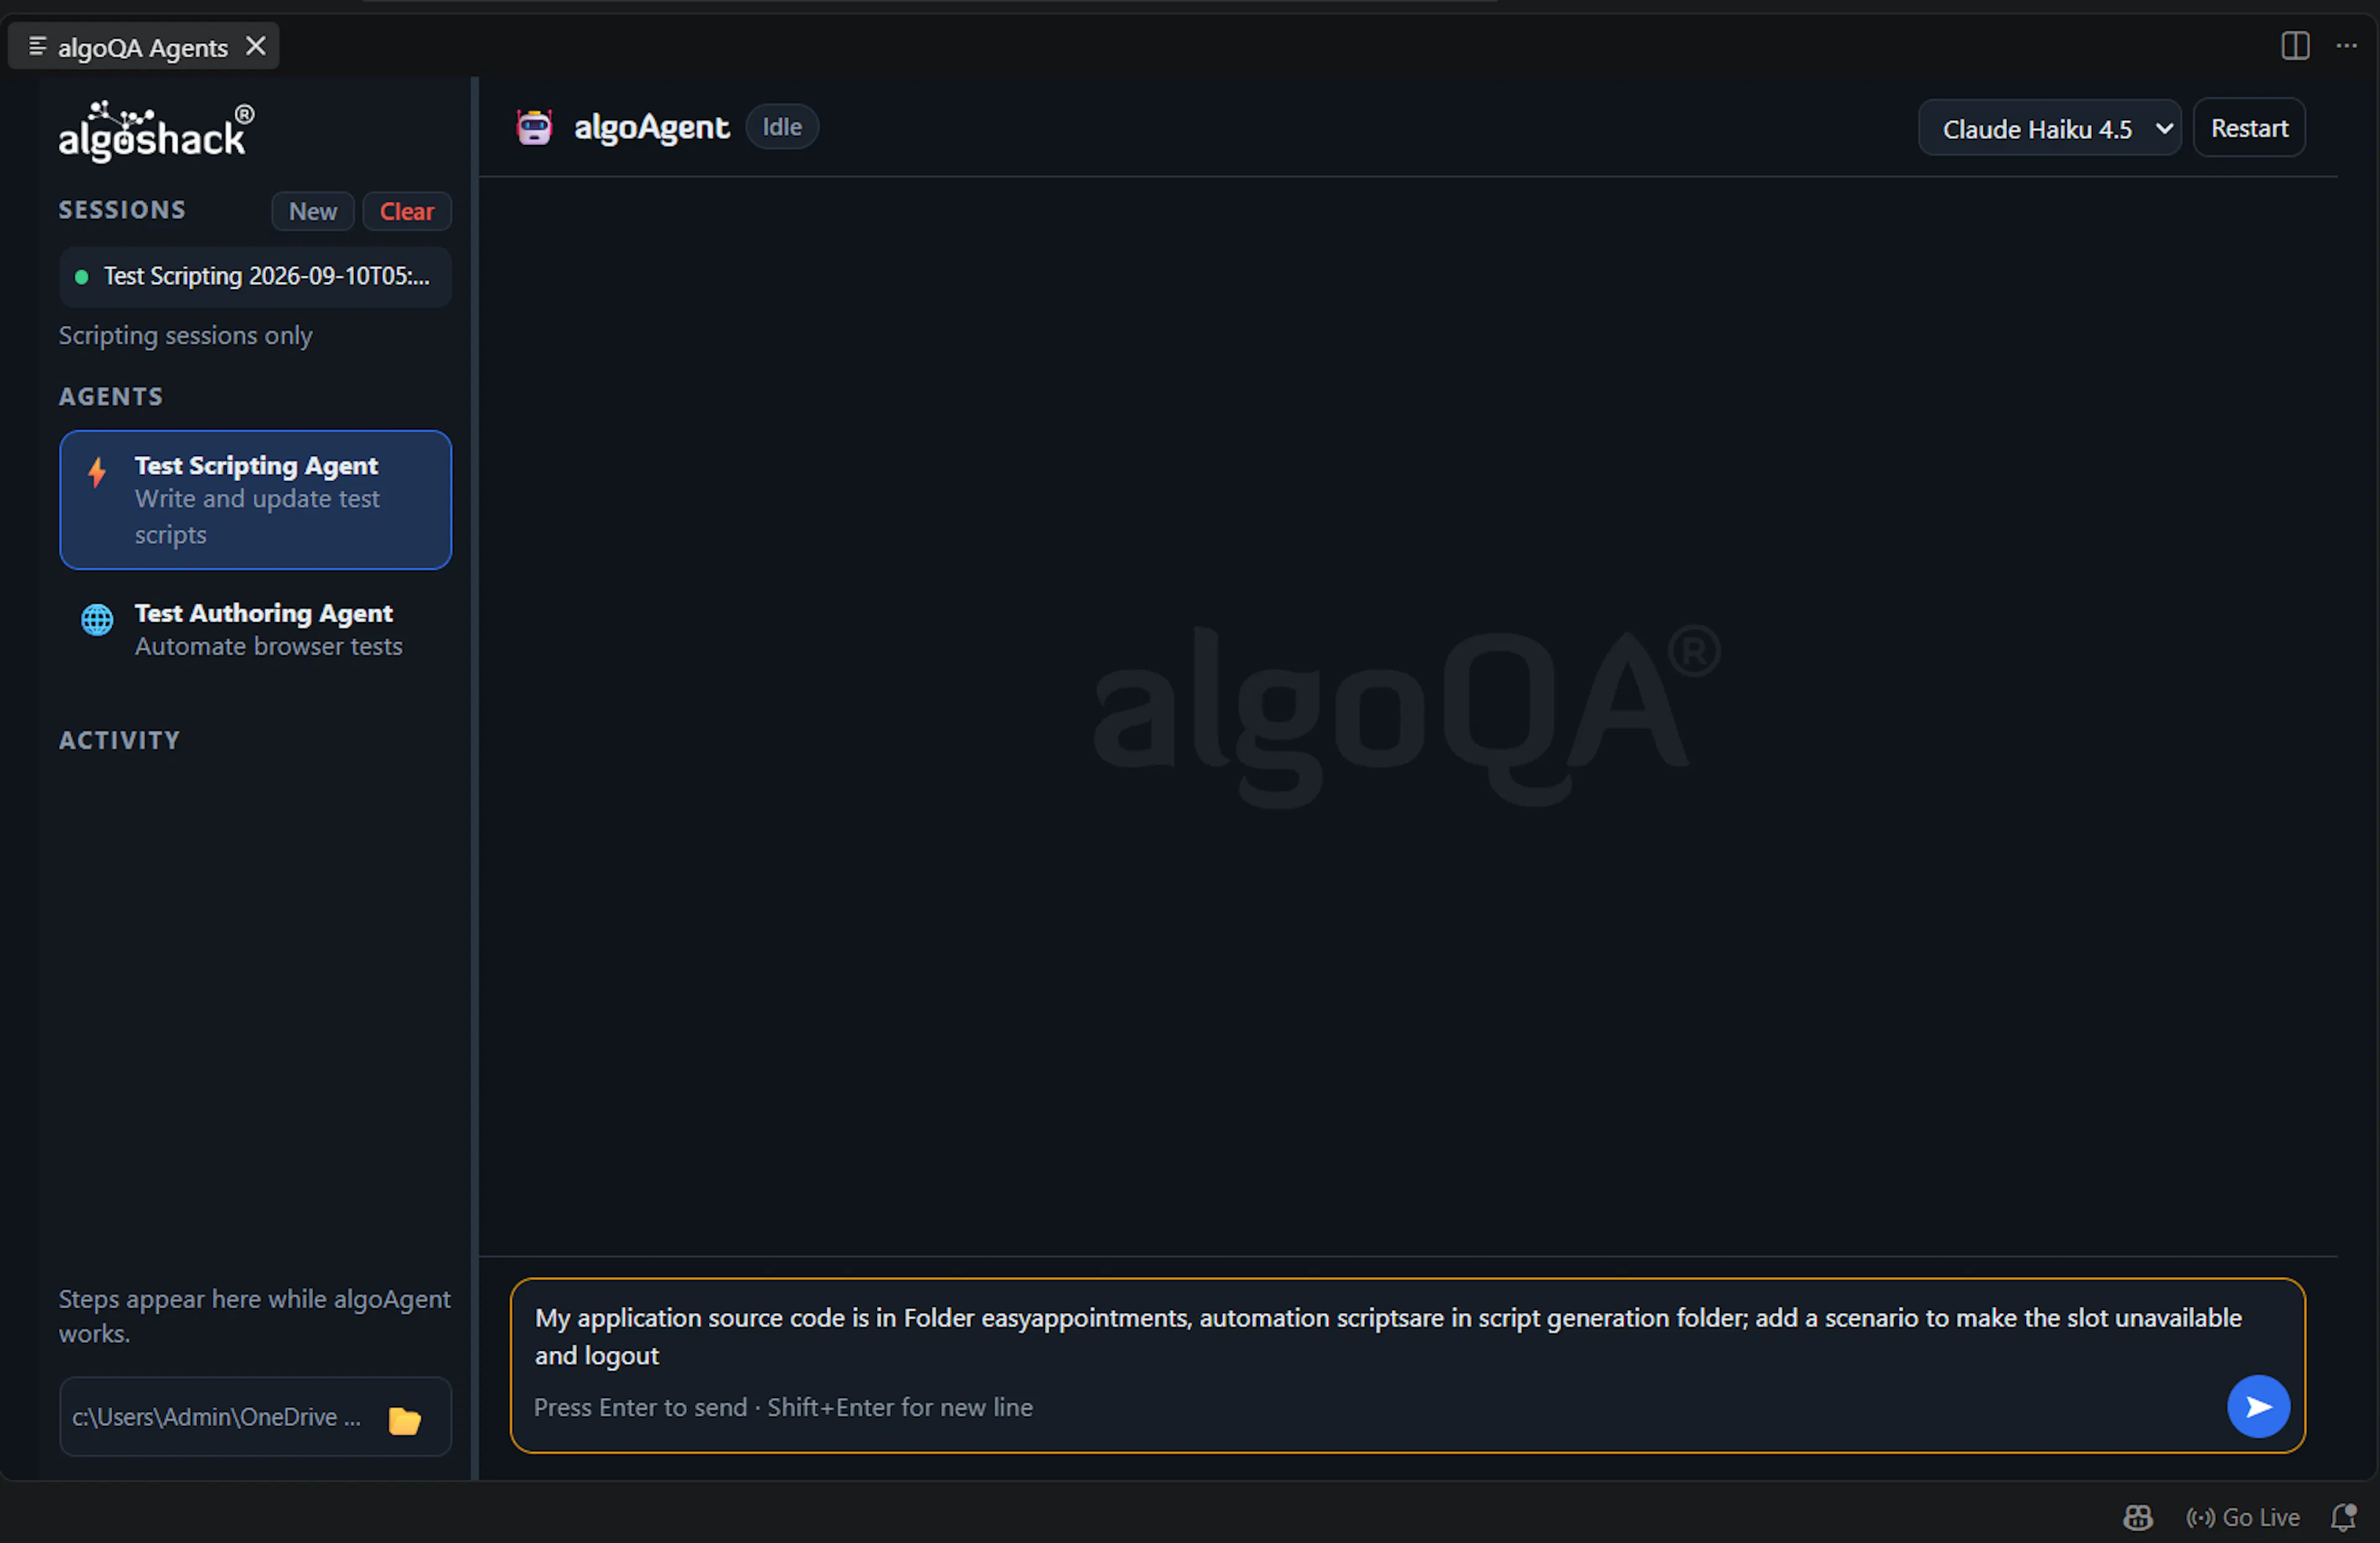
Describe what you want in plain English. For example:
My application source code is in Folder easyappointments, automation scripts are in script generation folder; add a scenario to make the slot unavailable and logout
You can also include specific instructions in the same prompt, such as:
- Only add this to the existing feature file (instead of creating a new one)
- Give me the report in PDF format
Step 4: Review the Impact Analysis
Before making any changes, the agent shows you an impact analysis (compatibility verdict), which tells you:
- Which files will be created
- Which existing files will be modified, and what kind of changes will be made
- What framework/conventions it plans to reuse
Review this and confirm, or provide additional instructions if you want something done differently.
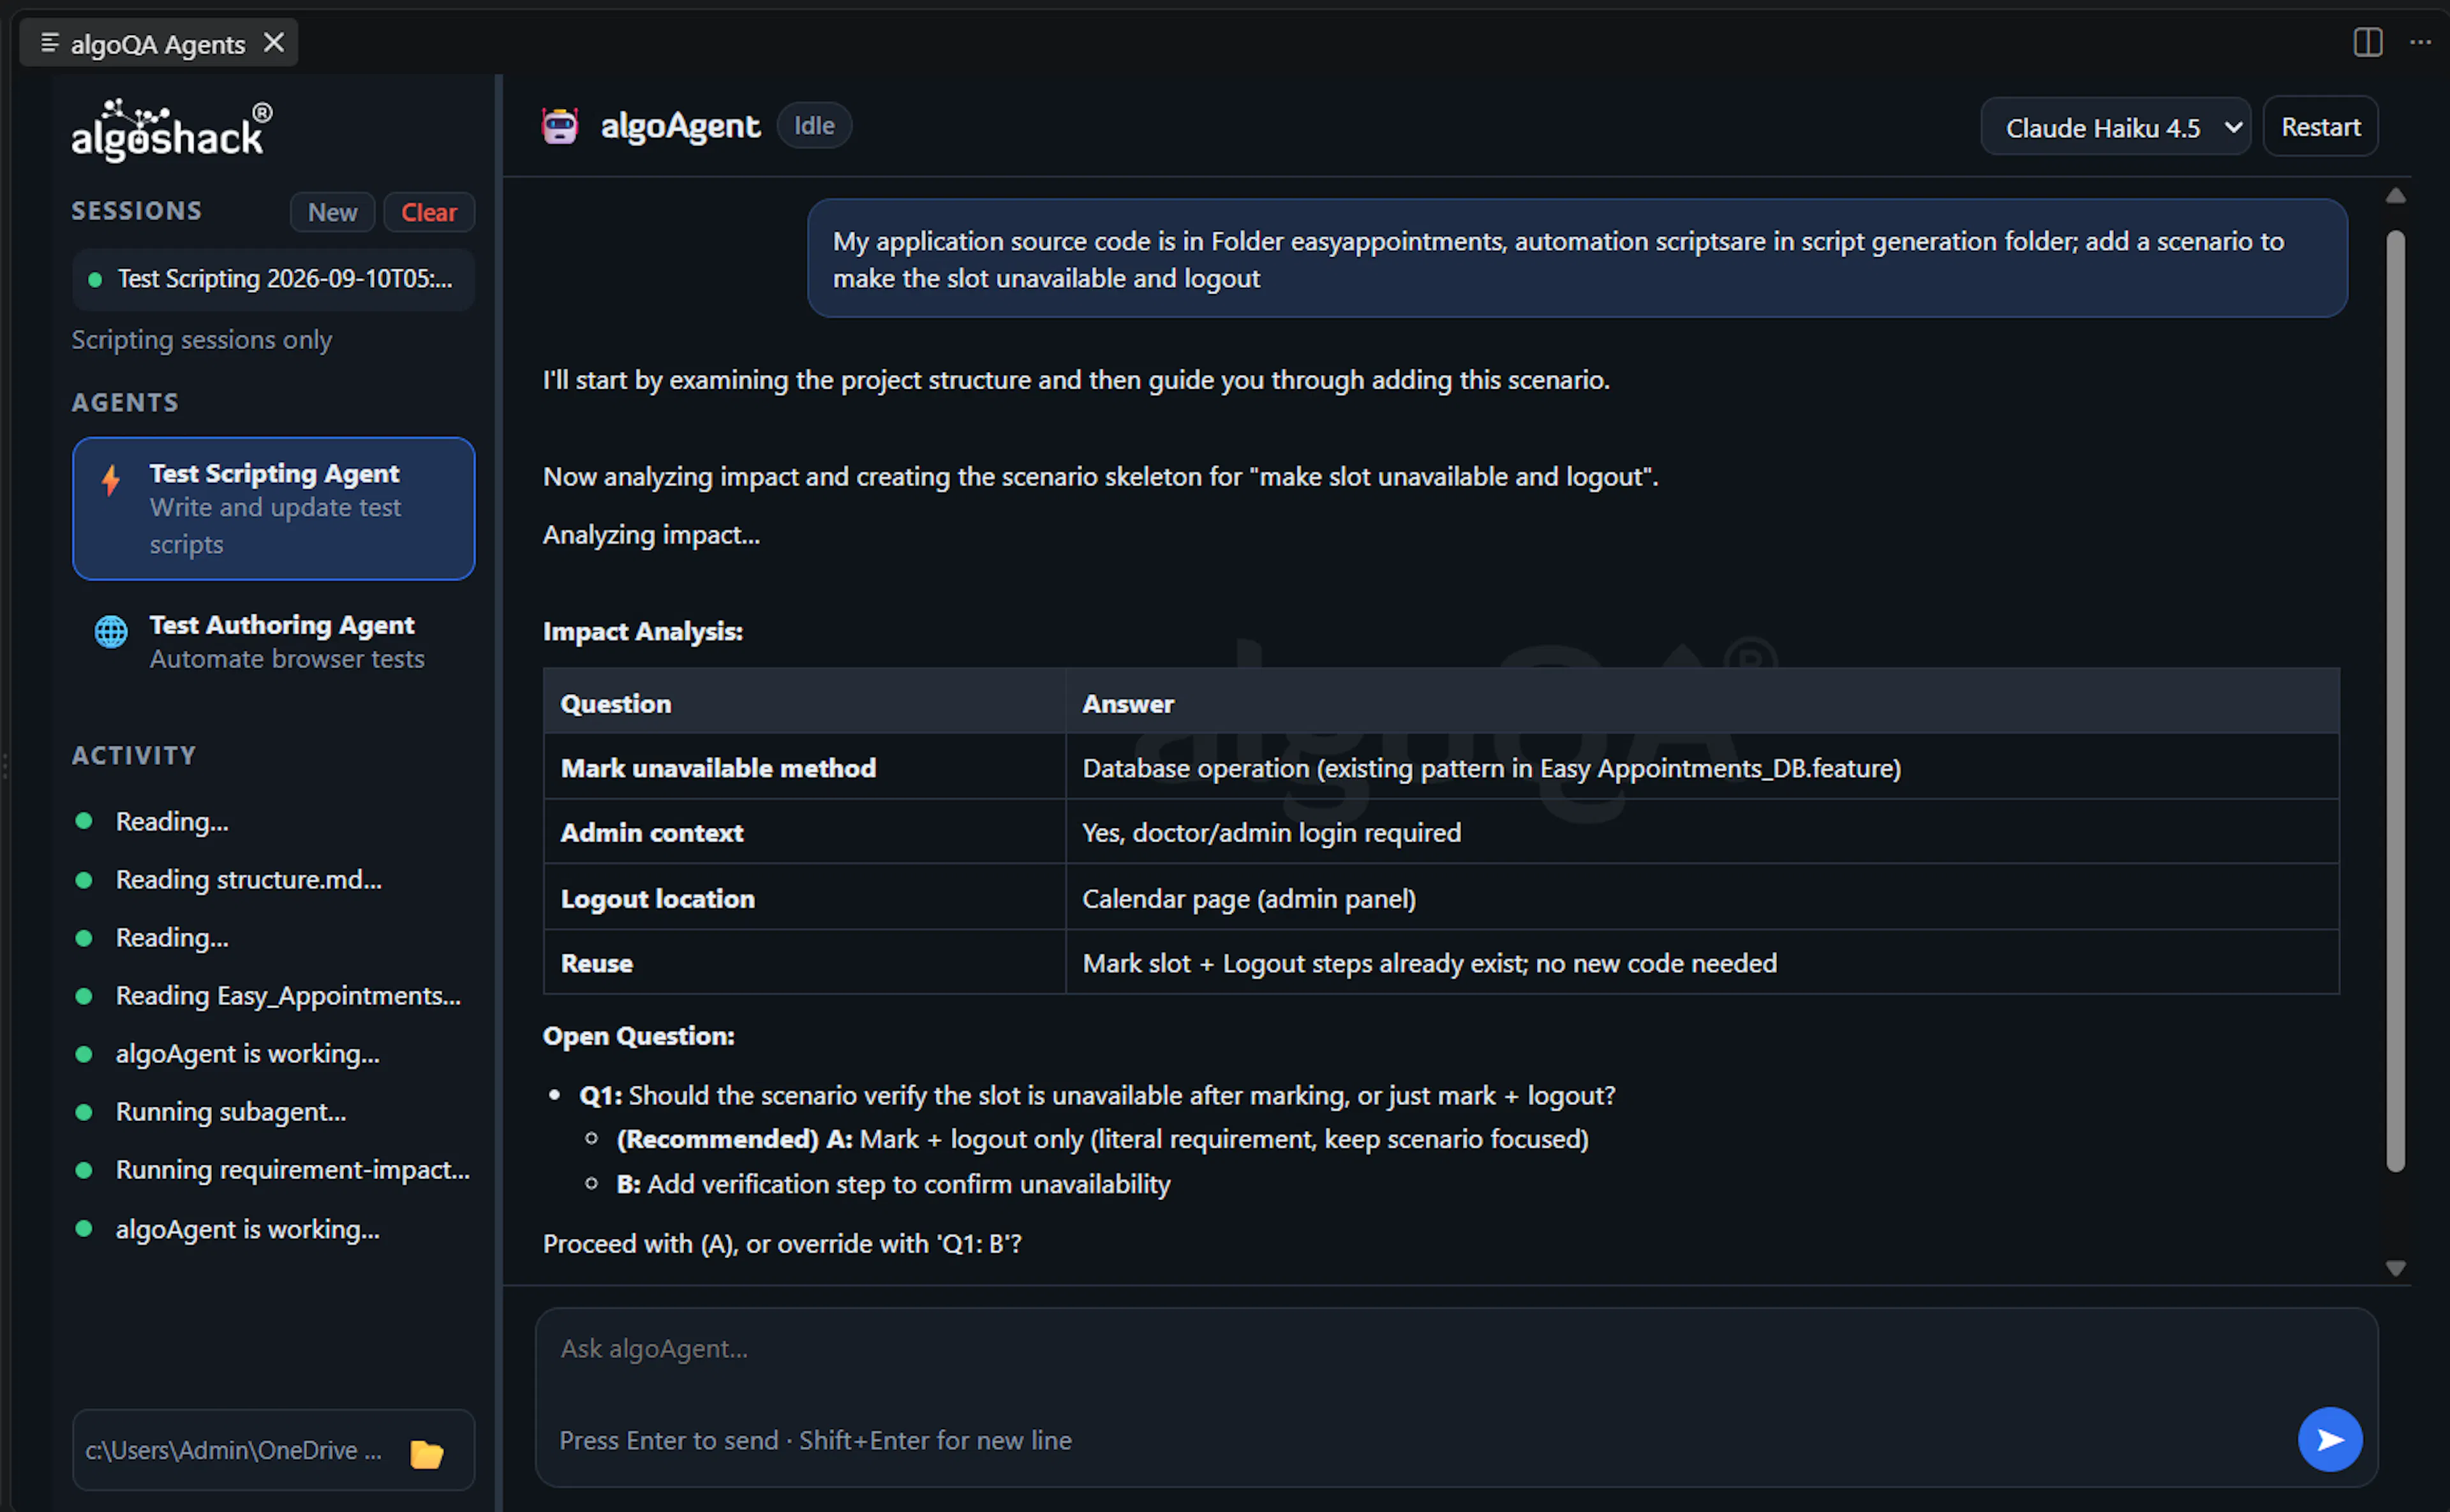
Step 5: Answer Any Clarifying Questions
The agent may ask a few clarifying questions if your prompt is ambiguous, for example:
- Which search result to select if multiple matches exist
- What validation or expected result to check for after an action
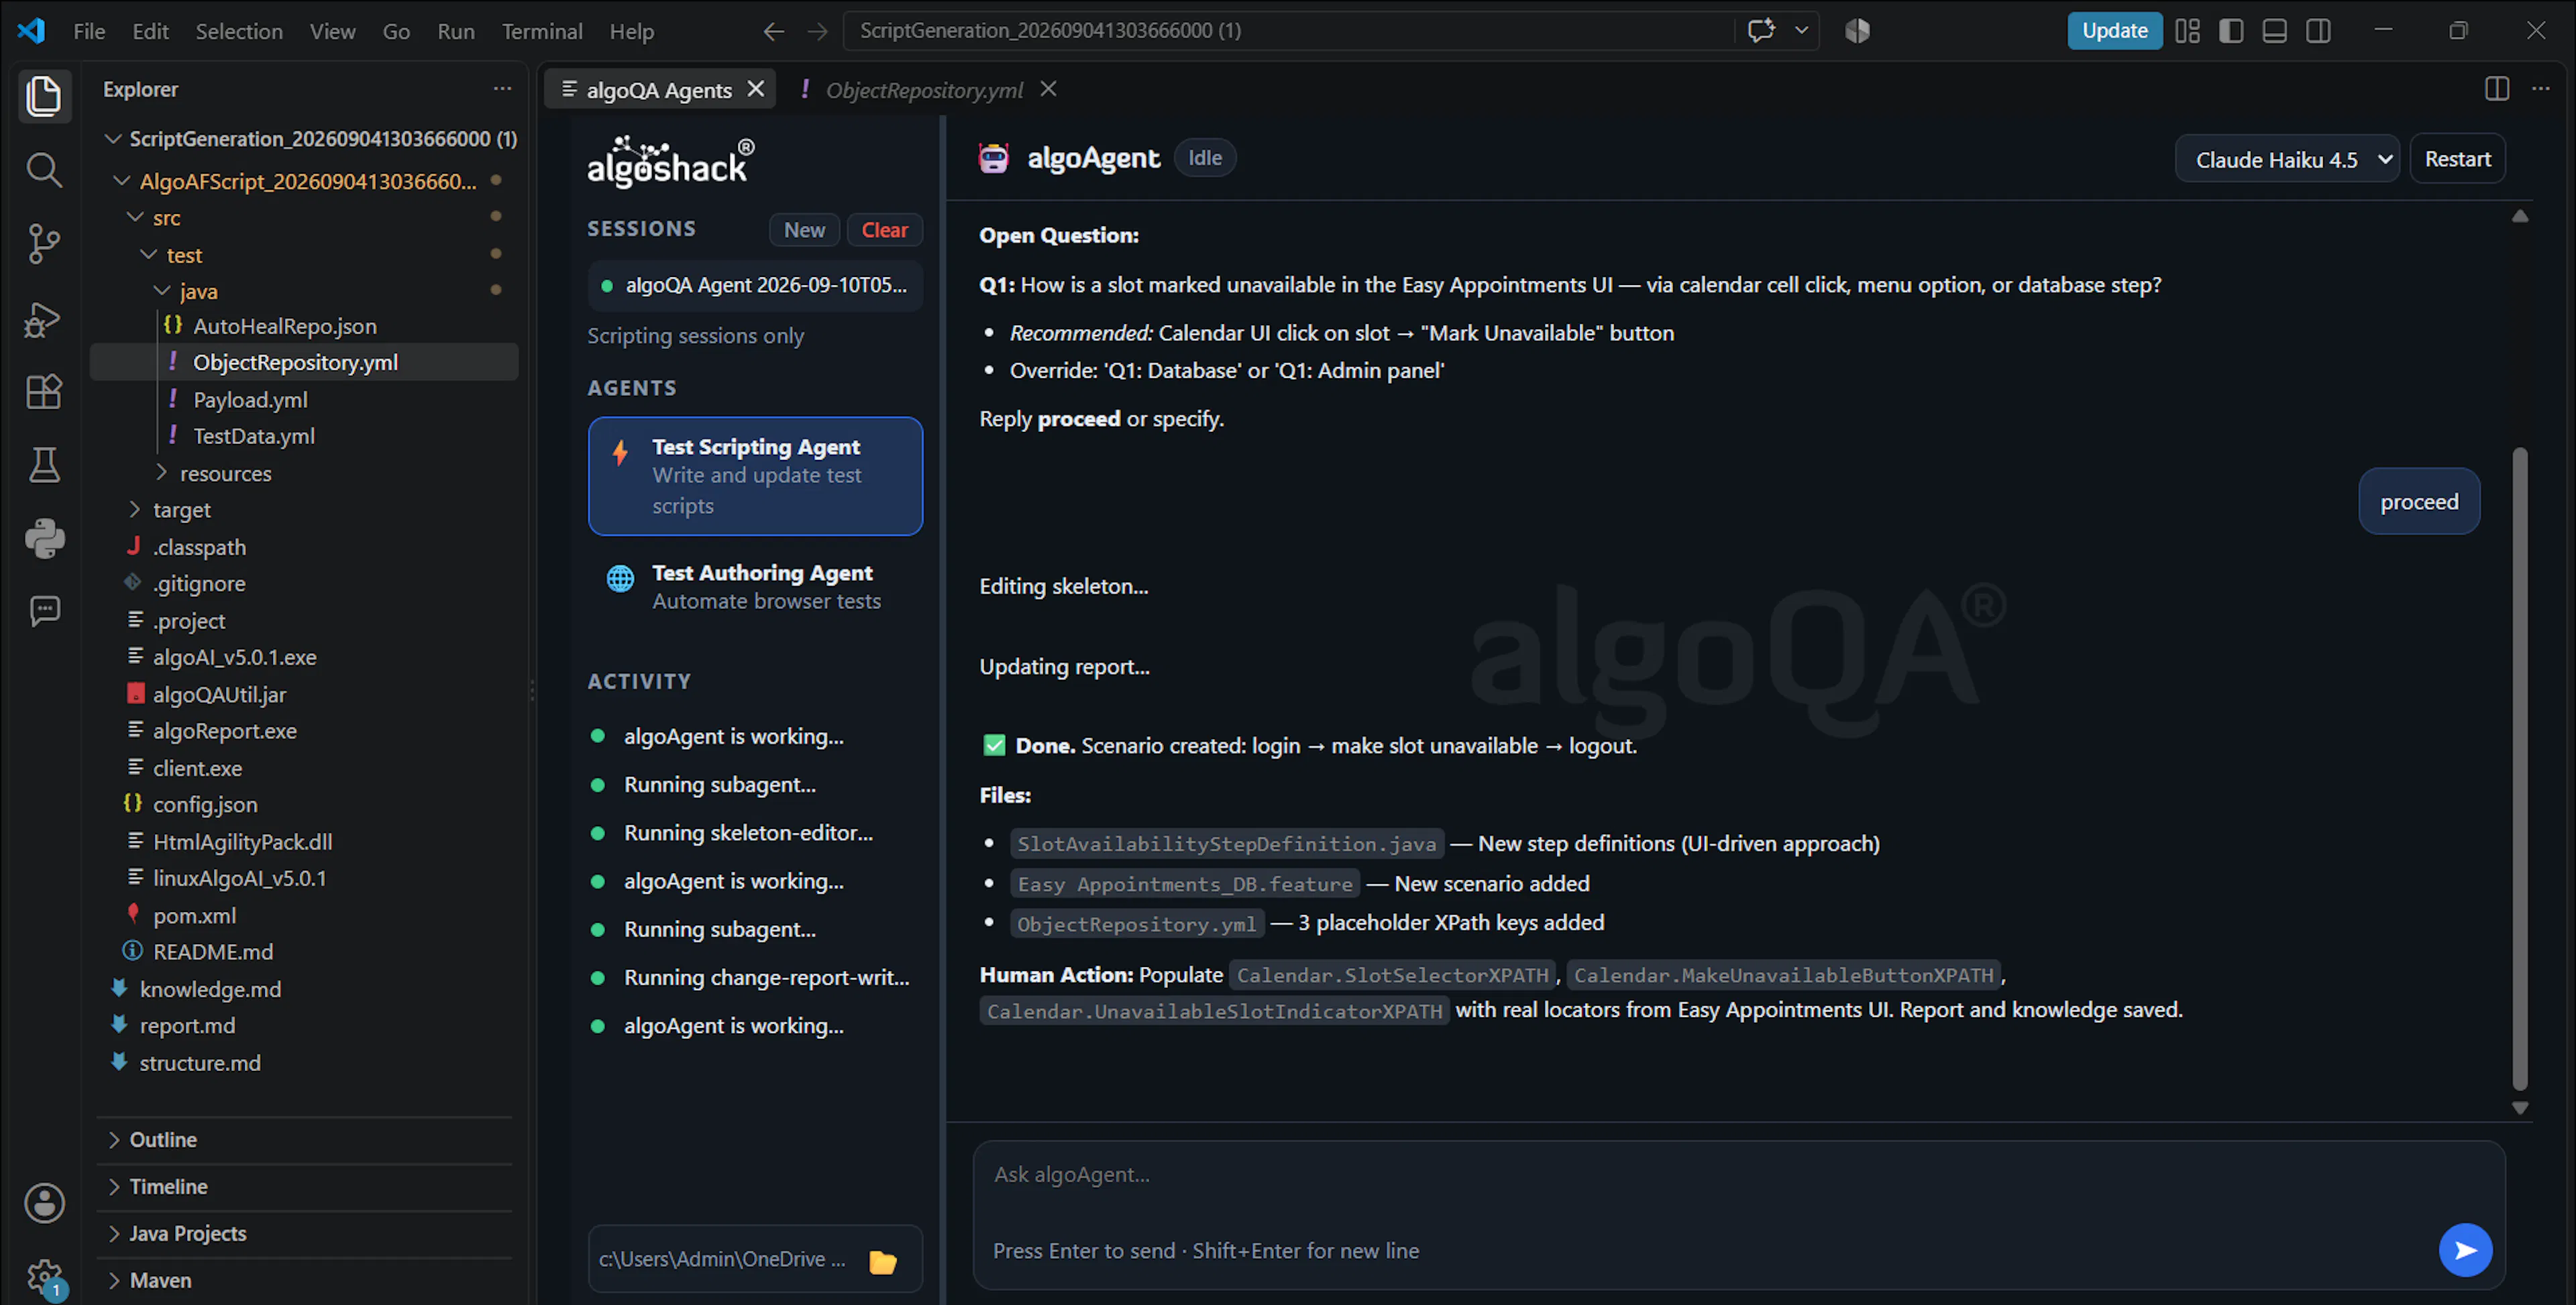
If you don't answer a specific question, the agent will proceed with a sensible default (clearly marked as the default in its response). To accept all defaults at once, simply reply proceed or yes.
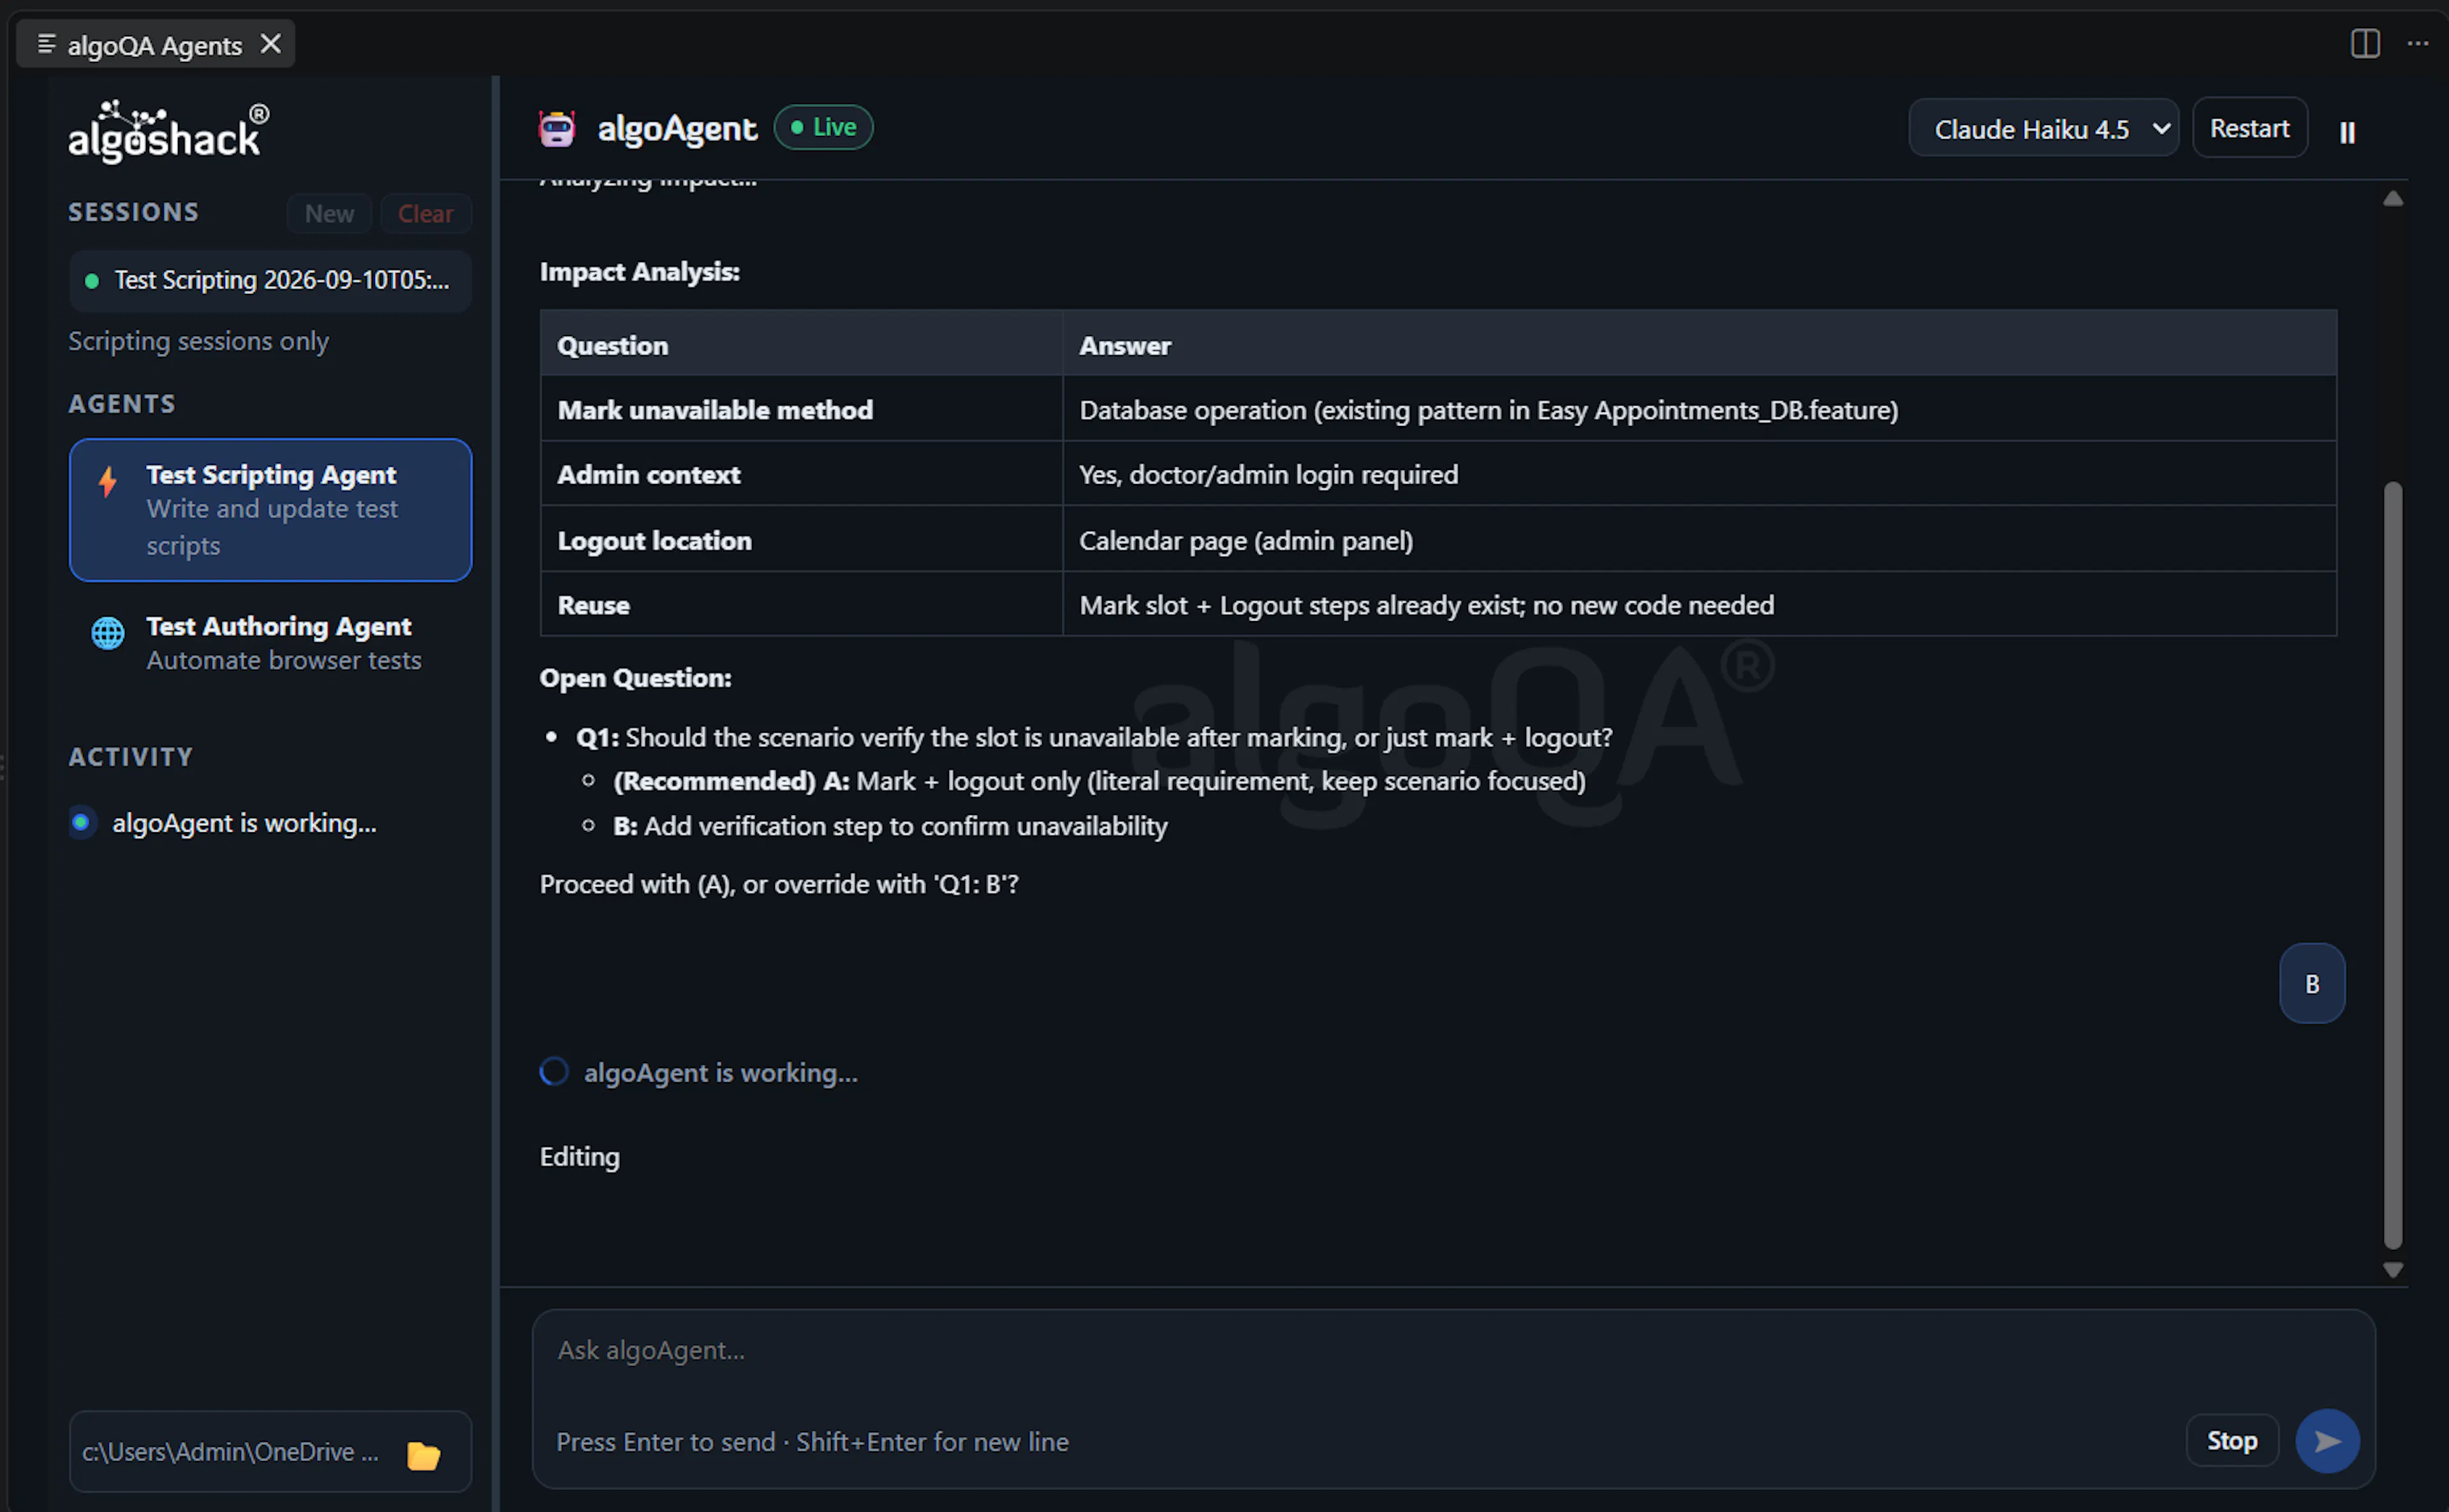
Step 6: Let the Agent Generate and Compile the Code
Once confirmed, the agent generates the necessary code, new feature files, step definitions, object repository entries, and modifications to existing files as needed, using placeholder values wherever a real locator (XPath) would be required. It then compiles the code and confirms whether the build was successful.
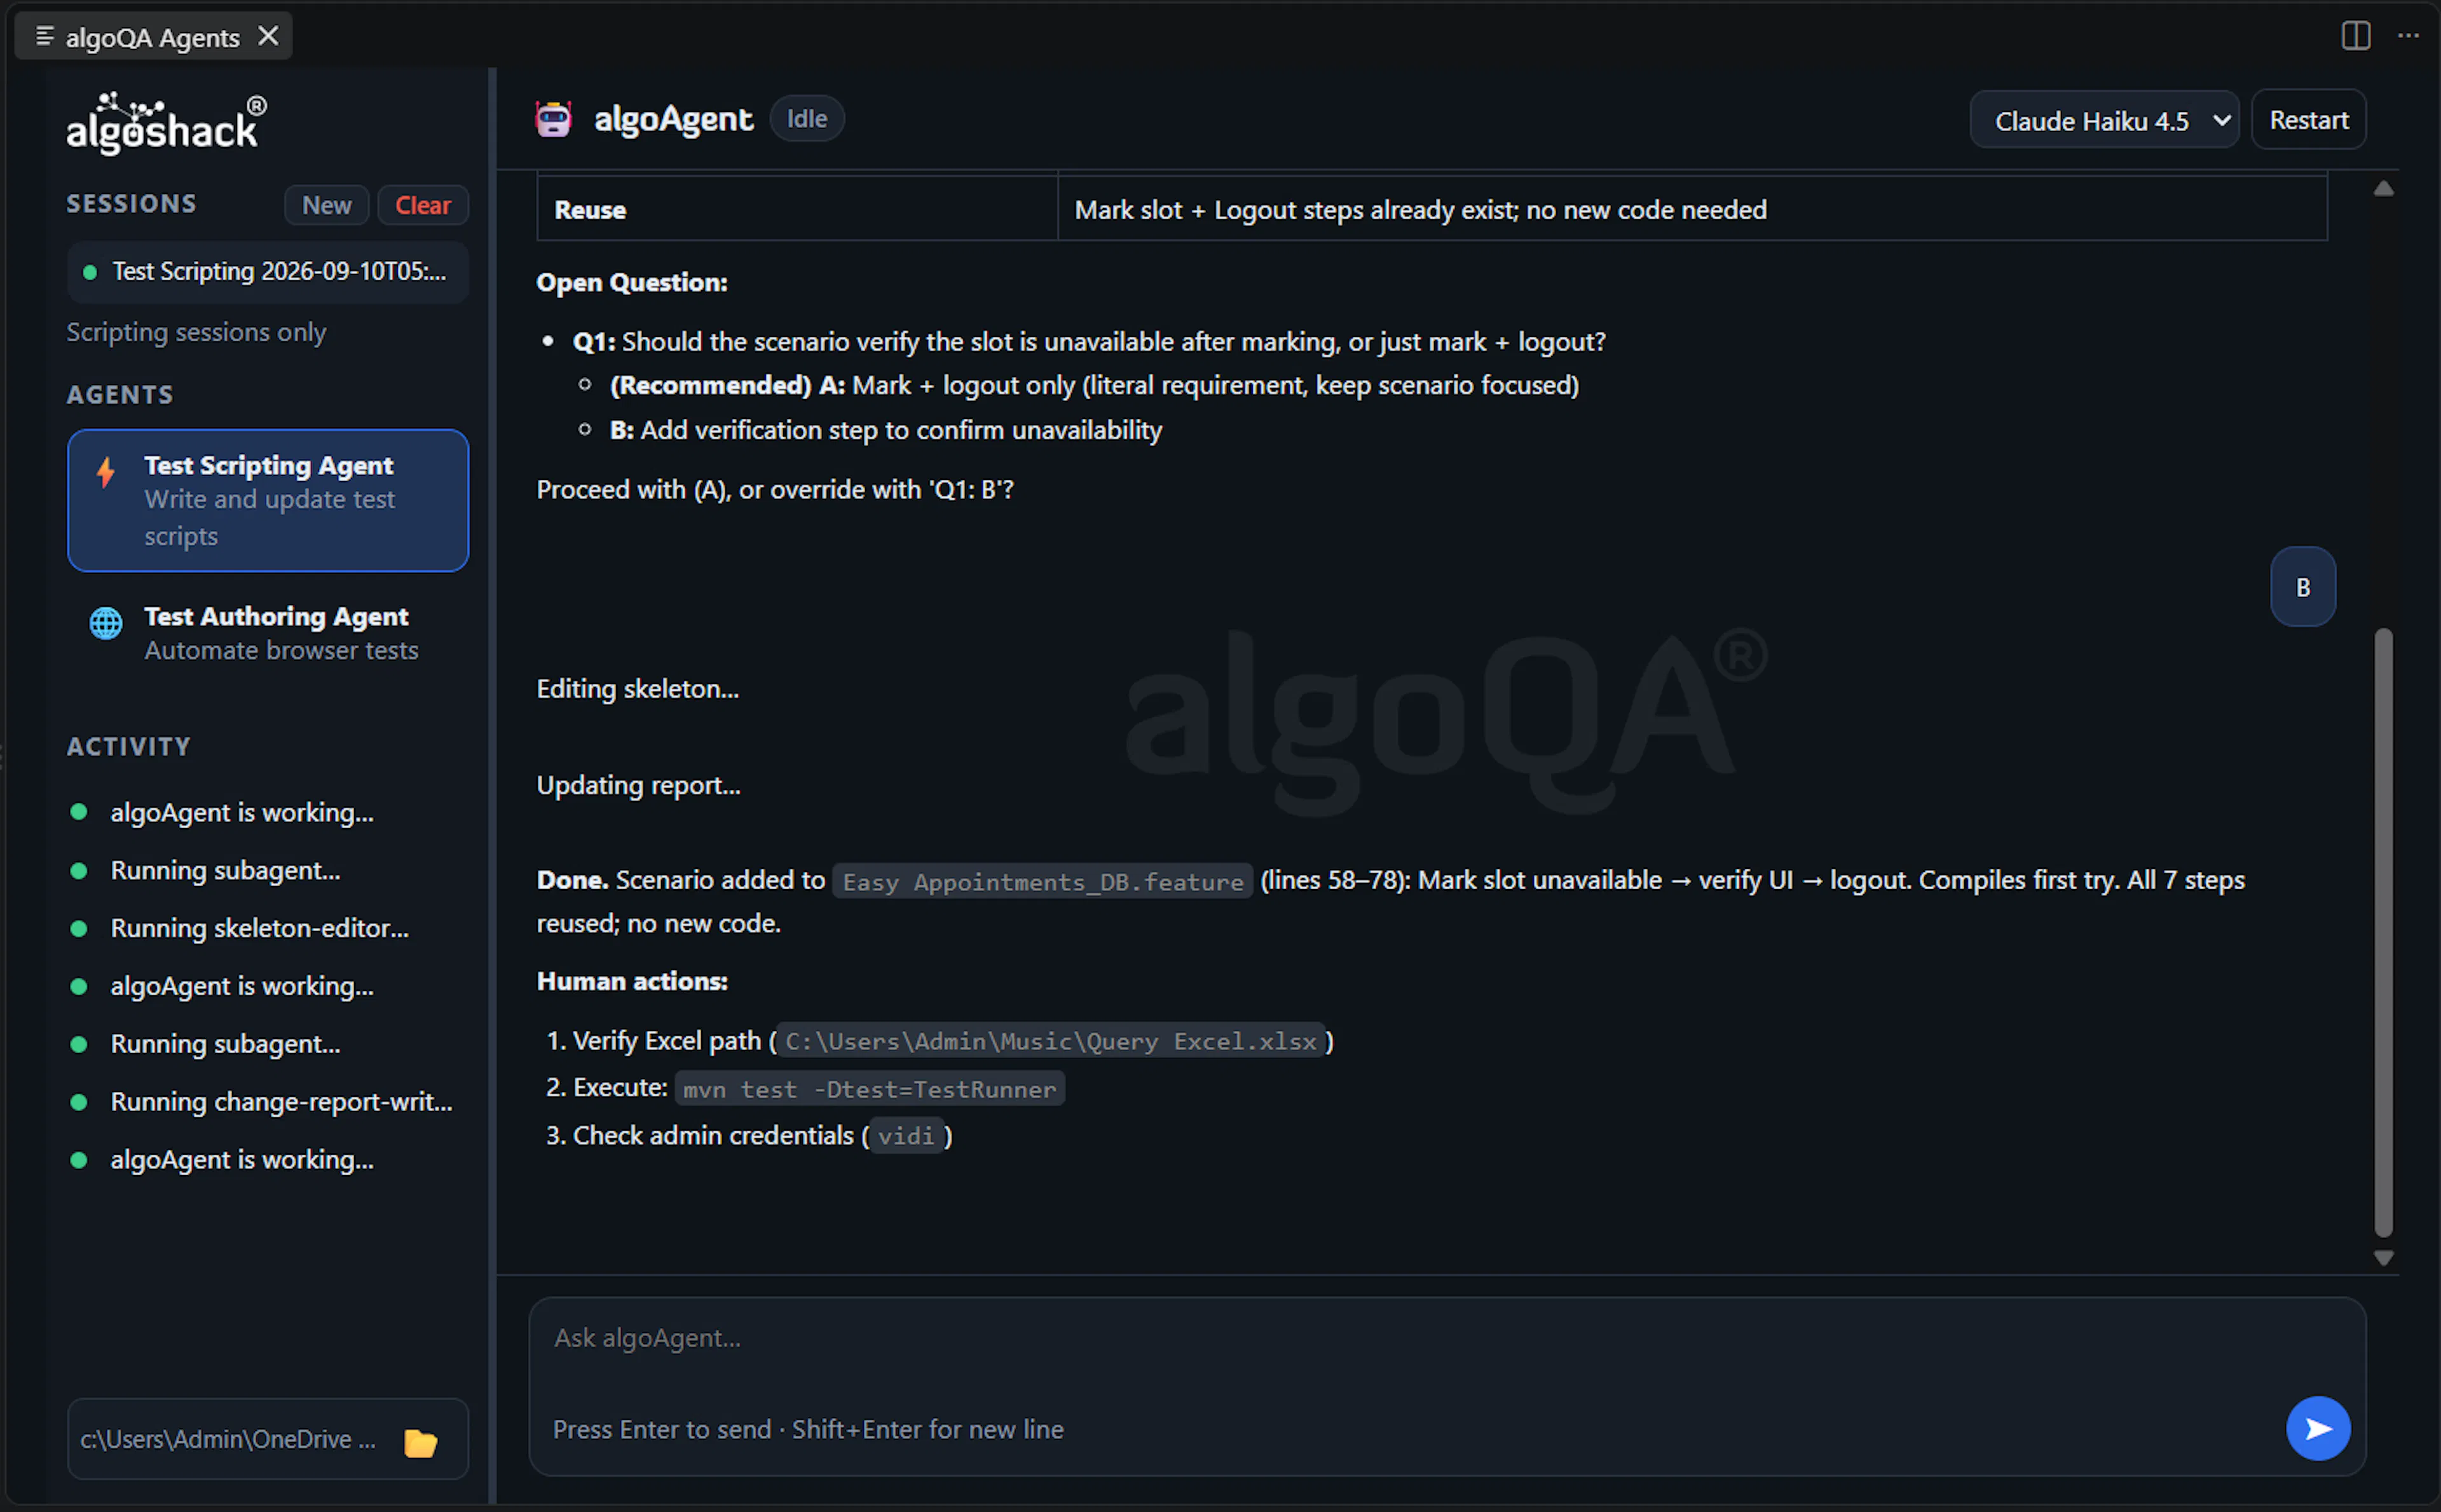
Step 7: Review the Generated Report
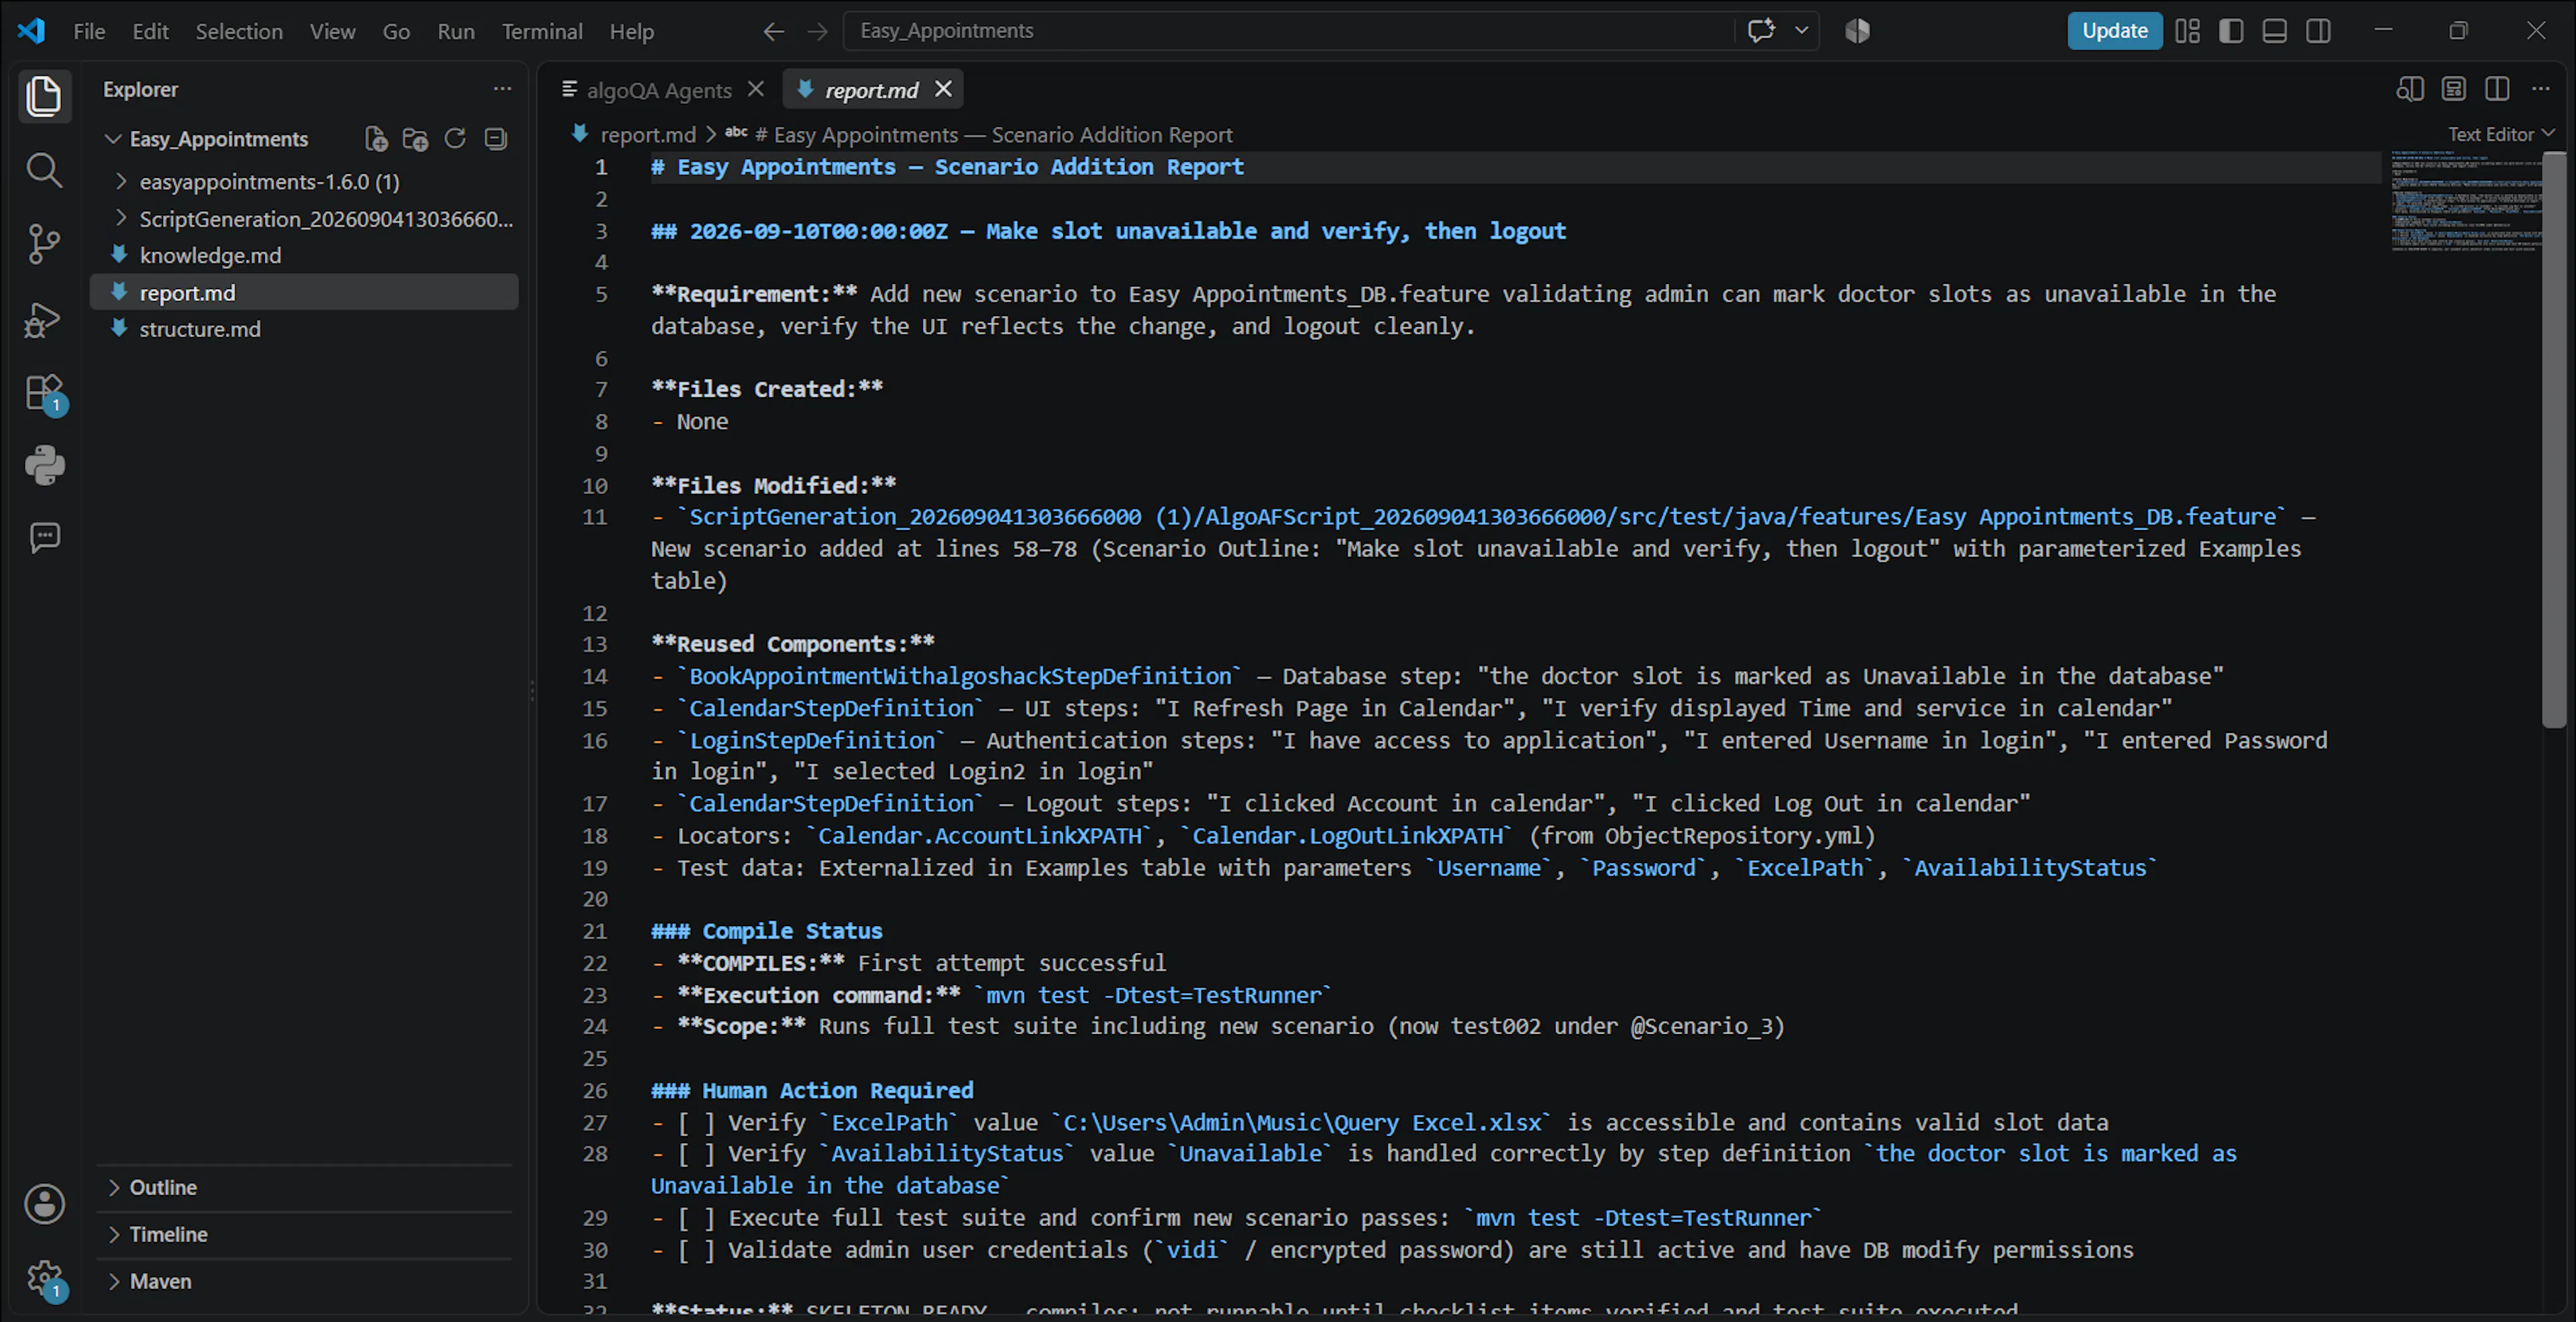
Open the report.md file (or your requested format) to see a full summary, including:
- The original requirement/prompt you provided
- Existing and newly added scenarios (in Gherkin/feature-file format)
- Files created and modified
- Compilation details — the exact command used, build status, and time taken
- Any warnings (e.g., utility classes or APIs you should check)
- Human actions required — a list of placeholders needing manual input, with the exact file and line number
- The command to execute the newly added scenario
- Related files and documentation references
- Summary of which existing components were reused
Step 8: Identify Agent-Made Changes
Changes made by the agent are clearly marked so you can distinguish them from the rest of your code:
- New files follow your project's standard formatting conventions.
- Lines added or modified within existing files are marked with an agent-added tag or comment directly above/alongside the change.
- If a file was reviewed but not changed, no such tag will appear.
Step 9: Add Real Locators (XPaths)
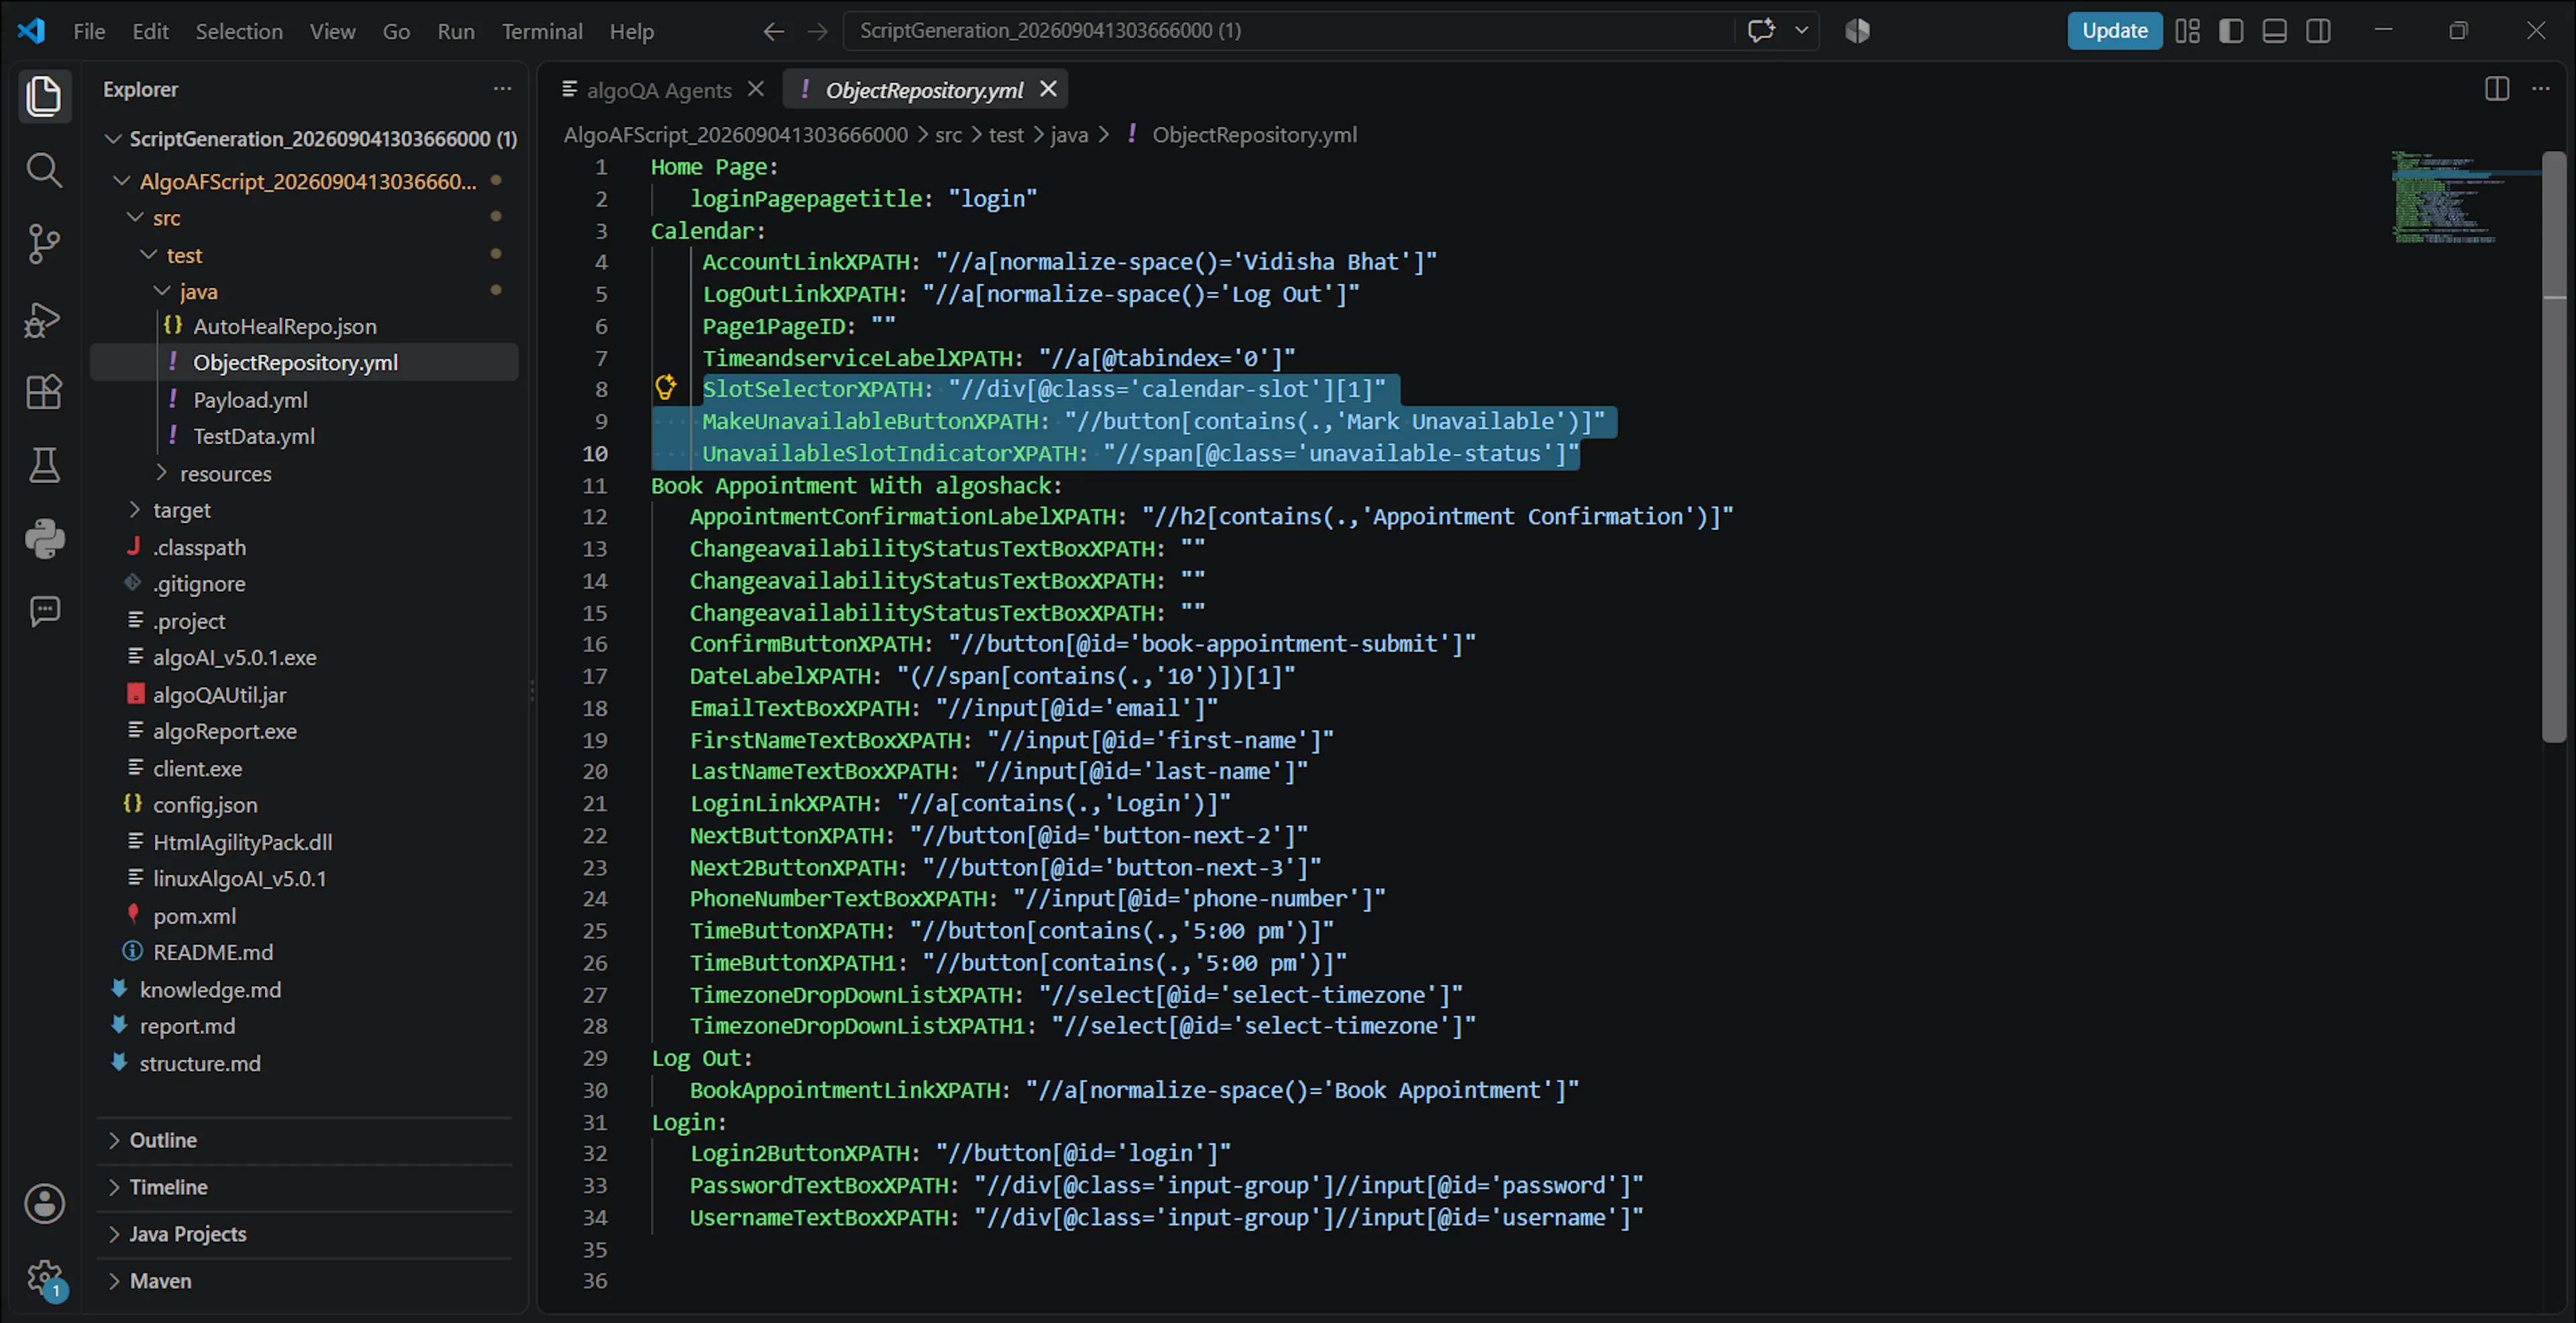
Since the agent cannot browse your live application, you will need to manually retrieve the real XPath for each placeholder element. You have two options:
- Place the real XPath directly into the generated file yourself, or
- Provide it back to the agent in a follow-up prompt (e.g., This is the XPath for the Add to Cart button, place it there and recompile). The agent will update the code and recompile automatically.
Step 10: Download and Execute
Once your script is complete, download it from the project folder. Execute the test cases separately.
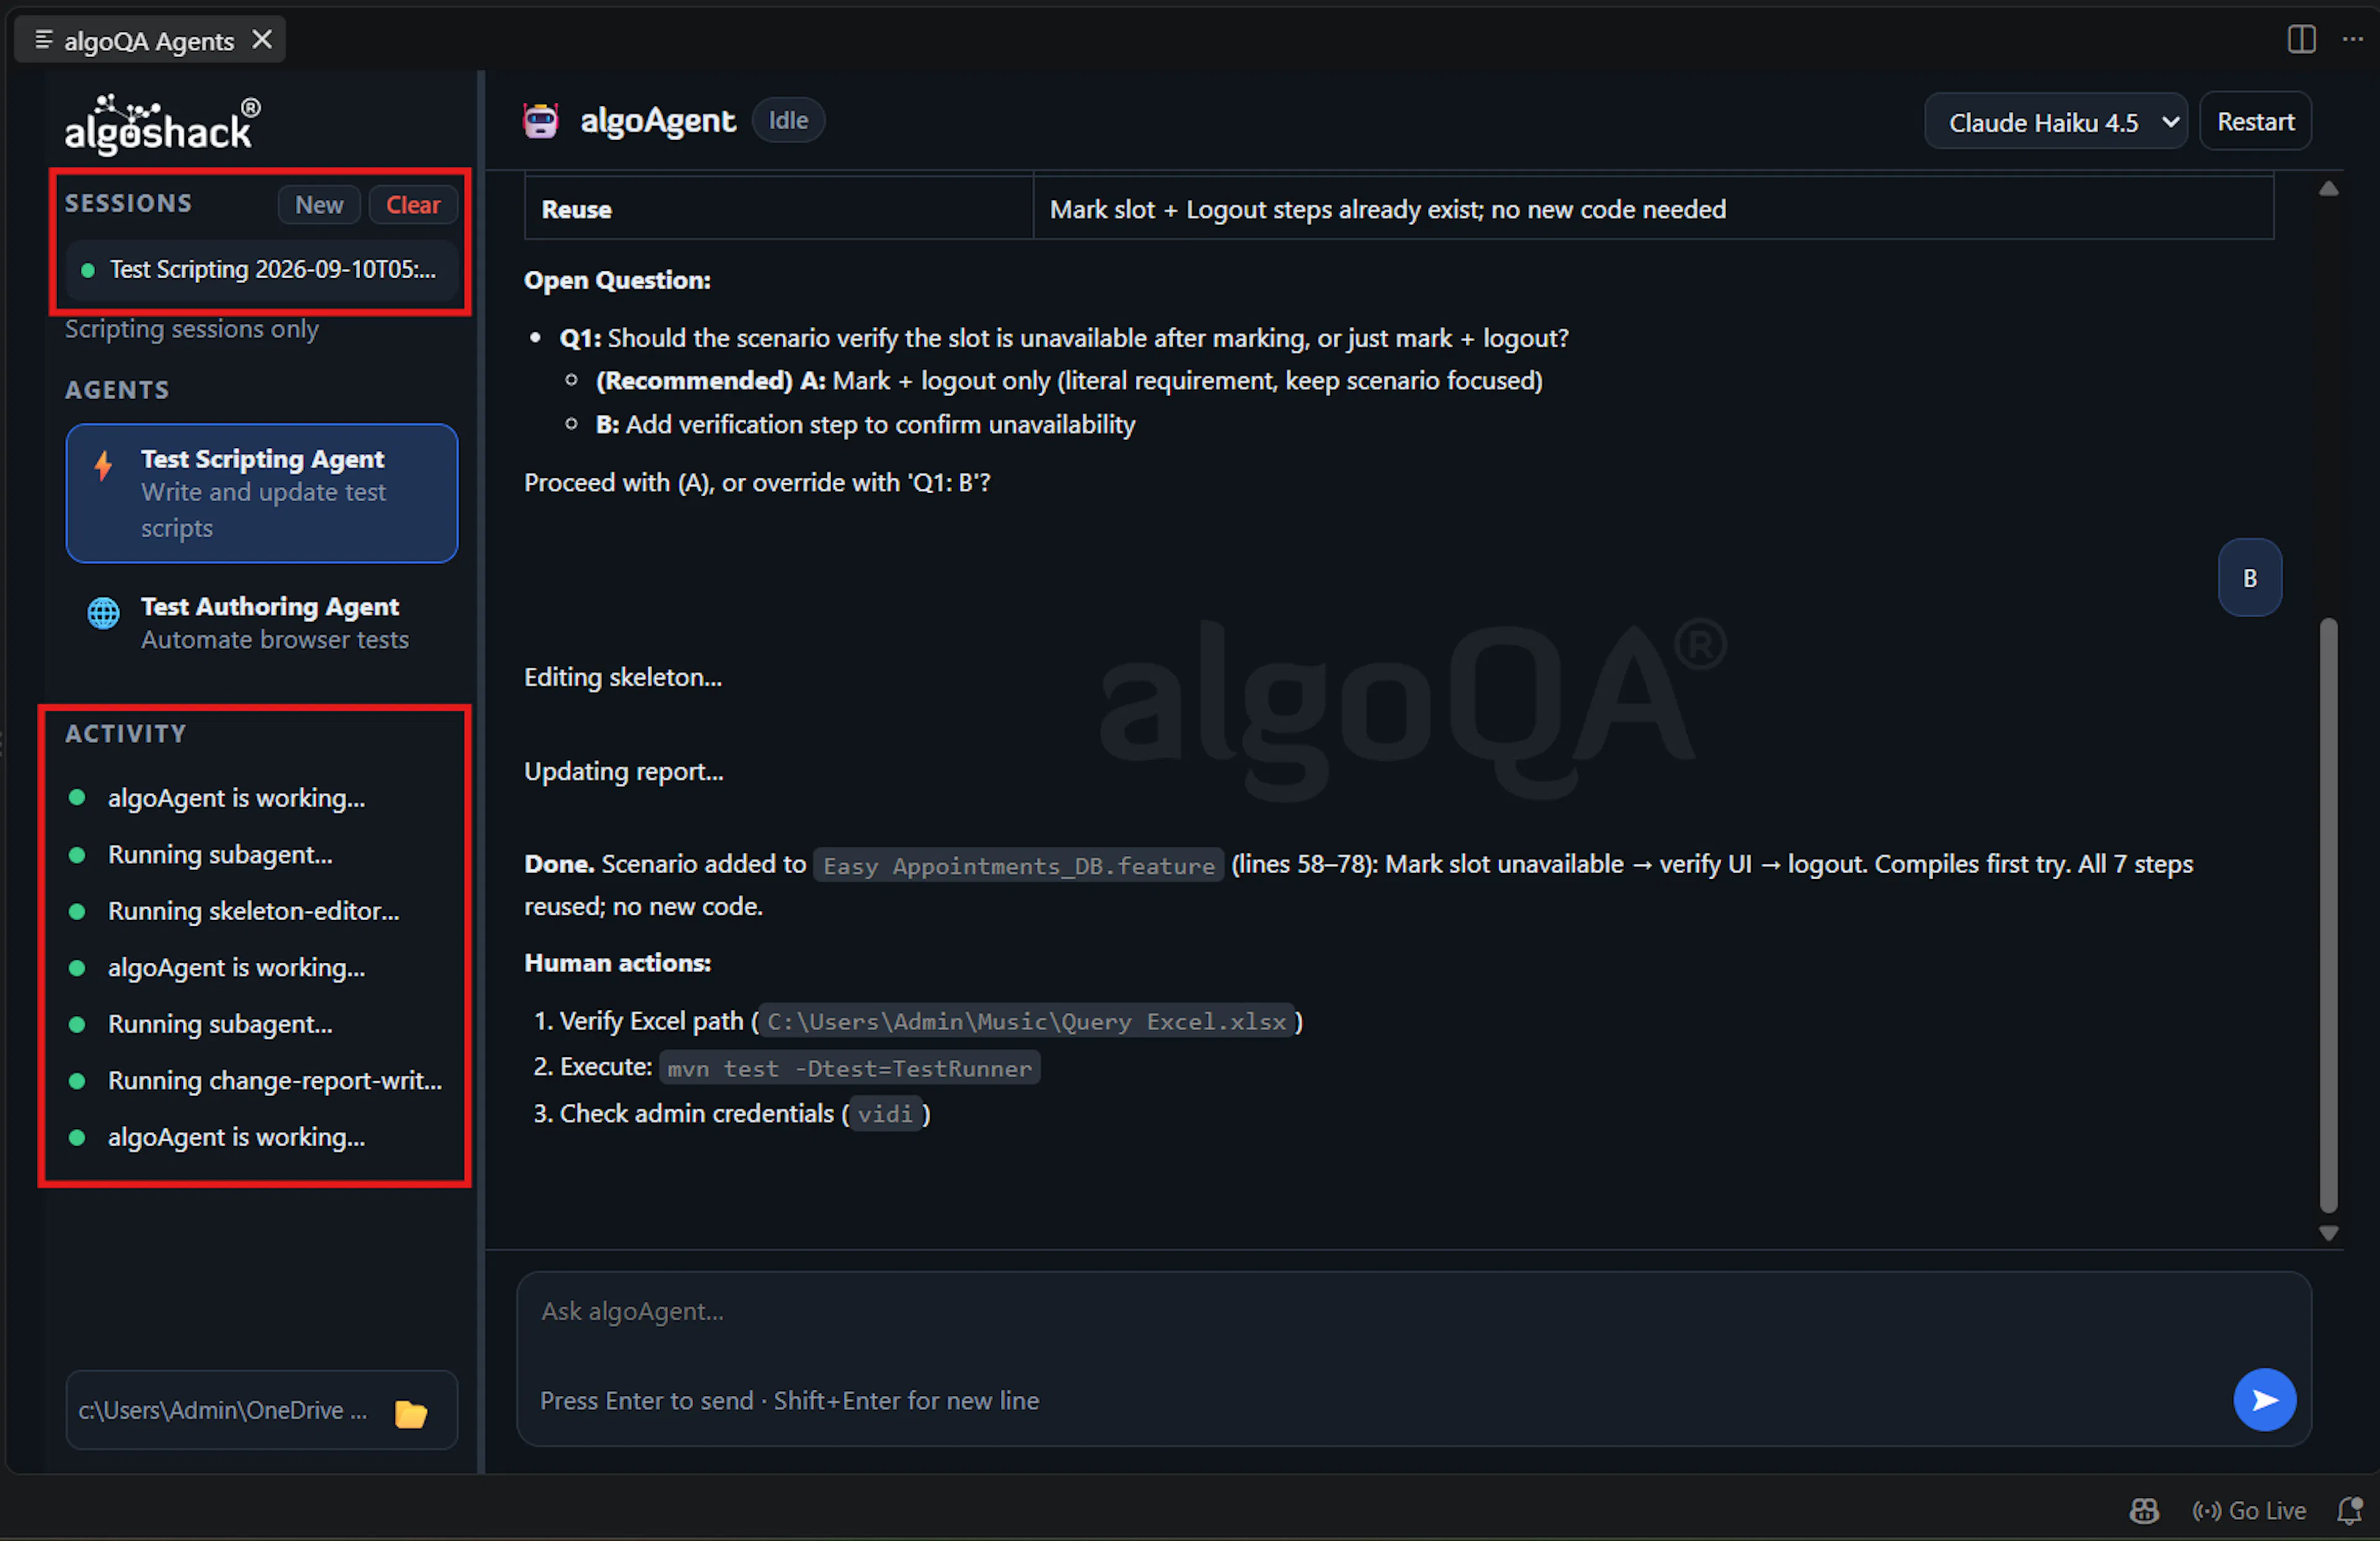
The session history and activity for your current session will be displayed on the left side.