JIRA Defects To Test Case Generation
This article provides detailed information on how to generate test cases using JIRA defects.
How it Works
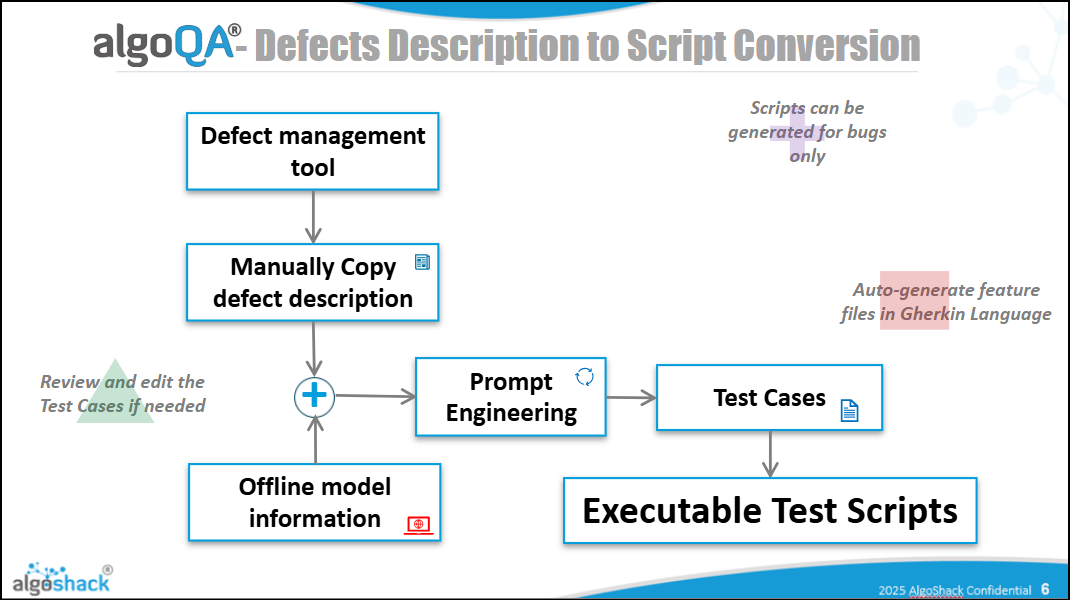
- Integrate JIRA with algoQA.
- Once integrated, all defects logged in JIRA will appear on the Prompting screen.
- Select the relevant defects and click on Generate to create test cases.
- The description of each defect will be used as the prompt for test case generation.
- Output: Test cases are generated automatically — even before the bugs are fixed.
How to Generate Test Cases using JIRA Defects
To generate test cases using defects logged in JIRA, start by creating a new project (see Creating a Project). Once the project is created, add nodes to the canvas as needed. Clicking on a node opens its configuration panel, where you can add features and controls. From there, navigate to the Prompting screen by selecting the option from the top menu. Toggle the "Would you like to generate test cases based on Failures" switch, then enter the Defect ID, Title, and a relevant prompt in the "Enter Your Prompt Here" field. Click on "Generate Test Cases" to generate the test cases, which will then be available for use even before the bugs are fixed.
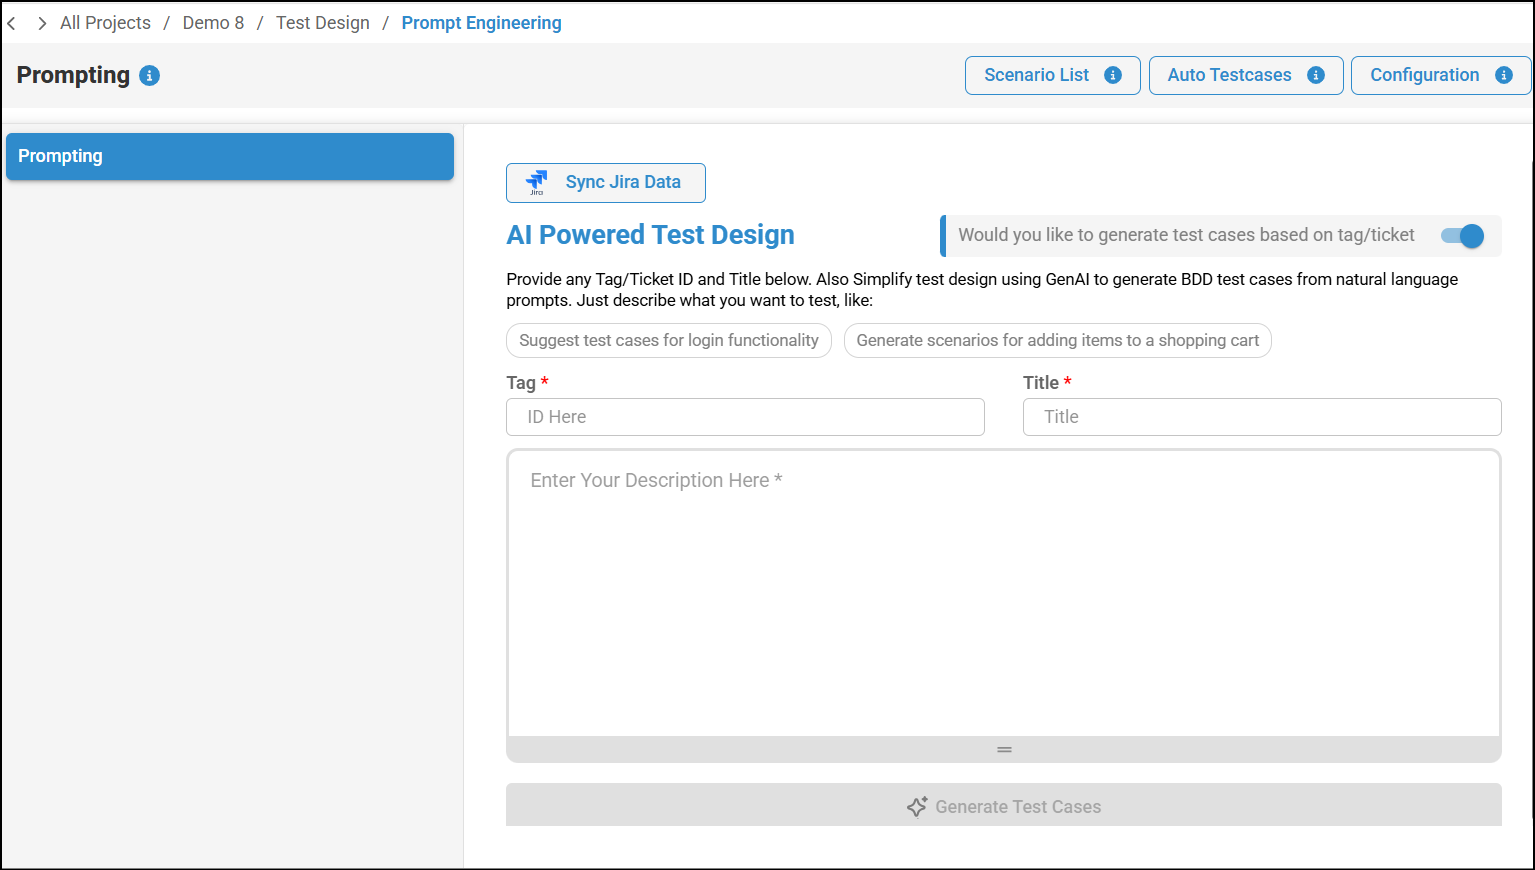
To fetch the complete list of defects from JIRA and generate test cases, click on "Sync Jira Data" to begin the integration process.
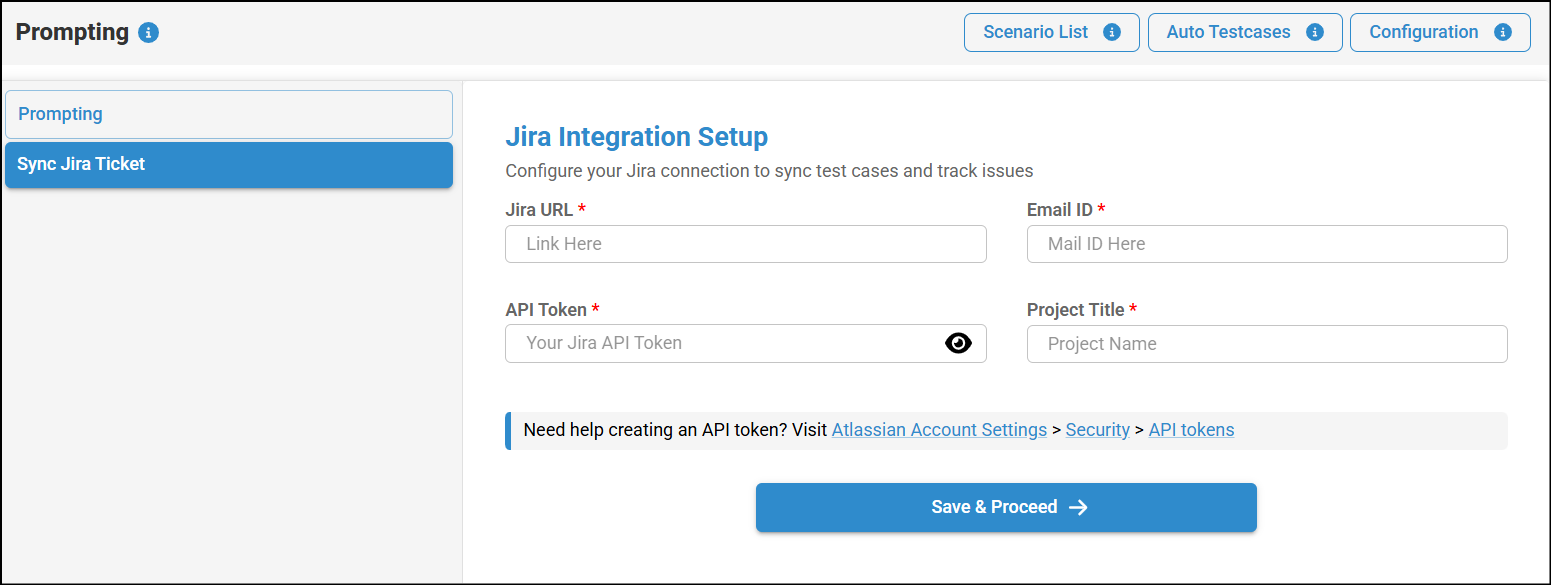
You will be directed to the Jira Integration Setup screen, where you need to enter the Jira URL, Email ID, API Token, and Project Title, then click Save & Proceed.
Note: This setup is required only during the first-time integration. For future use, the saved information will be available under the Sync Jira Bugs Report tab.
The entered details will be securely stored in our database, and you will be redirected to the JIRA Defect List, where all synced bugs will be displayed.
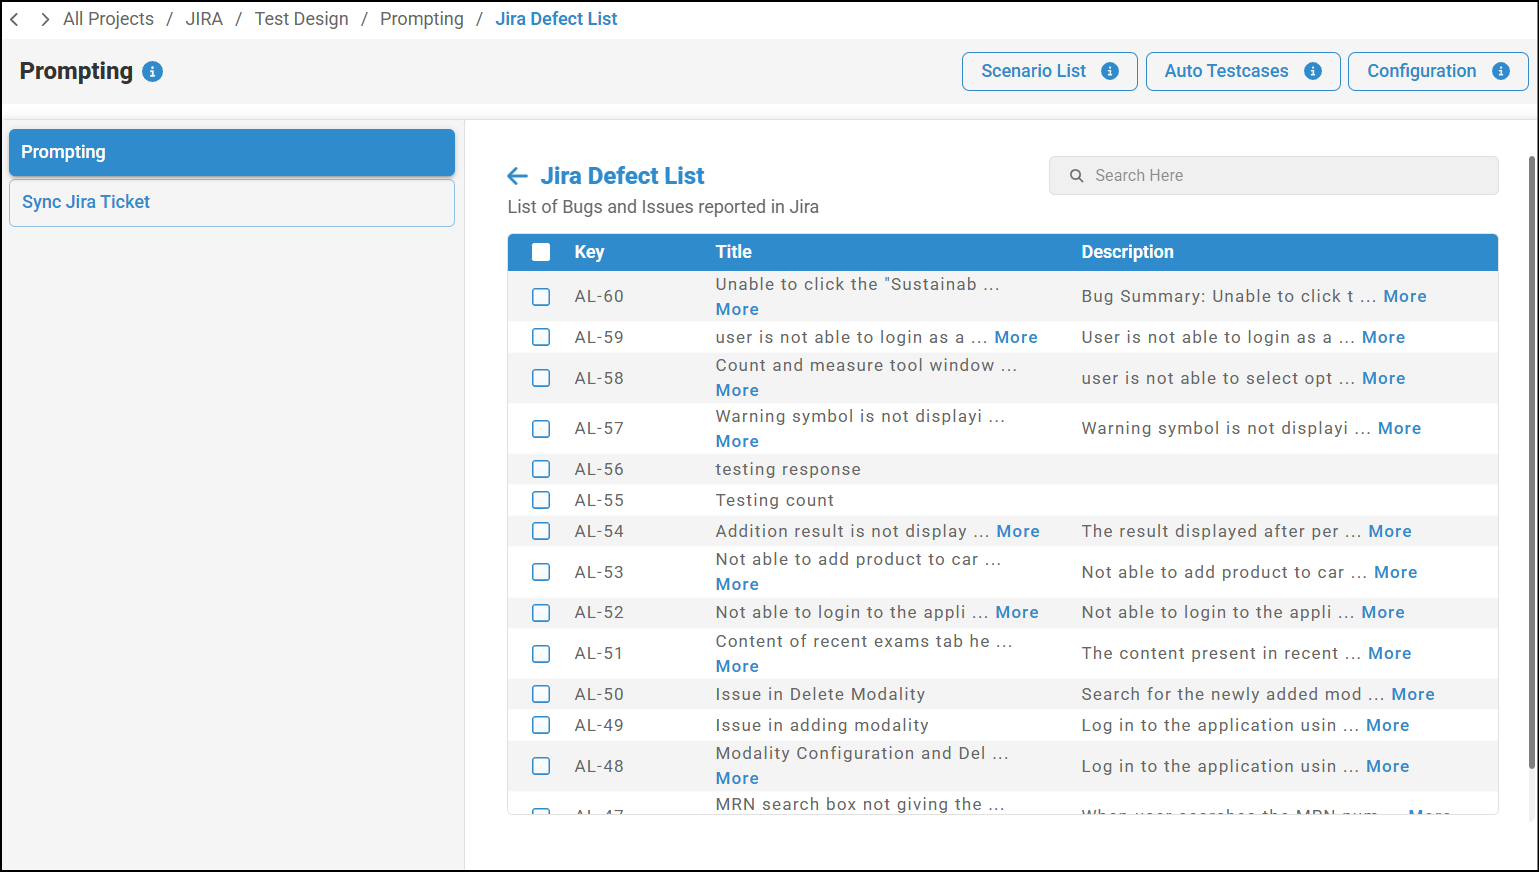
Each entry will include the ID, Title, and Description of the defect. To generate test cases, simply select the checkbox next to the desired defect(s) and click on Generate Test Cases. The corresponding scenarios will then be generated. You can use the search field to search defects by Defect ID, Title, or Description.
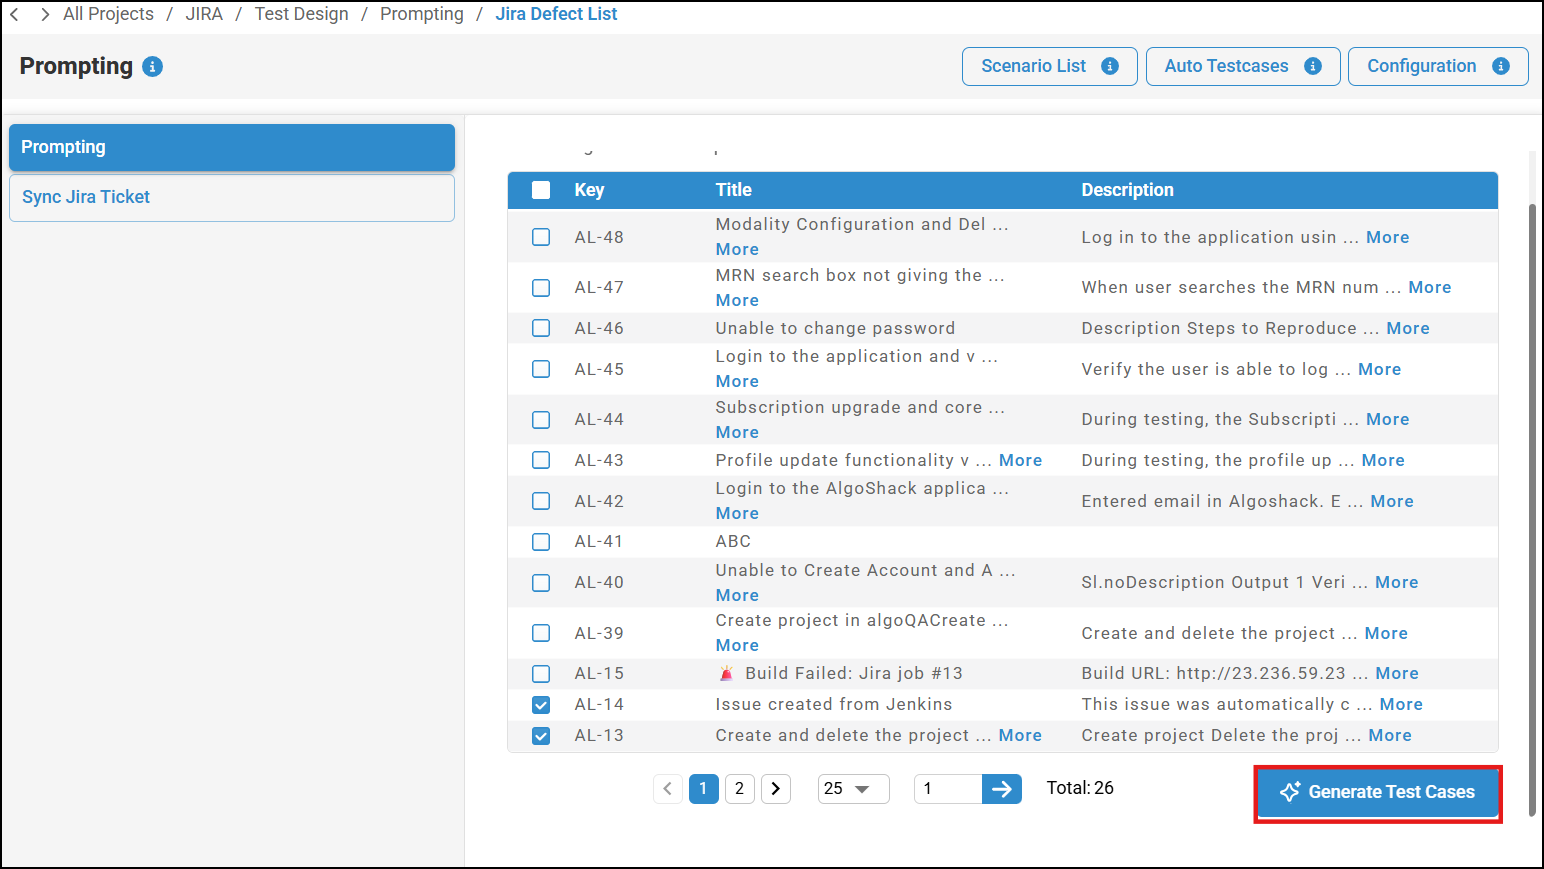
Tip: You can navigate to different pages using the Pagination functionality at the end of the page.

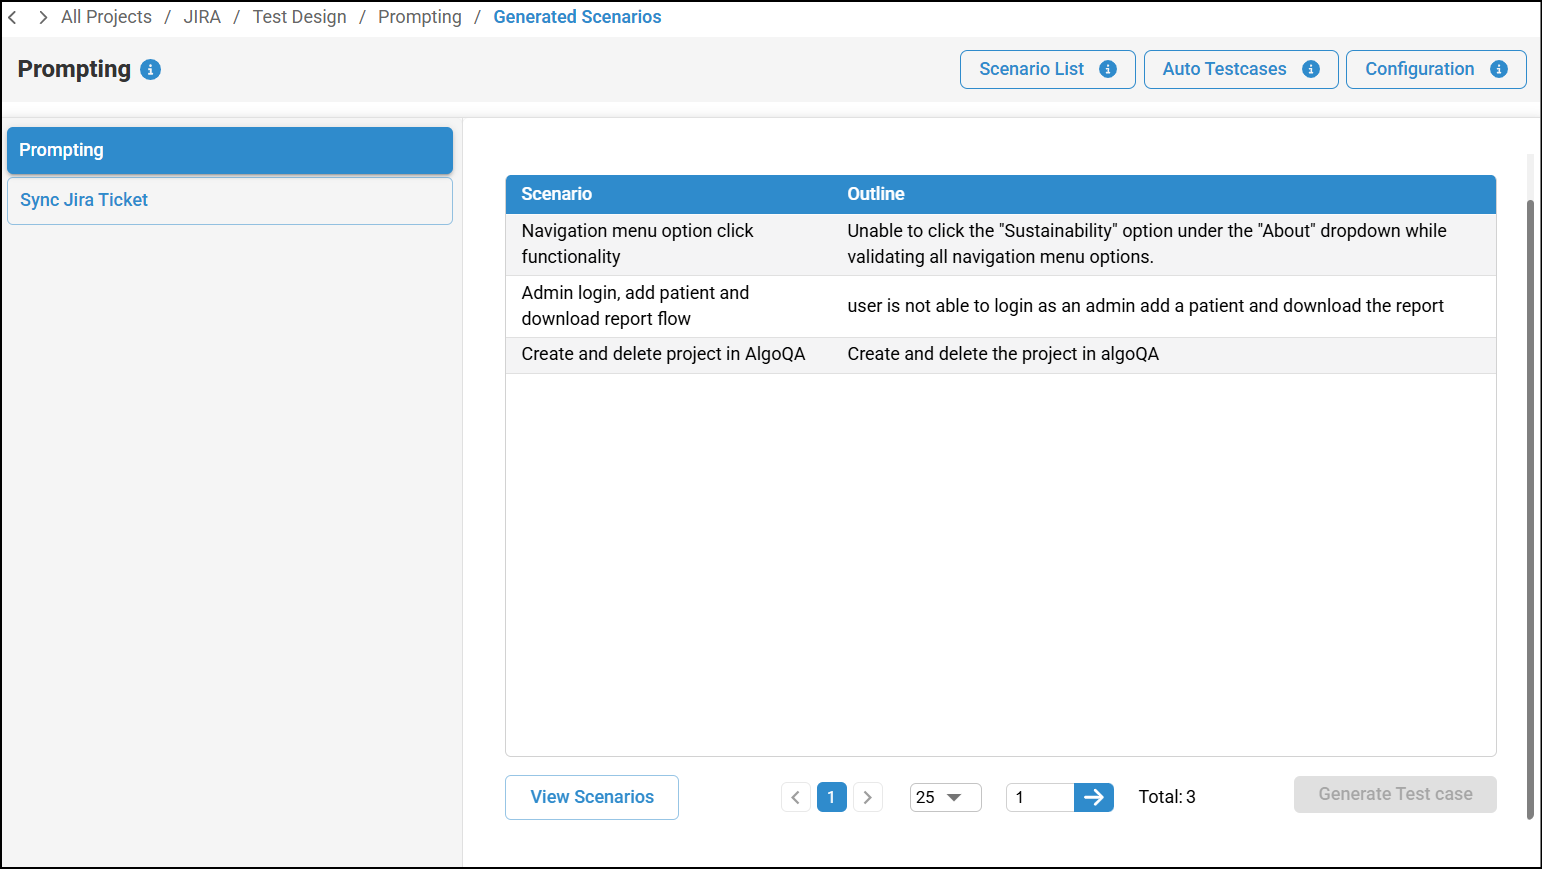
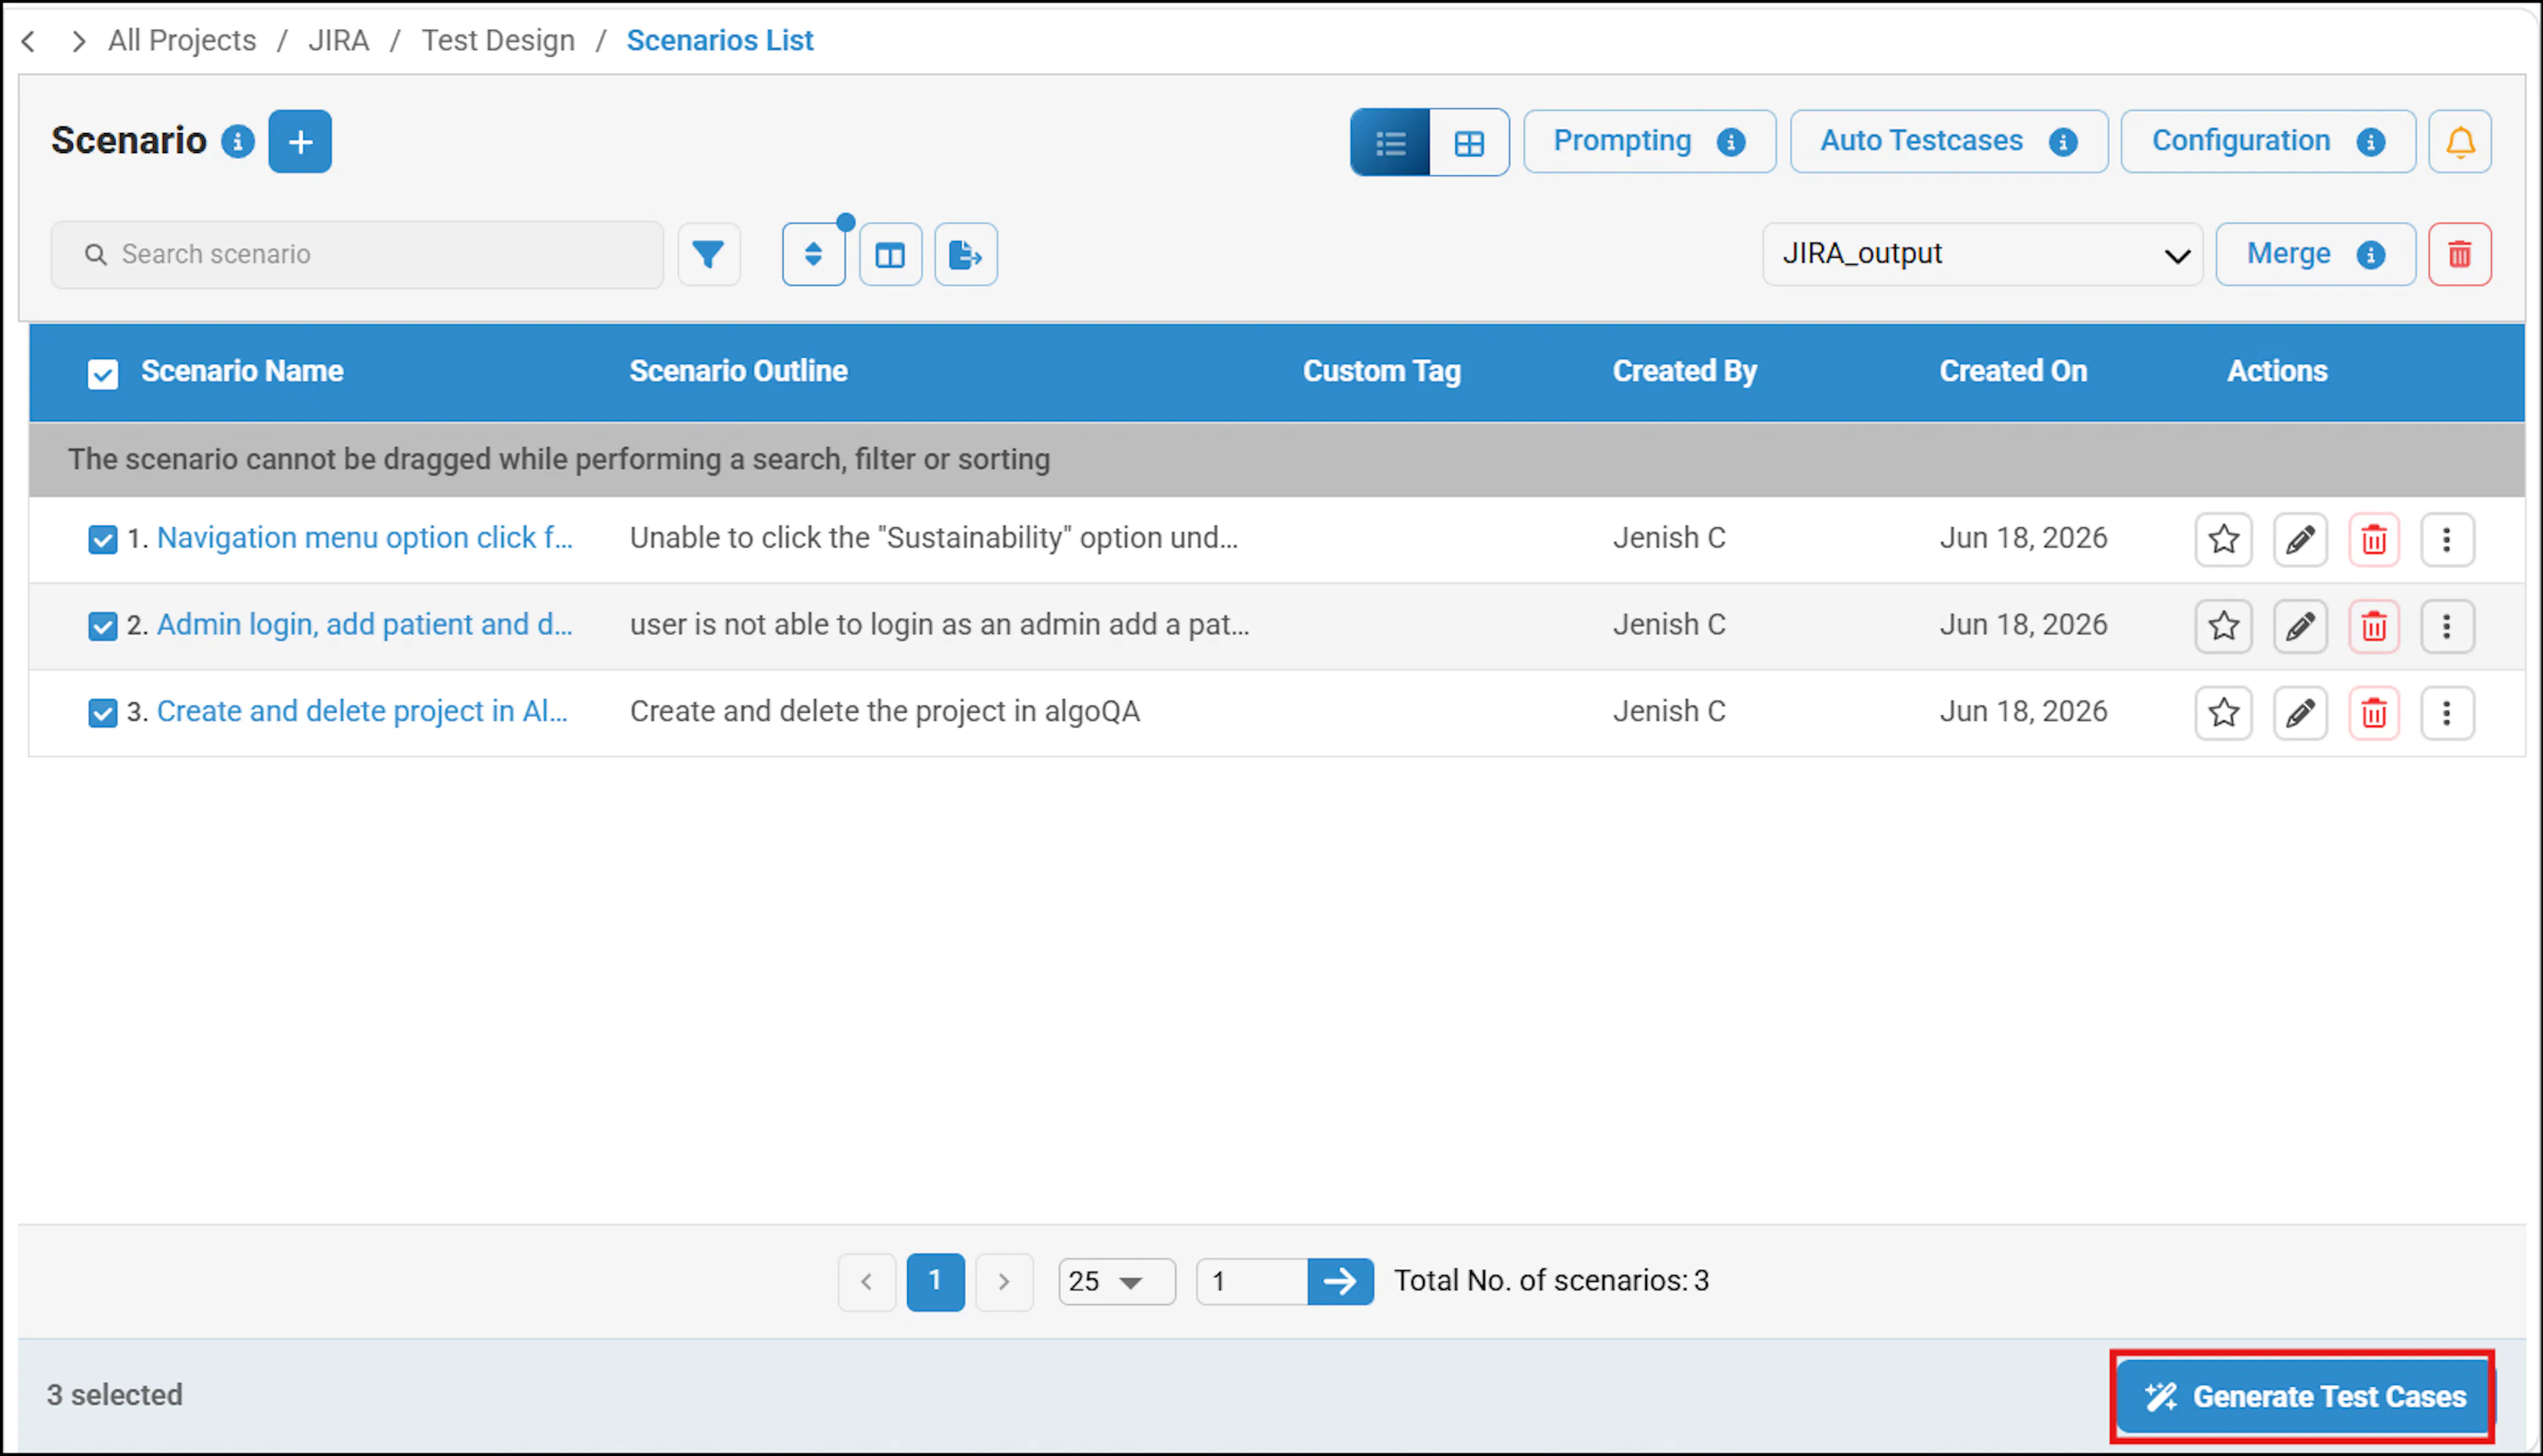
Click View Scenarios to review the generated scenarios. Once reviewed, click Generate Test Cases to generate the test cases.