
Merge Multiple Steps to One
Combine two or more scenario steps into a single step using the Merge Multiple Steps feature for inline and dataset merges. This article describes the Merge Multiple Steps feature and how to use it to merge scenario steps.
The Merge Multiple Steps into One Feature option is supported for Web automation using Java Selenium and Python Selenium, and for Desktop automation using the C# WinAppDriver framework.
How Merging Multiple Steps Works
Merging steps means combining two or more separate steps into a single, more efficient step. This is done to:
- Simplify processes
- Reduce time or complexity
How To Use Merge Multiple Steps Feature
There are 2 types of merge: inline merge and dataset merge. To merge steps within the scenario, perform the following:
-
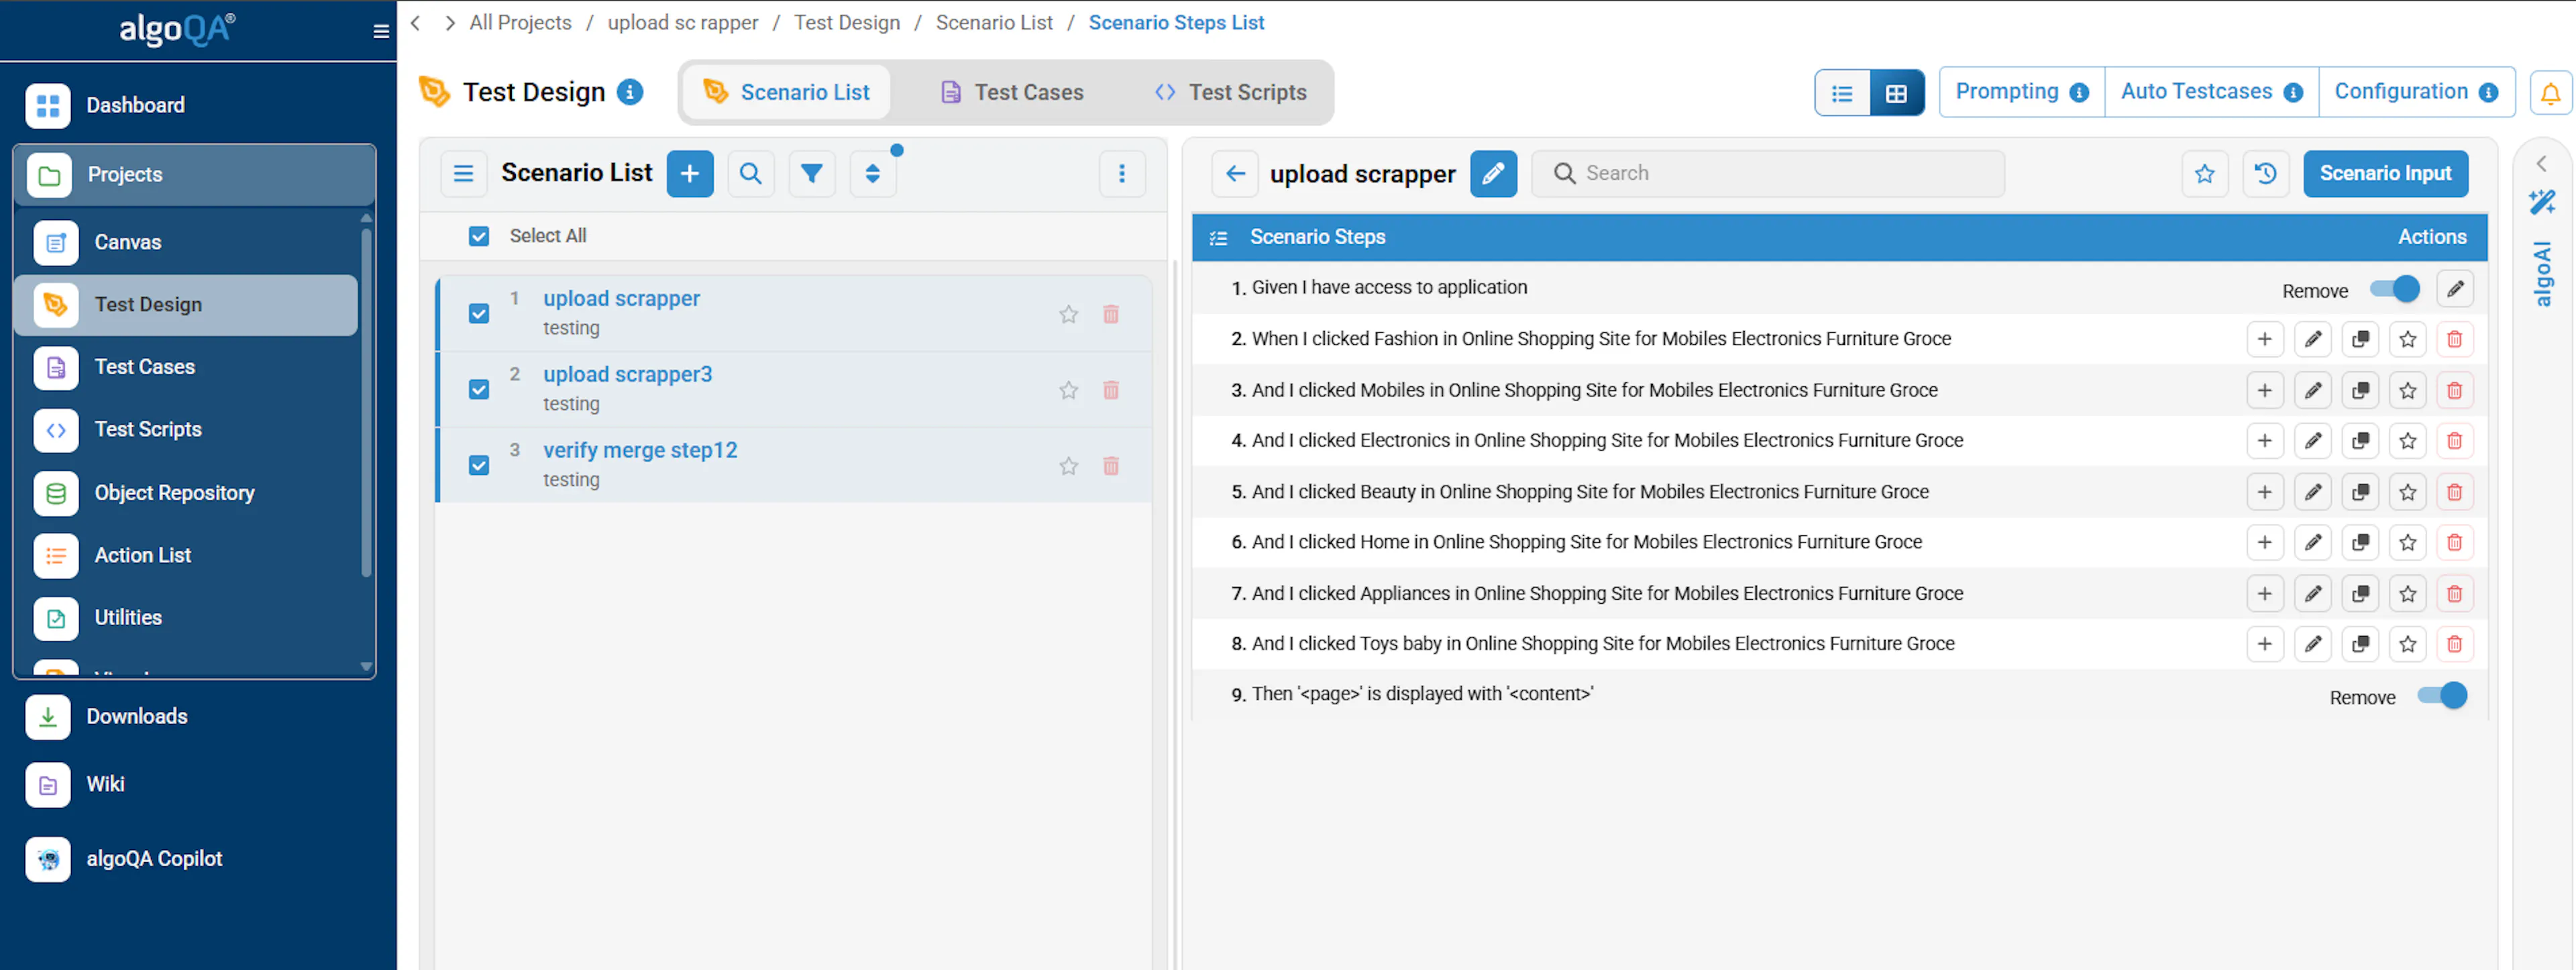
Click the Edit icon next to the recorded scenario in scenario list screen to view the Scenario Steps list.
-
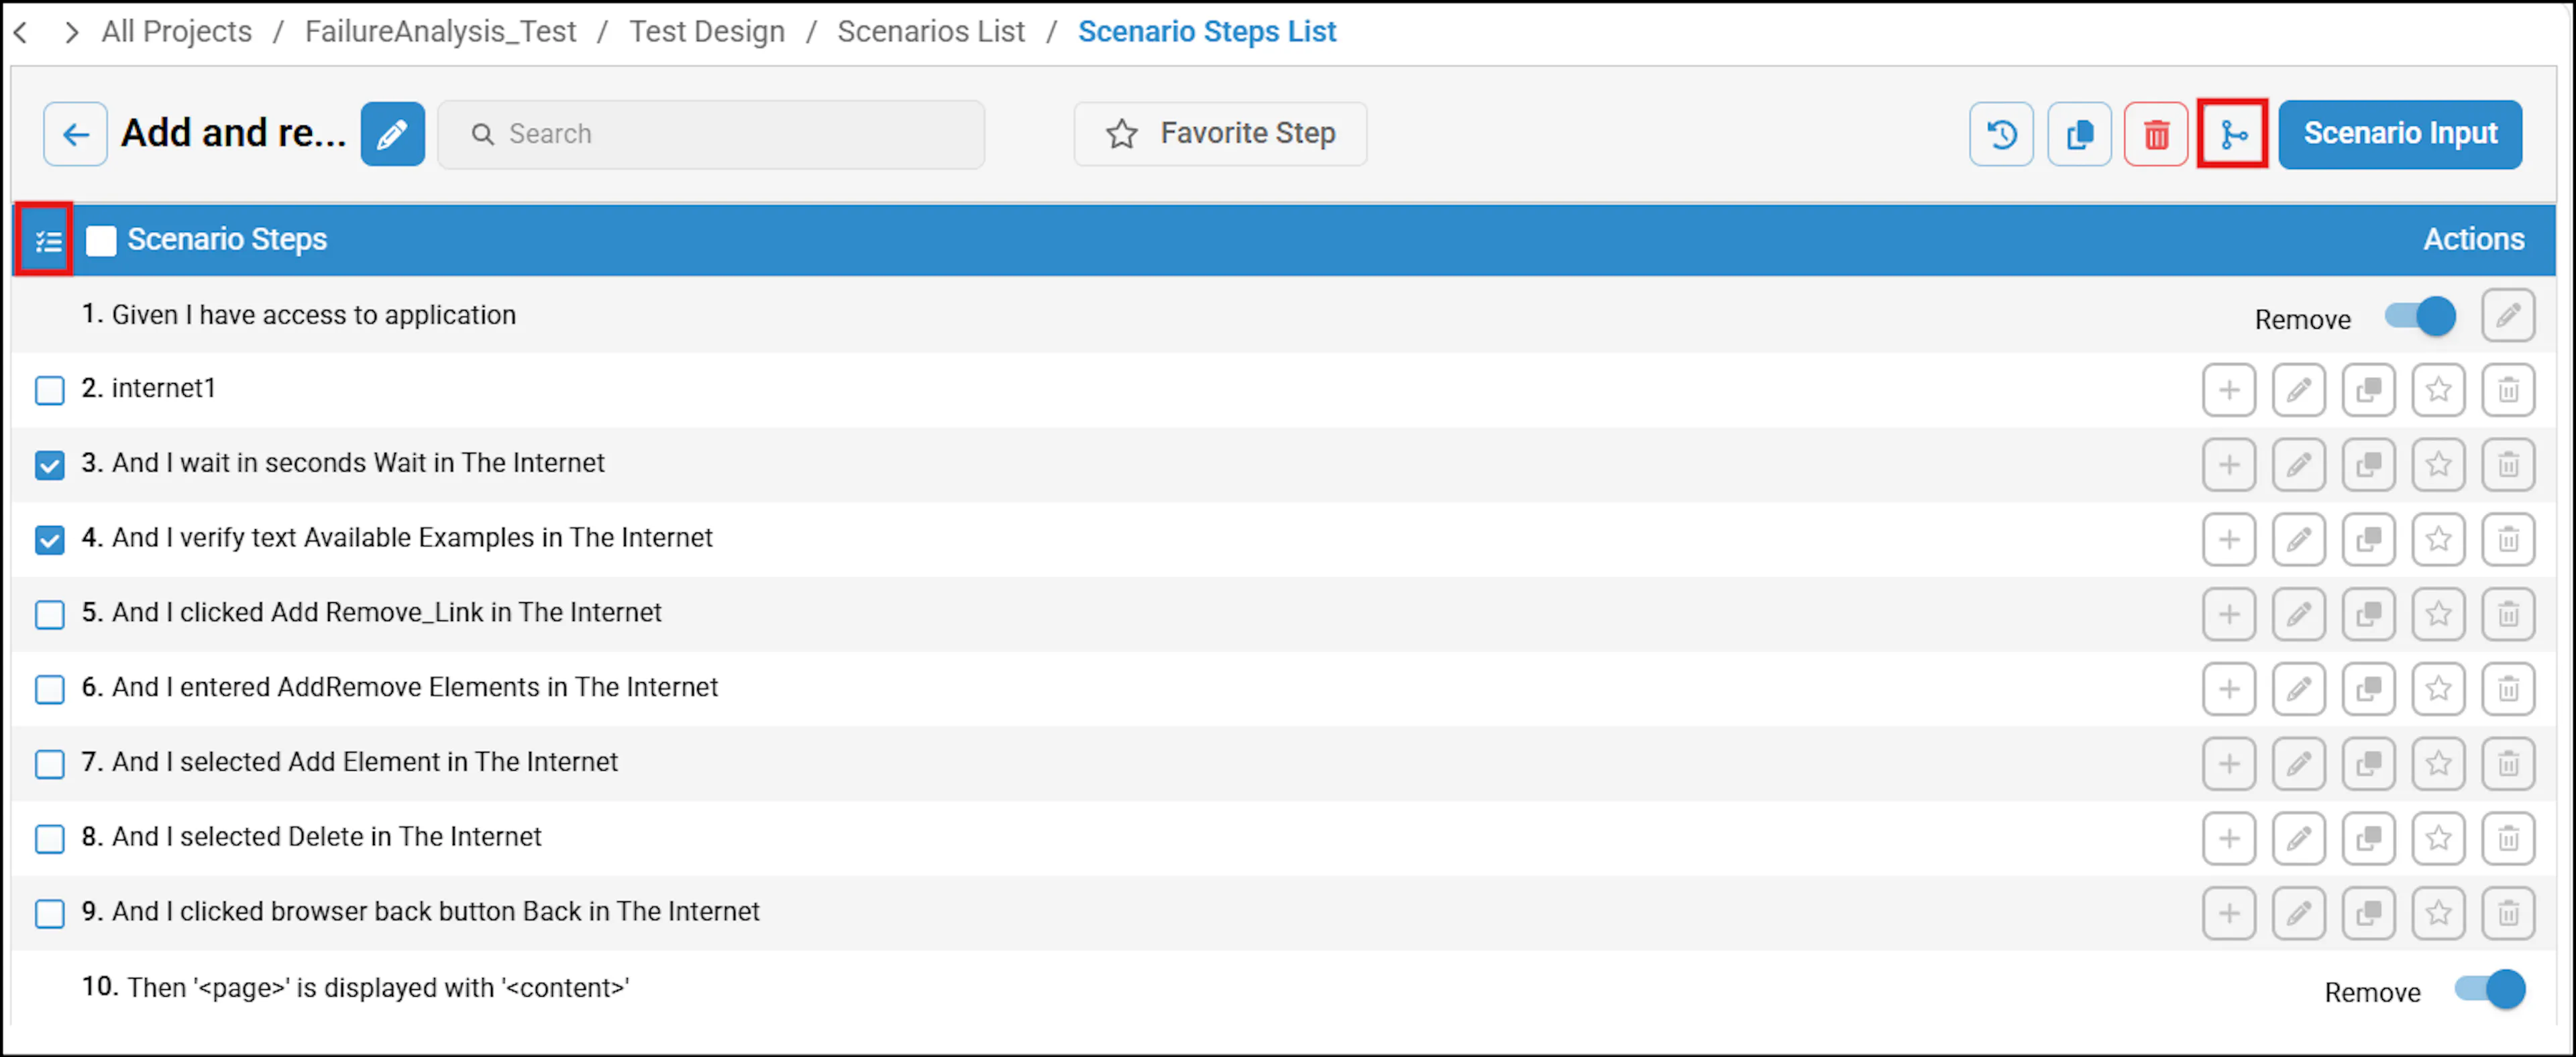
Click the Select Steps button to enable the checkboxes beside each step.
-
Select the steps you want to merge and click the Merge Steps button.
By default, the Studio View is displayed in Test Design screen. If needed, you can toggle to List View.
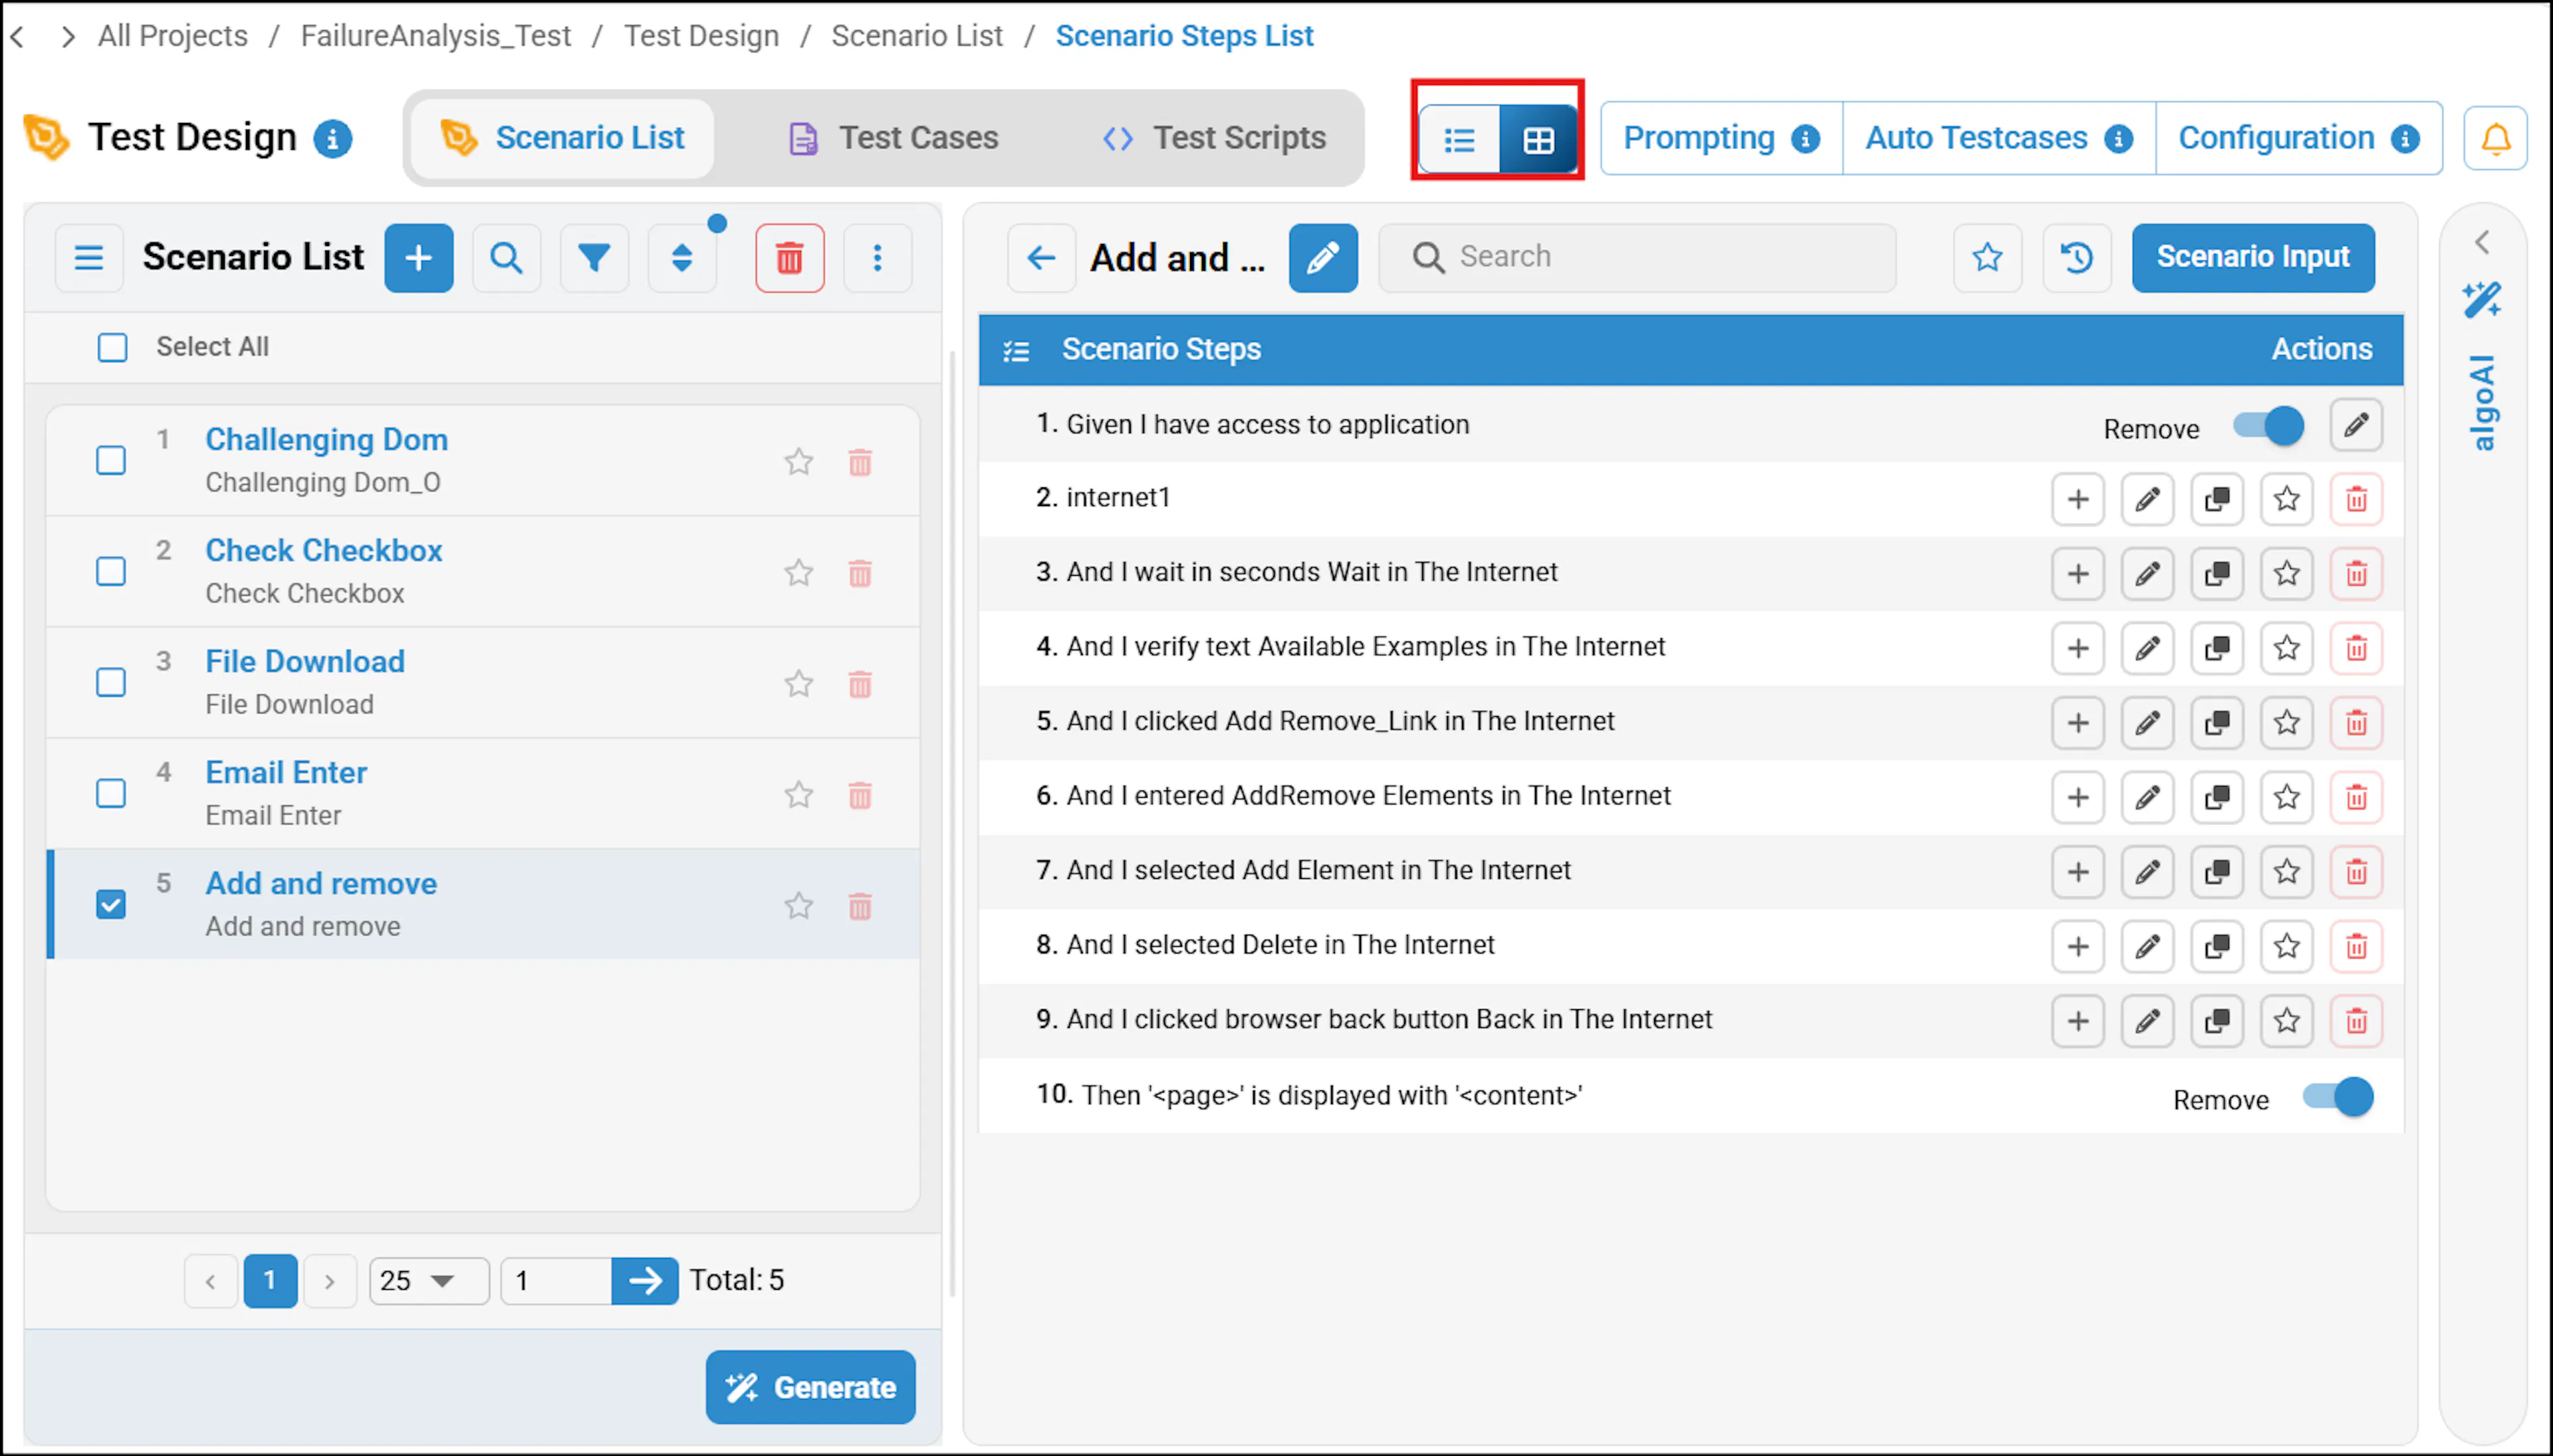
In Studio View
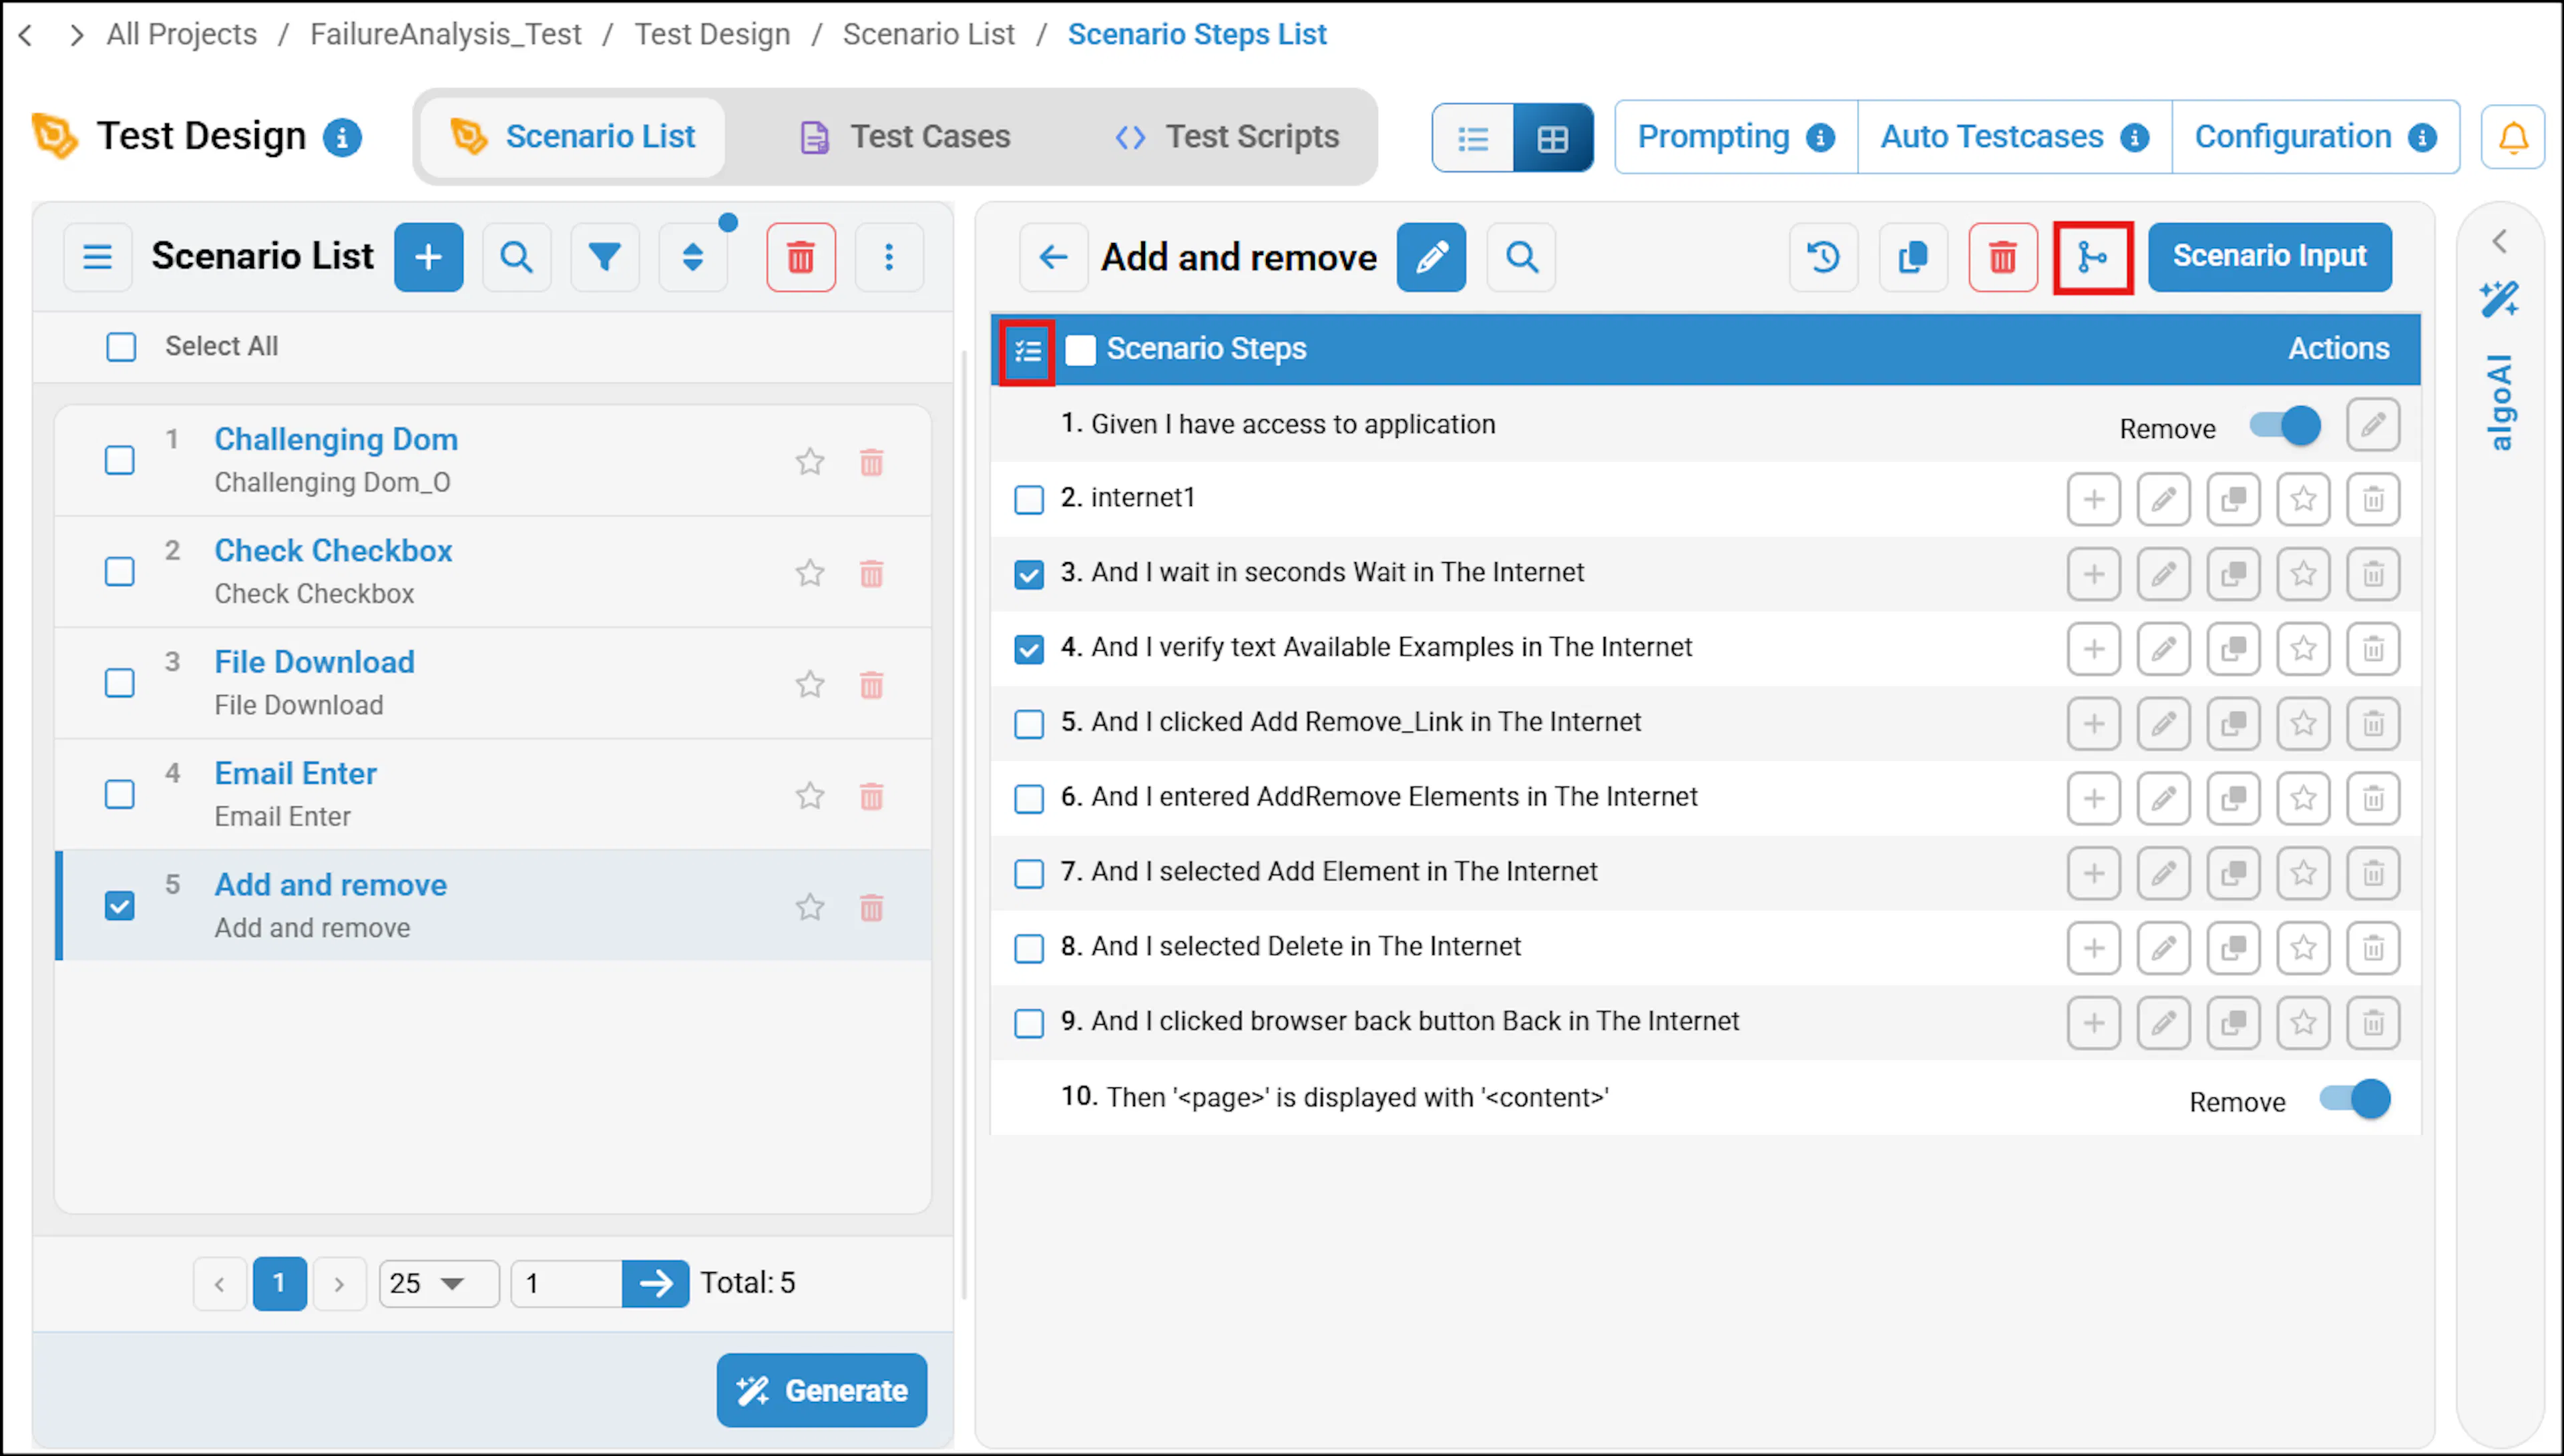
In List View
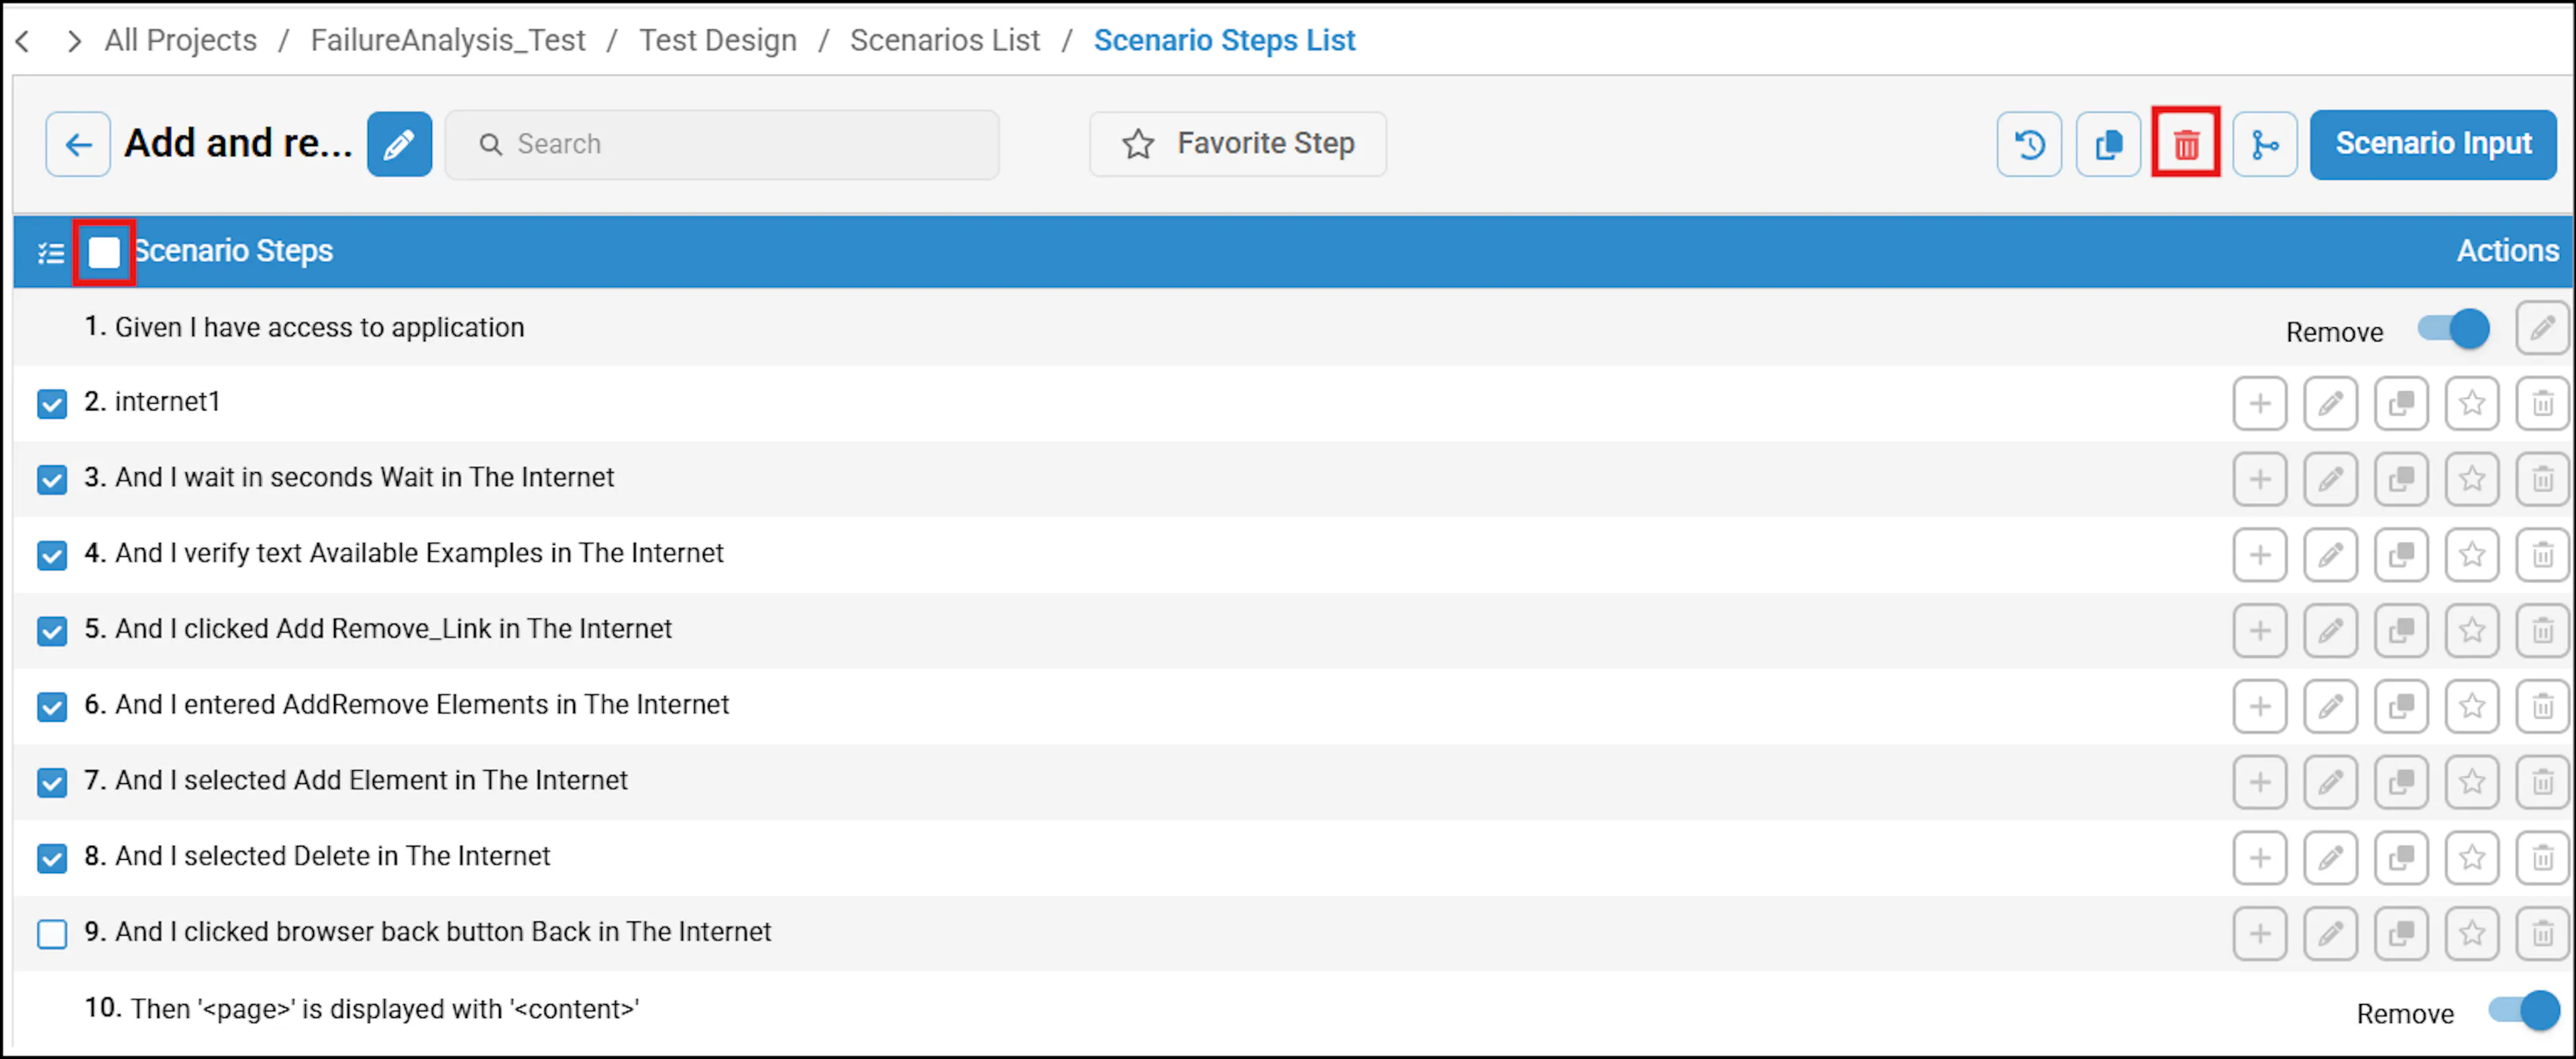
After selecting Select Steps, you can use Master Select to select all steps at once. However, deleting all steps is not allowed because at least one step is required in the scenario steps list, so the delete icon will be disabled. If you unselect one step and then click the delete icon, a confirmation pop-up will appear asking "Do you want to delete multiple scenario steps?". Click OK to delete the selected steps at once.
Inline Merge
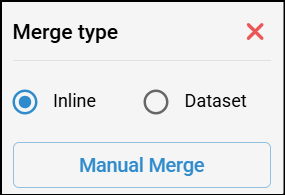
A pop-up will appear prompting you to choose between Inline Merge and Dataset Merge. Select Inline, then click Manual Merge to proceed.
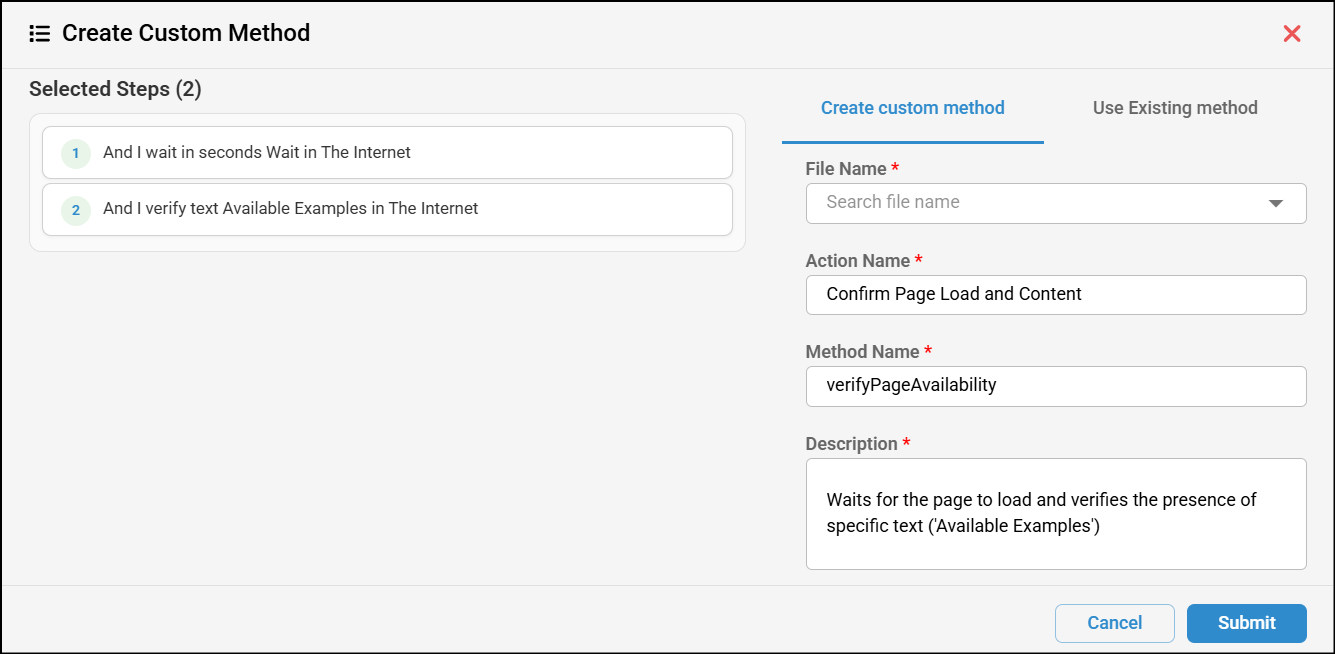
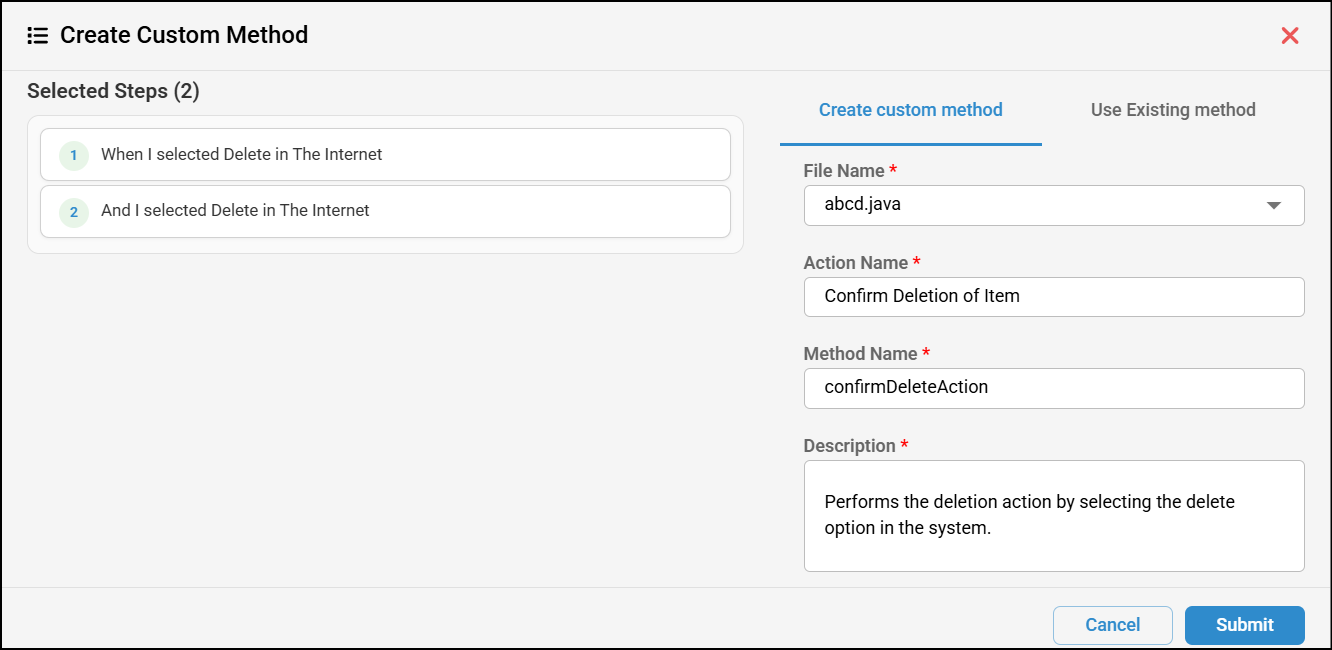
A pop-up will appear showing the selected steps. You can either click Create Custom Method to create a new custom method for these steps or choose Use Existing Method to apply an existing custom action.
A Verify action cannot be the first step in the scenario steps list. If you attempt to merge steps where a Verify action is first, a warning message will be displayed. Additionally, if there are multiple Verify actions among the selected steps, those steps cannot be merged.
How to create a new custom method in Merge Multiple Steps:
- Select Create Custom Method. The File Name will be filled automatically based on the selected language.
- Choose an existing file from the dropdown or create a new one.
- The Action Name, Method Name, and Description will be filled automatically. You can also edit them.
- Click Submit to save the custom method.
A pop-up will appear confirming that the method has been successfully created with the selected steps and method details. The alias name will be filled automatically in the Alias Step field, and there will also be suggestions available for you to choose. Then click Merge Steps. The selected steps will be merged into a single step, which will be displayed in green.
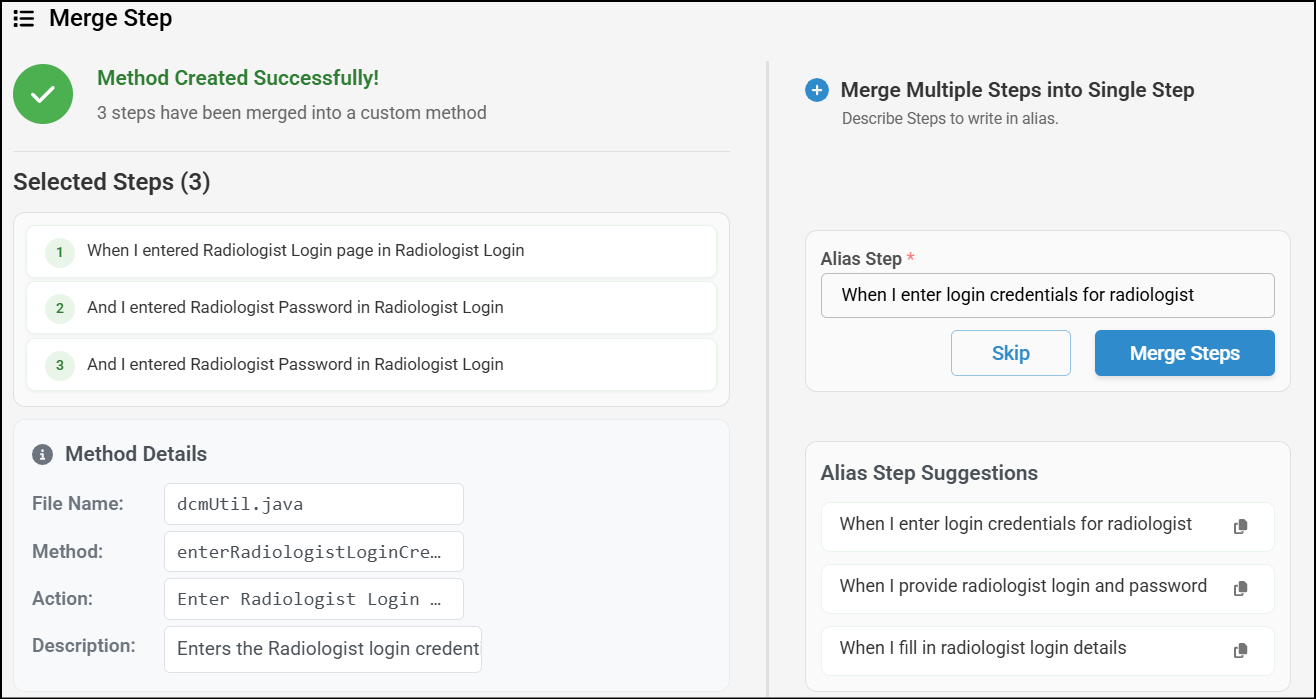
The method will also be created under Utilities. If you try to edit a step that has been merged, and attempt to change its default or custom action, a pop-up will appear stating: "Changing Default/Custom Action will update all alias steps that currently use the existing action in the merged step."
How to use an existing method in Merge Multiple Steps:
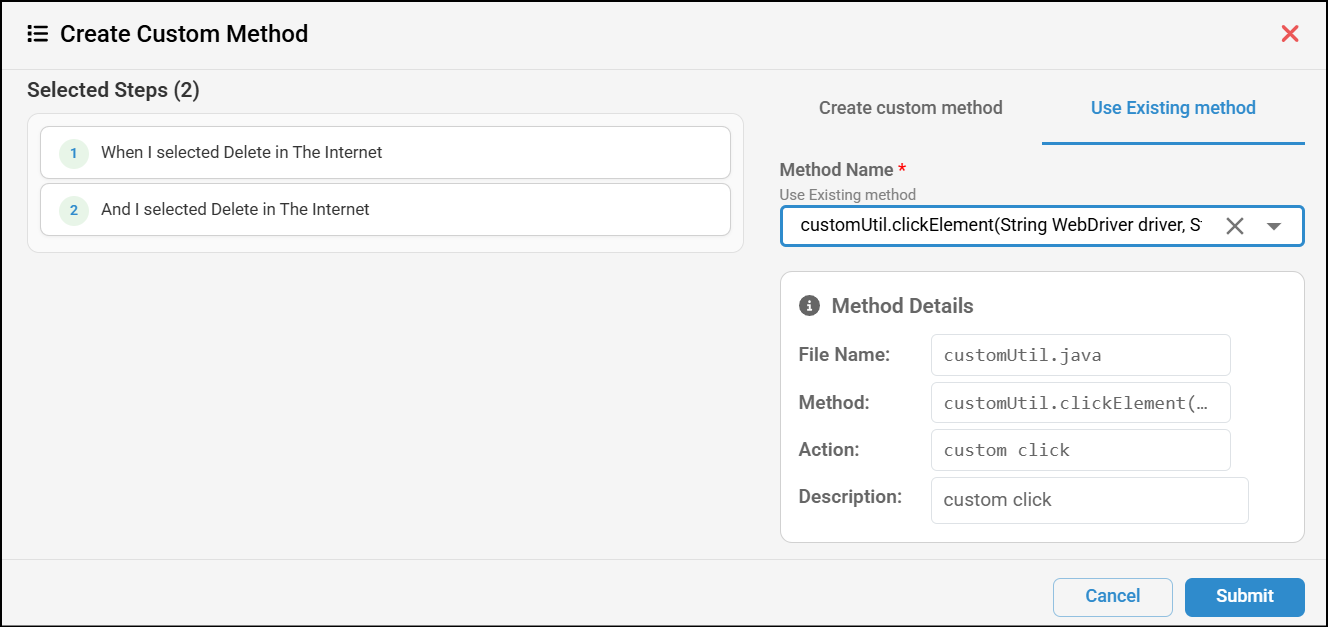
- Click Use Existing Method. The Create Custom Method pop-up will appear.
- In the Method Name field, select a suitable method from the dropdown to merge the selected steps. The method details will be displayed.
- Click Submit.
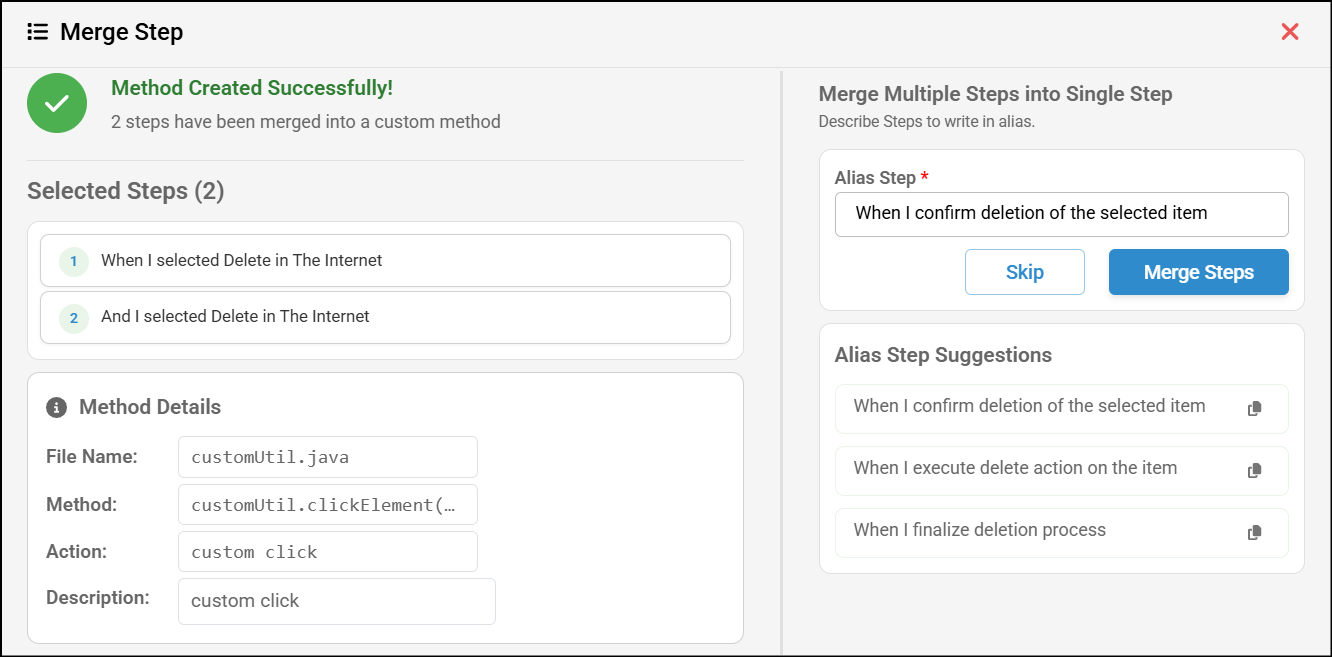
A pop-up will appear confirming that the method has been successfully created with the selected steps and method details. The alias name will be filled automatically in the Alias Step field, and there will also be suggestions available for you to choose. Then click Merge Steps. The selected steps will be merged into a single step, which will be displayed in green.
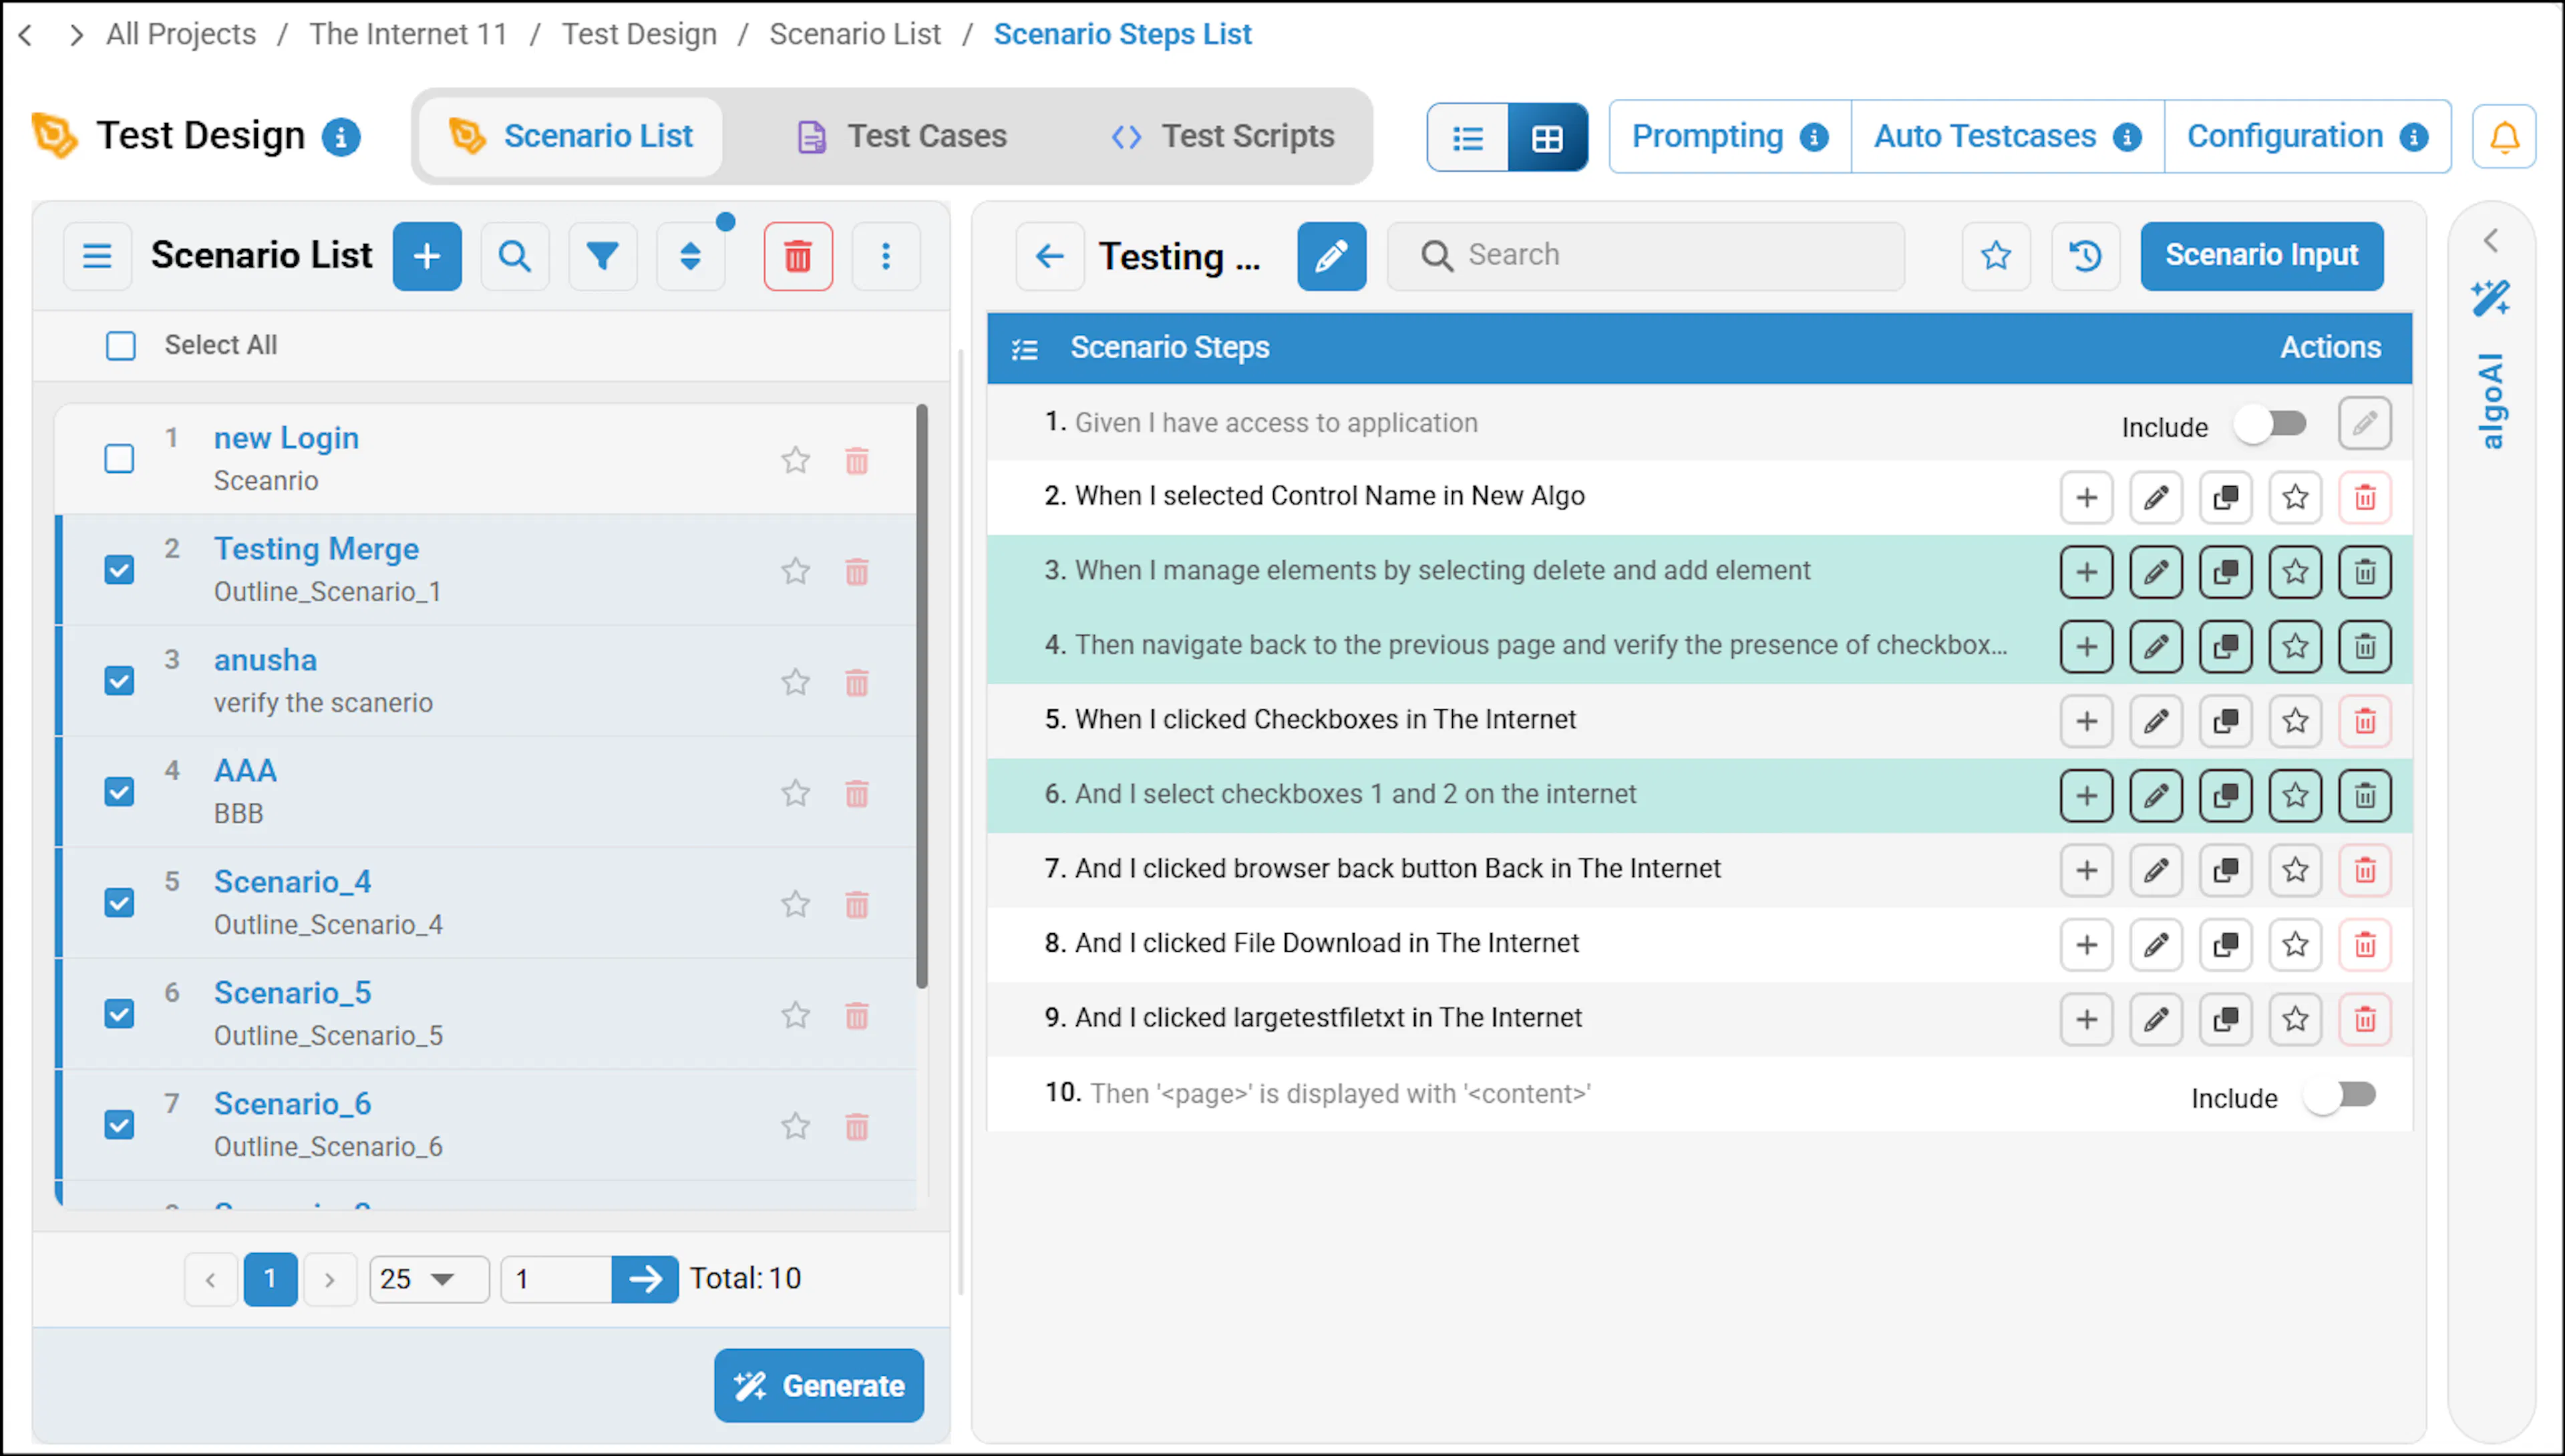
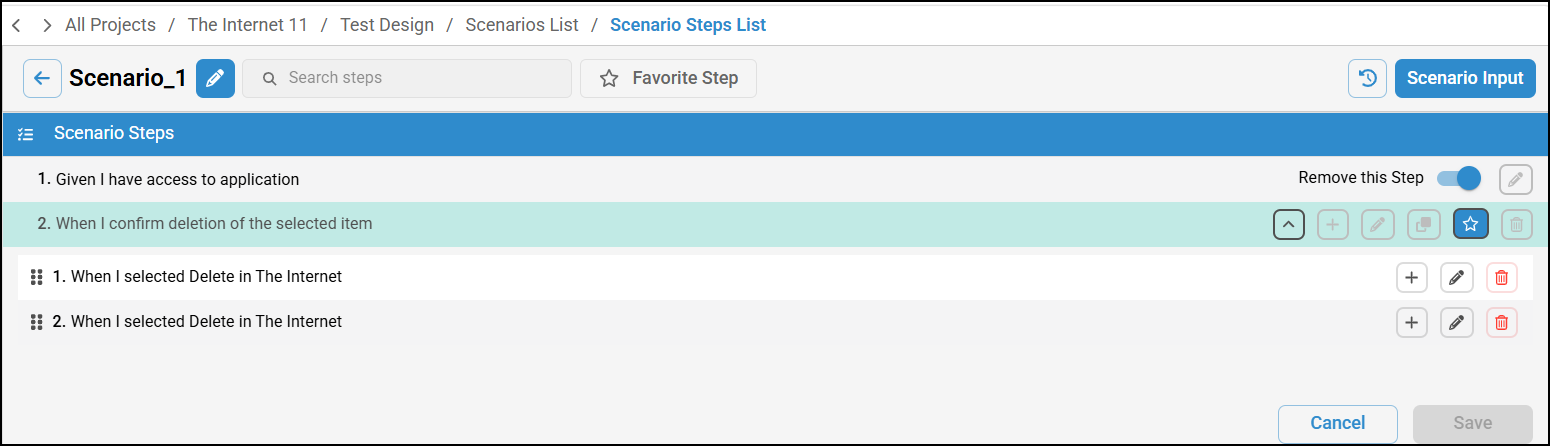
By clicking the down arrow next to a merged step, you can view the individual steps that were combined to create the current merged step. These steps can be edited, deleted, or added, and changes will be automatically applied to that custom action.
Dataset Merge
To merge steps, perform the following:
- Ensure that Dataset is enabled for the scenario by selecting the Dataset checkbox.
- Click the Edit icon for the recorded scenario to open the Scenario Steps list.
- Click Select Steps to display checkboxes beside each step.
- Select the steps you want to merge, and then click Merge Steps.
A pop-up will appear prompting you to choose between Inline Merge and Dataset Merge. Select Dataset Merge, then click Manual Merge to proceed with the merge operation.
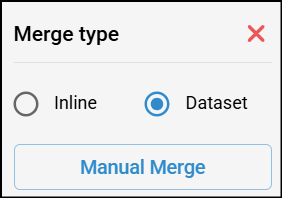
To merge steps by creating a new custom method, follow the steps under How to create a new custom method in the Inline Merge section. To merge steps using an existing method, follow the steps under How to use an existing method in the Inline Merge section.
If you attempt to reorder merged steps within the scenario steps, a notification will appear indicating that reordering may affect the data sequence. Please review the changes carefully before proceeding.
- Navigate back to the Scenario List.
- Click the More Options (⋮) icon.
- Select the Edit icon beside the dataset.
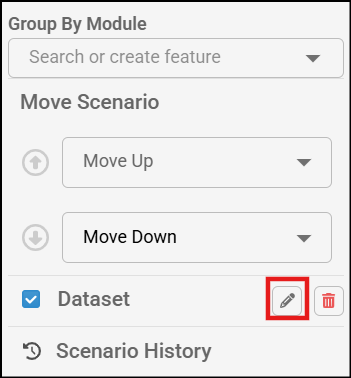
You can view the available datasets and make any necessary modifications if required.

Merge Steps for Existing Projects with New Recorded Data
When you record a new scenario in a project that already contains merged steps, and the new recording uses the same controls as the earlier merge, the platform can optimize the scenario after you upload the new scraped data.
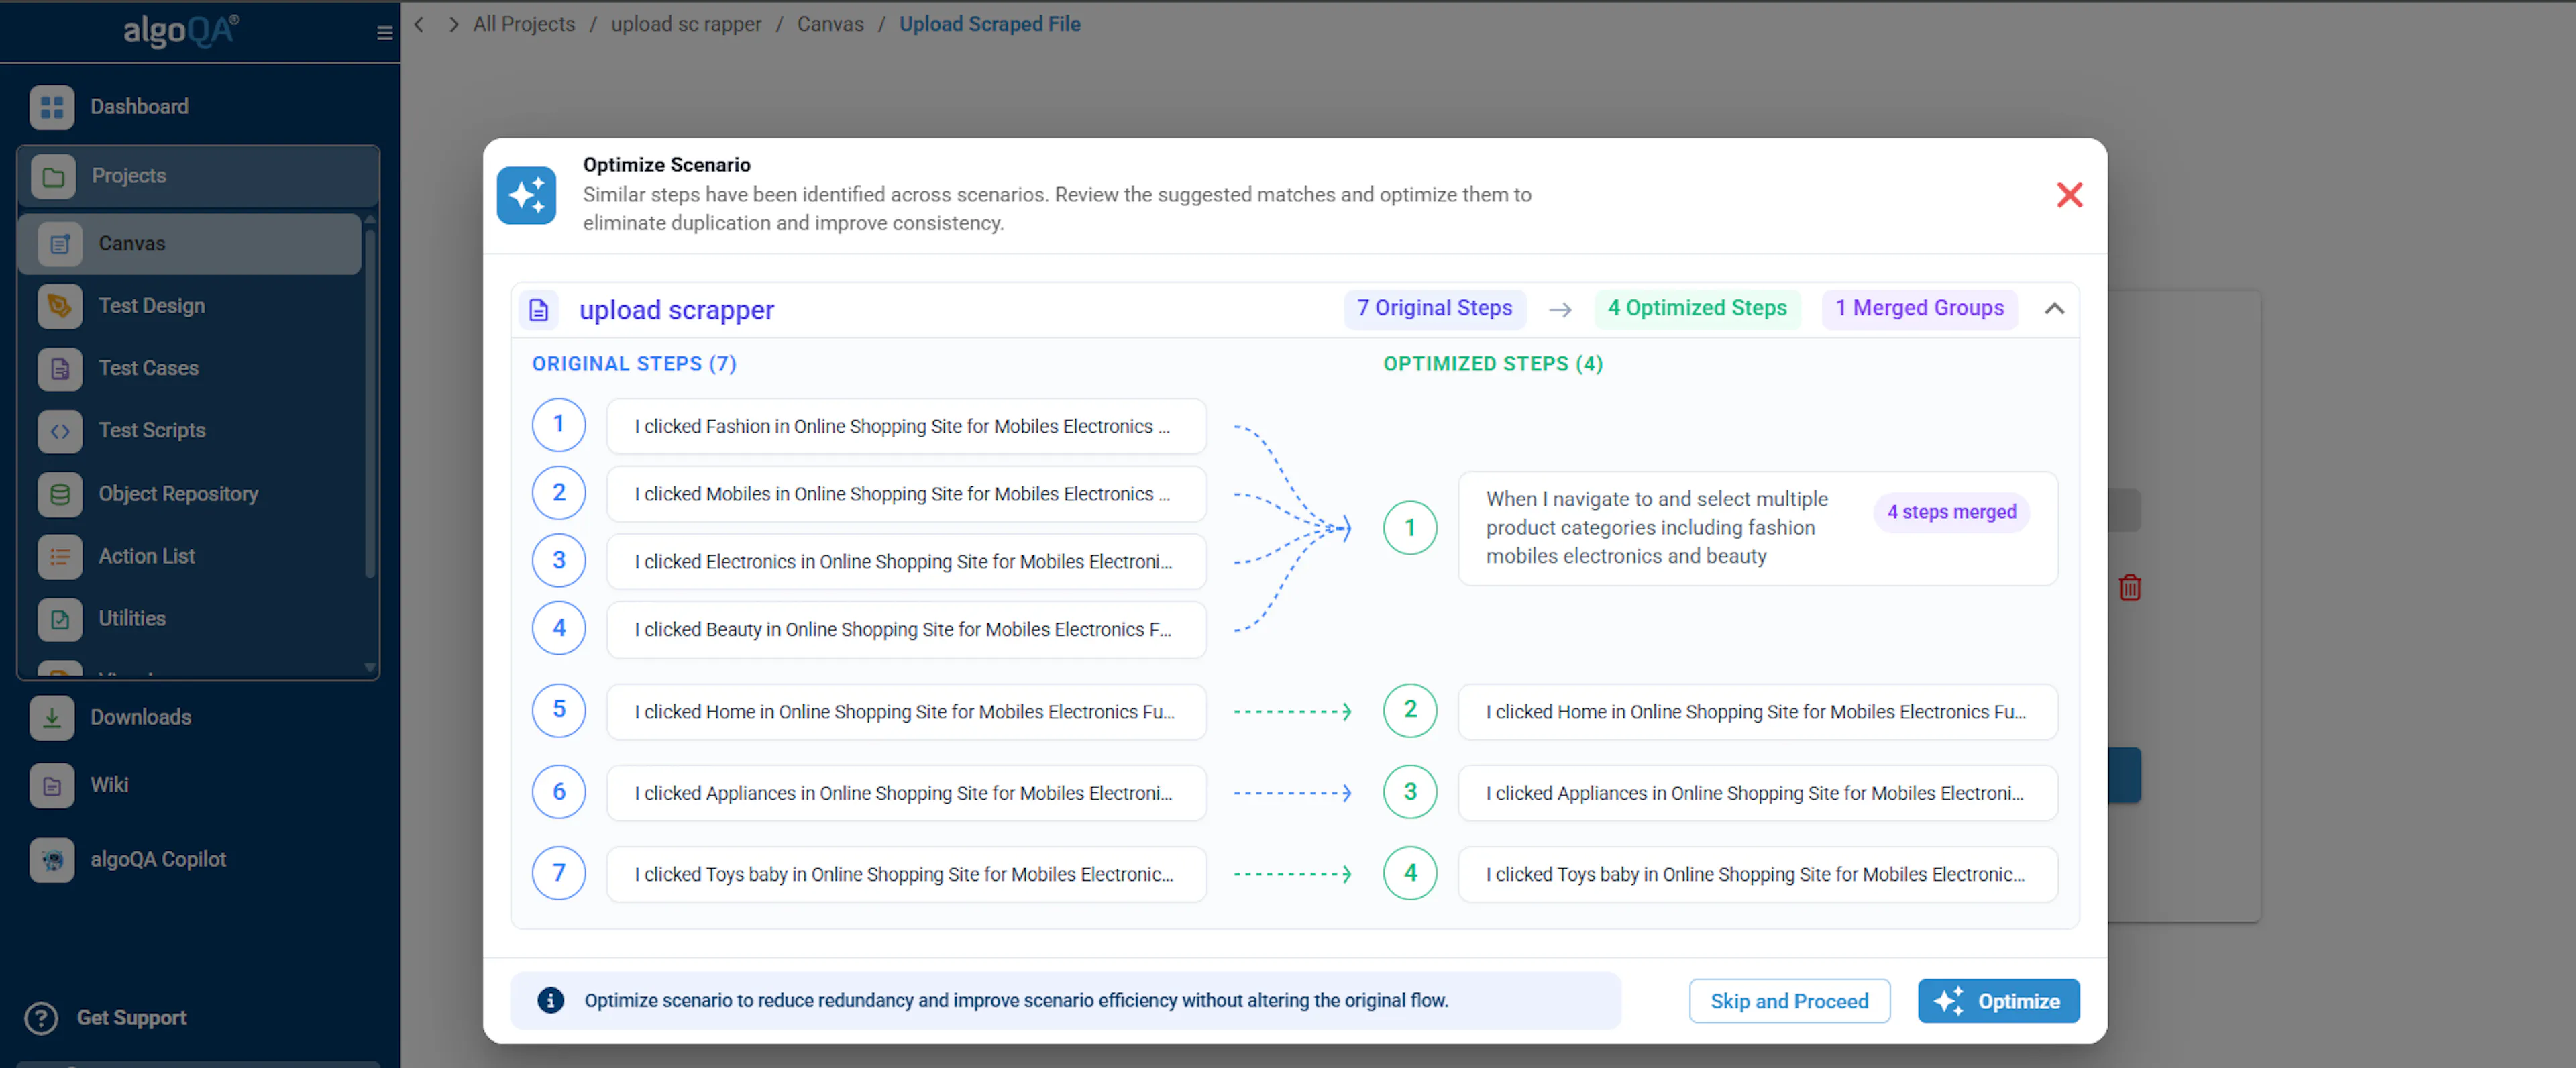
An optimization pop-up appears showing the original steps, optimized steps, and merged steps side by side. You can choose from the following options:
- Optimize — Merges the matching steps into a single step.
- Skip — Keeps the original steps unchanged without performing a merge.
When you click Optimize, the matching steps are merged into a single step. The merged step appears in the Scenario Steps list, highlighted in green.
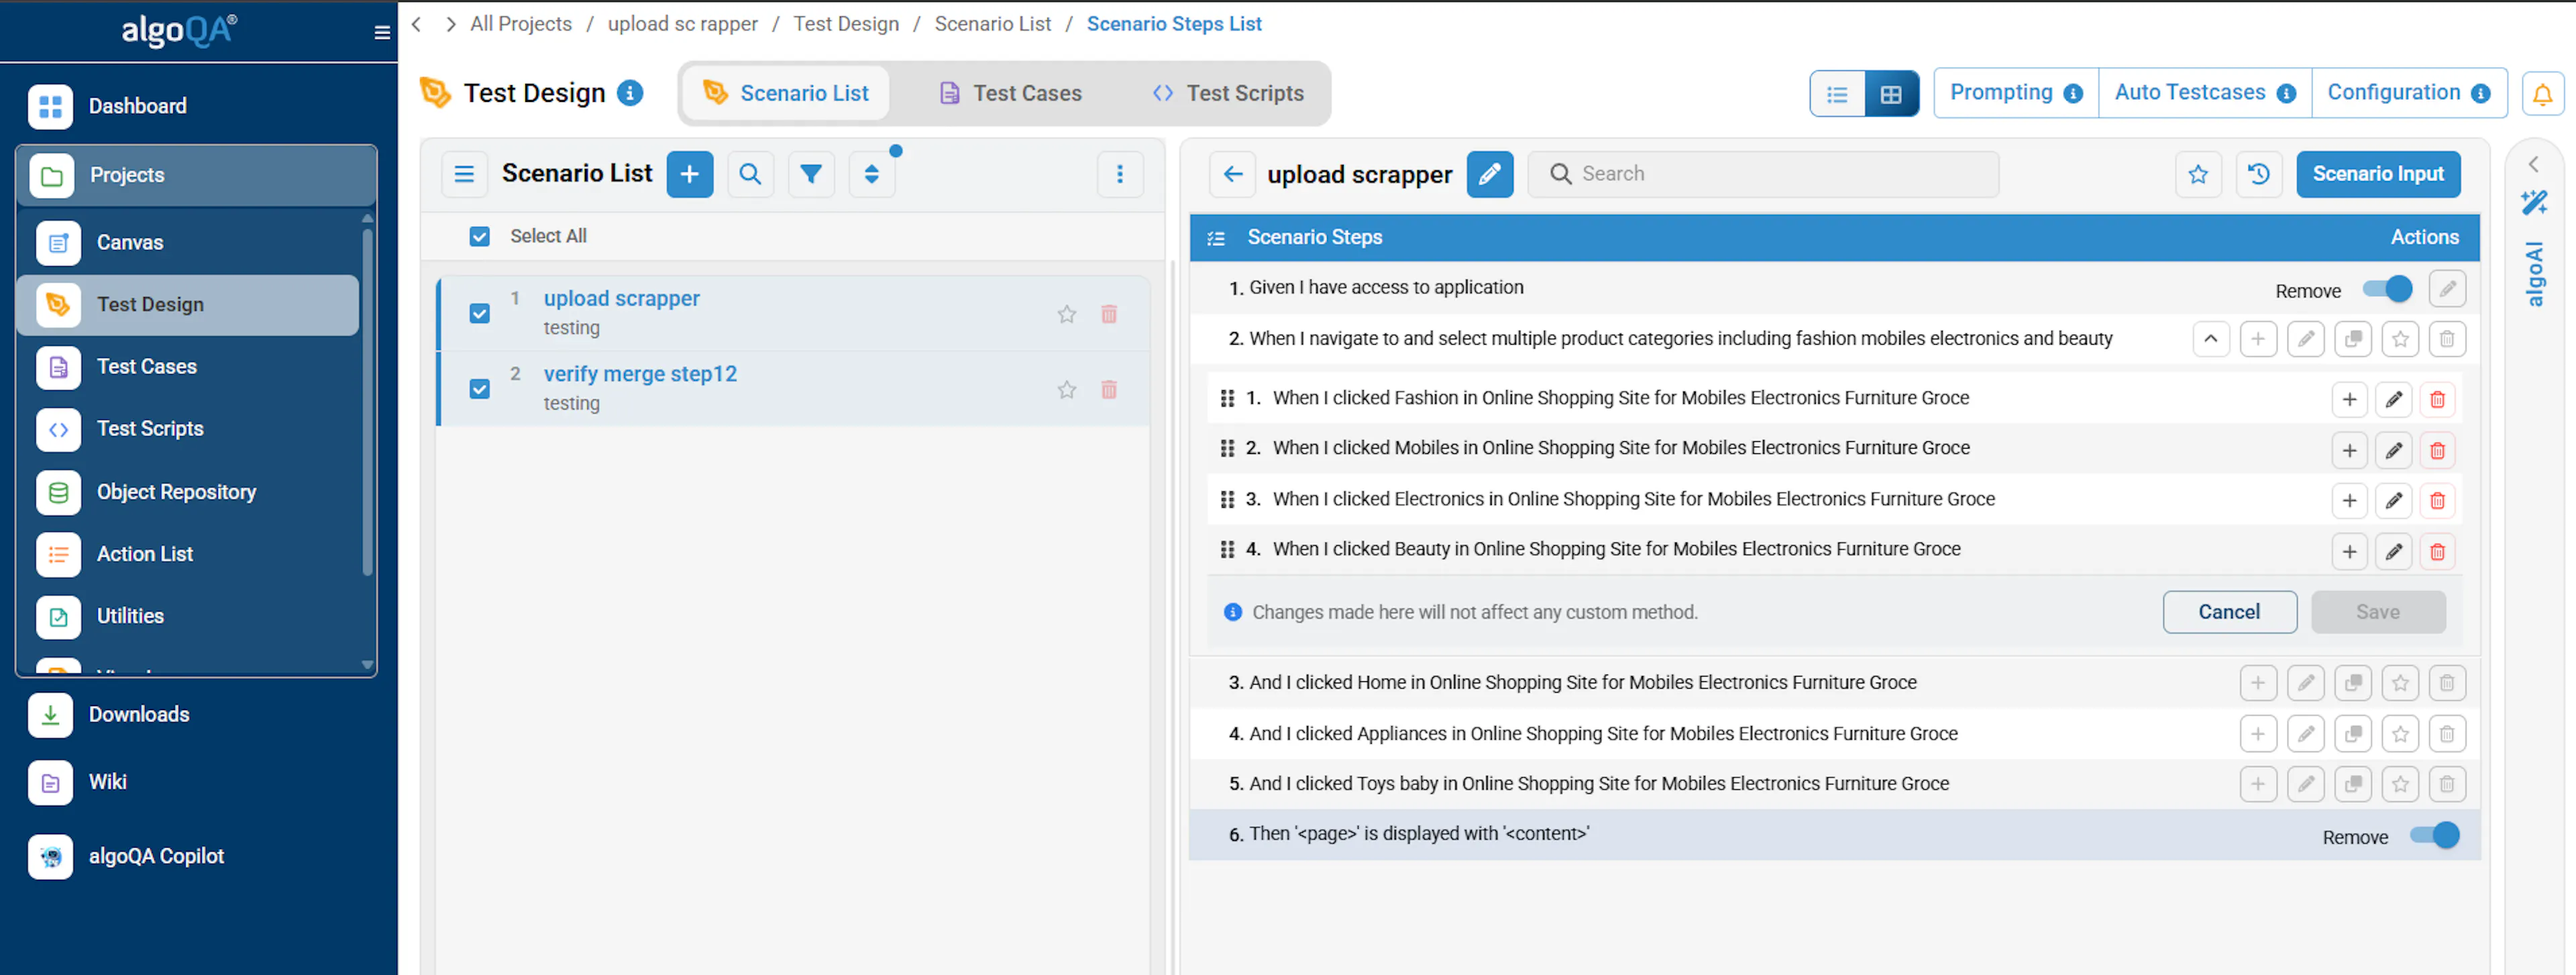
If you choose Skip, the original steps remain unchanged and no merge is performed.
Limitations
- Merge Steps functionality is currently supported only for Java Selenium and Python Selenium frameworks.
- Once steps are merged, there is no option to undo or revert the merge operation.
- Changes made in the configuration, such as Control Name, Control Type, or Default Action, are not reflected in the alias steps within a merged step, and vice versa.
- When merging steps in another scenario, if the same set of steps has already been merged in an existing scenario, the system compares attributes such as step sequence, custom/control values, and associated actions. If an exact match is found, the system suggests reusing the existing alias step.
- Any edits made to a merged step are automatically reflected in all scenarios that use the same merged step within the selected setup file.
- If a step is deleted from a merged step, the corresponding data is not automatically updated in the dataset sheet.
- After merging steps, if a user modifies the custom values or control values in the scenario, those changes are not automatically synchronized with the dataset. The dataset must be updated manually.
- Reordering scenario steps after merging does not update the sequence in the dataset sheet. Users must either manually update the sequence and indexing or delete and regenerate the dataset.
- If the same step is used multiple times within a scenario and is also part of a merged step, the dataset indexing may become incorrect. In such cases, it is recommended to manually adjust the indexing or regenerate the dataset.
- Steps containing inline parameters in the Test Step Settings cannot be merged.
- If a merged step contains a Custom Action, Auto Healing is not supported for that step, and execution may fail.
- A minimum of 2 steps is required, and only 5 steps can be merged at a time.
You can also create Custom Actions from the Action List. To know more about custom actions, check this article: Using Custom Actions