
How to Launch Scraper Using algoQA and Scrape the UI Elements
This article provides detailed instructions on how to launch a scraper from the Create Project page, scrape UI elements, and navigate back to the Create Project page.
Note: This feature is currently available only for Web and Mobile automation .
How to Launch Scraper for Web Automation
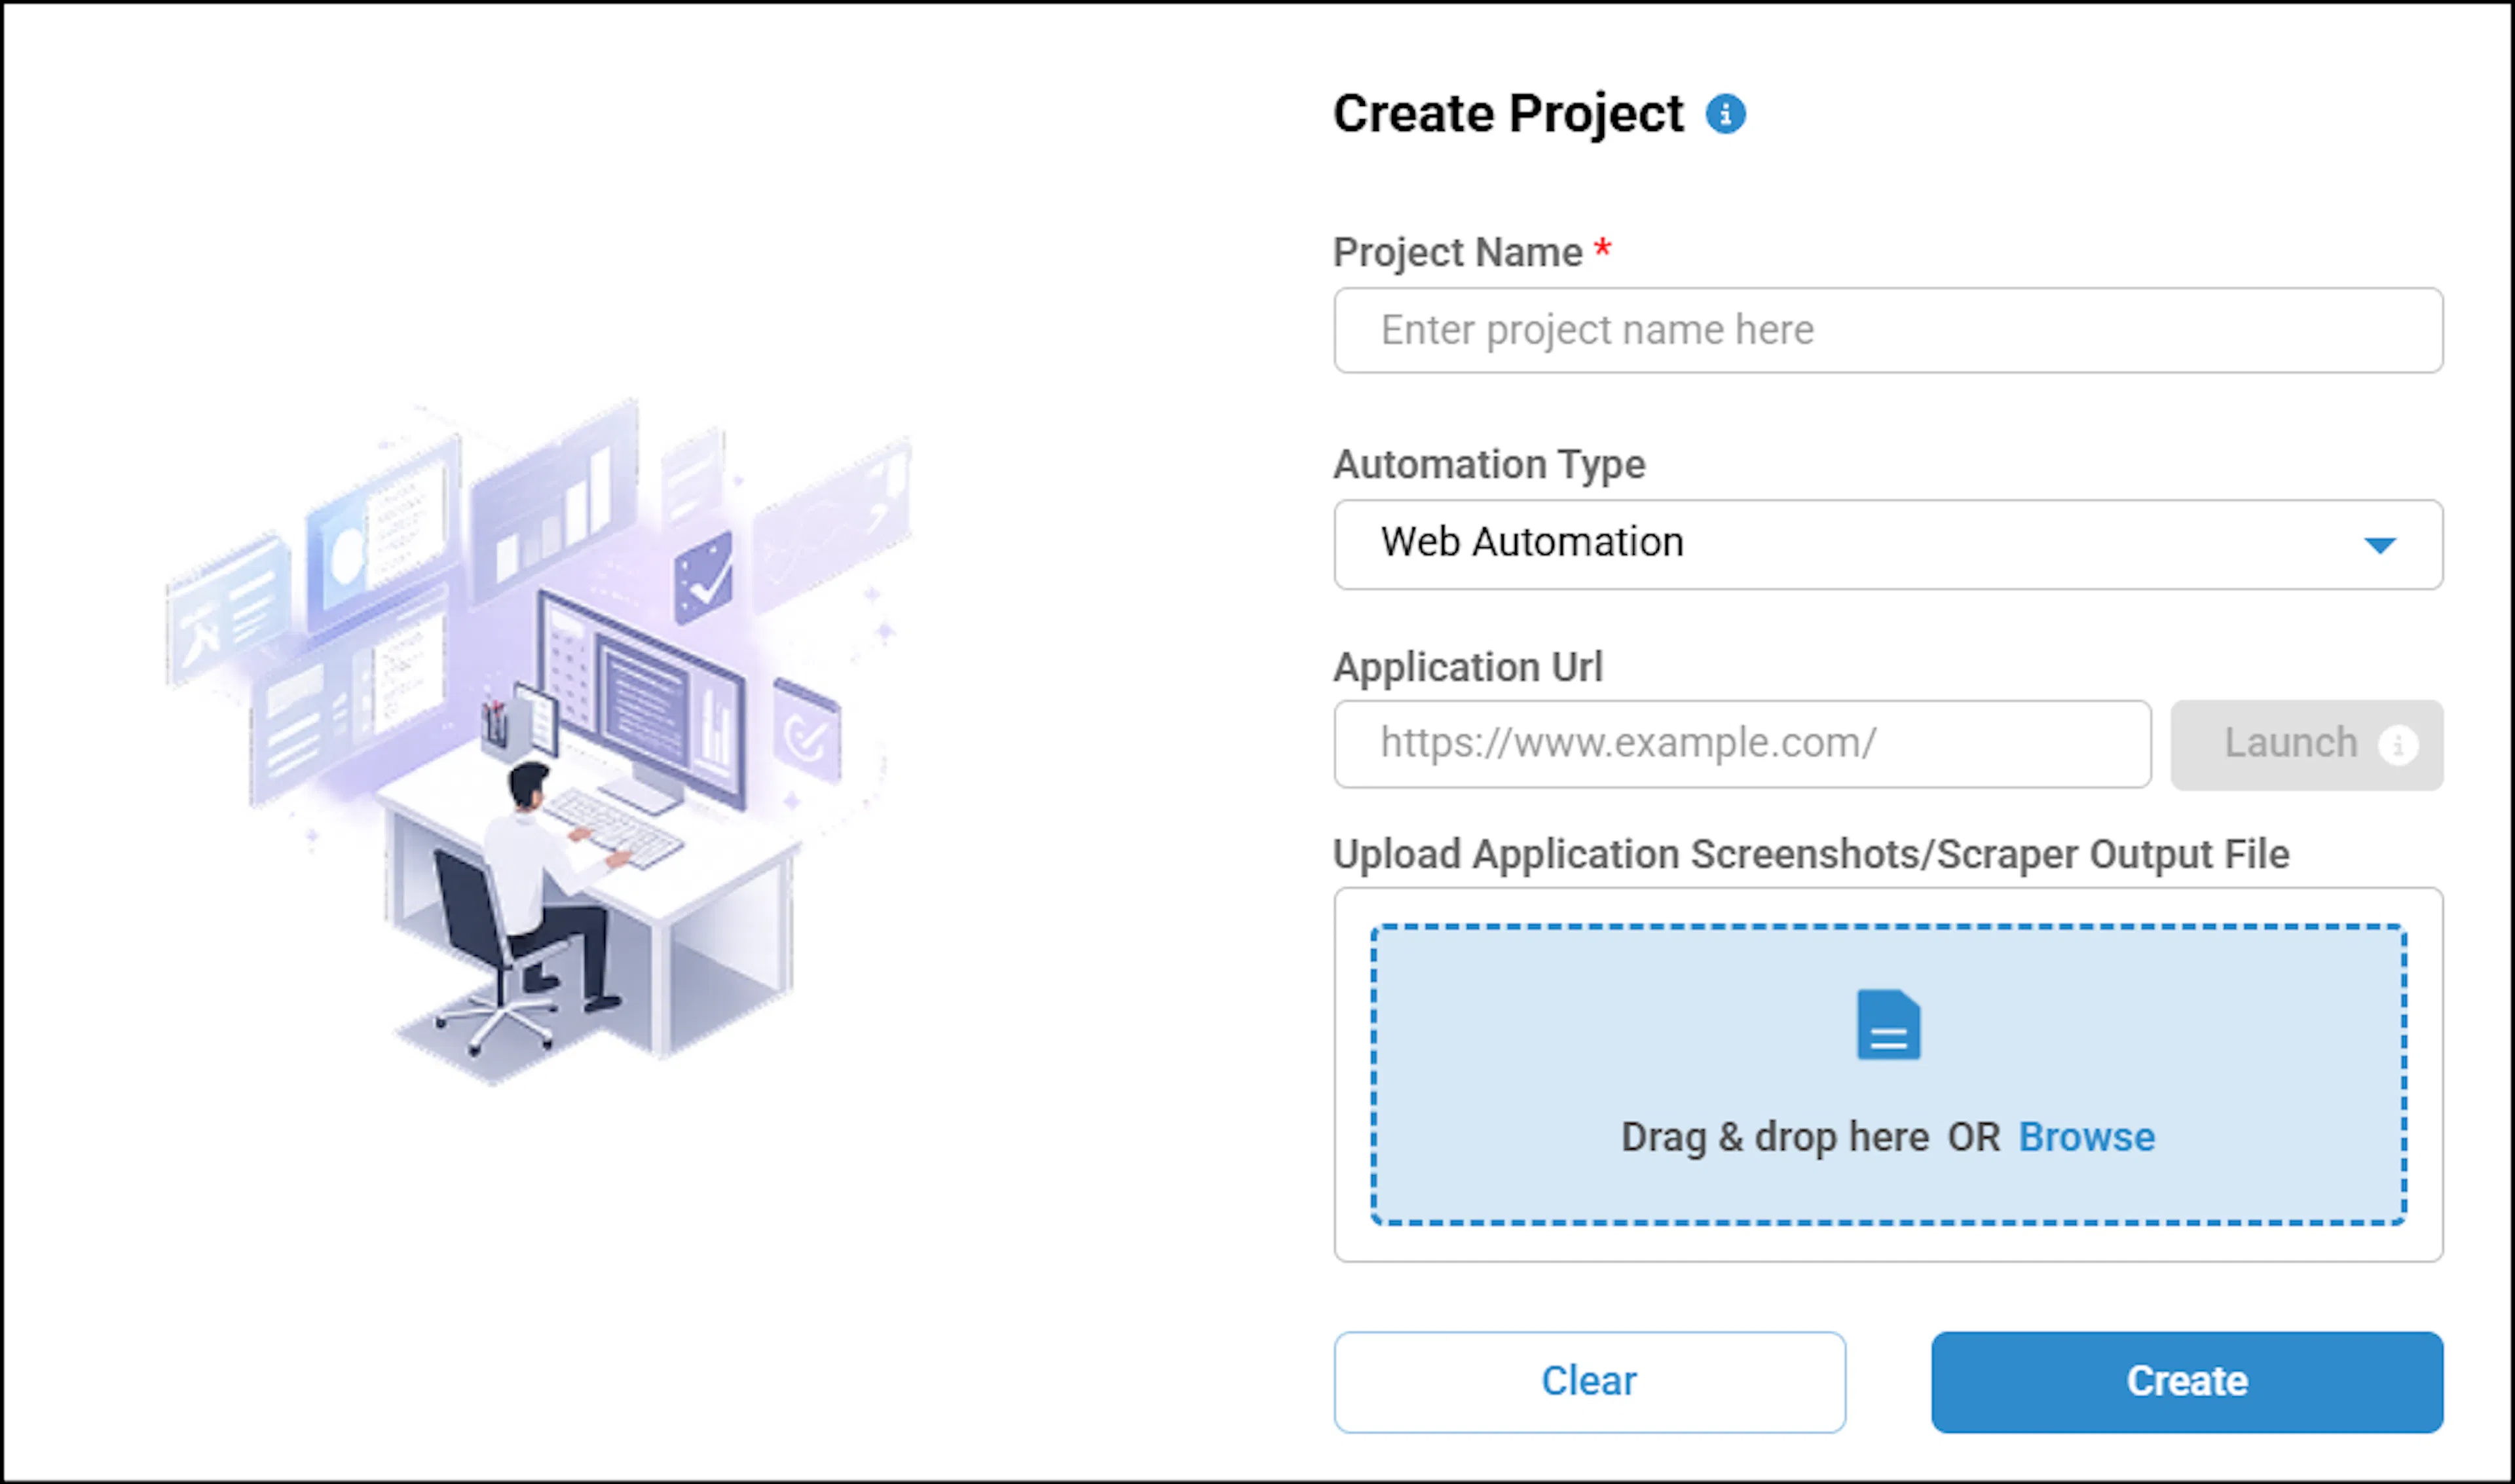
Navigate to the Projects page and click the '+' icon to create a new project. Select Web Automation as the automation type, enter the target URL in the Application URL field, and click Launch.
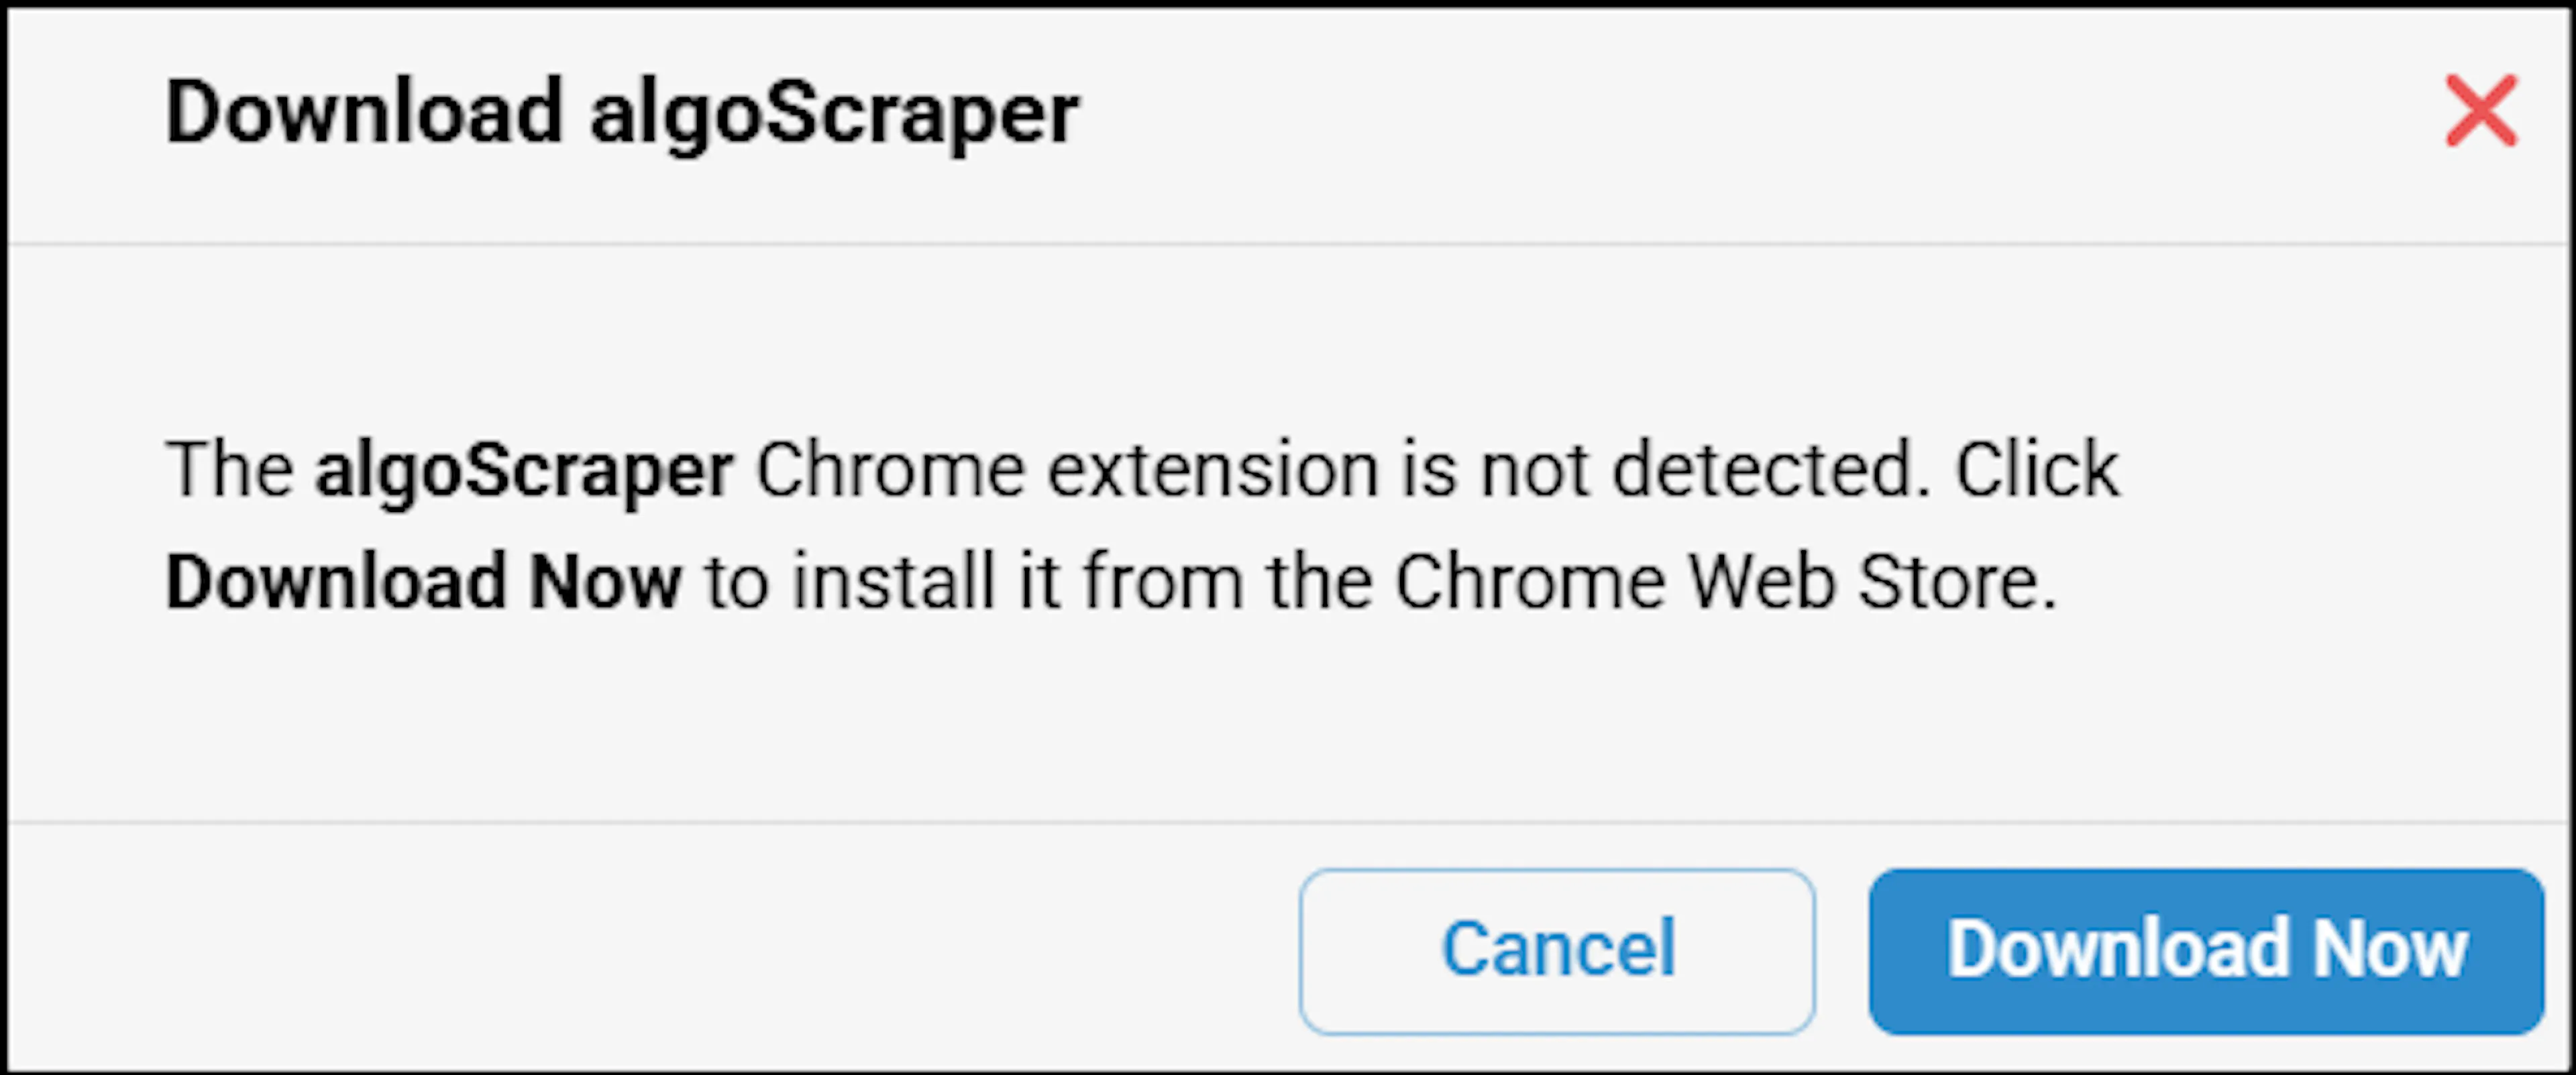
Note: If you don't have the algoScraper extension installed, a pop-up will appear prompting you to download the scraper.
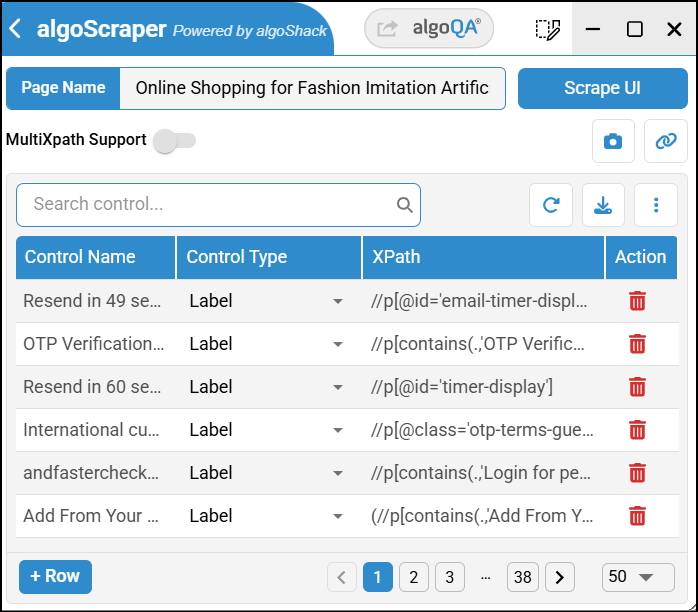
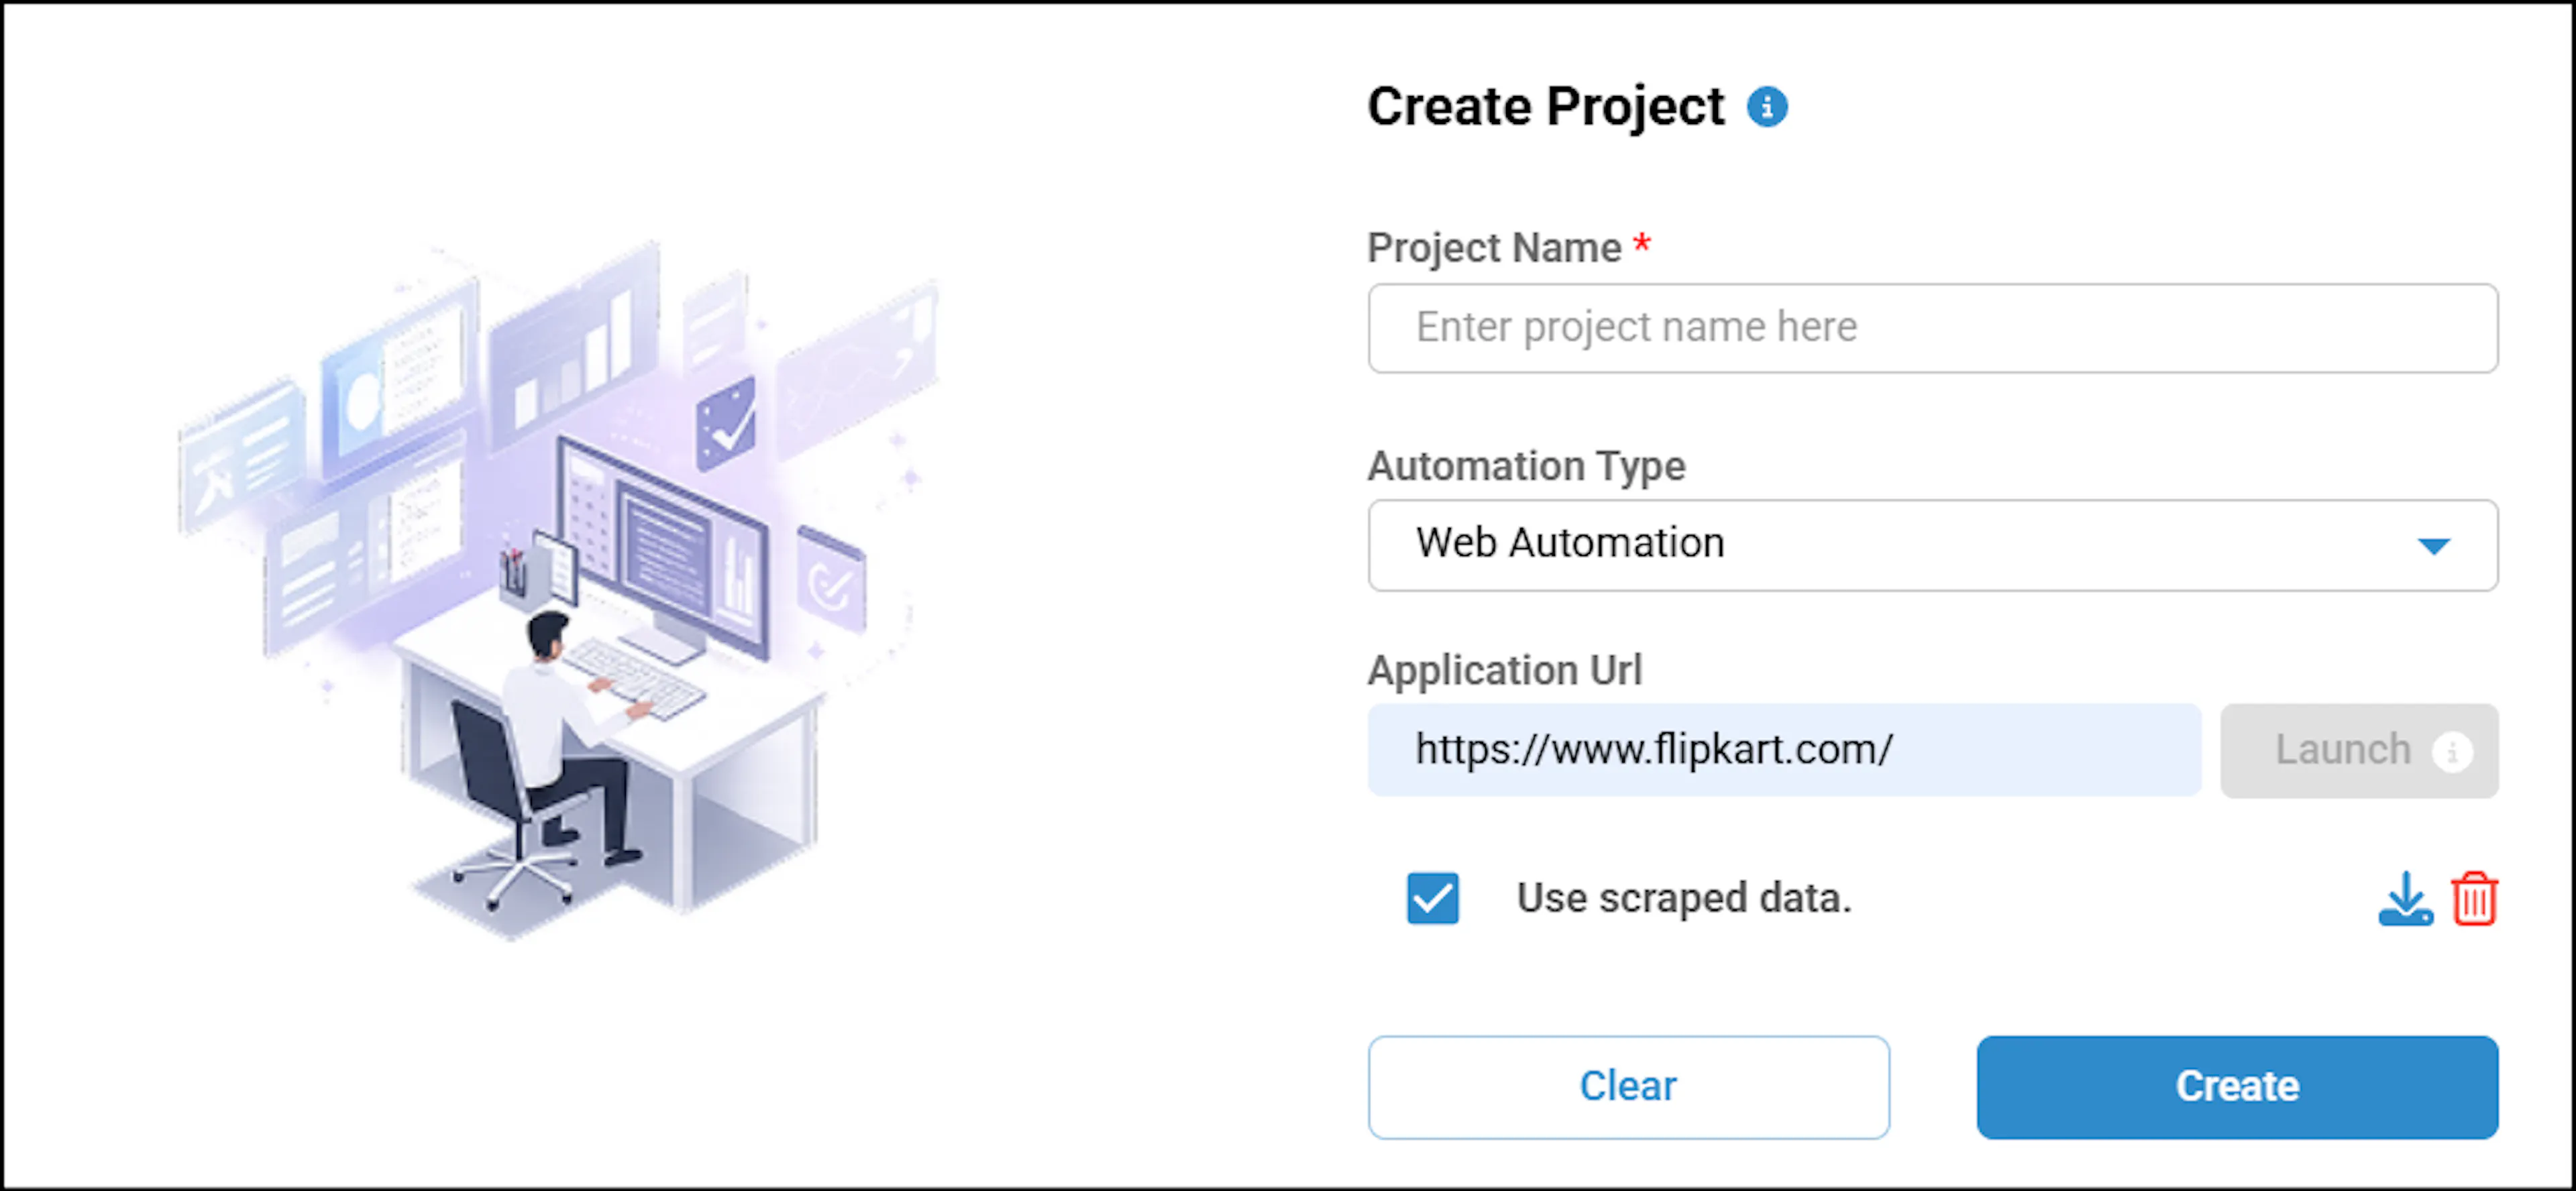
The web page will open with the scraper enabled. You can use the scraper to capture UI elements. Click here to learn more about Scraping Web applications. After scraping the UI elements, click the algoQA button in scraper to navigate back to the Create Project page, with the scraped file automatically attached.
Enter the project name and click Create for the project to be created.
How to Launch Scraper for Mobile Automation
- For M-Site
Navigate to the Projects page and click the '+' icon to create a new project. Select Mobile Automation as the automation type, check the M-Site checkbox, enter the target URL in the Application URL field, and click Launch.
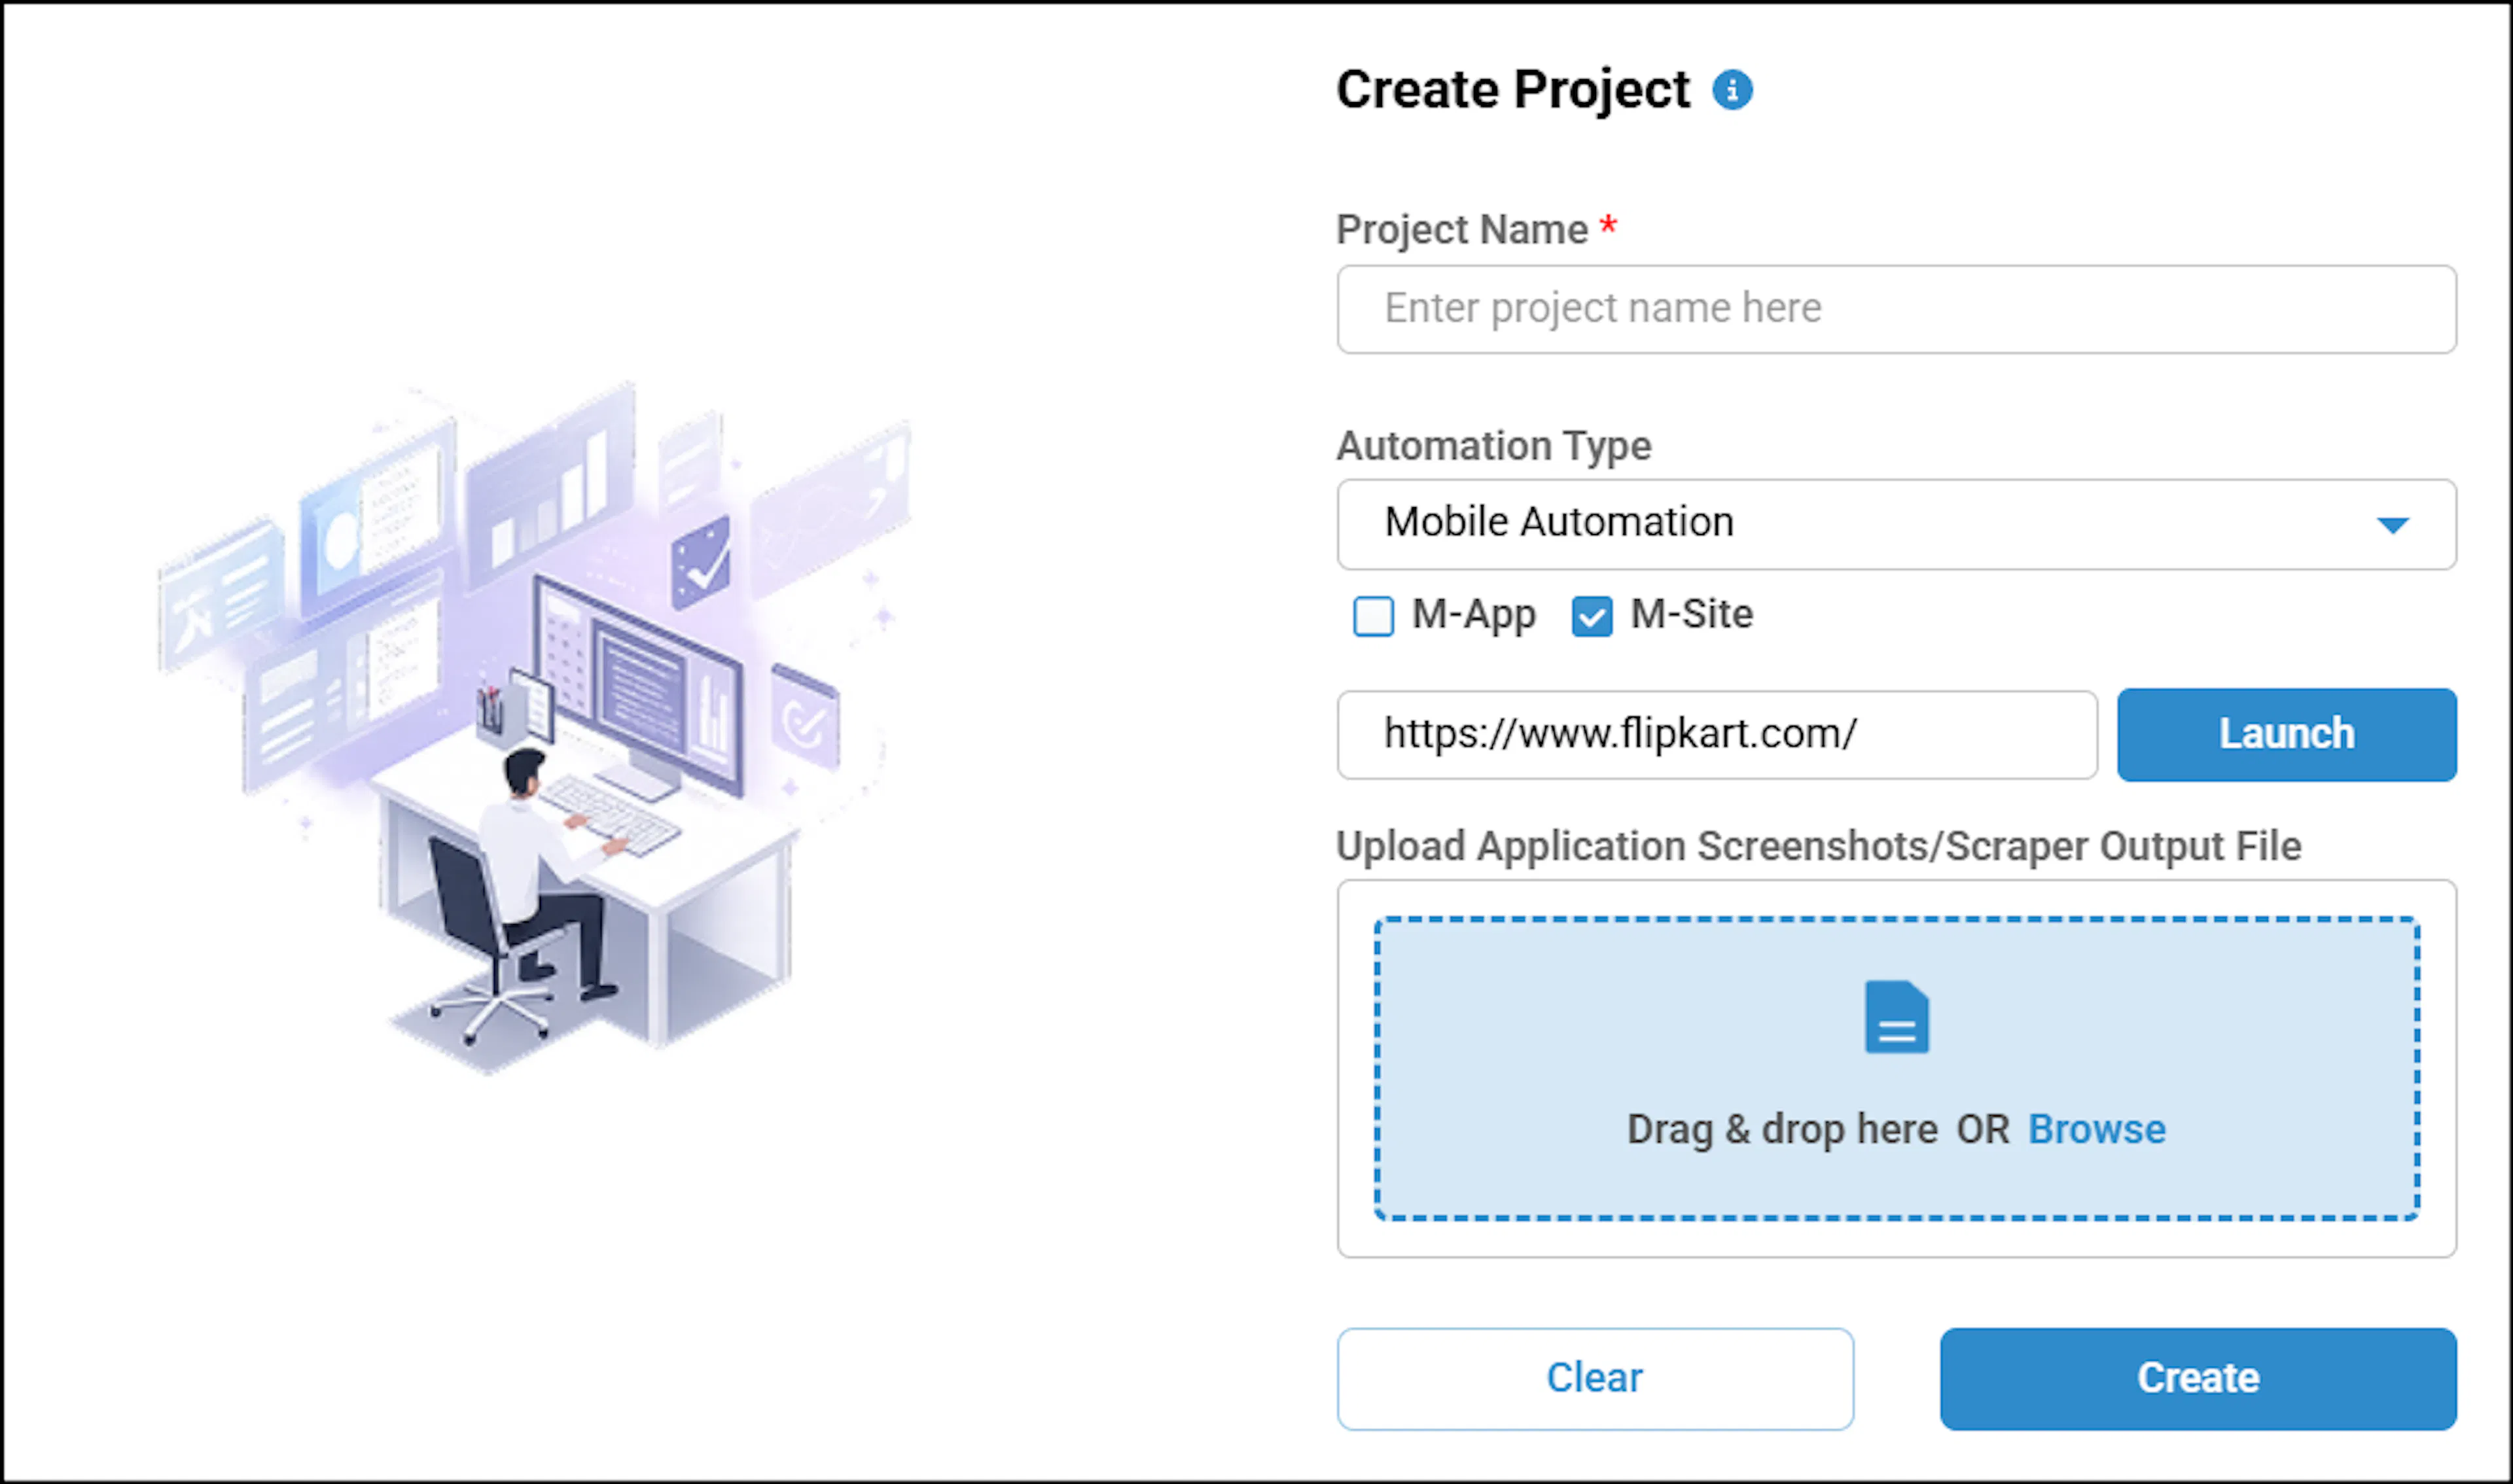
Note: If the algoScraper extension is not installed or is not the latest version, a pop-up will appear prompting you to download or update the scraper.
The application URL will open with a popup explaining how to scrape M-Site. Click this link to learn more about scraping M-Site applications.
After scraping the UI elements, click the algoQA button to navigate back to the Create Project page, with the scraped file automatically attached.
Enter the project name and click Create for the project to be created.
- For M-App
- Navigate to the Projects page and click the '+' icon to create a new project. Select Mobile Automation as the automation type, check the M-App checkbox, and click Launch.
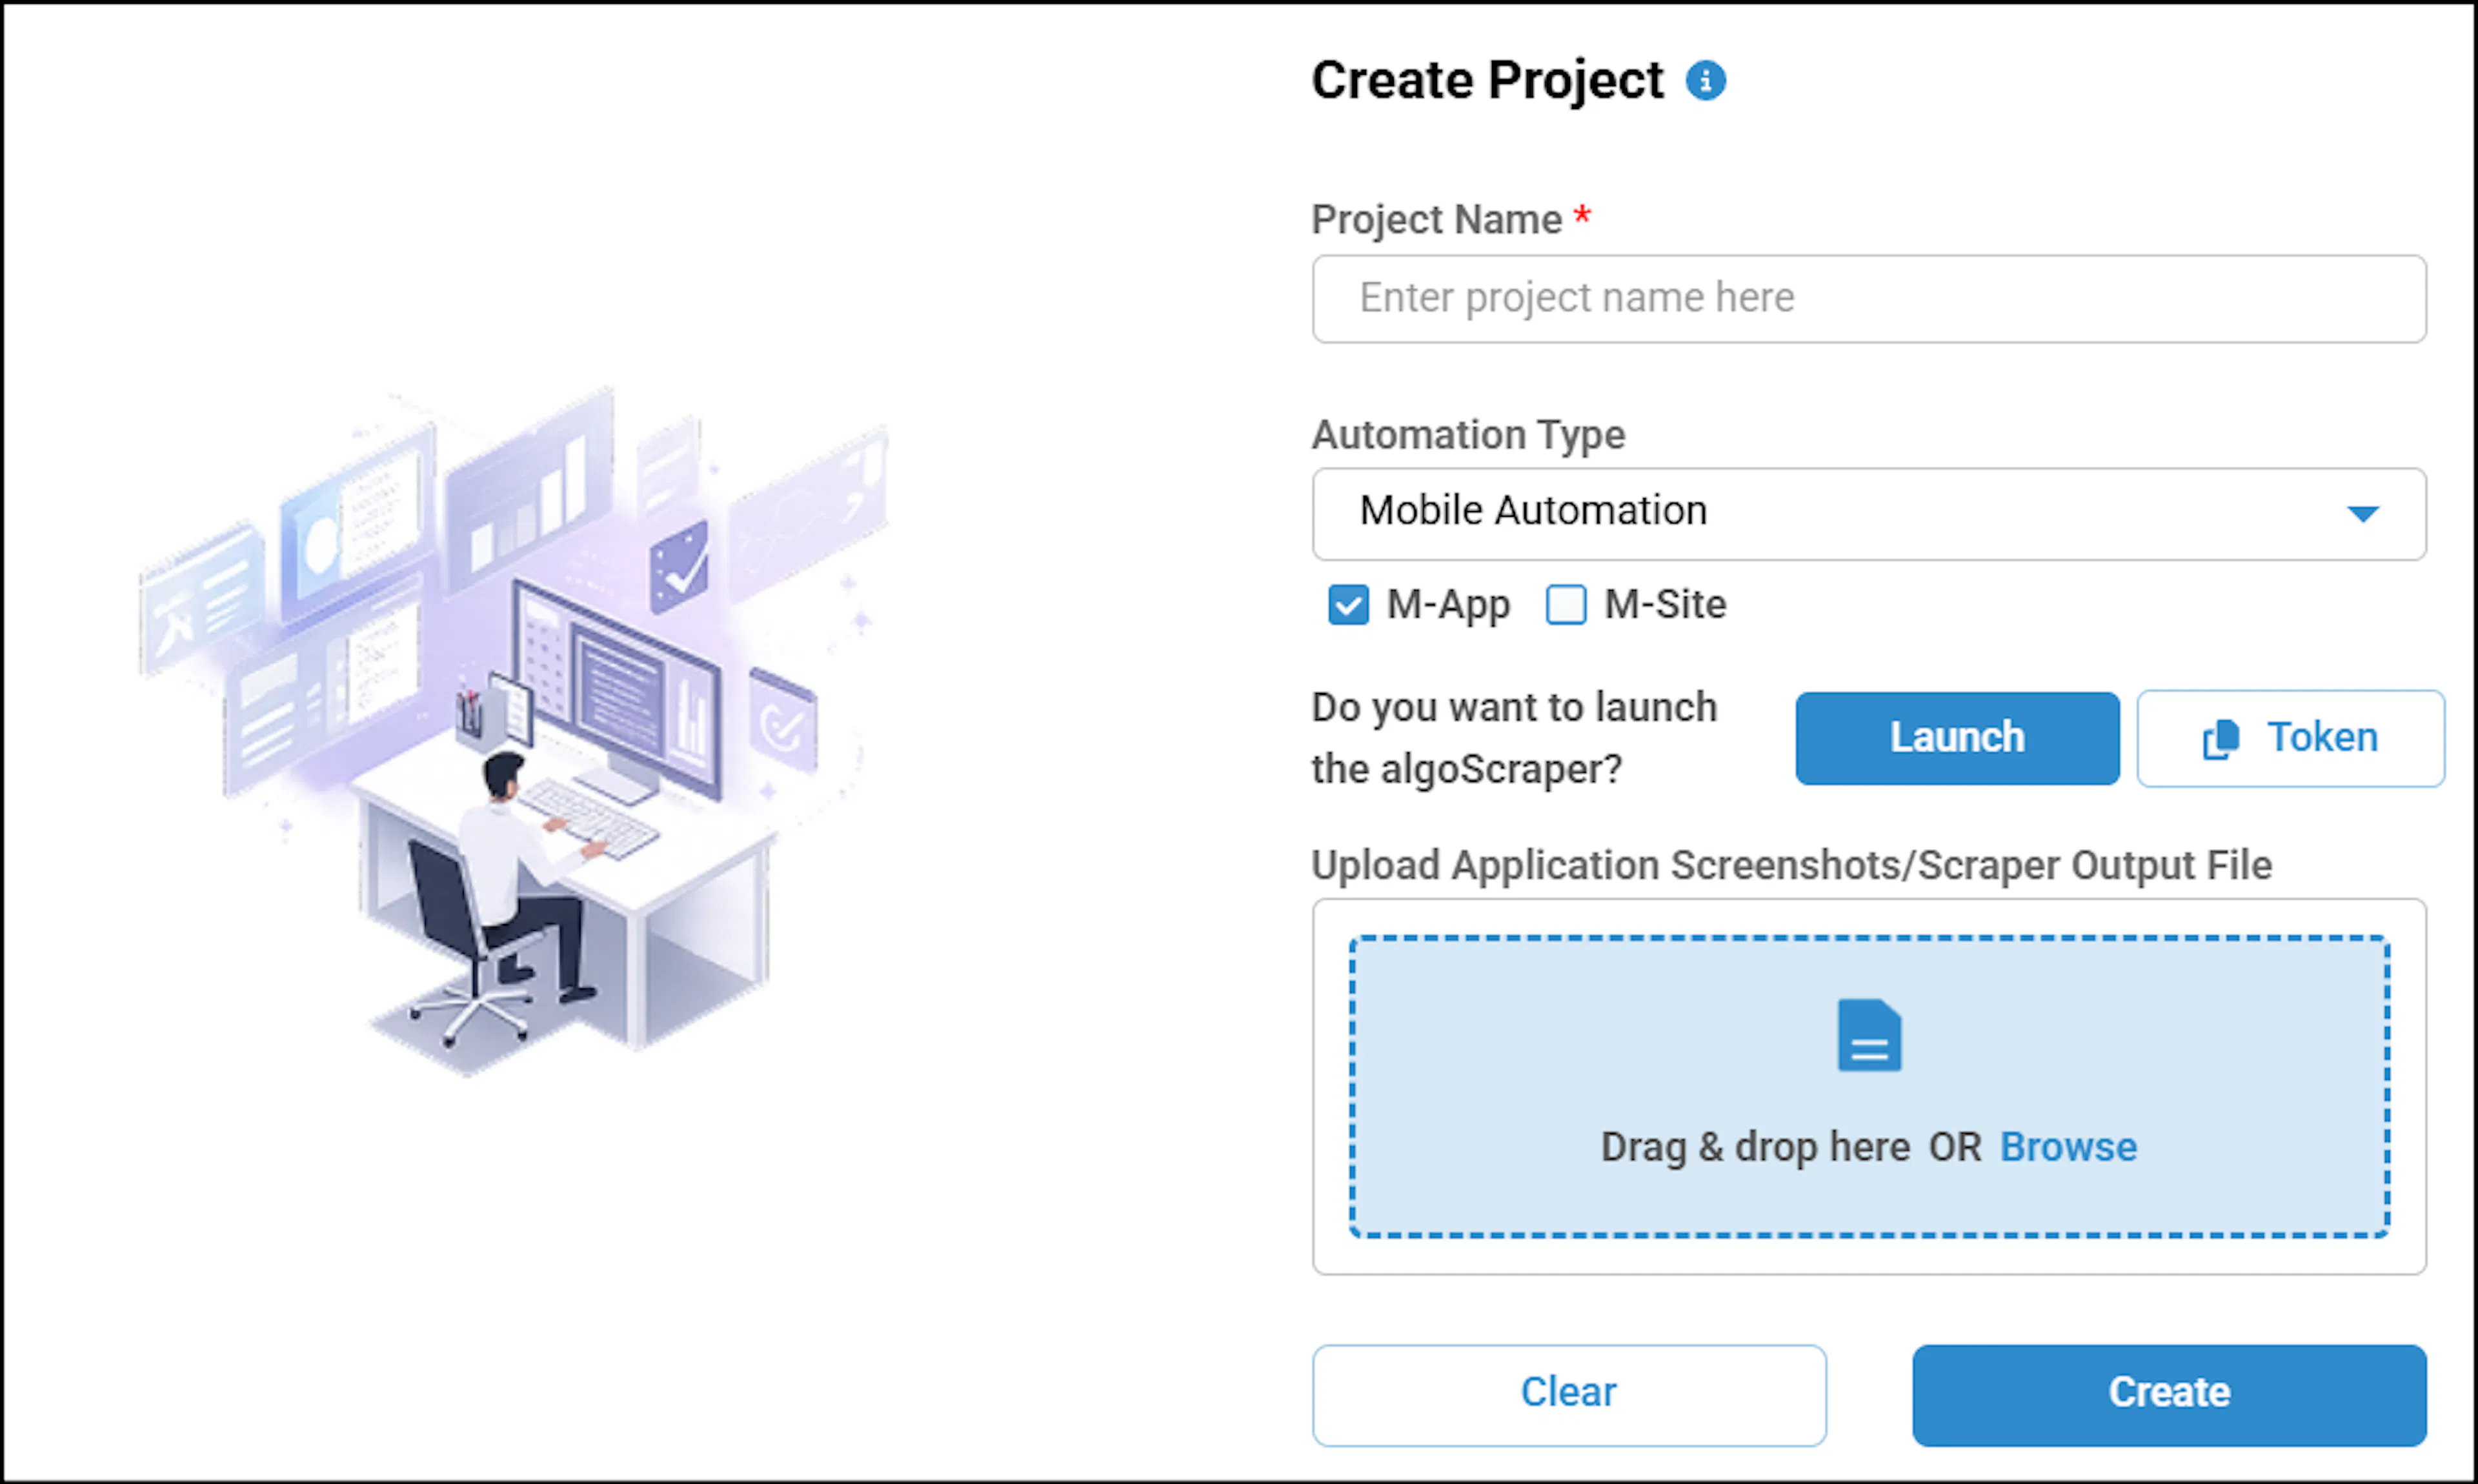
Note: The real device/emulator should be connected to the system before launch.
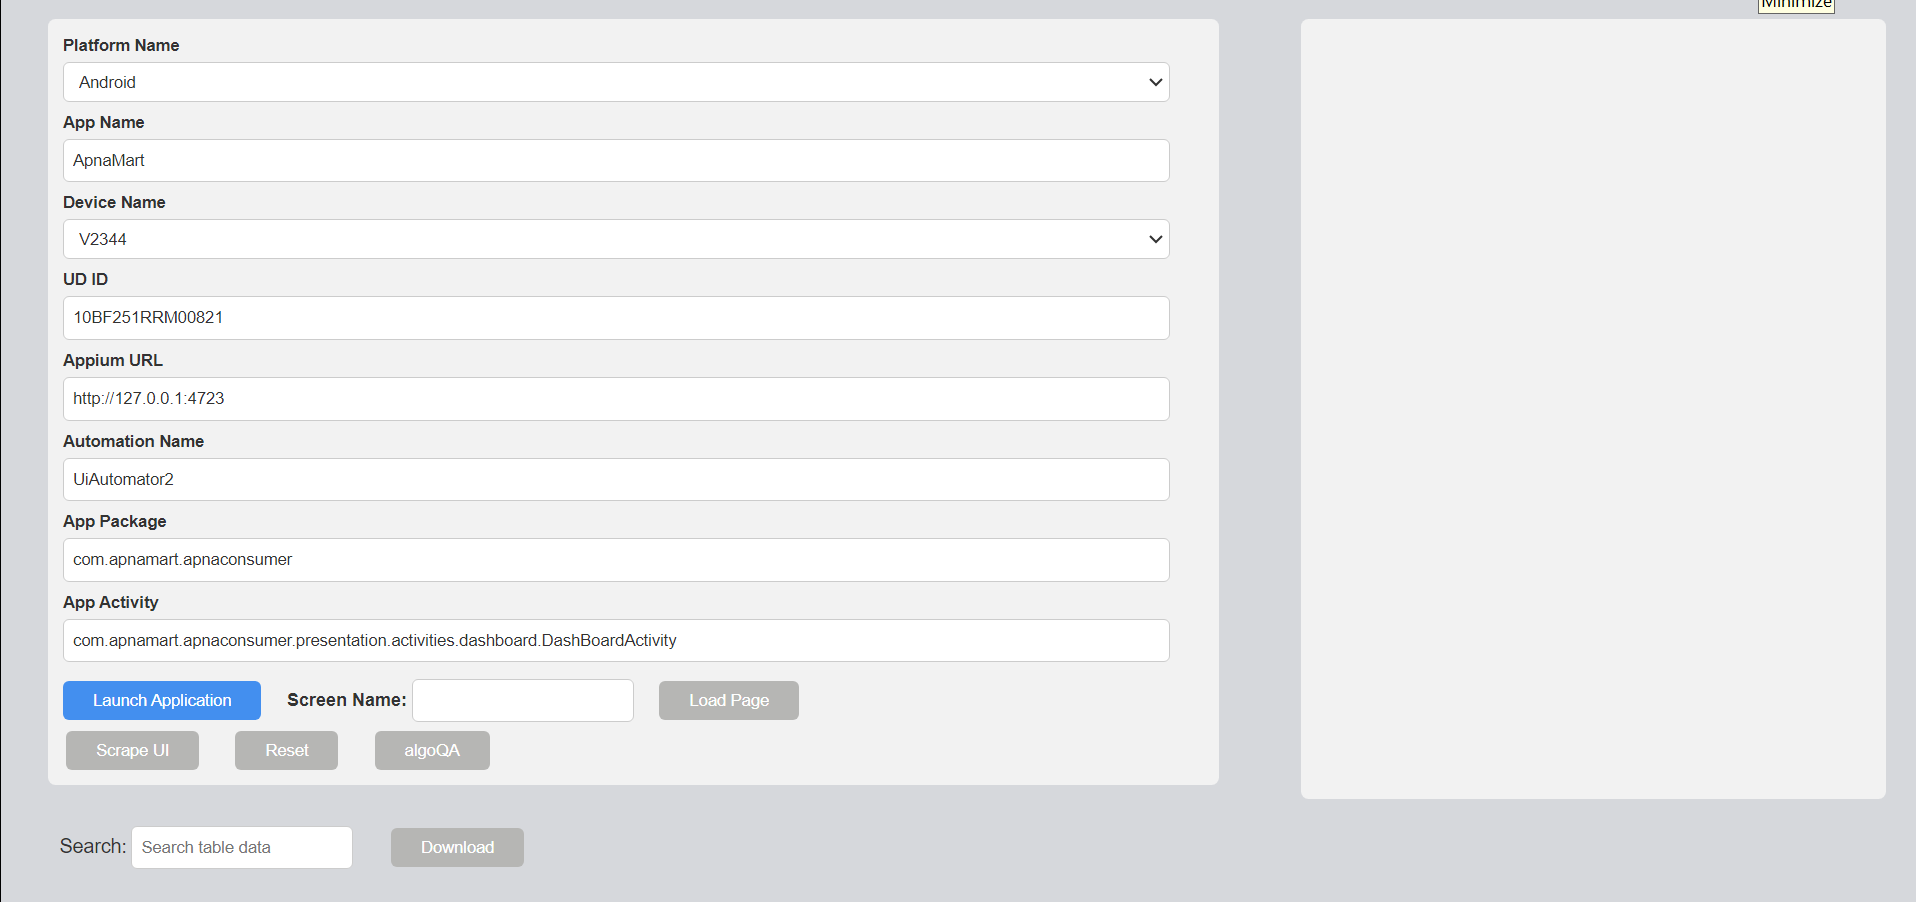
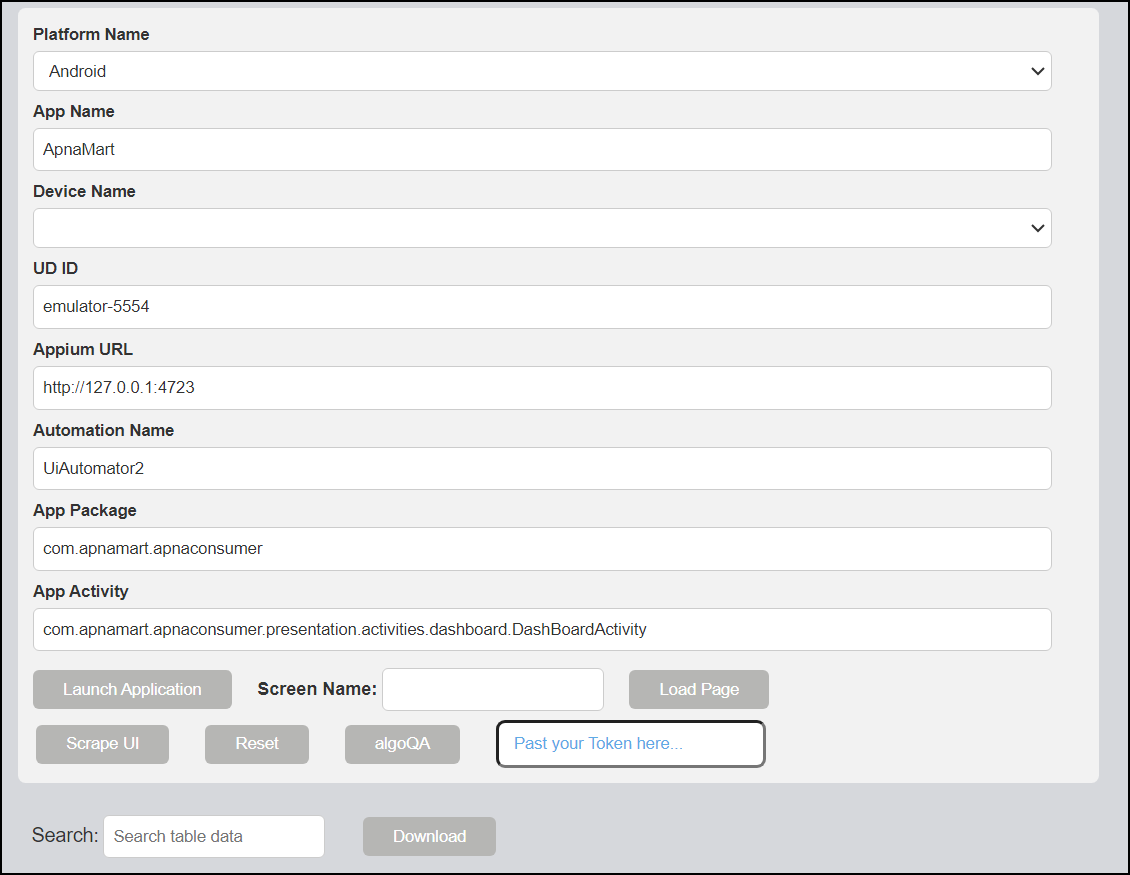
- When you launch the scraper, if a device is connected, the device name and UDID will be fetched automatically. You have to manually enter the App Package and App Activity, then click Launch Application to start the app. Once the application is launched, enter the Screen Name and click Load Page to make the screen available for scraping.
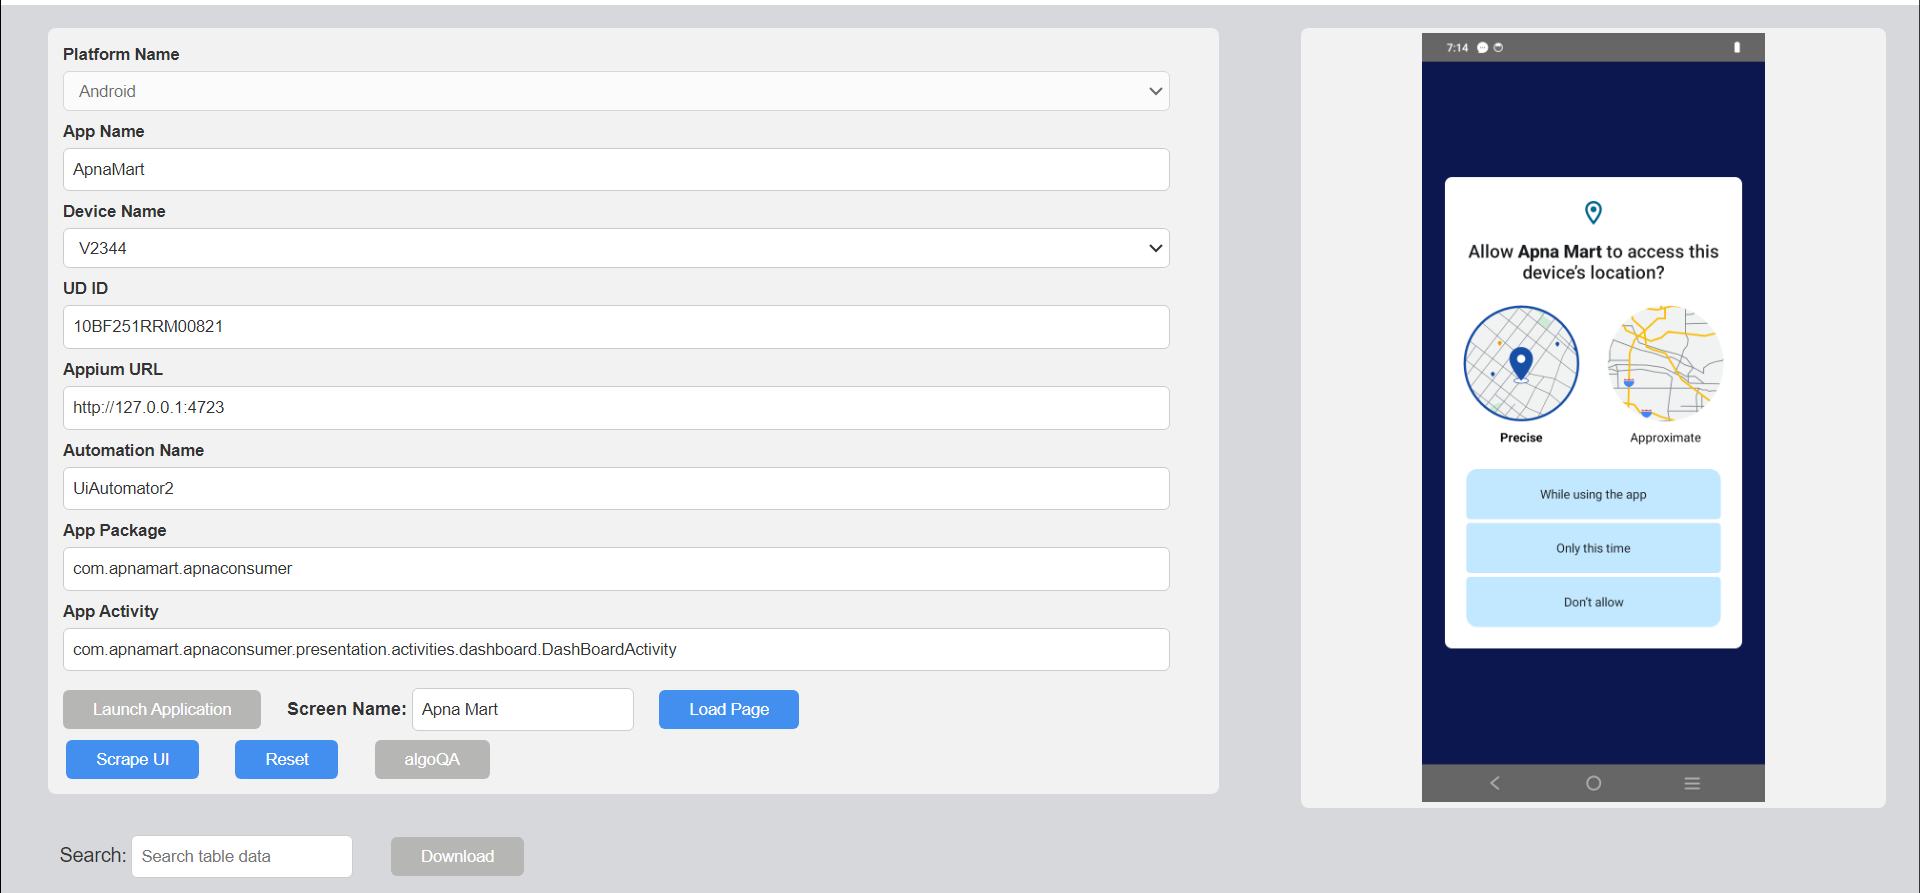
- You can either scrape UI elements individually or click Scrape UI to capture all UI elements at once.
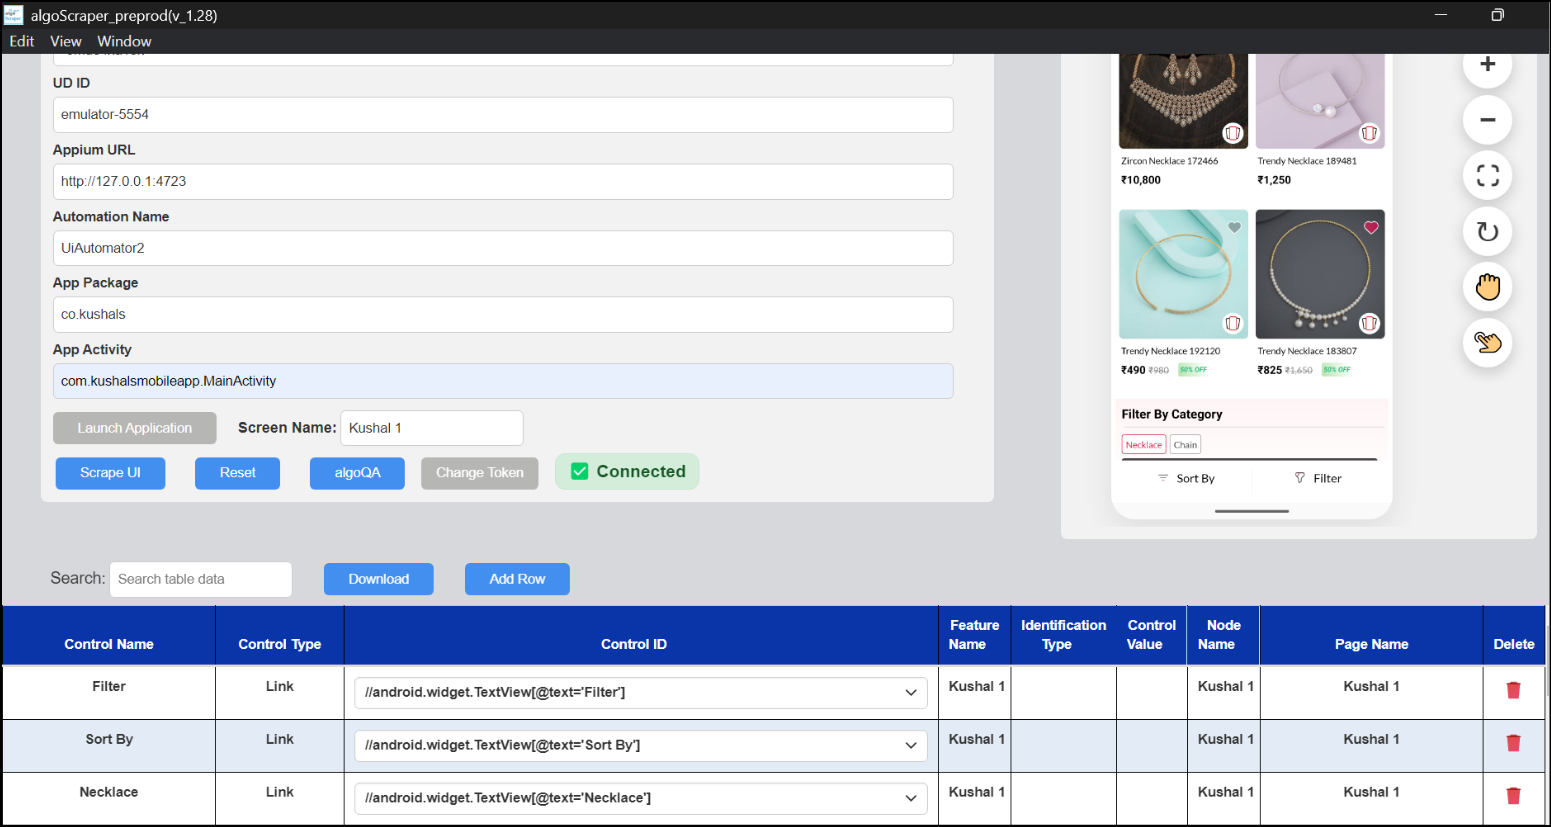
- Click the algoQA button to navigate back to the Create Project page with scraped file.
The scraper prompts for a token only during the initial connection and automatically reconnects using the saved token on subsequent launches. To update the token, click Change Token, copy the token from the Create Project page, and paste it into the scraper. You can also switch to a different user profile whenever required. If the saved token expires, the scraper prompts you to enter a new valid token before reconnecting.
- You can also open the scraper directly from your local system. Copy the access token from the Create Project page and paste it into the Paste Your Token Here field to connect with algoQA. Then, repeat steps 2, 3, and 4.
How to Launch Scraper in Upload Scraped Data and Re-Scrape for Web Automation
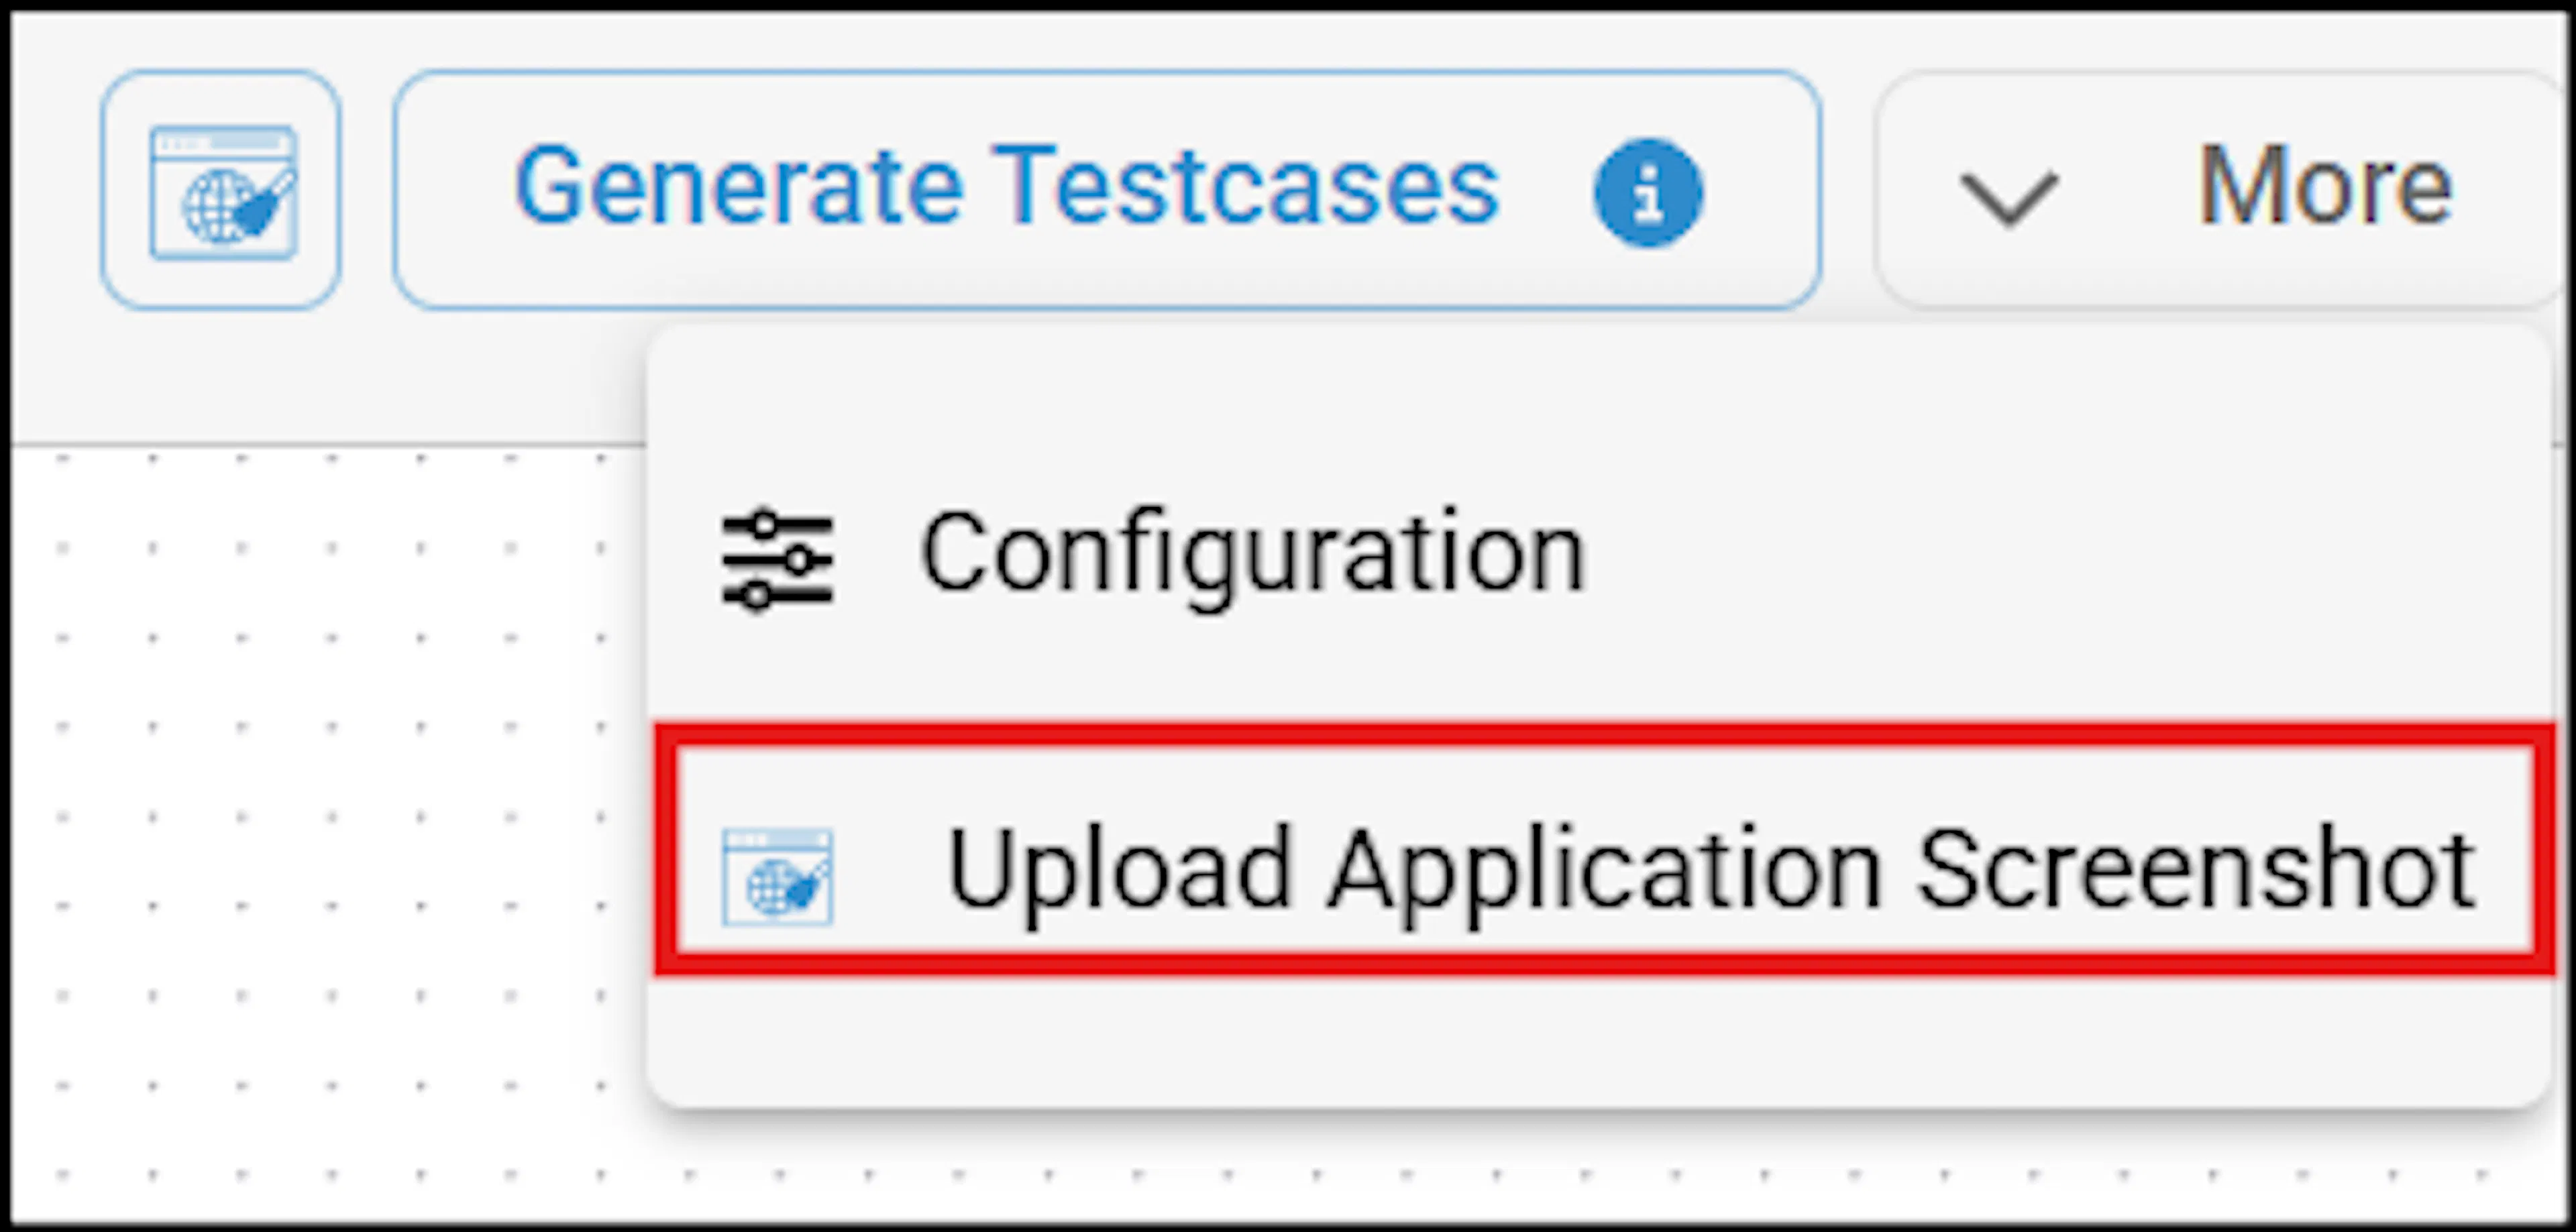
Re-scraping involves re-extracting data from a web page. It is performed when changes occur on the web page or application under test. You can upload the updated re-scraped file while profiling the application and generate test cases. Navigate to the Projects and select an existing web project, you'll be directed to the Canvas. Click the More dropdown and select Upload Application Screenshot.
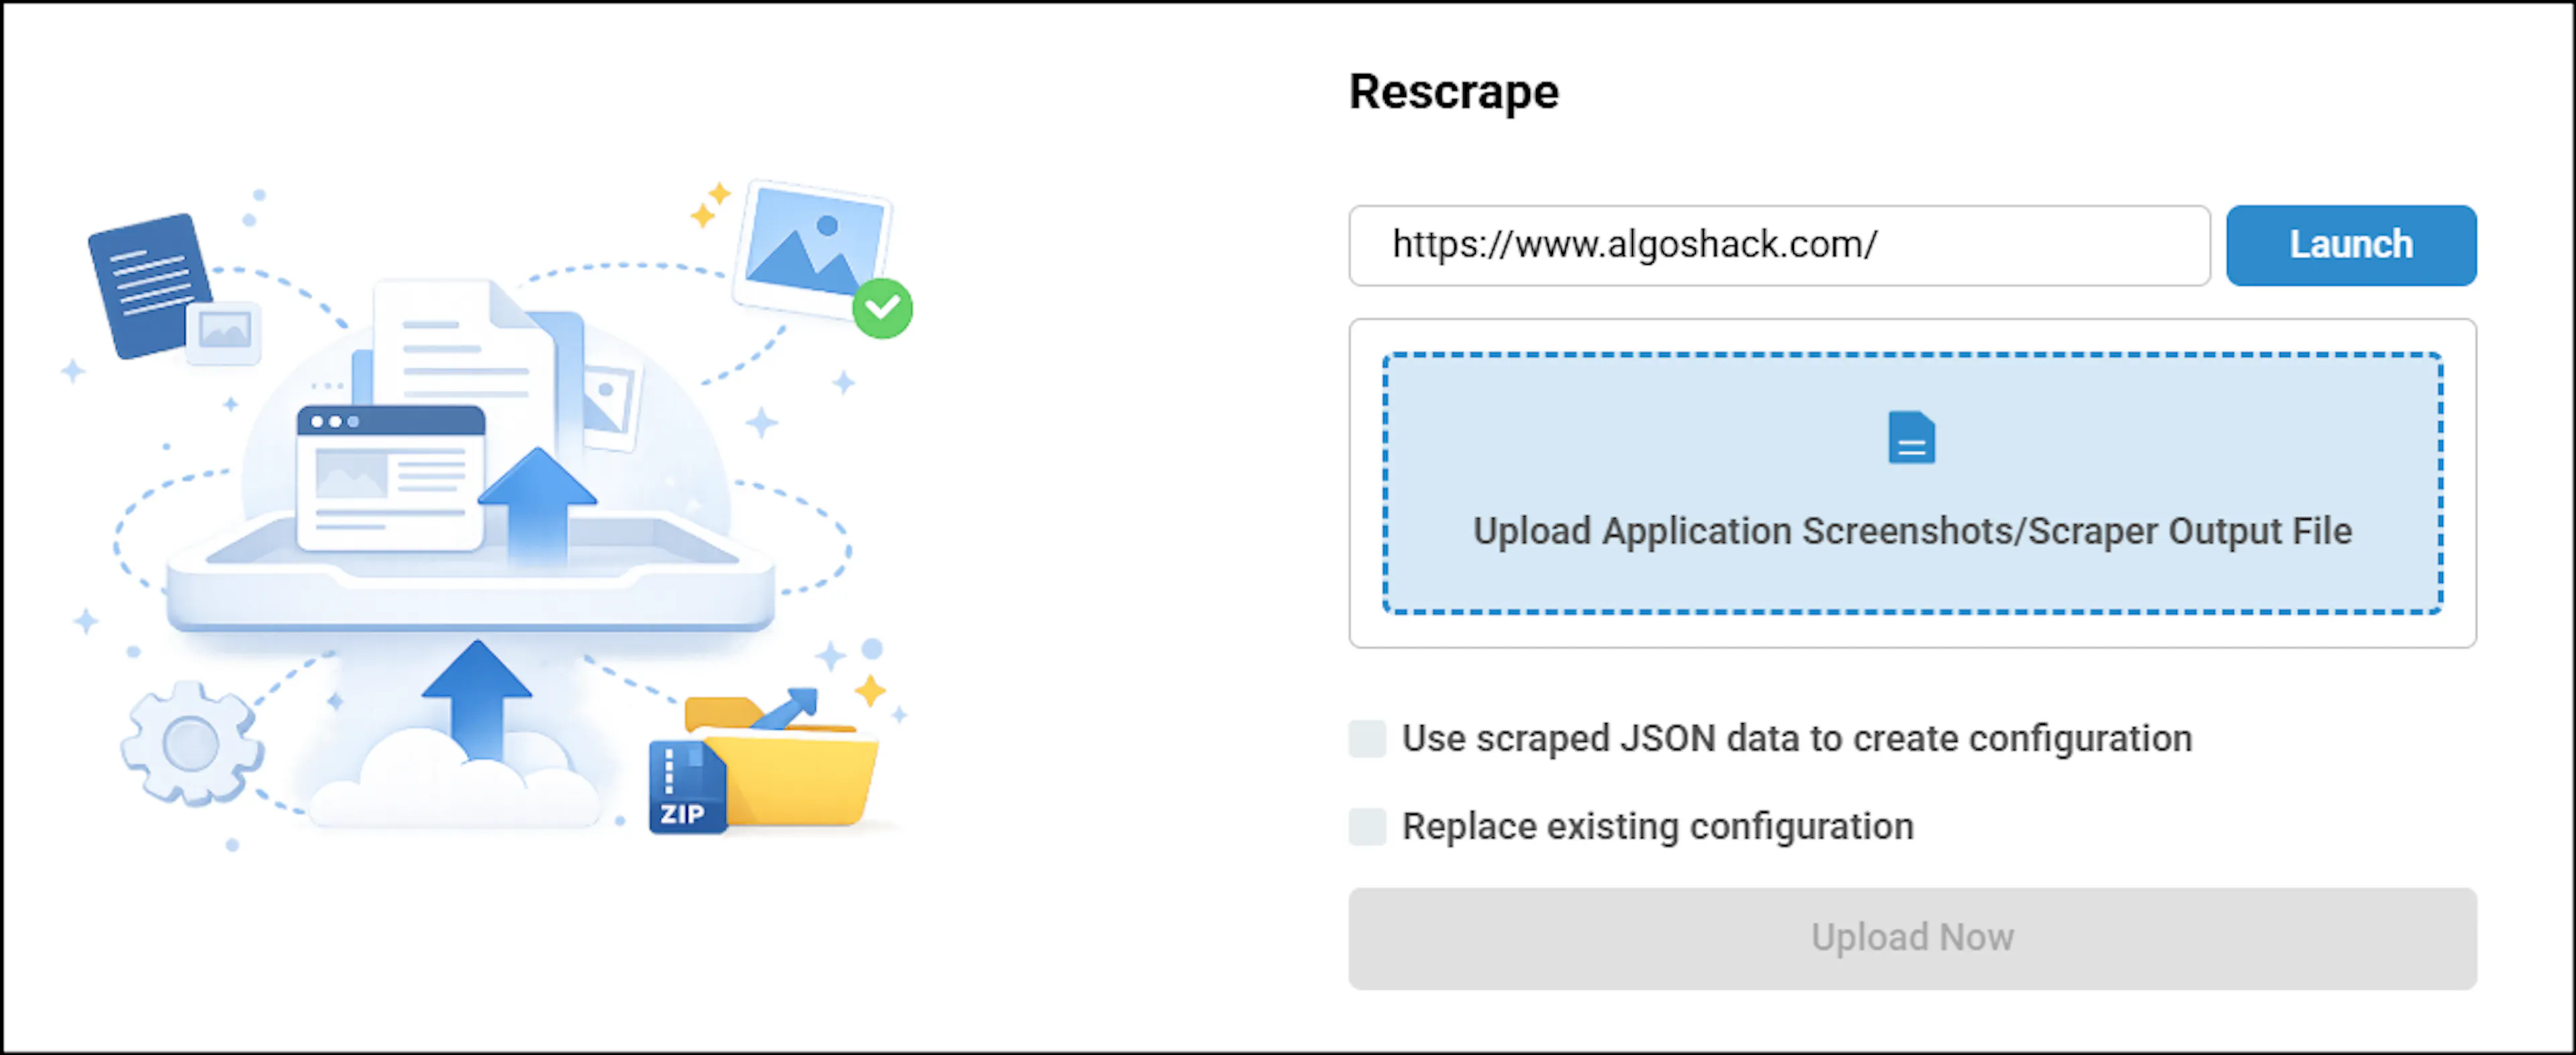
Enter the target URL in the Application URL field, and click Launch.
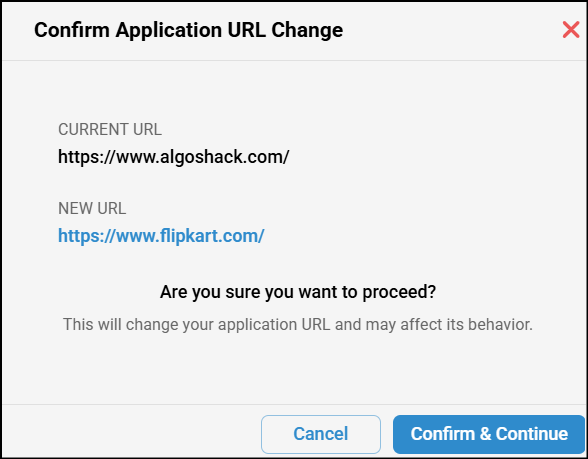
A confirmation pop-up appears when changing the application URL, informing you of the update before proceeding.
Note: If you don't have the algoScraper extension installed, a pop-up will appear prompting you to download the scraper.
The web page will open with the scraper enabled. You can use the scraper to capture UI elements. Click here to learn more about Scraping Web applications. After scraping the UI elements, click the algoQA button to navigate back to the Upload Scraped Data page, with the scraped file automatically attached. Select the Replace Existing Configuration checkbox if you want to replace the configuration and click Upload Now. The nodes will be created in the canvas.
How to Launch Scraper in Upload Scraped Data and Re-Scrape for Mobile Automation
Re-scraping involves re-extracting data from a web page. It is performed when changes occur on the web page or application under test. You can upload the updated re-scraped file while profiling the application and generate test cases. Navigate to the Projects and select an existing Mobile automation project, you'll be directed to the Canvas. Click the More dropdown and select Upload Scraped Data.
- For M-Site
Select the M-Site checkbox, enter the target URL in the Application URL field, and click Launch.
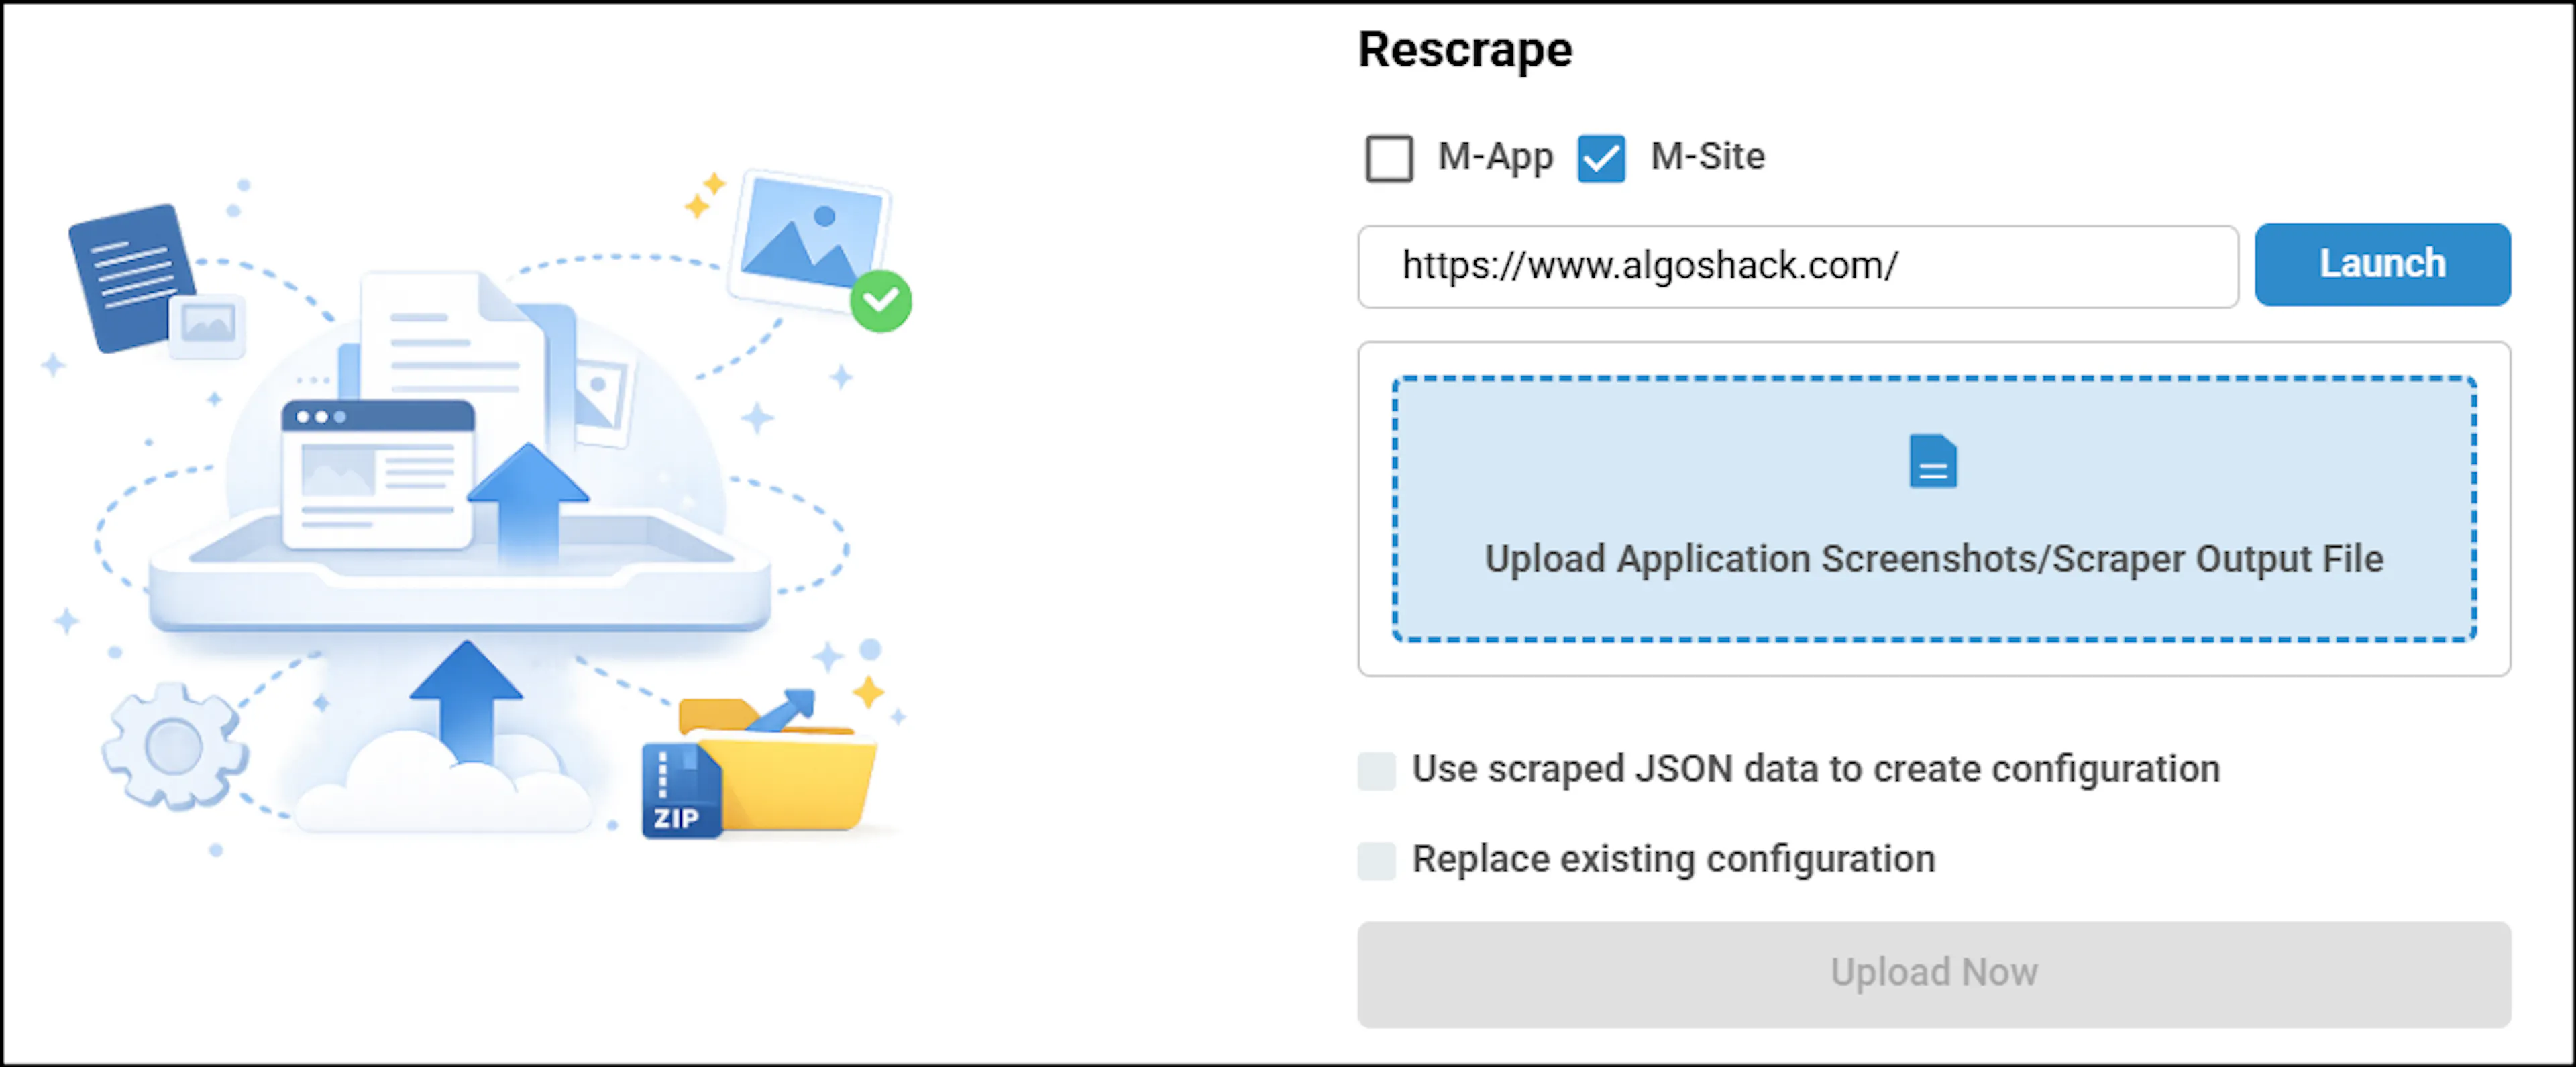
A confirmation pop-up appears when changing the application URL, informing you of the update before proceeding.
Note: If the algoScraper extension is not installed or is not the latest version, a pop-up will appear prompting you to download or update the scraper.
The application URL will open with a popup explaining how to scrape M-Site. Click this link to learn more about scraping M-Site applications.
After scraping the UI elements, click the algoQA button to navigate back to the Upload Scraped Data page, with the scraped file automatically attached.
Select the Replace Existing Configuration checkbox if you want to replace the configuration and click Upload Now. The nodes will be created in the canvas.
- For M-App
Select the M-App checkbox and click Launch.
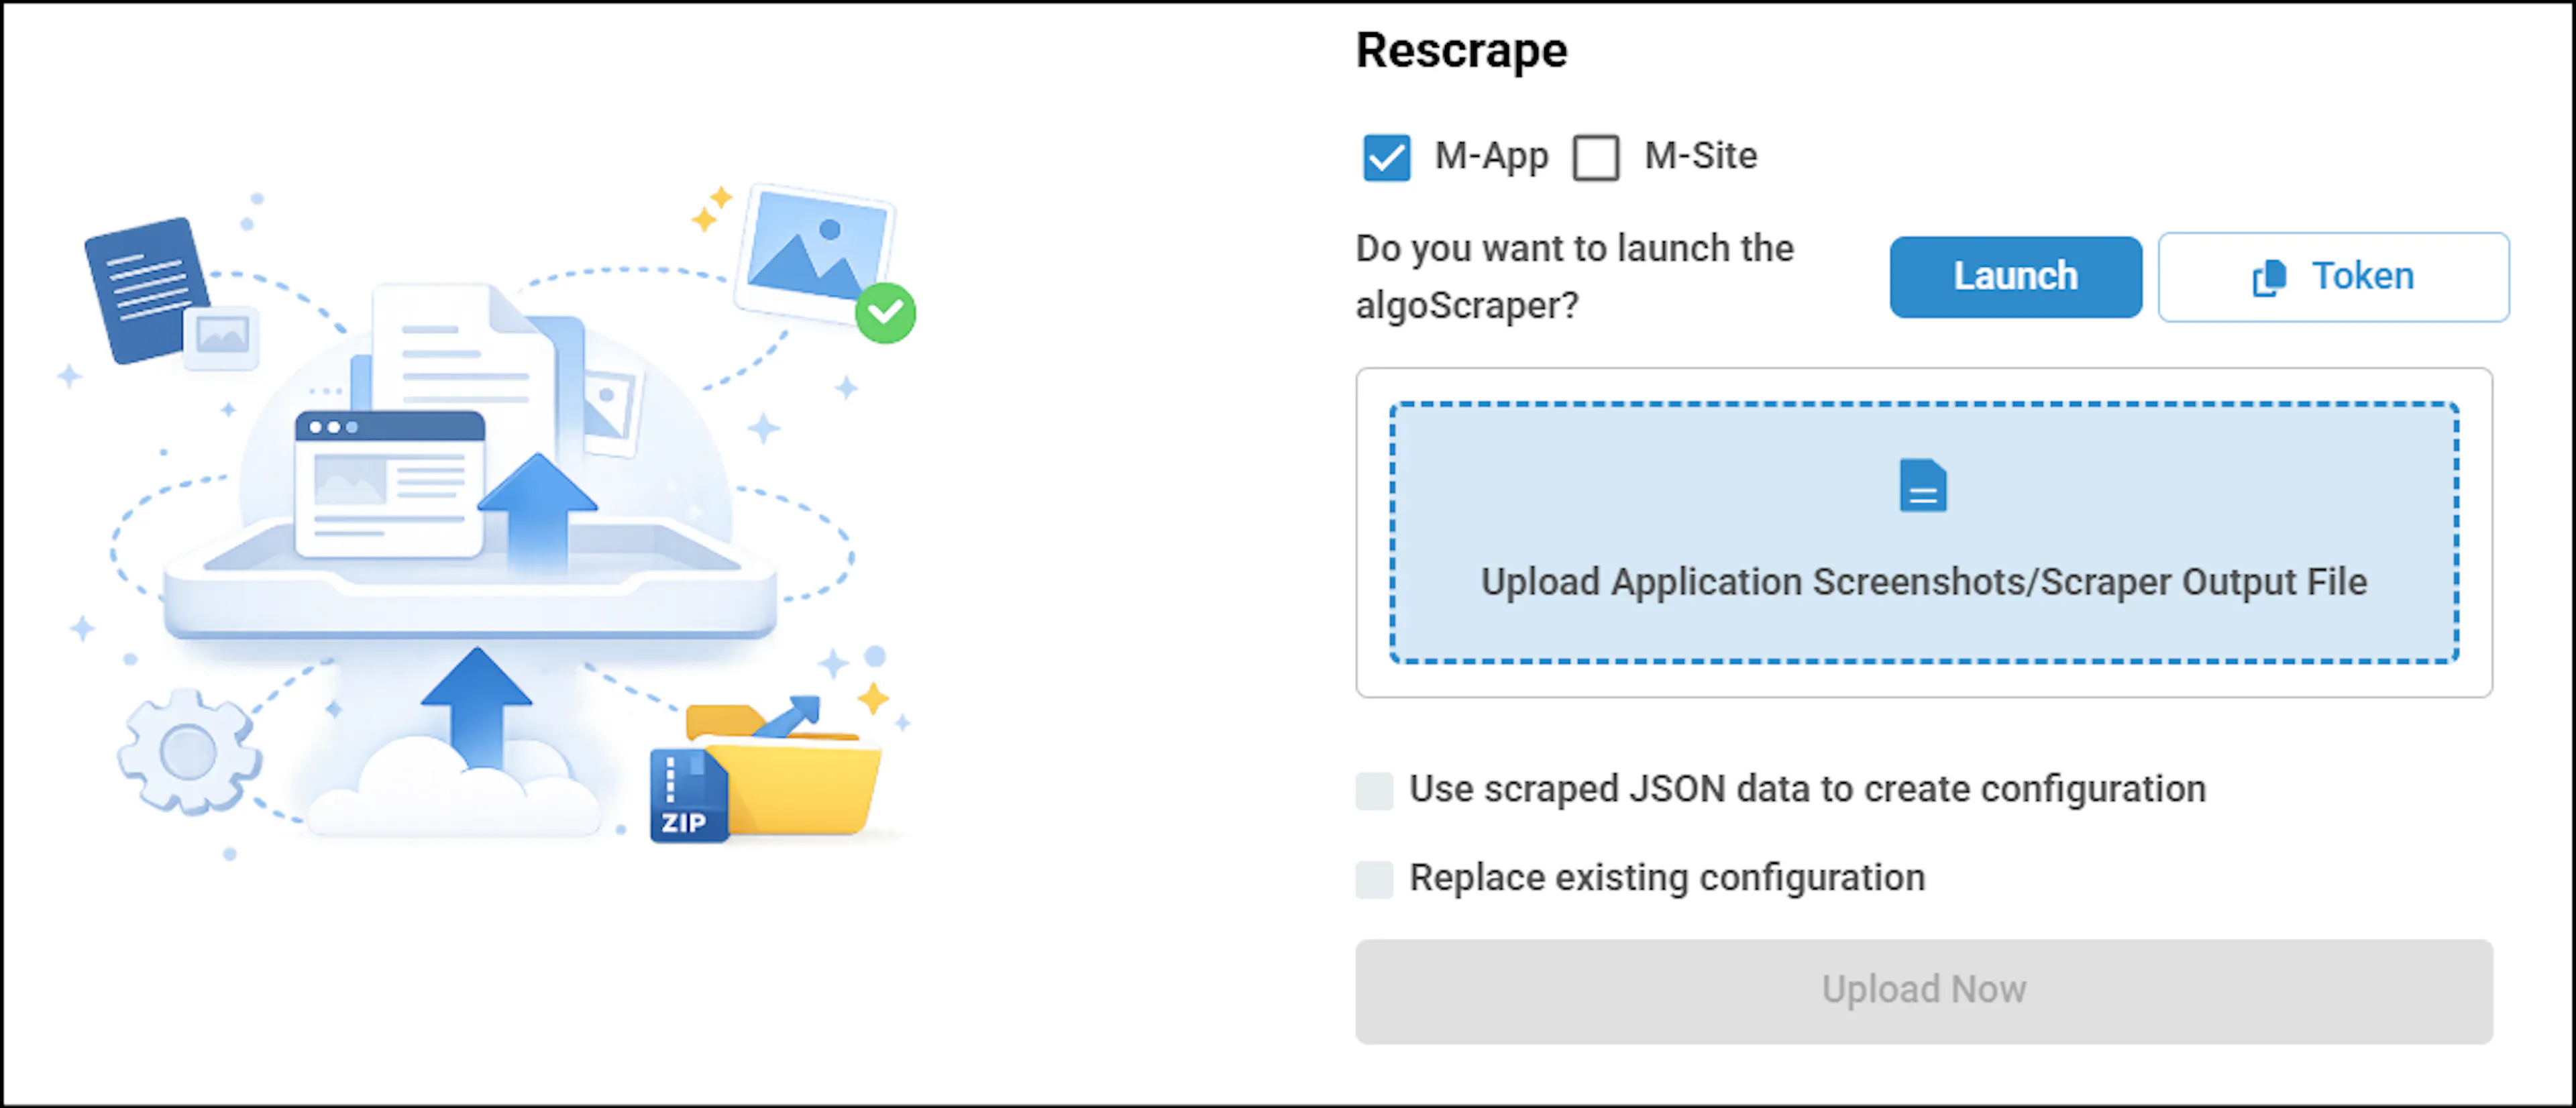
Note: The real device/emulator should be connected to the system before launch.
When you launch the scraper, if a device is connected, the device name and UDID will be fetched automatically. You have to manually enter the App Package and App Activity, then click Launch Application to start the app. Once the application is launched, enter the Screen Name and click Load Page to make the screen available for scraping.
You can either scrape UI elements individually or click Scrape UI to capture all UI elements at once.
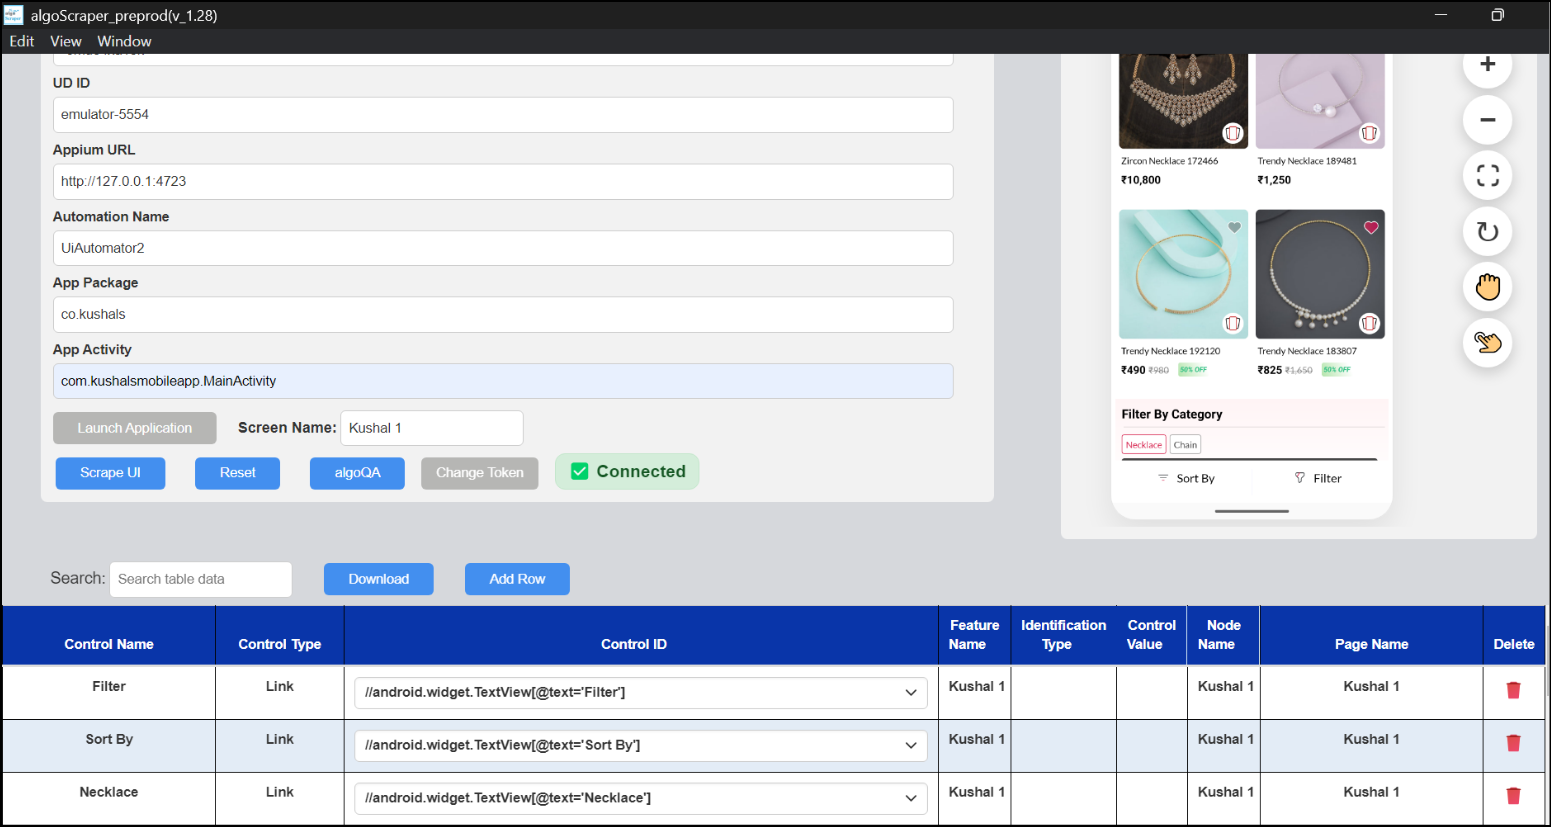
The scraper prompts for a token only during the initial connection and automatically reconnects using the saved token on subsequent launches. To update the token, click Change Token, copy the token from the Create Project page, and paste it into the scraper. You can also switch to a different user profile whenever required. If the saved token expires, the scraper prompts you to enter a new valid token before reconnecting.
Click the algoQA button to navigate back to the Upload Scraped Data page with scraped file.
You can also open the scraper directly from your local system. Copy the access token from the Create Project page and paste it into the Paste Your Token Here field to connect with algoQA. Then, follow the same process to scrape.
Select the Replace Existing Configuration checkbox if you want to replace the configuration and click Upload Now. The nodes will be created in the canvas.