
Record a Scenario Using Online Recorder
The Record Scenario feature in the algoScraper extension allows you to capture and record your interactions as a scenario within an application or website in real-time. This feature helps to generate test cases based on the actions you perform.
With Record Scenario, you do not need to follow the traditional approach of creating an offline model and using the Record Scenario feature to record a scenario and generate test cases. Instead, you can directly record your interactions and identify potential test cases. This feature is similar to the Record Scenario feature in algoQA, as both allow you to record scenarios
How to Use the Record Scenario Feature
Perform the following:
-
Launch algoScraper from the Create Project page. To learn more, see How to Launch Scraper Using algoQA.
-
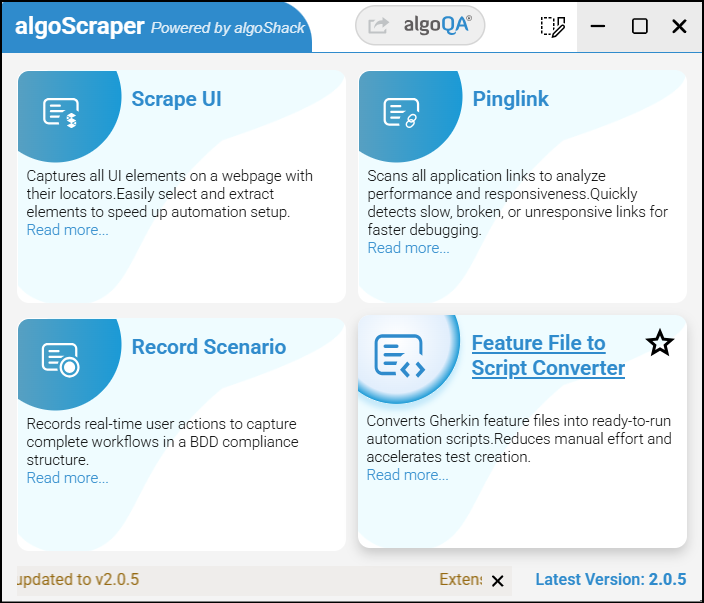
The algoScraper window appears. In this window, select Record Scenario.
-
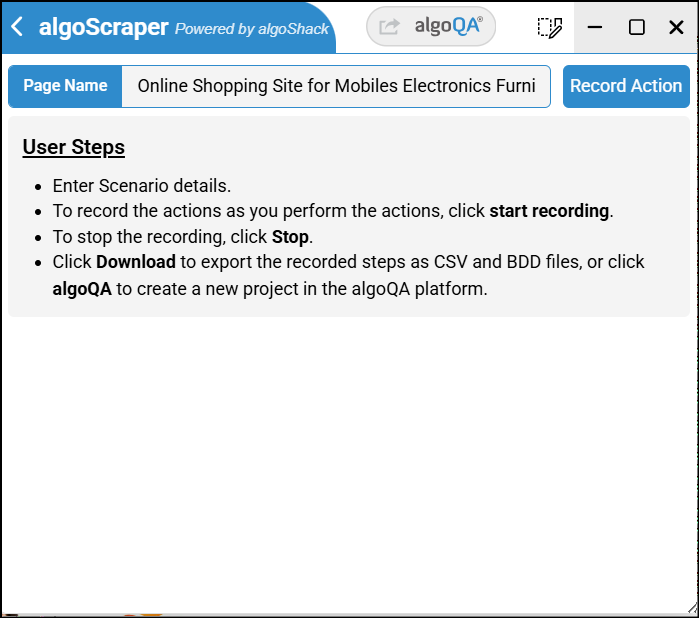
The Record Scenario window appears. In this window, the page name will be entered automatically. Click Record Action.
-
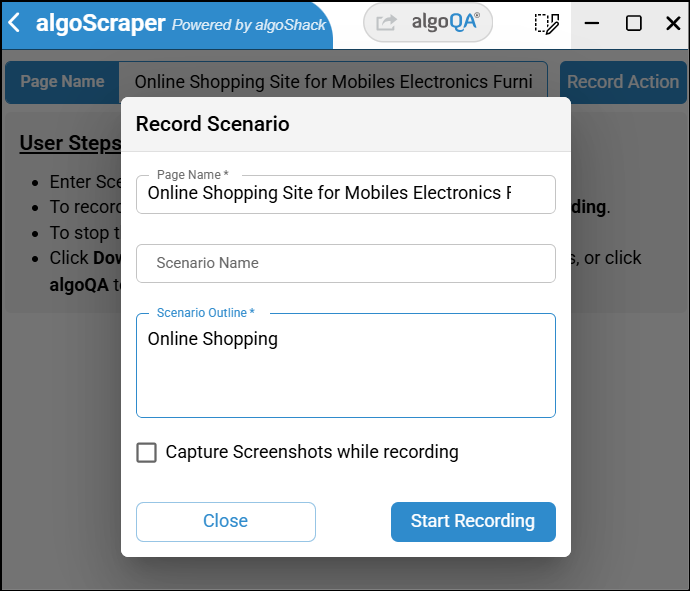
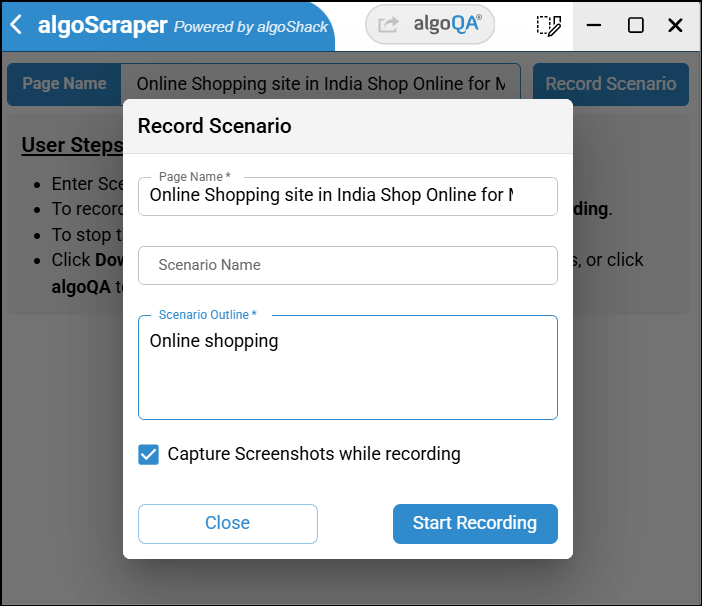
Enter the scenario name and scenario outline, then click the Start Recording button.
-
If you click the Start Recording button without adding a scenario outline, an error message will be displayed saying 'Scenario outline is required.' The scenario name is not mandatory.
-
The icons displayed on the screen are described in the table below:
Icon Description Edit Scenario You can view the recorded scenario in a new page. Add Scenario You can add scenarios to create new scenarios. Delete Delete all the UI elements that have been added Reset Reset the UI elements section to the default state Start Recording By default, this icon will be enabled for you to record the scenario. You can stop recording at any point by clicking this icon. View Scenario Name You can view the recorded scenario name. algoQA Button You can navigate to the Project page using this button after recording a scenario. -
You can click the Add Scenario button to create a new scenario.
In this window, you can use the Reset icon to revert to the Main window.
-
-
Perform the actions that need to be recorded as a scenario in your application.
Iframe elements can also be scraped using algoScraper.
-
Clicking the same element multiple times will record it only once, preventing unwanted duplicate elements.
-
Repeatedly capturing the Collapse/Expand button in the webpage results in correct detection each time. After uploading the data to algoQA, if the XPath remains the same, a single control is created; if the XPath changes, separate controls are created with indexed values.
Duplicate controls cannot be created using the same Control Name or XPath across different Features or Nodes. When the same element is scraped using the Recorder, it is automatically mapped to the existing control. If the same Control Name is associated with different XPaths, indexed entries are automatically created under the same control.
-
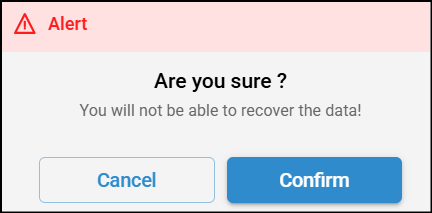
While recording a scenario, if you click the Close icon, a warning message will be displayed saying "You will not be able to recover the data!" Click Confirm if you wish to close, or click Cancel.
-
You can also select the desired page name from the Page Name dropdown menu or add a new page name.
-
While recording, if a pop-up appears, the recorder will capture both parent and child XPaths. When two elements share the same name, both are captured by the recorder.
-
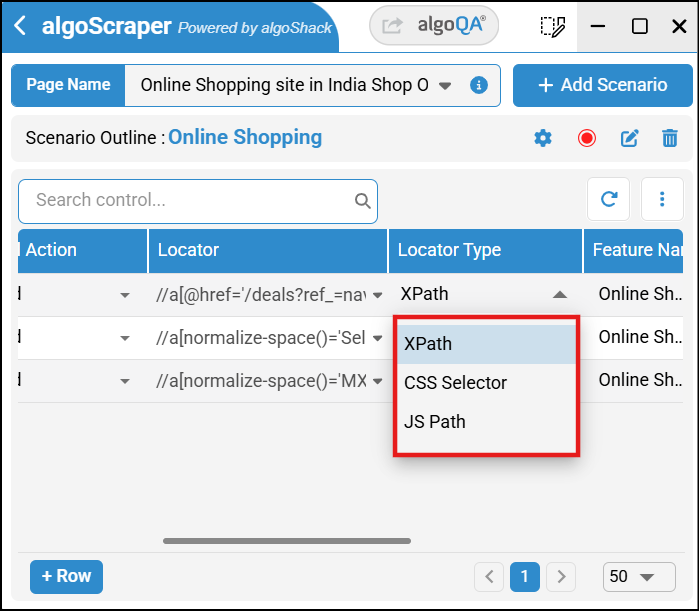
From the Locator Type column, you can select the locator type to be used for the control. Supported locator types include XPath, JSPath, and CSS Selector.
CSS Selector locator type is currently available only for Java Selenium framework.
-
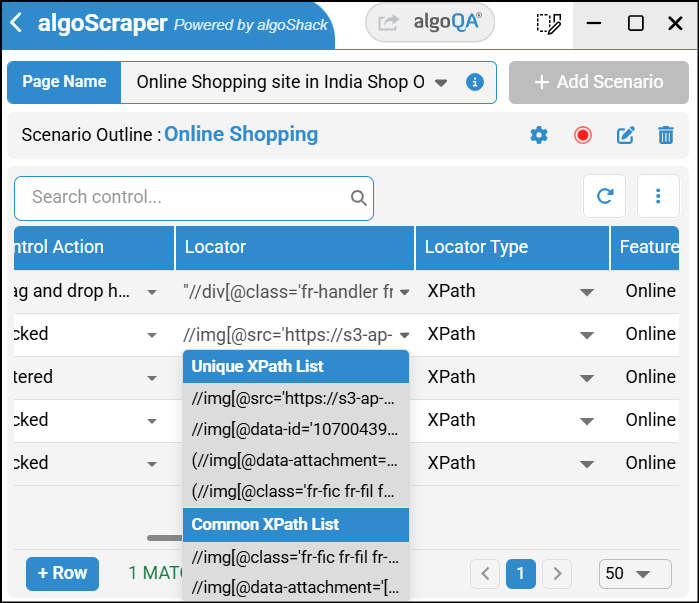
While recording scenarios, the Locator column will display a dropdown menu where you can select the desired locator for XPaths. The available options are Unique XPath and Common XPath.
The Feature Name column is not editable.
-
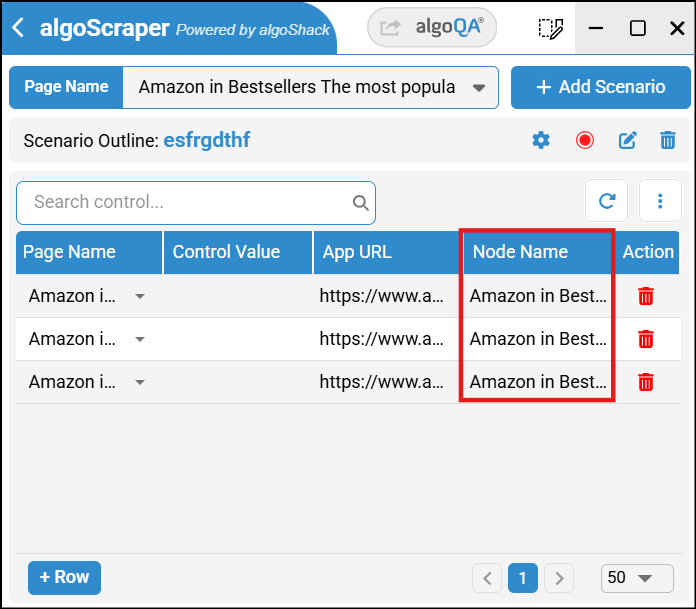
A Node Name column is available in the Scraper where node names are created automatically.
-
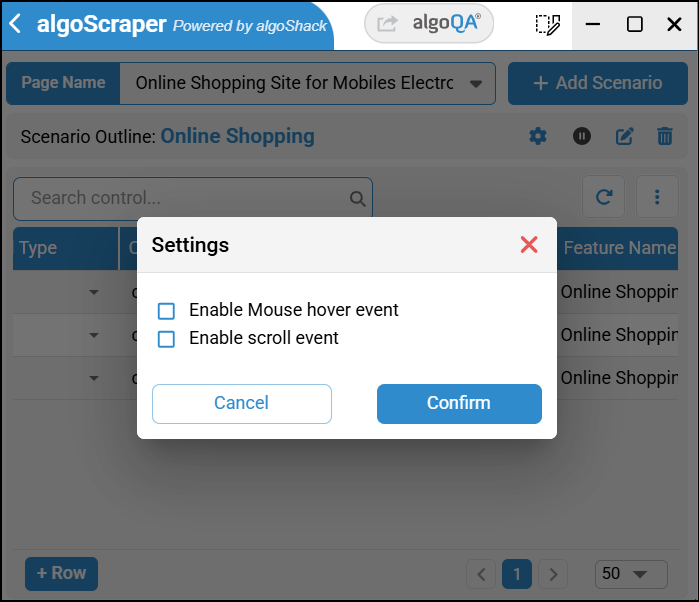
You can enable the mouseover event from the settings when needed. This helps prevent recording unintended actions and ensures it's only active when required. Similarly, the scroll event can be enabled from the settings whenever scroll tracking is necessary.
-
The Tab key can also be used for scraping. Press Tab to navigate and scrape the next available element.
-
Use Shift + Tab to navigate back and scrape the previous element.
-
Click the Stop Recording button after recording your actions.
-
Add a feature name for a control. To learn more about how to add a feature, see How to Add a Feature Name.
If you select Textbox, Textarea, or Dropdown List as the control type in algoScraper for a verification action and the corresponding control values are unavailable, select the Avoid Param option in the Test Step Settings field in algoQA. The scraper maps the captured control types to the appropriate verification actions:
- Checkbox, Radio Button → Verify Checked / Verify Unchecked
- Dropdown, Textarea, Image → Verify Displayed
- Textbox, Link, Button, Label → Verify Text
When a dropdown is not implemented using the standard HTML
<select>element, it is still identified as a DropdownList control type. In such cases, you must configure the Avoid Param option in Test Step Settings for both the dropdown and the selected controls in algoQA. This prevents incorrect recording and avoids build failures during execution. -
You can use the algoQA navigation button to navigate back to the Create Project page for a new project, or to the Upload Scraped Data page for existing project. You can also download the .json file and upload it to algoQA.
-
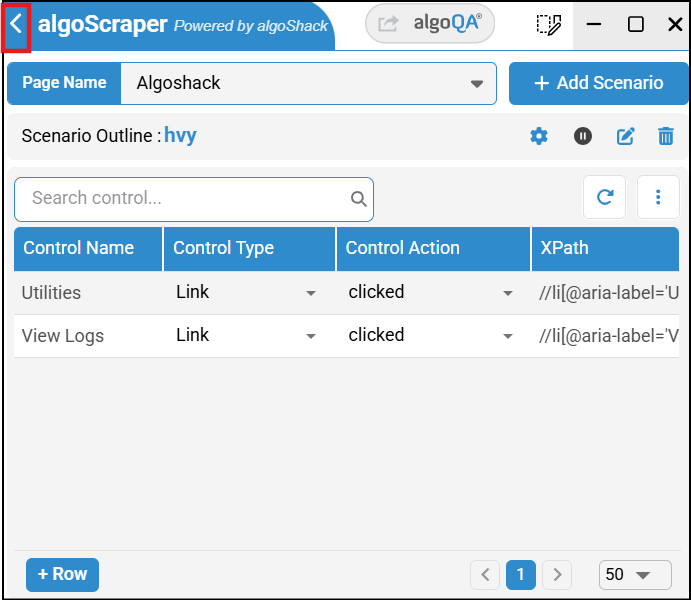
To download the scraped data, click the back icon.
-
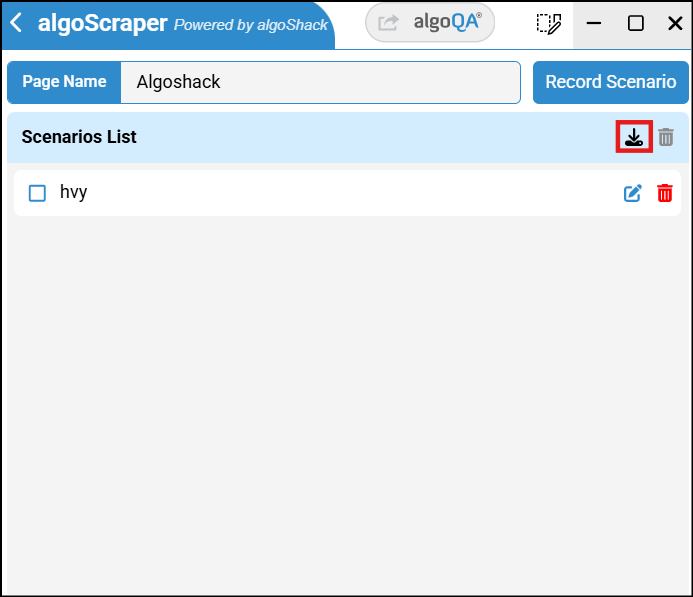
Click the download icon to download the scraped data.
-
Click the edit scenario icon to edit the scenario, or the delete icon to delete the scenario.
Edit out unnecessary steps that were recorded while recording actions, either in the recorder or in the profiler.
How to Capture Screenshots while Recording a Scenario
- This is helpful when the recorded scenario does not capture certain actions, as you can refer to the screenshot to review them in greater detail.
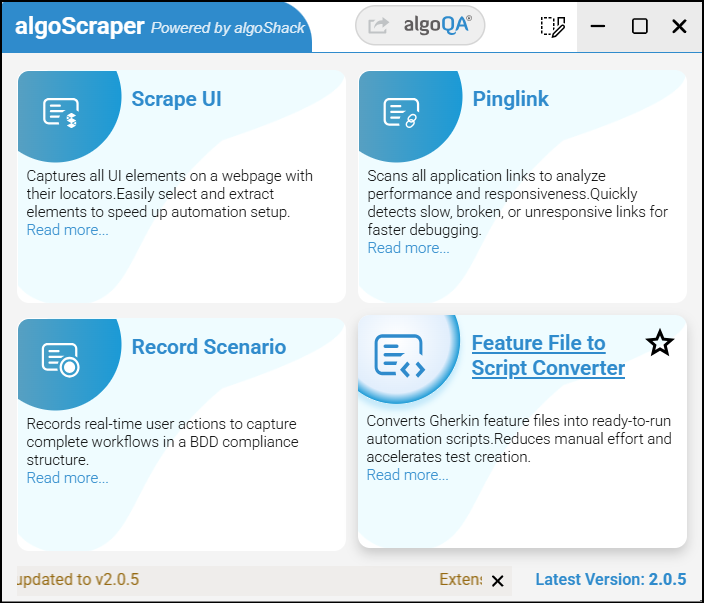
- After launching the scraper on a webpage, select Record Scenario.
- The Record Scenario window appears. In this window, the page name will be entered automatically. Click Record Scenario.
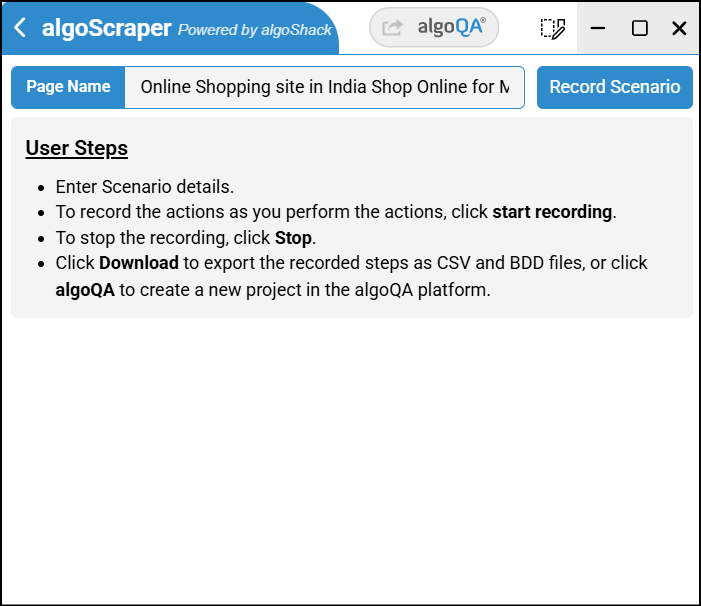
- Enter the scenario name and scenario outline, select the Capture Screenshots While Recording checkbox, and click the Start Recording button.
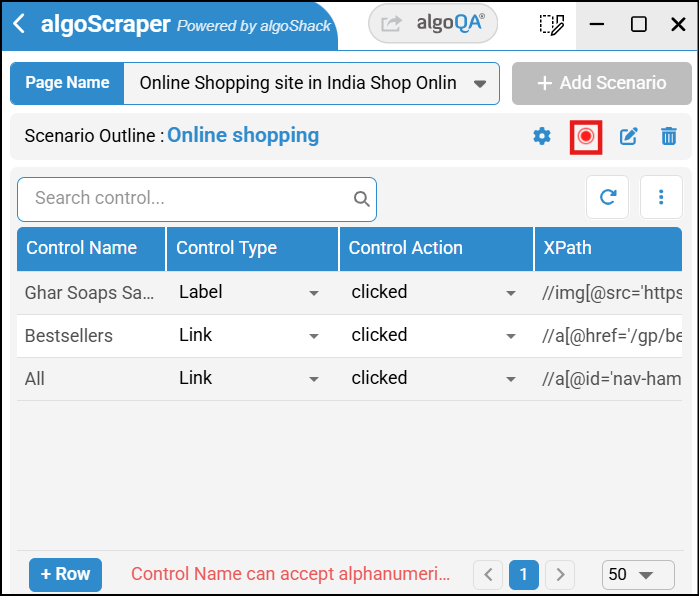
- Perform the actions in your application that need to be recorded as a scenario. During this process, screenshots will be captured automatically.
- Click the Stop Recording button after recording your actions.
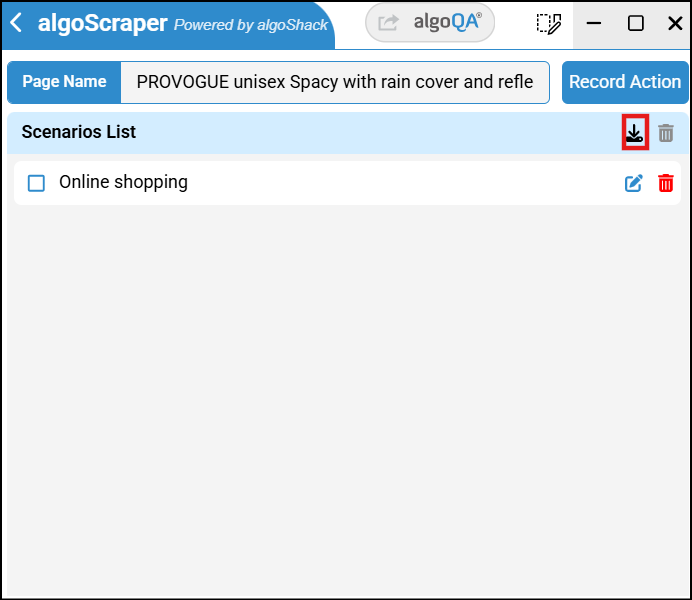
- After recording, go back to the scenario list and click the Download icon. A BDD report will be downloaded.
- Open the BDD report and click the Play icon next to the Scenario Outline.

- The BDD steps will be generated automatically. Click the Show button beside each step to view the corresponding screenshots. In each screenshot, the location clicked during the recording will be highlighted in blue.
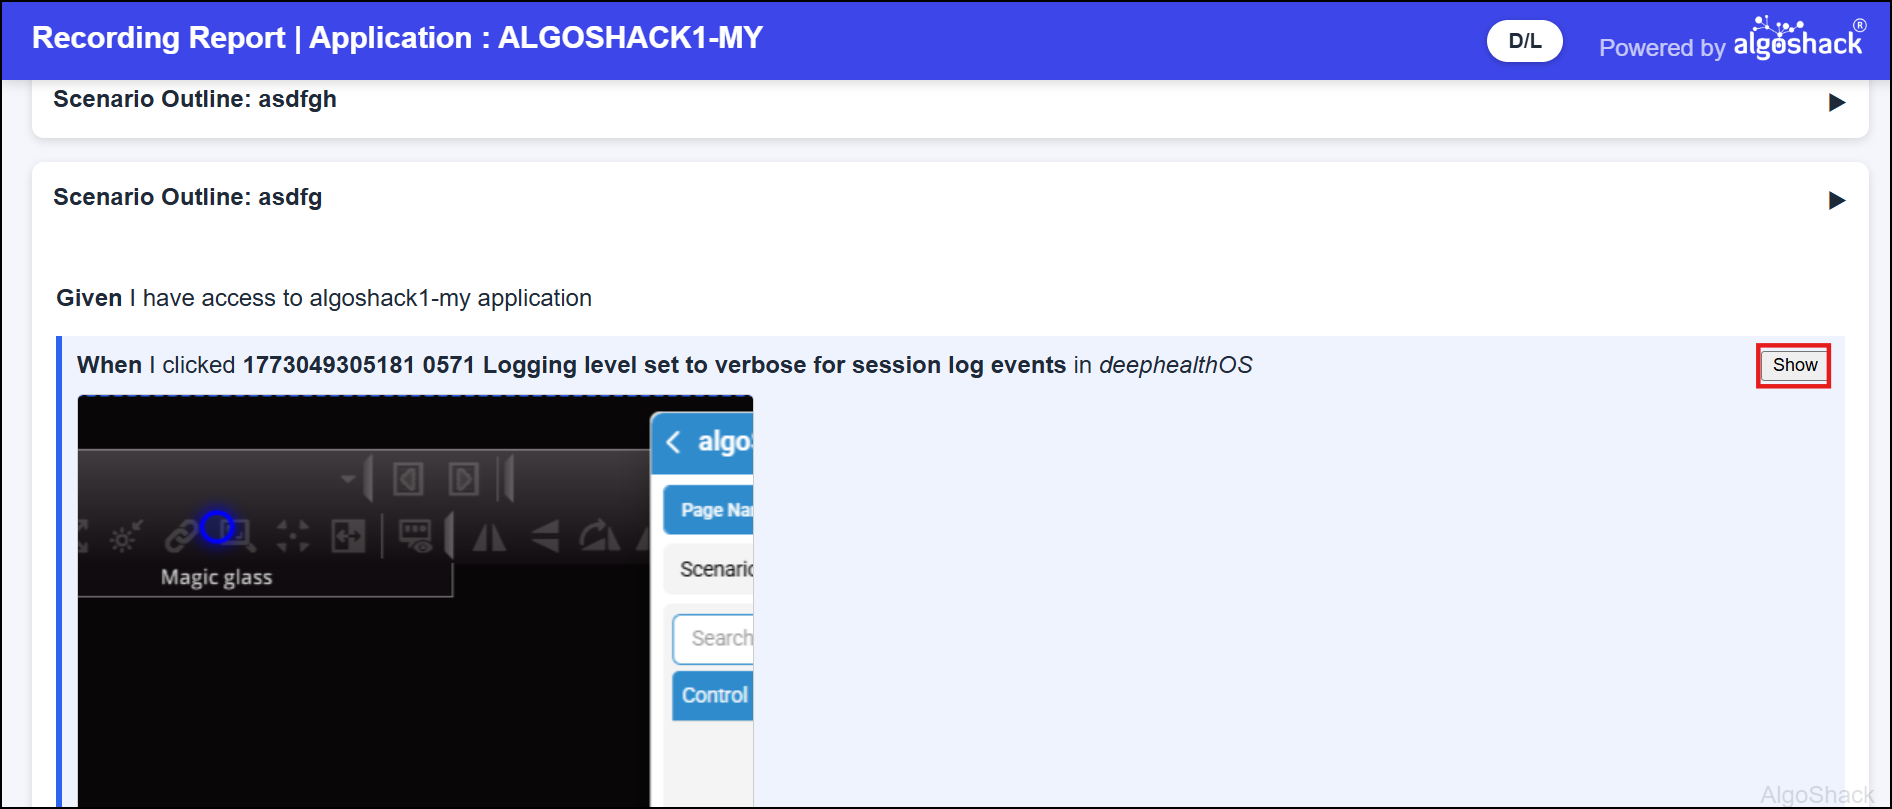
- Click the Hide button to stop viewing the screenshot.

All sensitive data, such as OTPs, passwords (pwd), one-time passwords, security IDs, security keys, secret IDs, and secret keys, will be encrypted throughout the entire process. This includes during data recording via the scraper, after the scraped file is uploaded to algoQA, and during script generation. For the customized framework, a new file named
LoggerUtil.javamust be added. Additionally, changes need to be made inCommonUtil.javato ensure that sensitive data is encrypted throughout the execution process.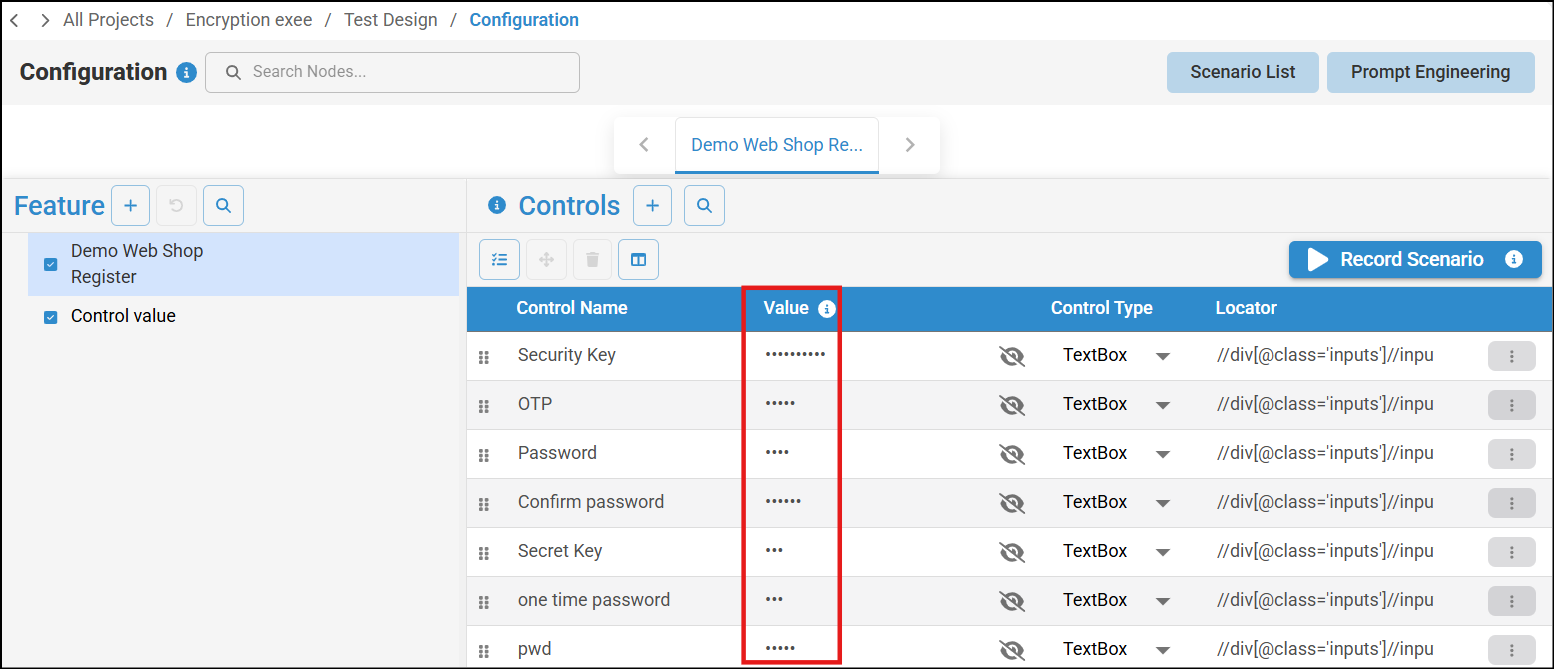
Limitations of the Record Scenario Feature
- If the control name captured in the recorder is different from the element name — for example, while clicking a checkbox, hovering, or selecting an option from a dropdown, the name appears different — you must manually edit the name.
- Desktop elements cannot be captured in the recorder. In this case, you can add them manually while profiling.
- You cannot capture a complete row XPath in the Record Scenario feature. If you try to capture a complete row, the control name will not be meaningful. If you try to capture correct control names, the XPath will be wrong. In these cases, manual changes must be made.
- Keyboard actions cannot be captured. In this case, you can add them manually.
- If there are two different controls with the same name but different control types, the control type of the first control will be recorded for both controls. In this case, you can manually edit the control type from the recorder.
- Hardcoded XPaths will need to be handled manually.
- For indexed XPaths, achieving 100% accuracy is not feasible. When pop-ups interfere with XPath functionality, the scraper captures structured XPaths that reflect the element hierarchy, which helps to eliminate index-based identification.
- If you have not selected a UI element on the webpage, the Tab key will start navigation from the Scraper, but the element will not be scraped.
- Only interactive elements will be captured.
- While trying to prevent recording duplicate elements, double-click actions can be captured continuously.
- While trying to prevent recording duplicate elements, if the control name is the same but the action type or XPath is different, the system will allow continuous capture.
If you choose to re-record a scenario, use the preceding feature, then download the file containing the updated scenario. After downloading, upload the file back into algoQA in Upload Application Screenshot to apply the new configuration. Upon the file upload, the new node will be added, while the existing node will remain in place. The new node configuration will take precedence. For more information on how to upload an existing scraped file, refer to How to Upload an Existing Scraped File.
Use Cases of Online Recorder
- By leveraging the Record Action feature during manual testing, you can capture test scenarios in real time—enabling automation to be generated alongside manual validation. This approach provides several key benefits:
- Manual testers actively contribute to automation, increasing overall automation capacity without additional overhead.
- Automation stays aligned with ongoing application changes, reducing the risk of outdated scripts and improving long-term coverage.
- In-sprint automation becomes feasible, helping teams achieve faster, more reliable, and continuous releases.
- Recorded scenarios and files can be easily shared with automation engineers, allowing for quick refinement, enhancement, and integration into the automation framework.