
API Test Automation Using API Collection
Automate APIs using algoQA API collections — upload collections, configure requests, generate test scripts, and execute automation tests with environment variables.
Alternatively, if you wish to automate an API by leveraging the algoQA platform when API details are captured from an API collection, such as Postman, install the Postman app for different operating systems, such as Windows, Linux, and Mac by clicking here. Upon installing the Postman app, create an API collection and include all the necessary requests to perform user actions.
API Test Automation When API Details are Captured Using algoQA API Collection
- User actions and HTTP methods: API endpoints correspond to specific user actions, and different HTTP methods indicate the type of operation you want to perform on these endpoints.
- Example: The following table shows user actions to access and manage a profile, along with their corresponding HTTP methods (POST, GET, PATCH, OPTIONS, and DELETE).
| API | HTTP Methods to call API |
|---|---|
| Login | POST |
| Create a profile | POST |
| Access the profile | GET |
| Update the profile | PATCH |
| Lists the supported HTTPS methods | OPTIONS |
| Delete a Profile | DELETE |
Perform the following:
-
Create a project:
- Name your project "API Automation using algoQA collection."
- Select API Automation.
- Click Create to initiate the project setup.
-
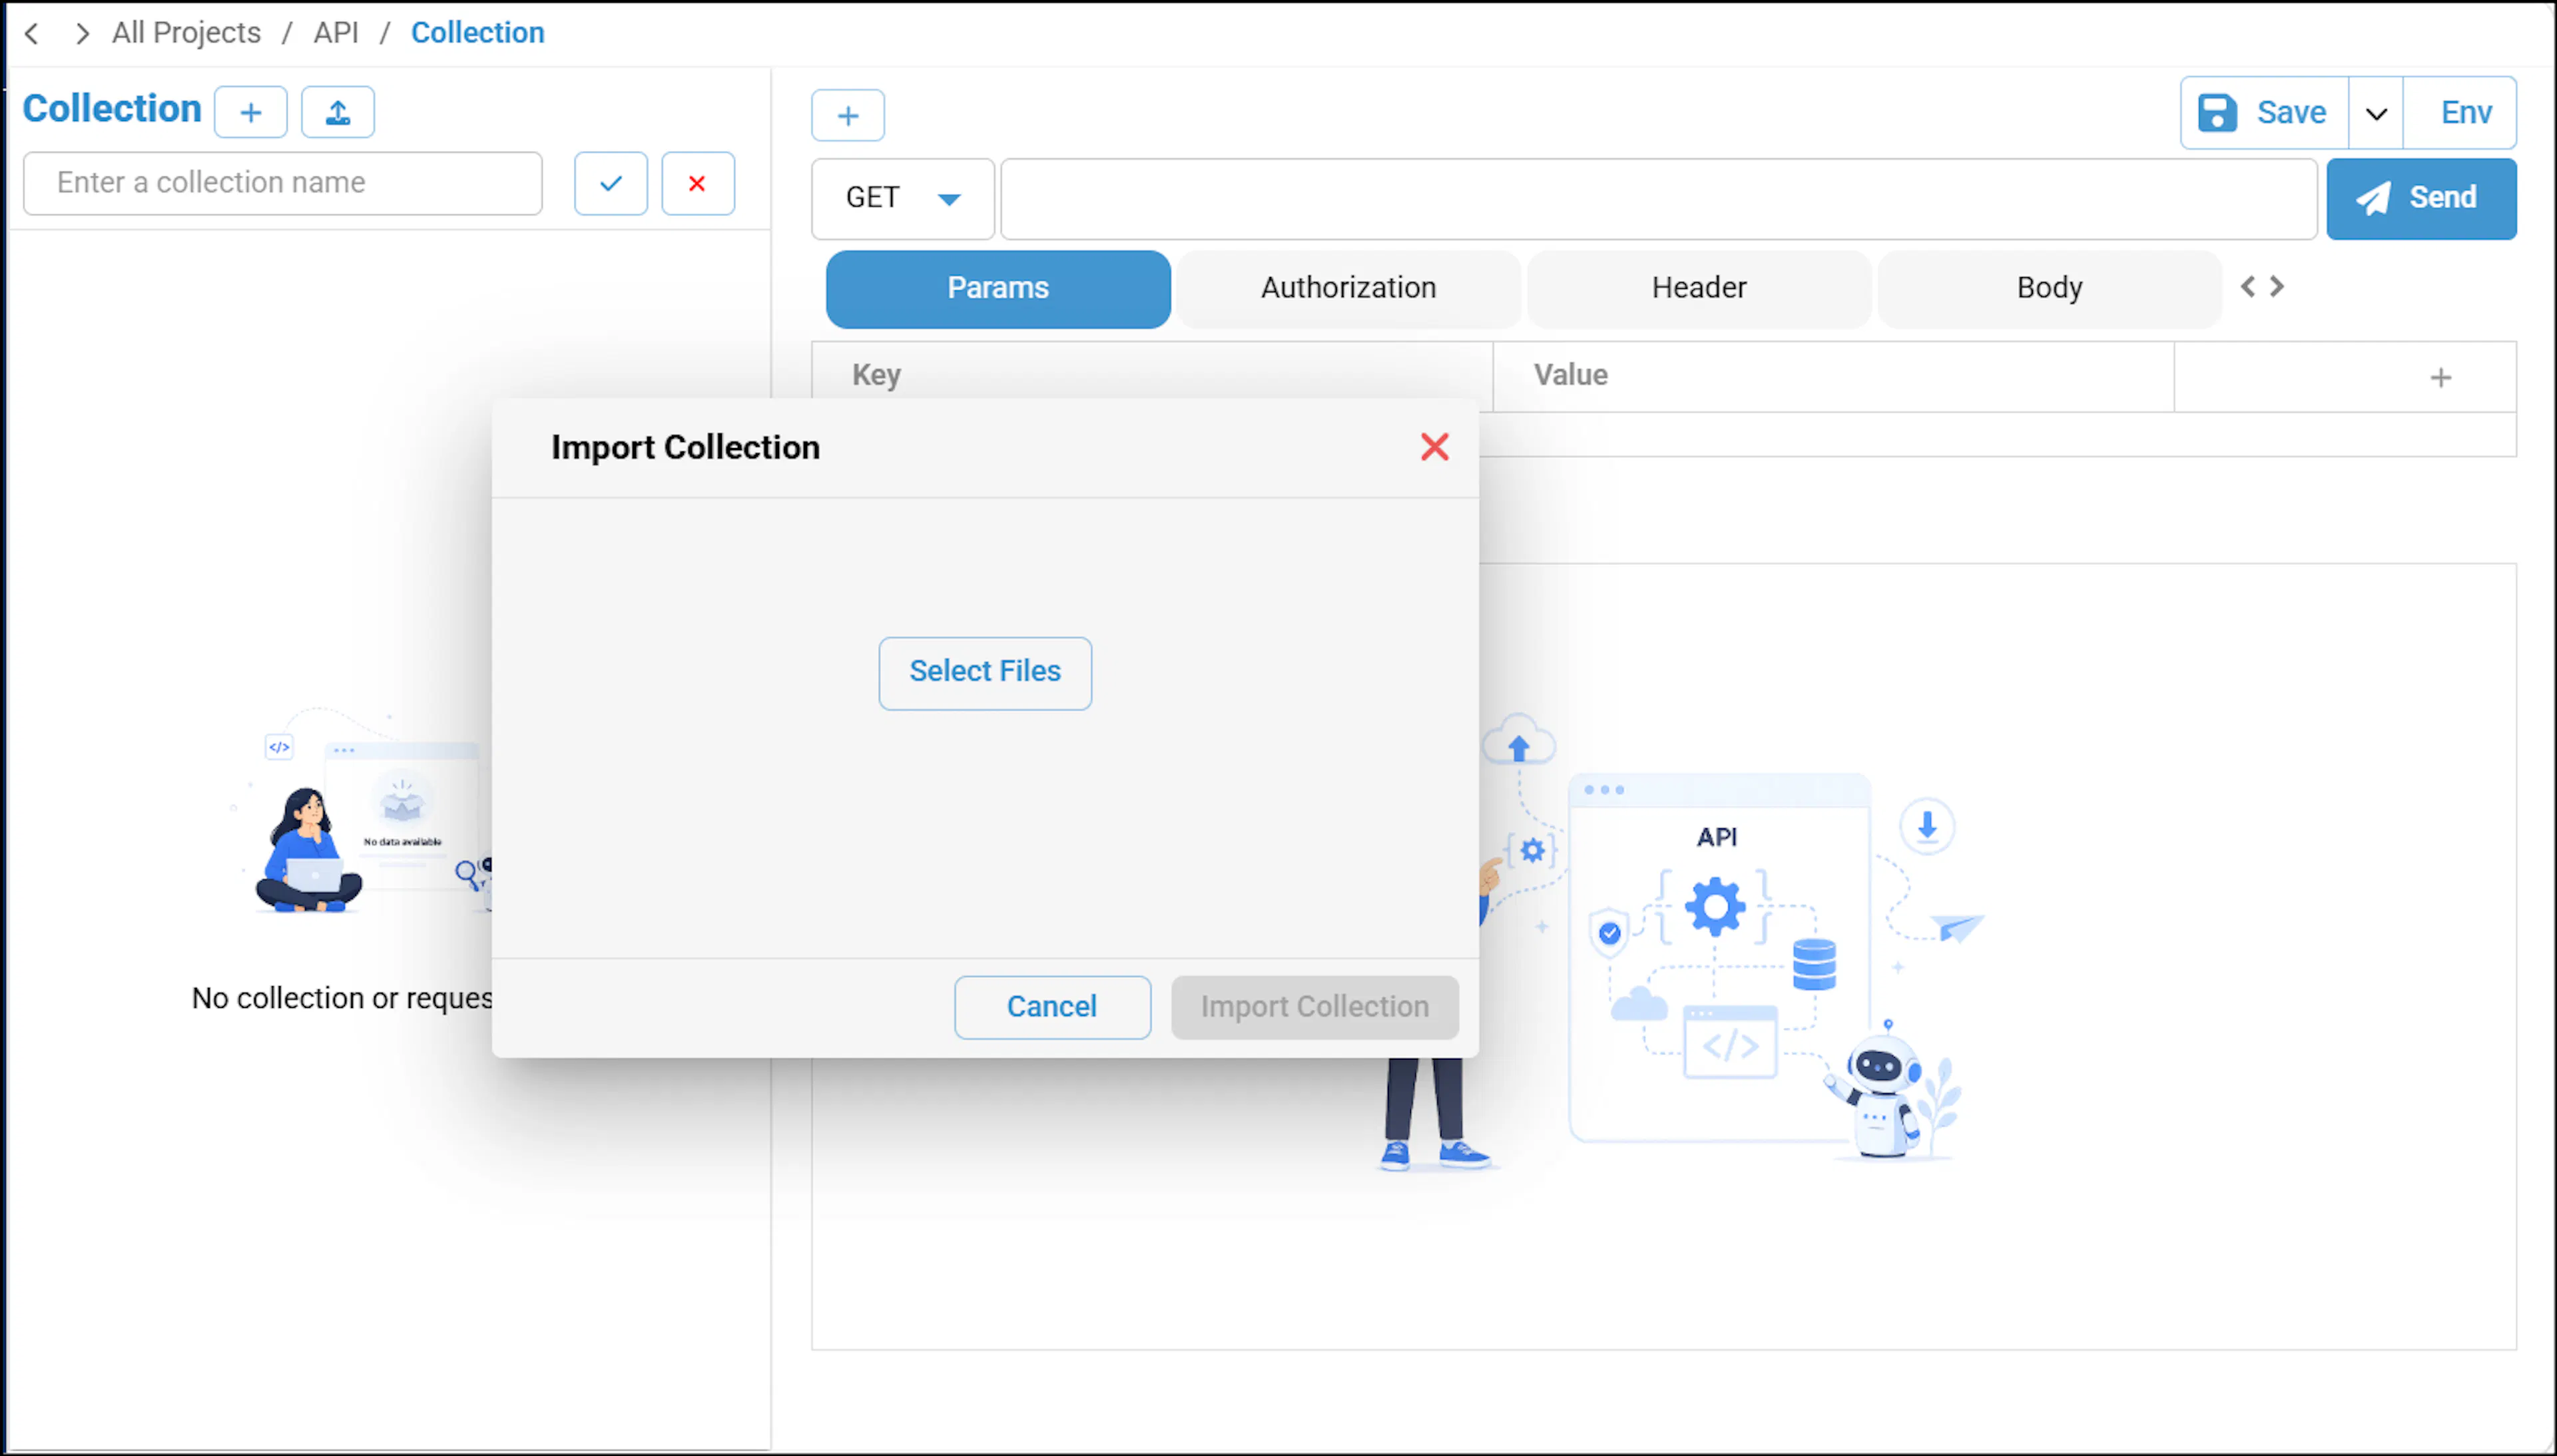
Upload an API collection: Click the Upload icon to import a collection. Supported file formats include JSON, Swagger JSON, Swagger YAML, and XLSX. You can also add an API collection using the Save As option — click the + icon, enter a name, and the collection will be created and selected. Multiple collections can be imported. The Save button will then be enabled for you to save. When a project is exported and then imported, the sequence of requests is preserved exactly as it was at the time of export, including during script generation.
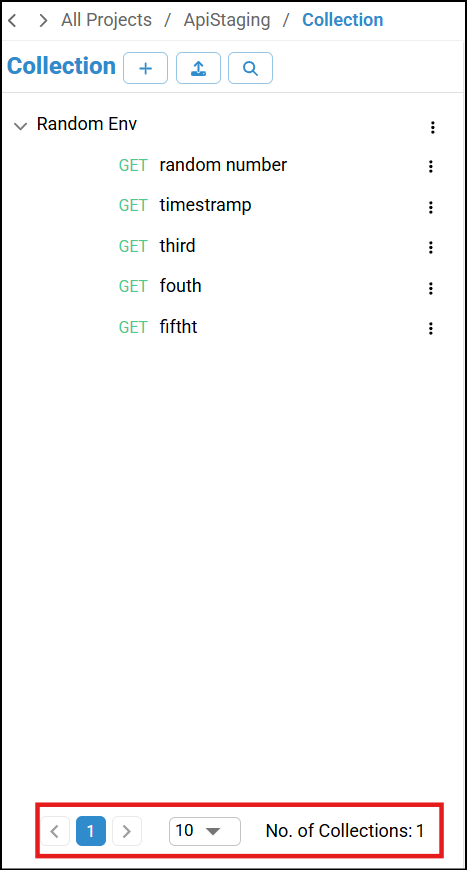
You can use the pagination option in Collections to navigate through different collections. You can also configure how many collections are visible at a time.
-
Execute the API Automation test cases:
-
Validate the HTTP method details to log in a user using the POST method. Save it and click Send to execute it. Enter the URL. If required, add parameters in the Key and Value text boxes by clicking the plus icon. Select Bearer Token in the Authorization tab and add the appropriate parameters. In the Body tab, pass the request body and click Send.
The request body format can be one of the following: form-data, x-www-form-urlencoded, raw, GraphQL, or none. You can download a request and reuse it, and import a request at collection and request level.
When a user uses
::(double colon) in URL, headers, or request body, the system treats it as a special delimiter.Instead of considering it as a normal string, the framework splits the value into pipeline parts.
For example,
https://::algoshack.net/is split into|https://|and|::algoshack.net|.This happens because
::is interpreted as a pipeline separator in the parsing logic.Due to this, the value is broken into multiple segments instead of staying as a single input.
To avoid this, special characters like
::should be escaped or properly handled in the parser.If you have selected No Auth in the Authorization tab, you can provide the Bearer token and the Authorization key in the Header tab.
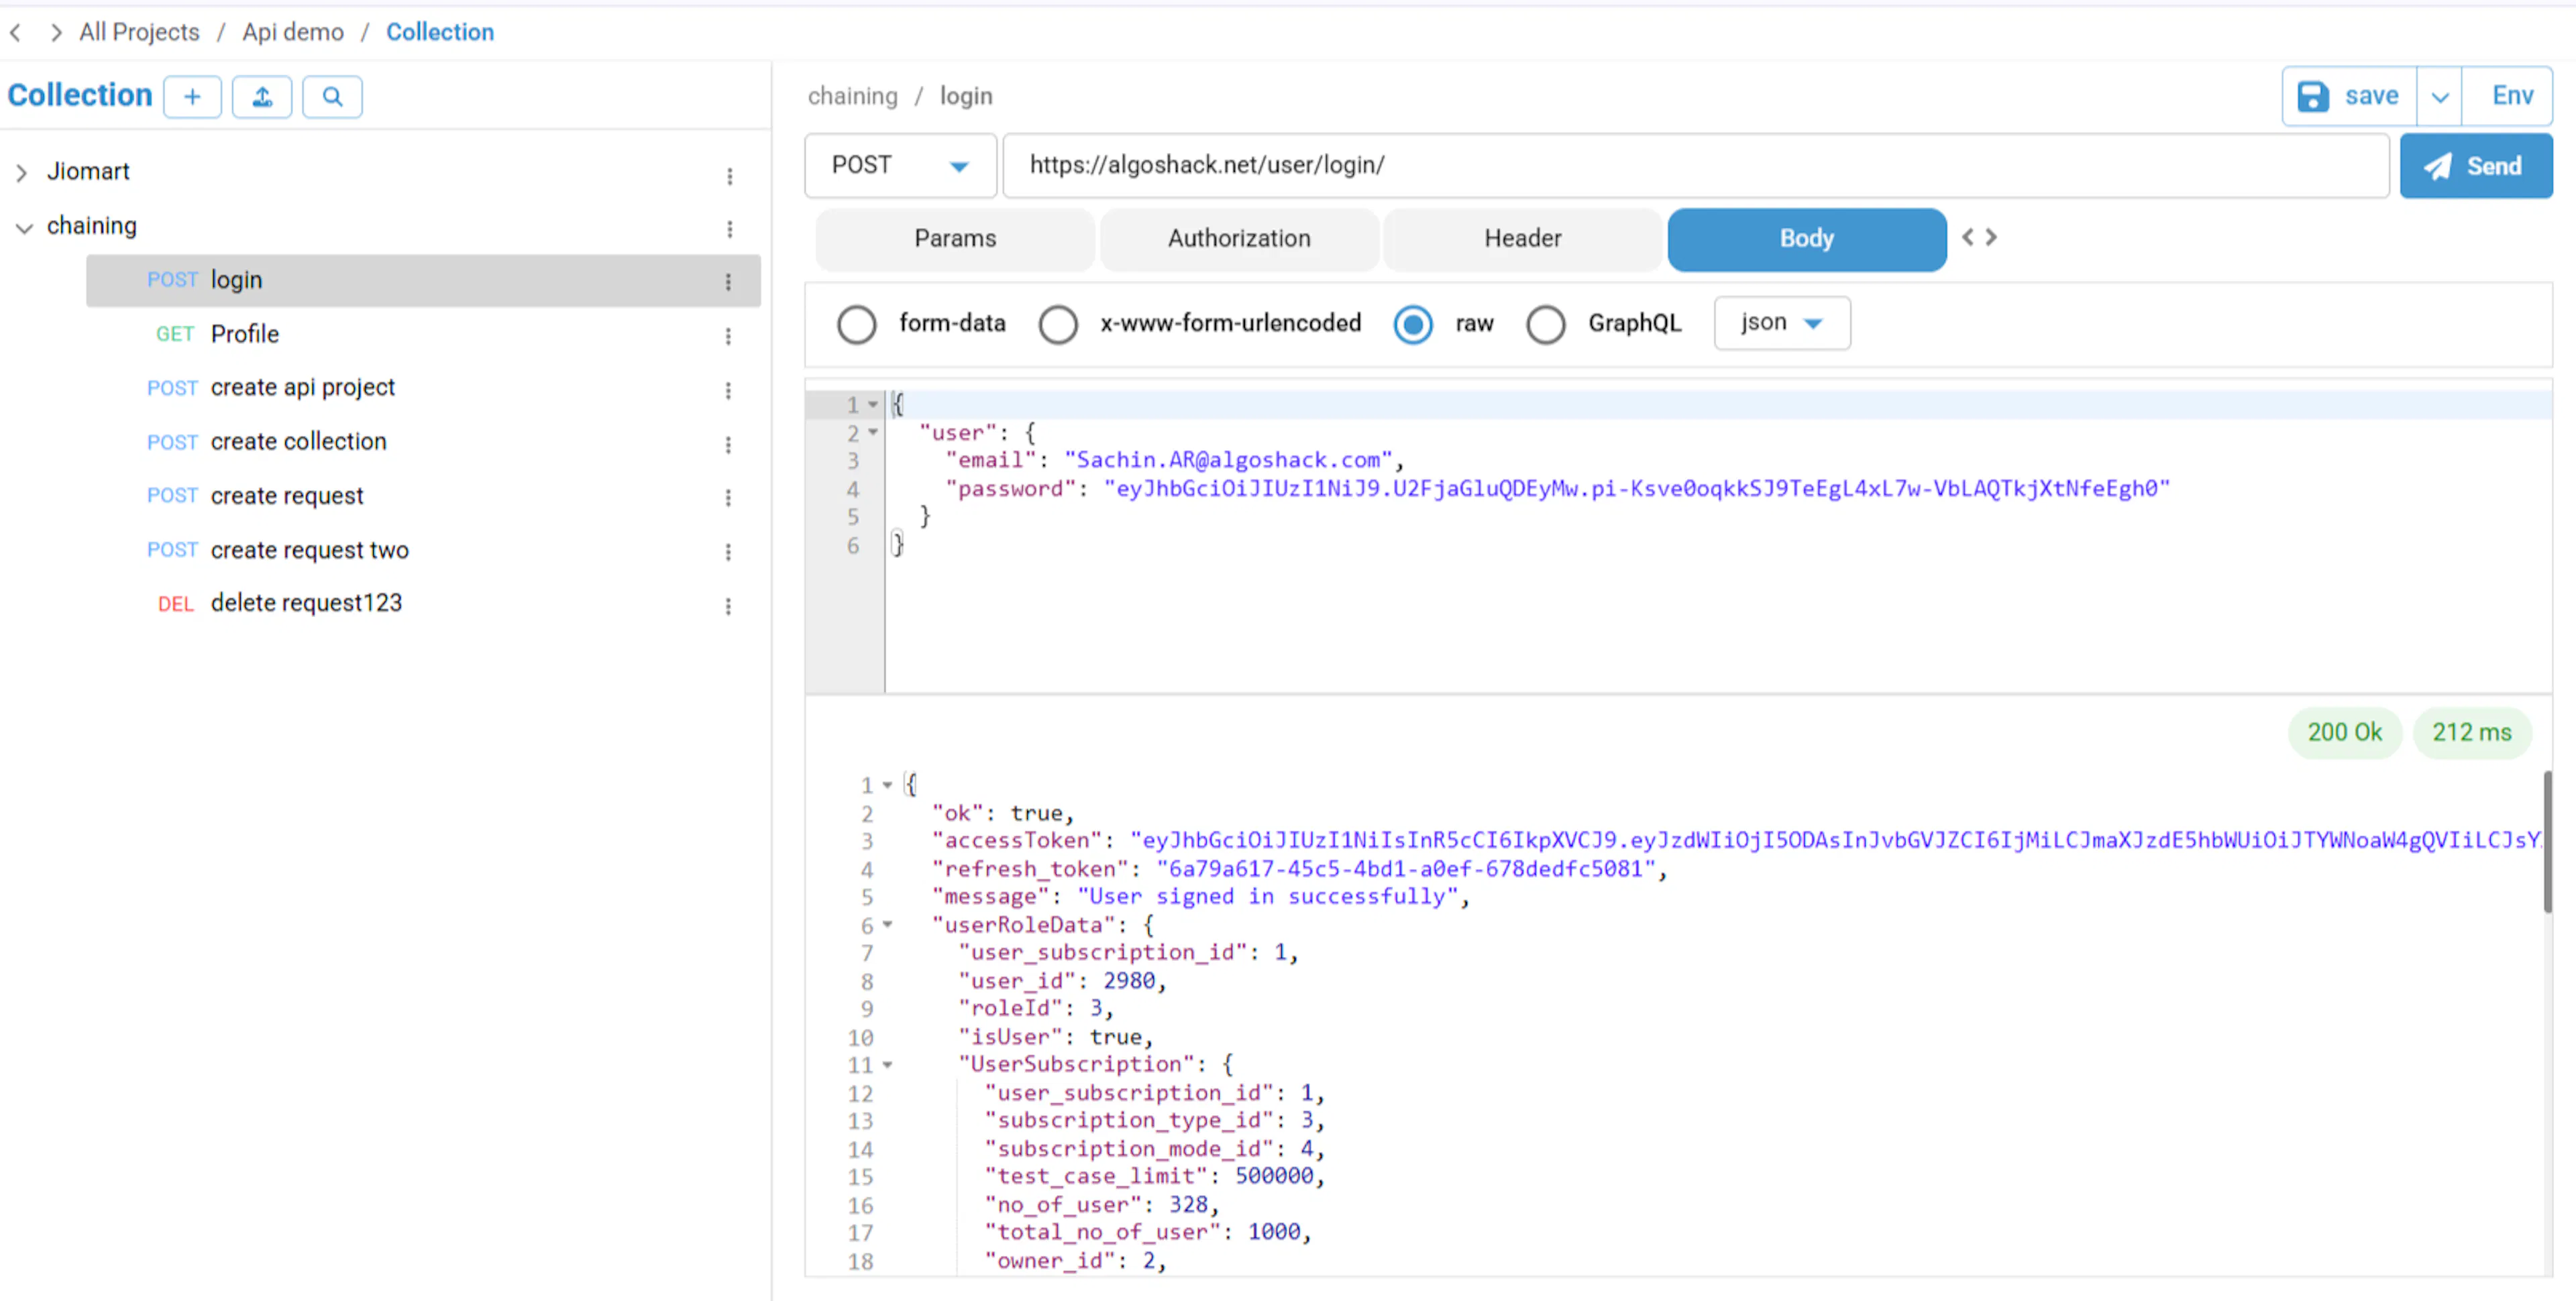
You can find and confirm the execution status in green.
- Understanding the example: In the provided example:
- Endpoint:
/api/loginis the endpoint or URL where the login functionality is implemented. - HTTP Method: POST is used to submit user credentials.
- Request Body: The username and password are included in the JSON file that is part of the request body. Similarly, you can configure the PUT HTTP method, which is used to change an existing resource with new information, or create a new one if it does not exist.
- Endpoint:
- Understanding the example: In the provided example:
-
Validate the HTTP method details to update user details, such as user_ID, using the PATCH method. Save it and click Send to execute it. Enter the URL. If required, add parameters in the Key and Value text boxes by clicking the plus icon. Select Bearer Token in the Authorization tab and add the appropriate parameters. In the Body tab, pass the request body and click Send. You can confirm the execution status in green.
- Understanding the example: In the provided example:
- Endpoint:
/api/users/{user\_ID}is the endpoint or URL where the user profile update functionality is implemented. - HTTP Method: PATCH is used to update user-specific information.
- Request Body: The user_ID and job title are included in the JSON file that is part of the request body.
- Endpoint:
- Understanding the example: In the provided example:
-
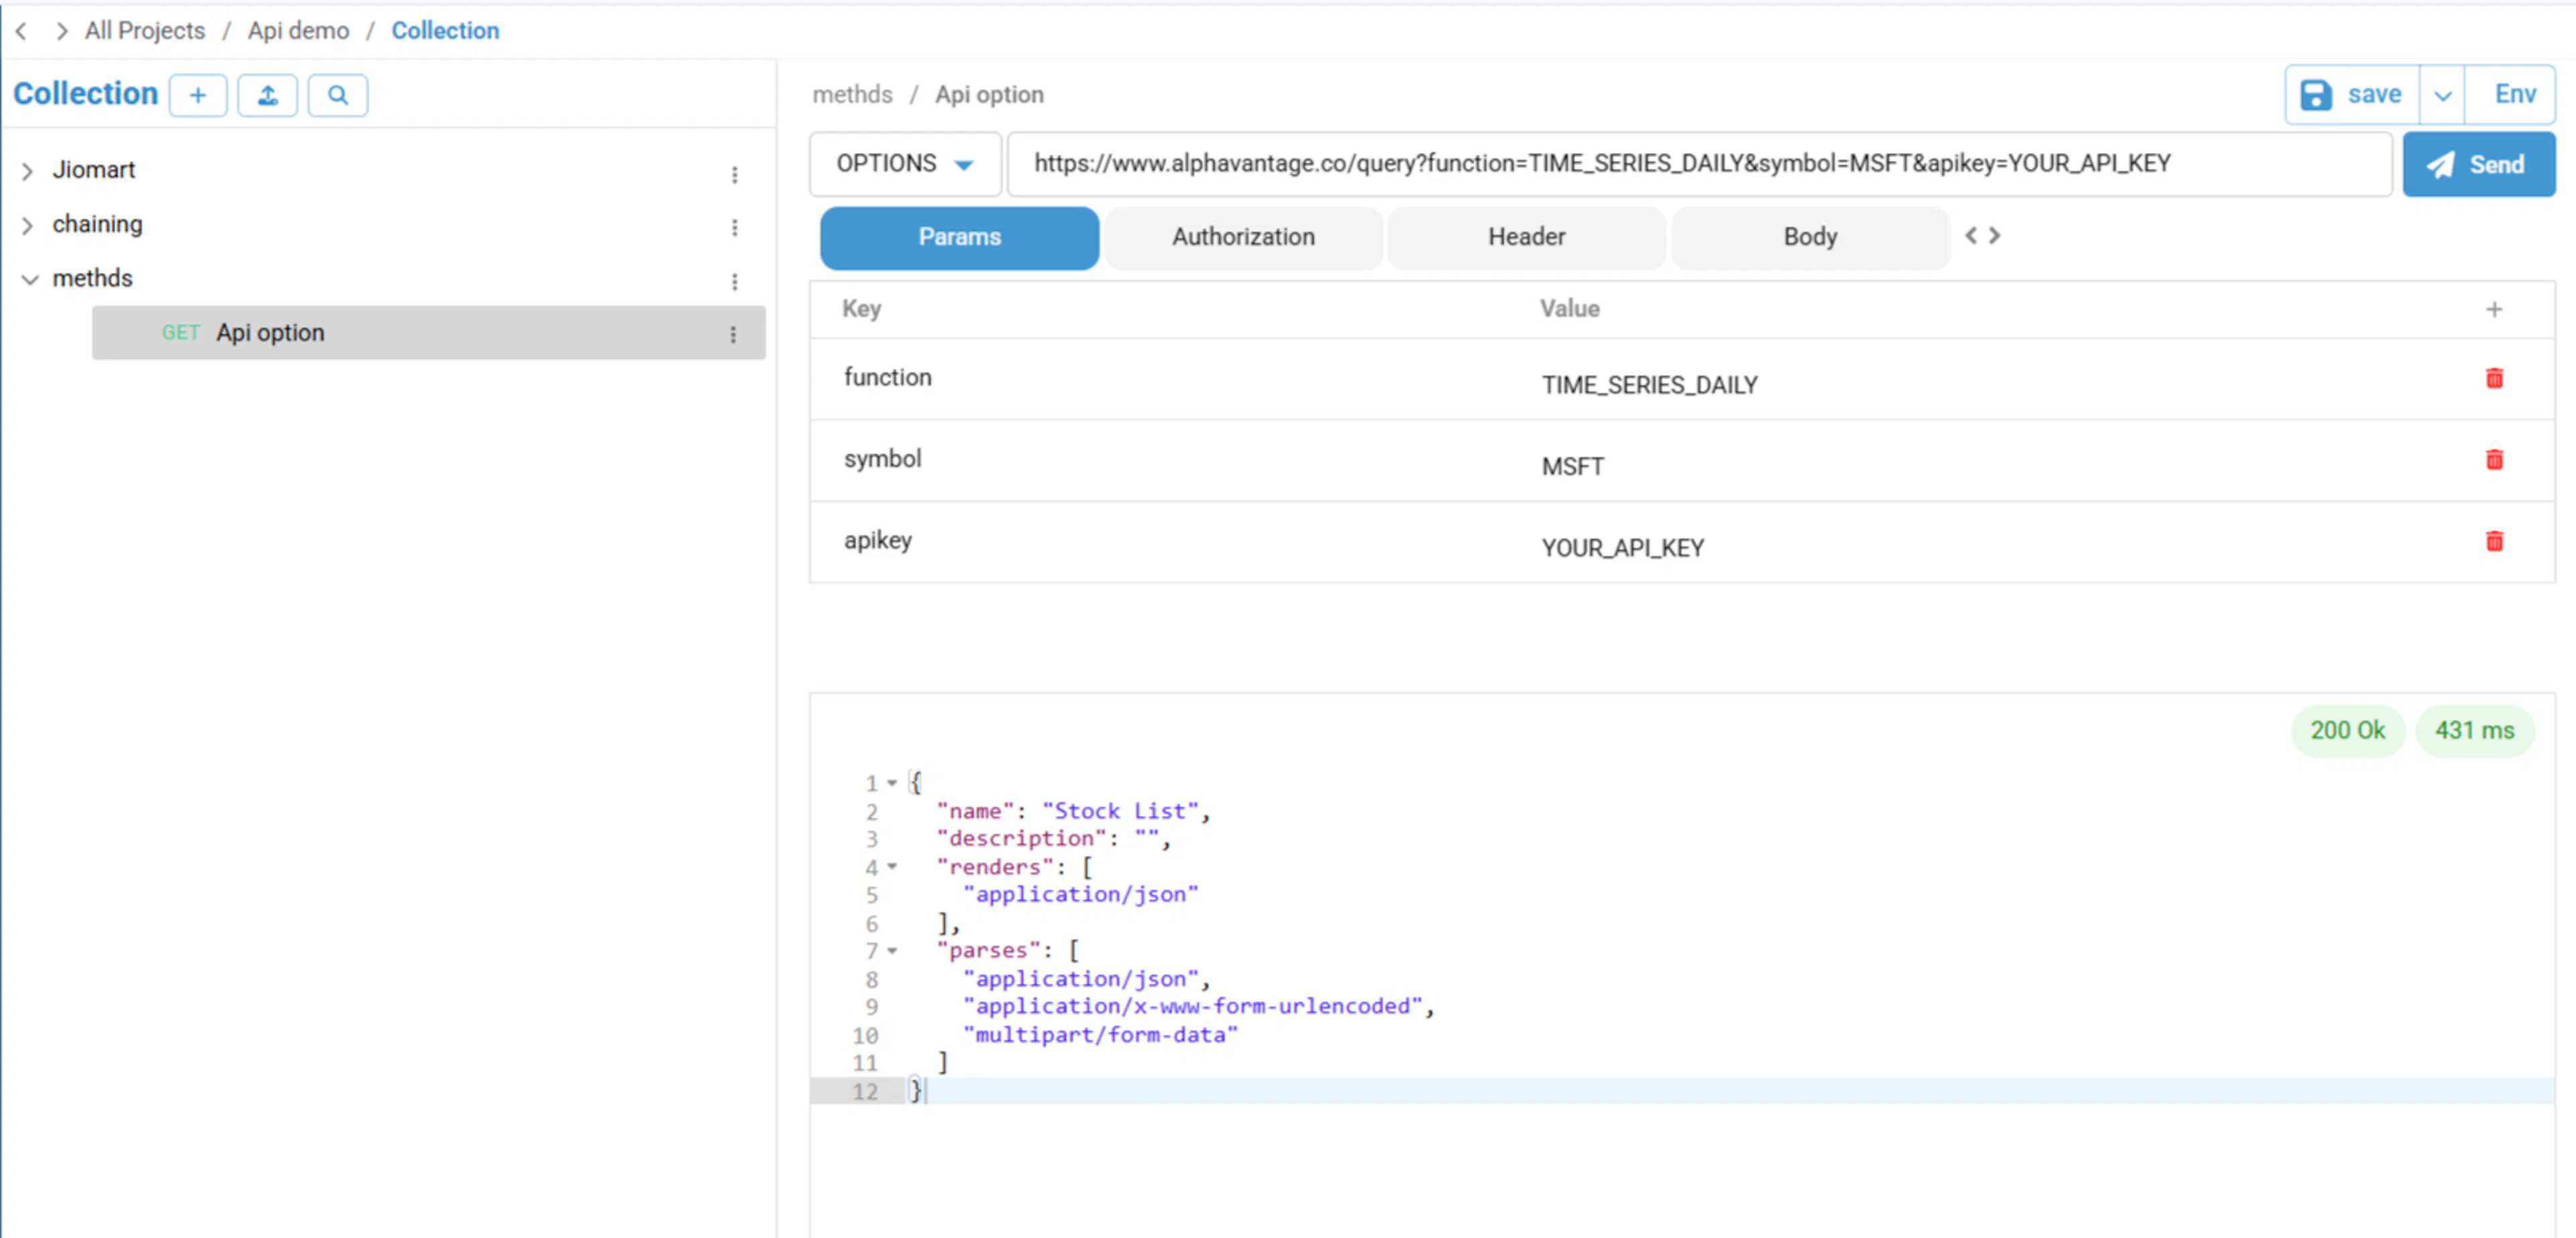
Validate the OPTIONS method, which is used to query a server to find out what actions or operations can be performed on a particular resource. Save it and click Send to execute it. Specify the URL of the resource you want to query. You can confirm the execution status in green.
-
Validate the HTTP method details to update user details, such as user_ID, using the DELETE method. Save it and click Send to execute it. Enter the URL. If required, add parameters in the Key and Value text boxes by clicking the plus icon. Select Bearer Token in the Authorization tab and add the appropriate parameters. In the Body tab, pass the request body and click Send. You can confirm the execution status in green.
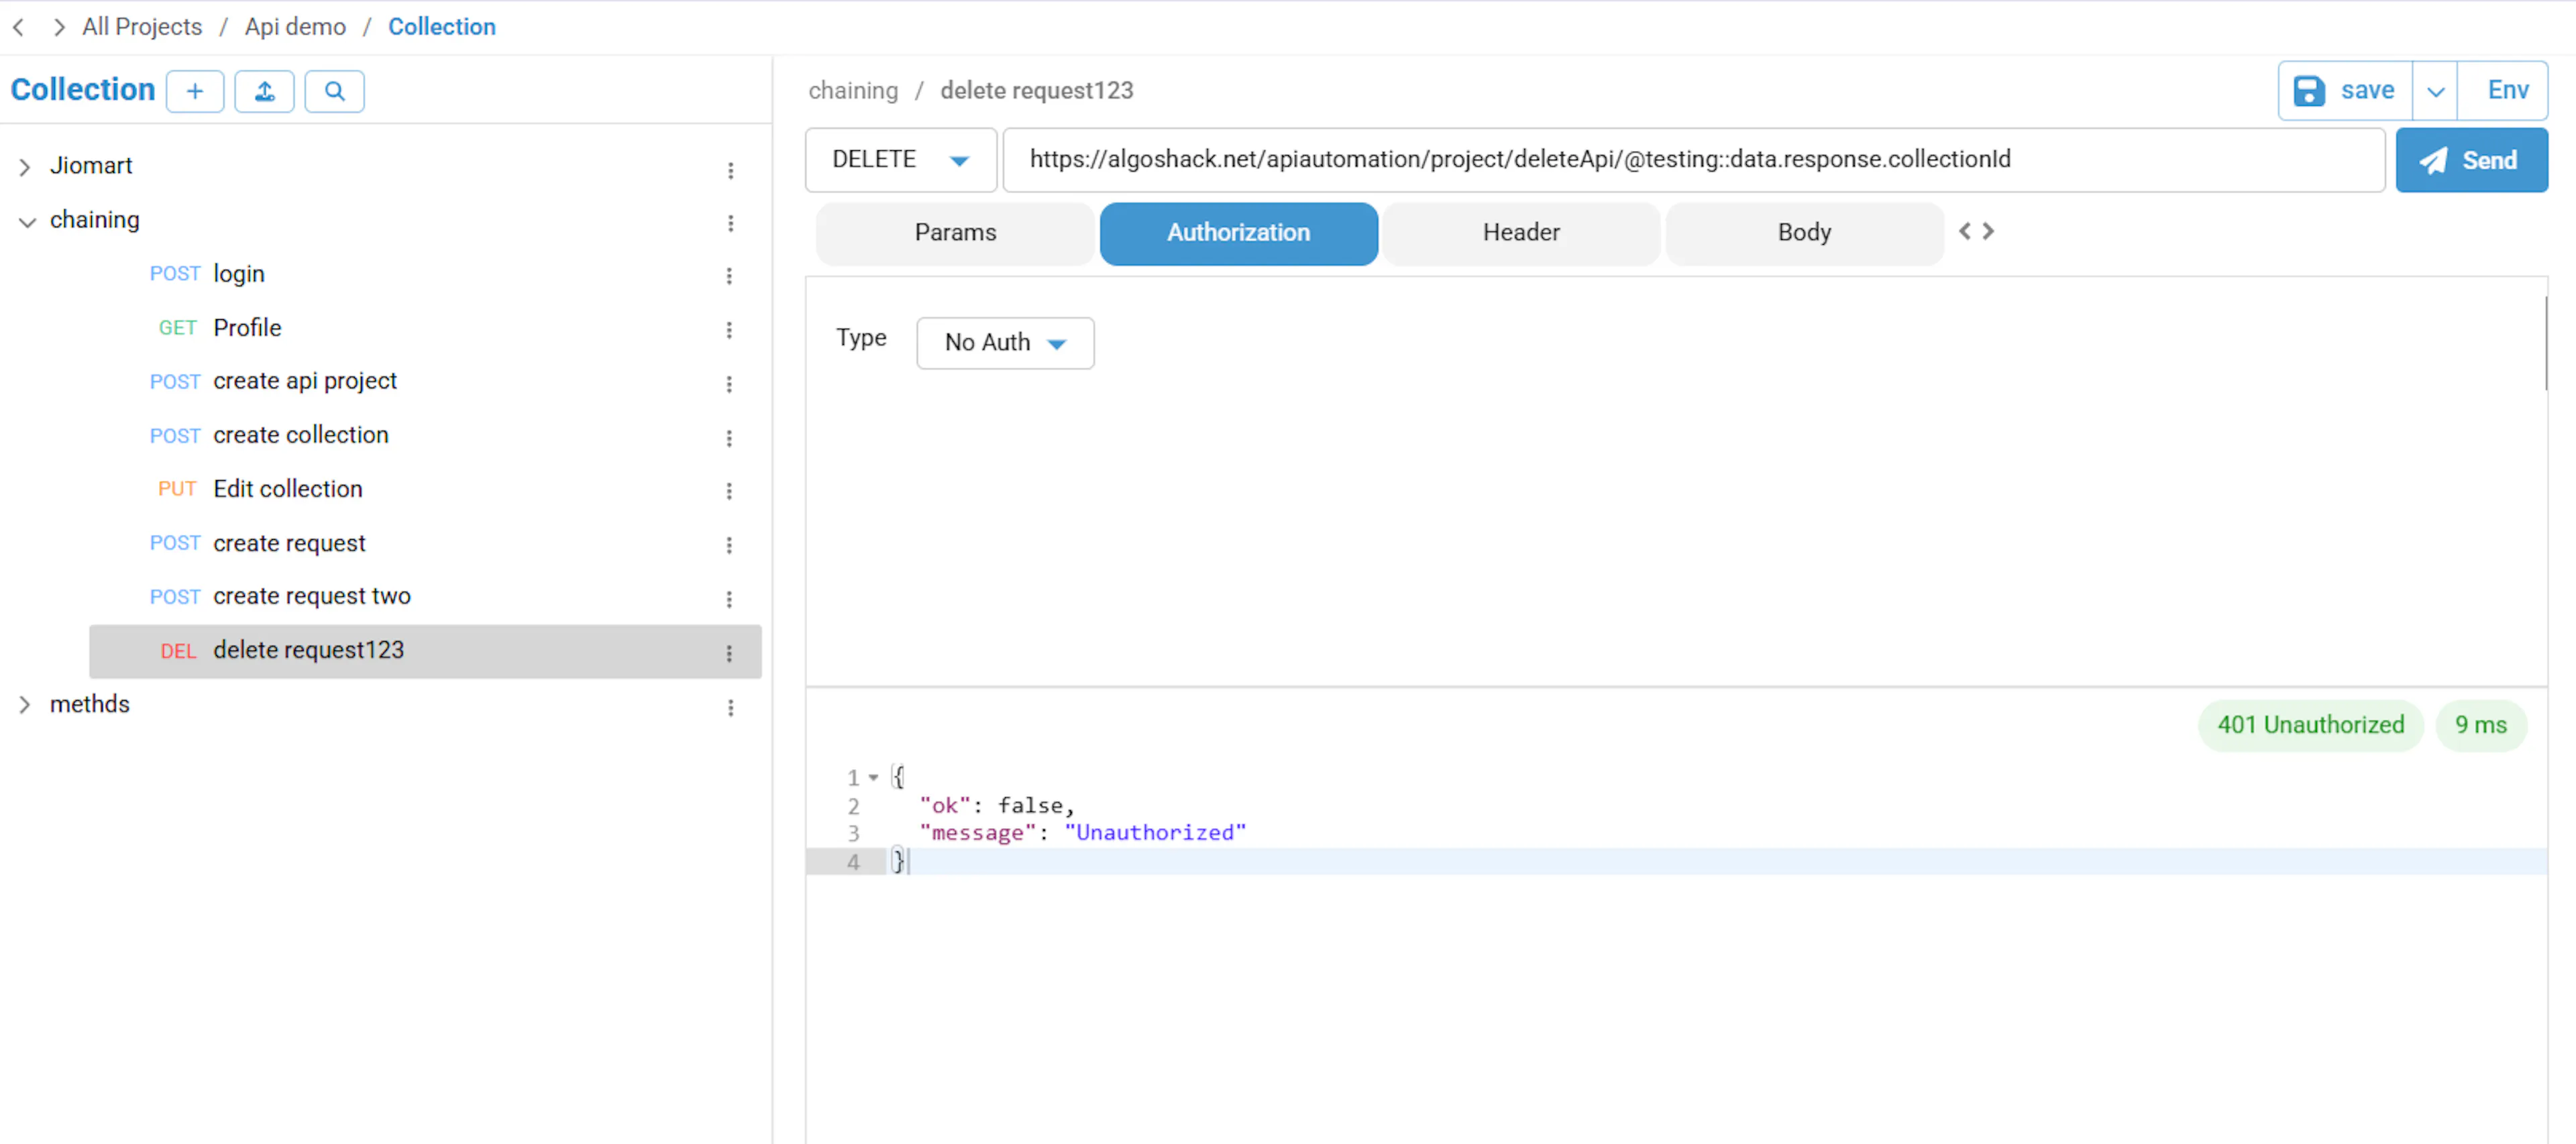
- Understanding the example: The DELETE HTTP method asks the server to delete a specified resource. In the provided example:
- Endpoint: https://algoshack.net/apiautomation/project/deleteApi/17961 is the endpoint or URL.
- HTTP Method: DELETE is used.
- Request body to be deleted:
{ "projectId": "15772" } - When the record is deleted, a 401 Unauthorized error is displayed.
- Understanding the example: The DELETE HTTP method asks the server to delete a specified resource. In the provided example:
-
-
If you are adding an environmental variable for a particular API collection, it will be generated in a separate file named
TestDataEnv.jsonwithin your test cases.TestDataEnv.jsonis a configuration file used to store user-defined environment variables. It allows you to manage and access these variables from a single location. For more information on how to update environmental variables and generate a separate environmental file, see Updating Environmental Variables and Generating a Separate File. -
Generate the test automation scripts:
-
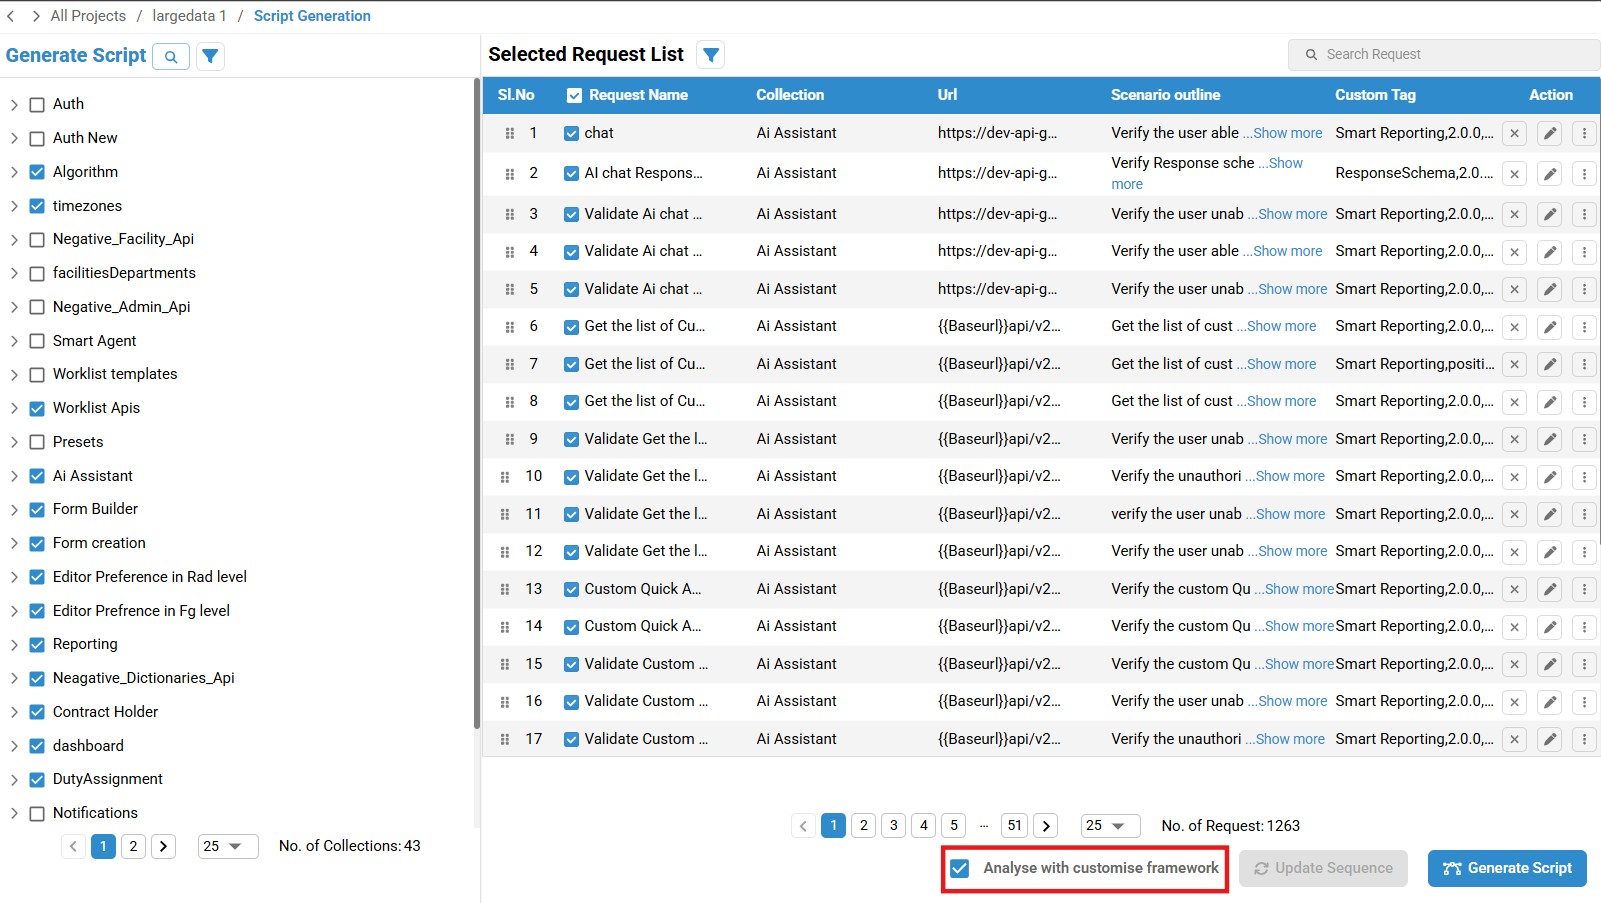
In the left panel, select the appropriate folder to view the sequence. Select the user actions and click the Generate Scripts button (to access the side panel, refer to step 2 — "Upload an API collection"). If a project is assigned to and being used by multiple users, only one user can generate scripts at a time. While a script generation process is in progress, the Generate Script button will be disabled for other users. A notification will be displayed indicating that another user is currently generating the script. If a customized script is used in the project, select the Analyze Customized Script checkbox to include the customized script in the analysis, if required.
-
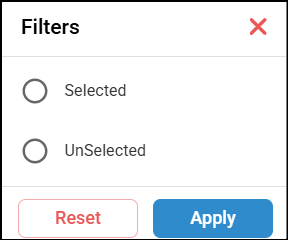
You can also use the filter option next to Generate Script to filter by Selected and Unselected.
-
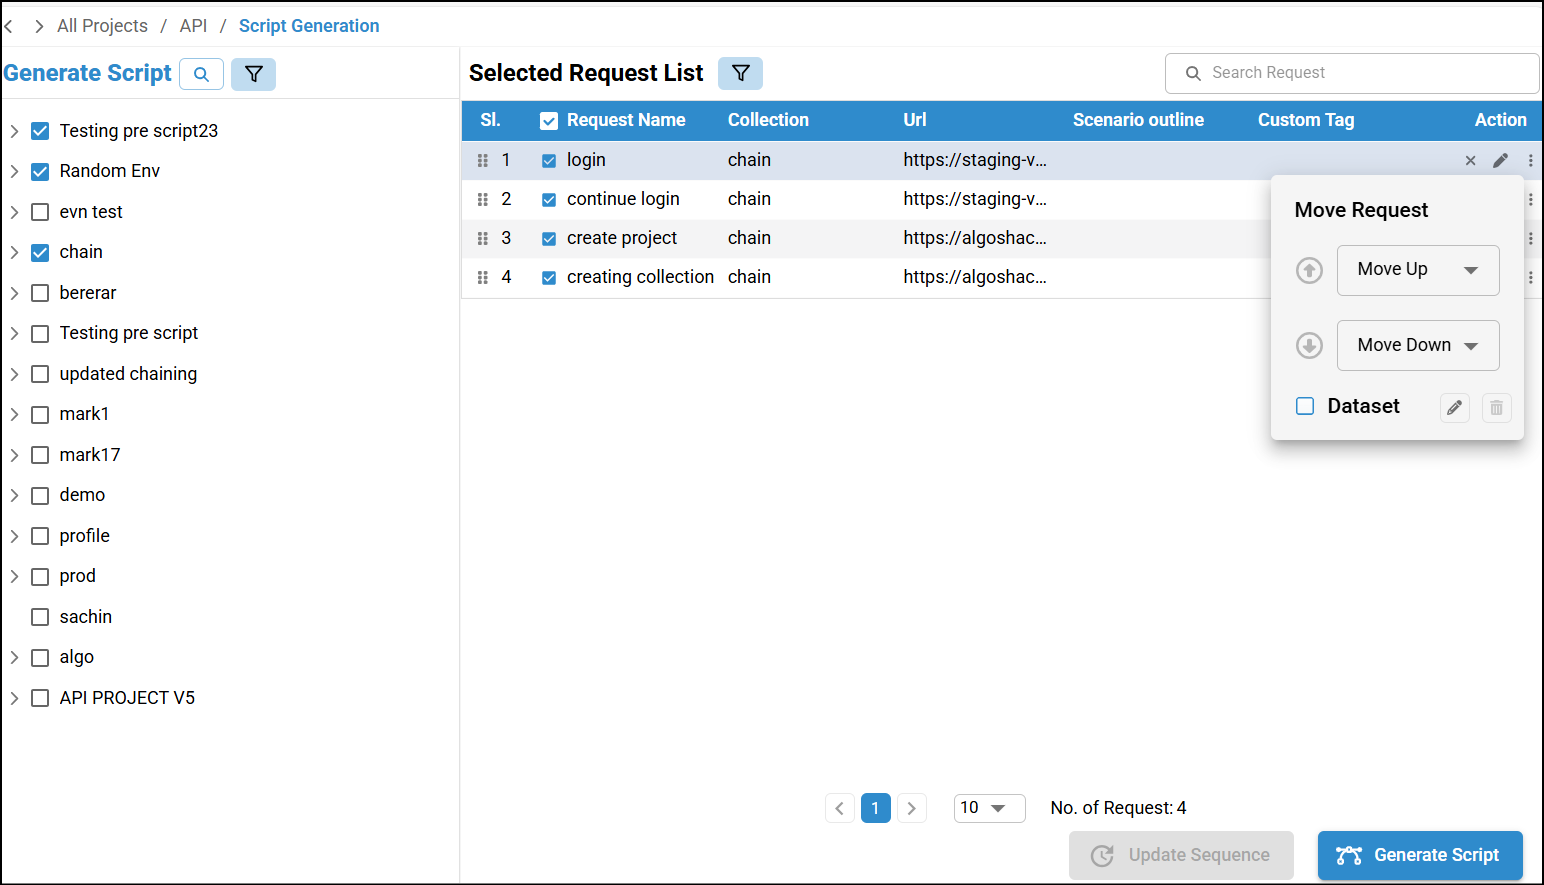
If you wish to generate negative scenarios, you can upload a dataset in CSV format. Ensure that you select the same scenario that was created previously. When you check the dataset option, this feature allows you to generate datasets that were uploaded recently. When unchecked, the system will generate default datasets. To access the Upload Dataset option, click the More Menu option.
-
Dataset option — When checked, this option allows you to generate datasets that were uploaded recently. When unchecked, the system will generate default datasets.
-
Delete icon — Remove datasets as needed.
-
Edit icon — This will navigate to the dataset editor where you can create your own dataset.
-
Click Create Table.

-
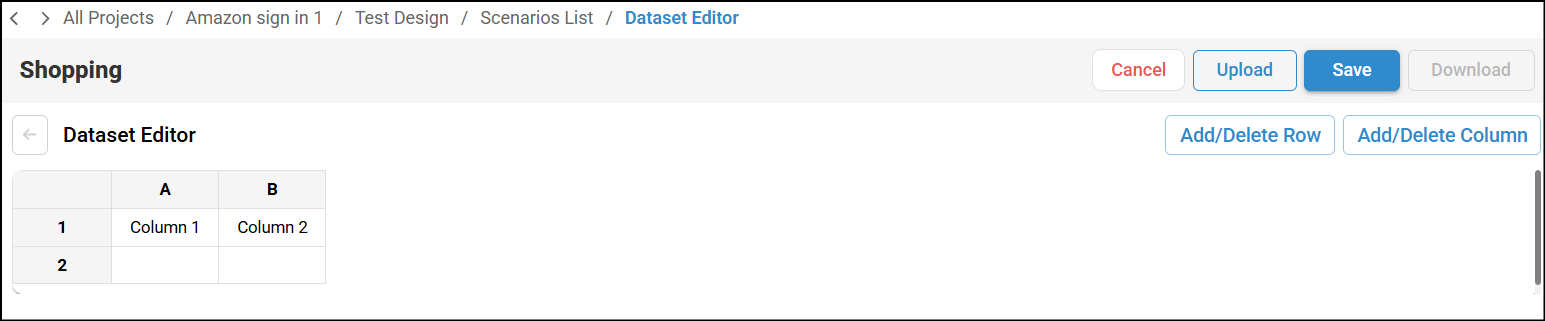
Default rows and columns will be added. You can add and delete columns by clicking the Add/Delete Row and Add/Delete Column buttons.
-
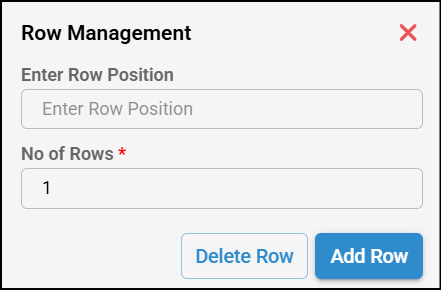
Click the Add/Delete Row and Add/Delete Column buttons to add them. Enter the row or column position, enter the number of rows or columns, and click Delete or Add as needed.
-
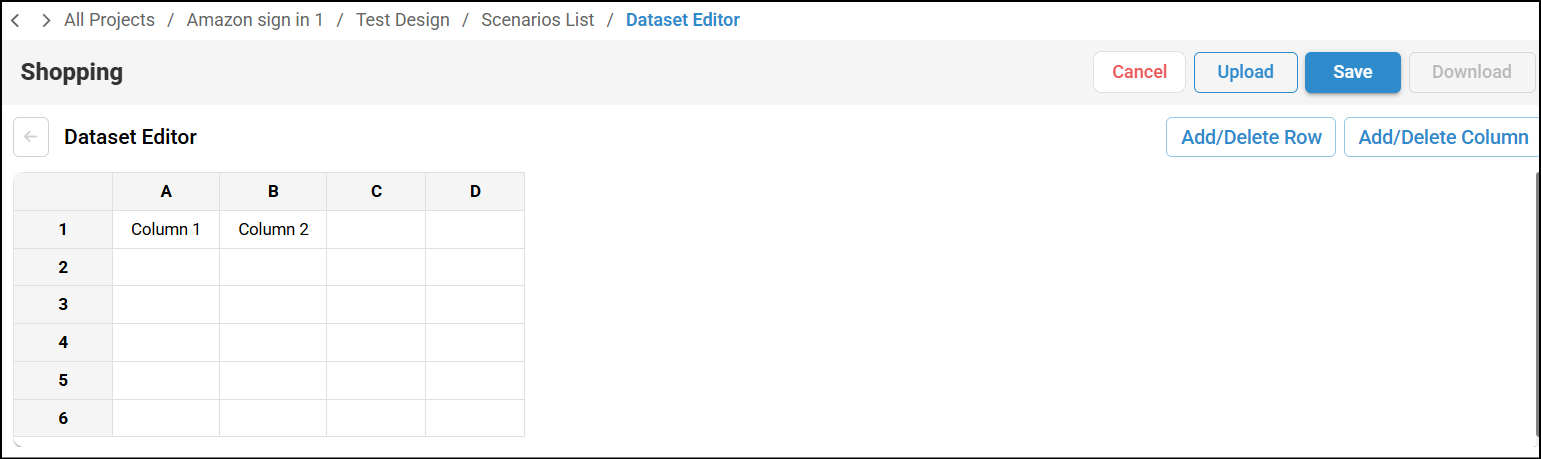
Rows and columns will be added. You can fill in the data as needed and click Save for the data to be saved.
-
Click Cancel to reset to the original settings.
-
Upload — You can upload datasets in CSV format. Ensure that you select the same scenario that was created using the Record Scenario feature.
-
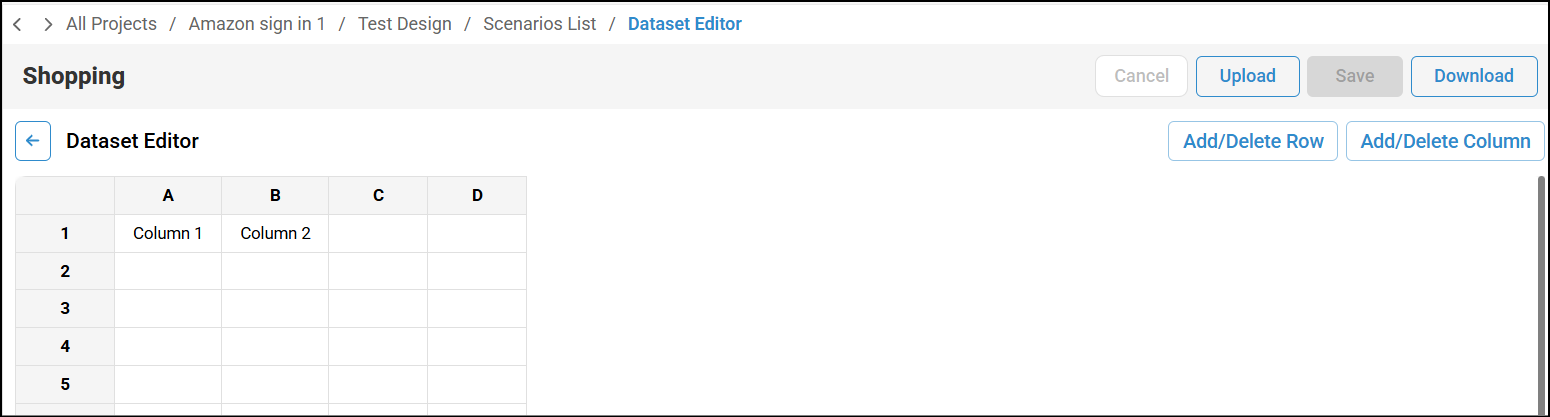
Download — Once data is saved, the Download button is enabled and you can download datasets in CSV format.
You can use the filter option to find selected collections and their related requests. Using the Search button, you can filter by Selected or Unselected.
You can use the filter option next to the Selected Request List to filter APIs by All, Selected, or Unselected. You can also filter by custom tags by selecting the Custom Tags checkbox and choosing a tag using the search field.

In the API generate script screen, once you select a collection, the Selected Request List will be selected by default. Check the Data Set option and click Generate Script. After generating the scripts, click More Menu to view the Download Data Set button.
Upon clicking, the system will create a template in spreadsheet format for you to update your inputs. In this template, you can add Request URL, API header, API Request, and API Output.

When you upload a dataset for a negative test case and wish to generate a separate YML file, refer to Options for Generating Test Data in a Separate YAML File.
-
-
In the negative scenario verification, the API enforces permissions by returning a 403 Forbidden status when an authenticated user tries to access a resource they are not allowed to access. Verify that an API returns a 403 Forbidden response when a user attempts to access a resource they do not have permission to access, even if they are authenticated. Additionally, when you pass parameters in key and value as username and
na, they will reflect in the Feature File. When generating test cases for negative test data, click Edit in the script generation screen to view the Data Generation tab. In this tab, select Yes to view the listed parameters. Available options are URL, Params, Authorization, Header, and Body. By default, all options are selected. You can choose the options as required. Negative test cases are generated only for URL, Header, and Body.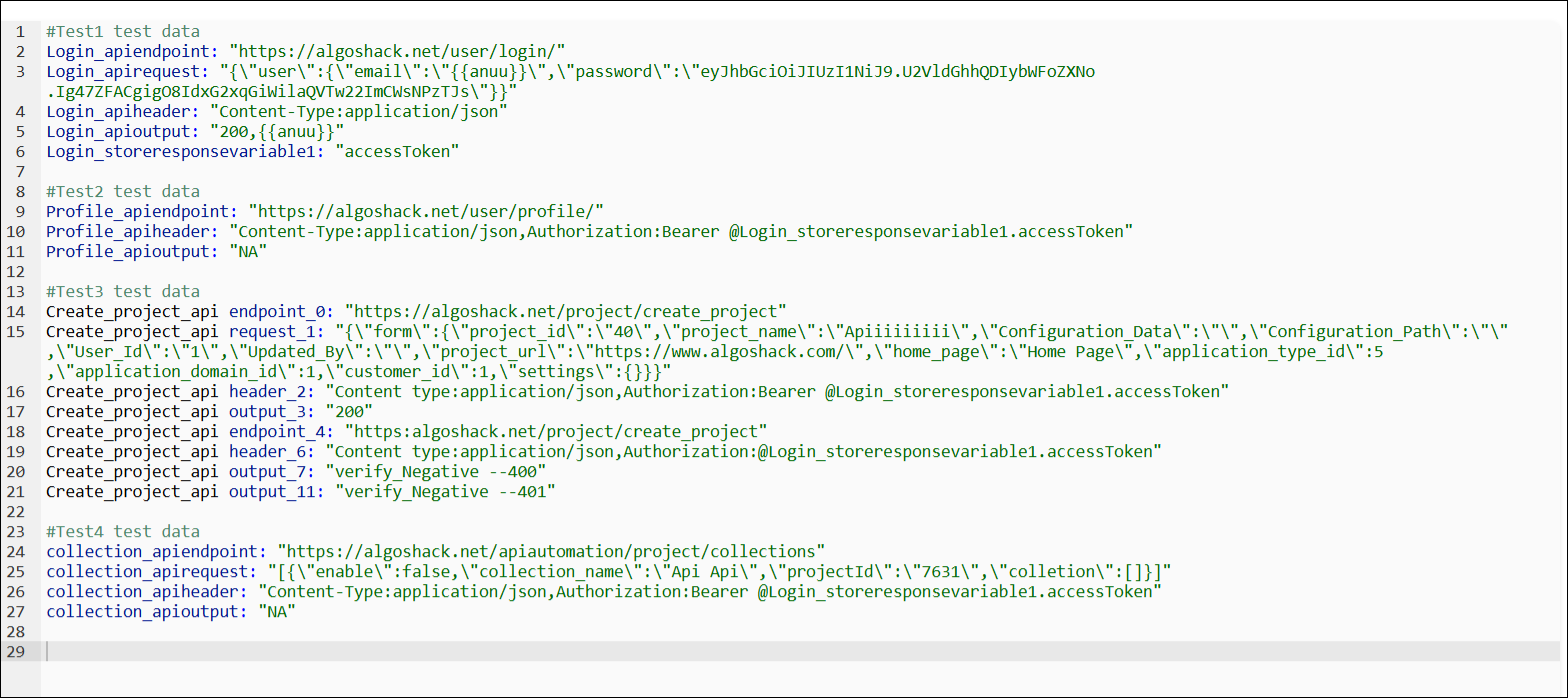
A report will be generated.
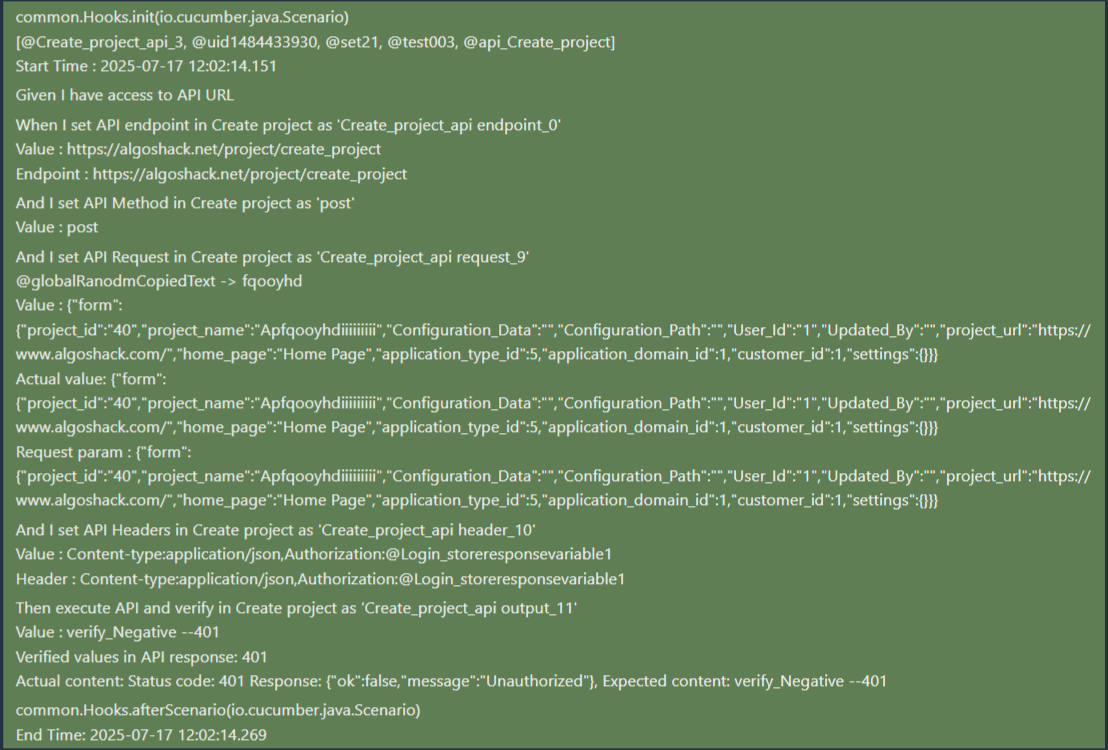
-
If needed, you can rearrange the sequence with drag-and-drop functionality and click the Update Sequence button. If you wish to update the sequence in the left pane, perform the following: Uncheck the Select All check box if it is checked. Use drag-and-drop functionality to rearrange the steps and click the Update Sequence button. When the sequence is updated for a particular collection in the script generation screen, it will reflect in the Create API screen. You can click the back arrow and verify that the changes are reflected.
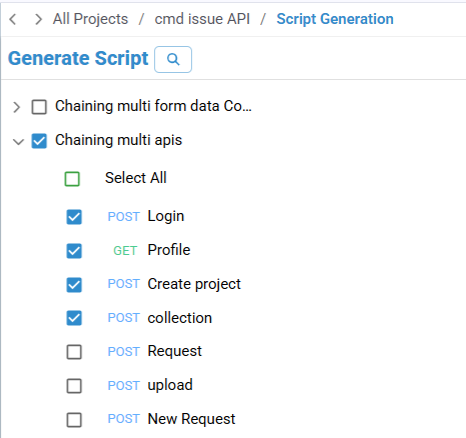
If you move to a different API collection without saving the changes after rearranging the request names, the system will alert you to update the sequence.

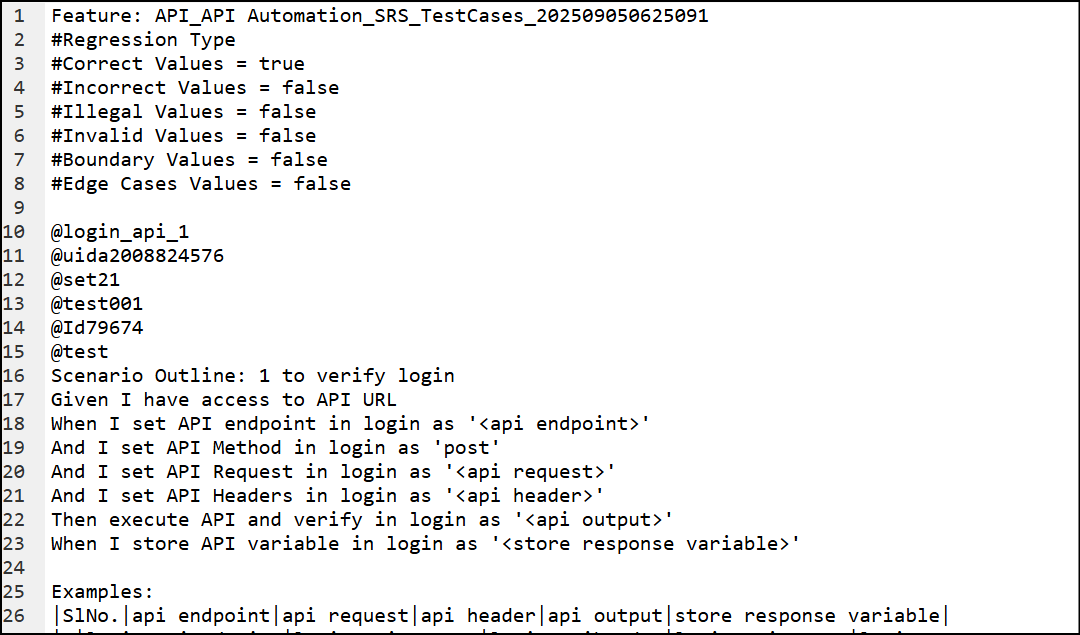
Navigate to Test Cases to access the Feature File. You can view all the generated files and delete the ones created on that specific day.
System-generated feature files can now be viewed and downloaded. Each test case is assigned a unique Test Case ID for easy searching, and each API within the feature file is assigned a unique API ID.
-
The system analyzes the test cases and then generates the script.
-
After generating the script, you can also view the scripts by clicking View Generated Scripts.
-
Download the script: Navigate to Test Scripts and click the download icon next to the desired script to save it to your local folder.
-
Execute the test automation script:
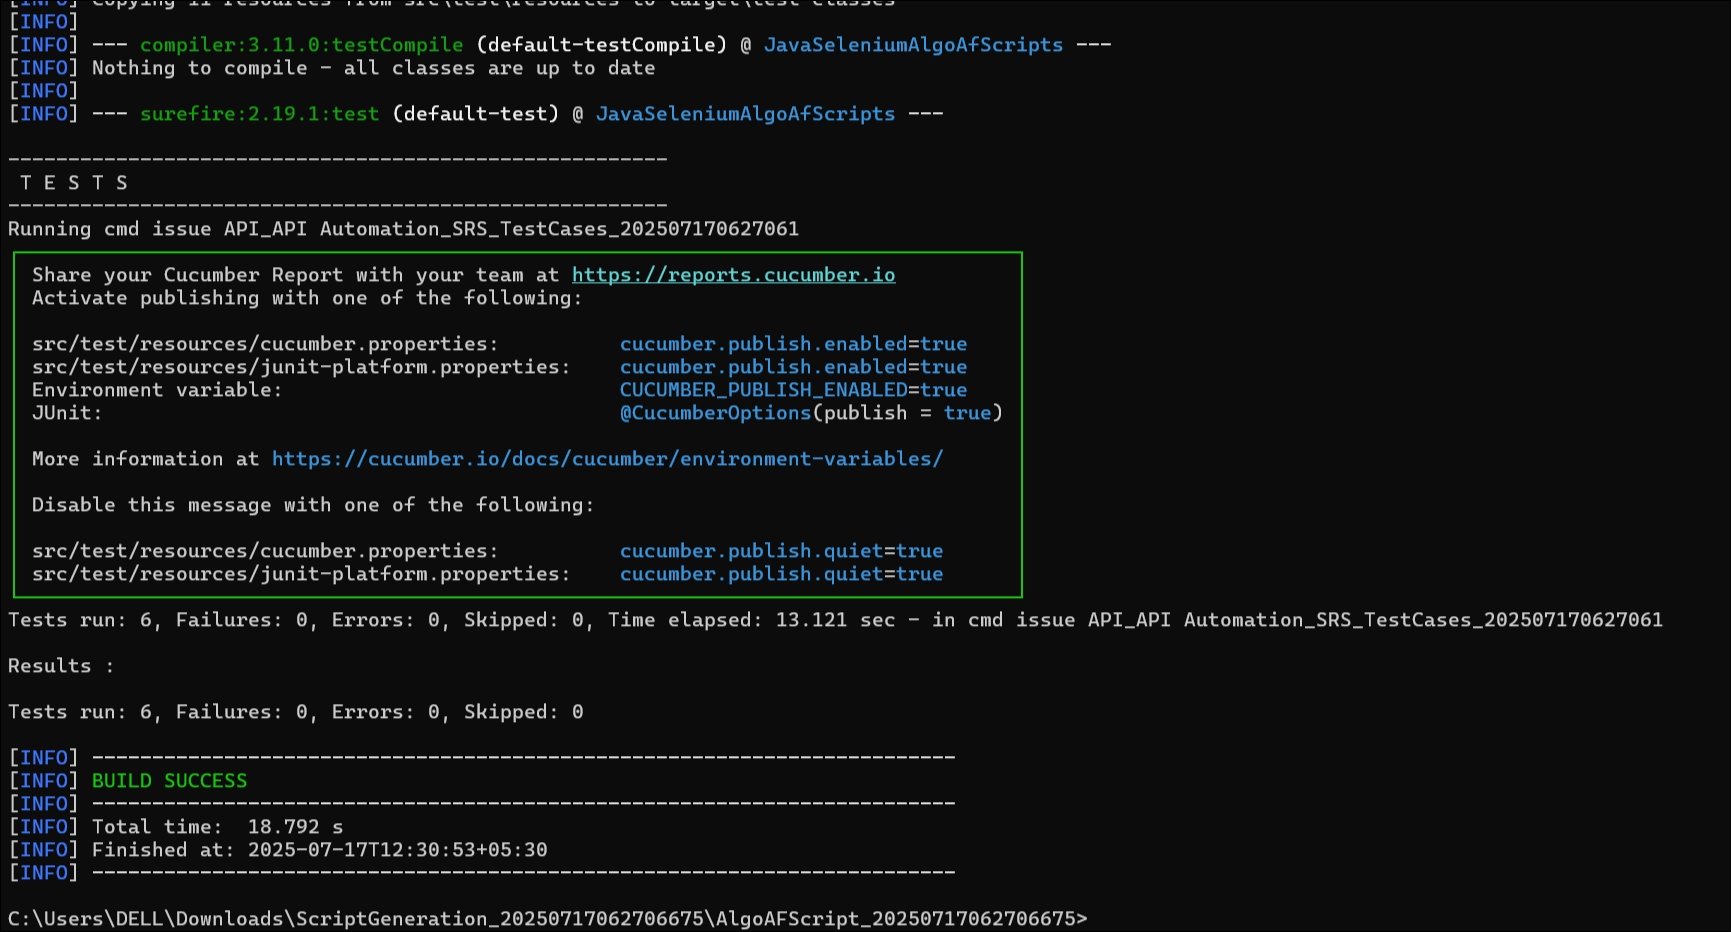
- Navigate to the same folder described in the previous step. Run the following command to trigger the script:
mvn test - A build success message will be displayed and you can view the respective report.
- Navigate to the same folder described in the previous step. Run the following command to trigger the script:
API Automation Limitations
Important notice regarding backend server requirements:
- The API Testing Platform is served over HTTPS and does not support testing APIs hosted on localhost or servers using session-based authentication (e.g., session cookies) in the following cases:
- When the backend server is running on localhost or behind HTTP without HTTPS.
- When session-based authentication relies on browser-managed cookies (such as Set-Cookie headers with session tokens).
This limitation is due to browser CORS (Cross-Origin Resource Sharing) and cookie security policies that:
- Block insecure http://localhost API calls from an HTTPS site.
- Do not send or accept cookies without proper cross-origin credentials (Access-Control-Allow-Credentials, secure cookies, etc.).
For testing such APIs, consider:
- Hosting your backend on a secure public domain (with HTTPS).
- Using token-based authentication (e.g., JWT) instead of session cookies.
If you attempt to test an API that relies on session cookies from a local or insecure origin, the request may fail silently or with CORS/authentication errors.