Managing Test Cases using Test Design Feature
Organize scenarios through the Test Design workflow, including modifying, filtering, merging, and copying test cases. The Test Design workflow offers an efficient and organized approach for managing your test scenarios. By utilizing its various capabilities, you can easily update, arrange, and filter scenarios to meet your evolving testing requirements.
Relevant Use Cases
While profiling the application, the Test Design workflow is applicable for the following scenarios:
- Modifying Record Scenario generated Test Cases: When you choose to modify or update a scenario in a test case that has been generated using Record Scenario functionality.
- Accommodating Additional Requirements: When you need to modify an existing test case to accommodate additional requirements, such as updating test case steps.
Accessing the Test Design Feature
To begin using the Test Design feature.
- Open your web browser, enter the URL and navigate to https://algoshack.net > algoQA > Create a project.
- Navigate to Test Design in the left side panel.
In the centralized project, concurrent users can use Save and Save as functionalities simultaneously without causing any issues with the set up files.
Test Design Workflow
The Test Design screen allows you to access and manage scenarios more efficiently. You will be able to view, add, search, filter and reset the scenarios.
-
Navigate to https://algoshack.net > In projects select a project or create one.
-
Click Test Design after selecting a project.\
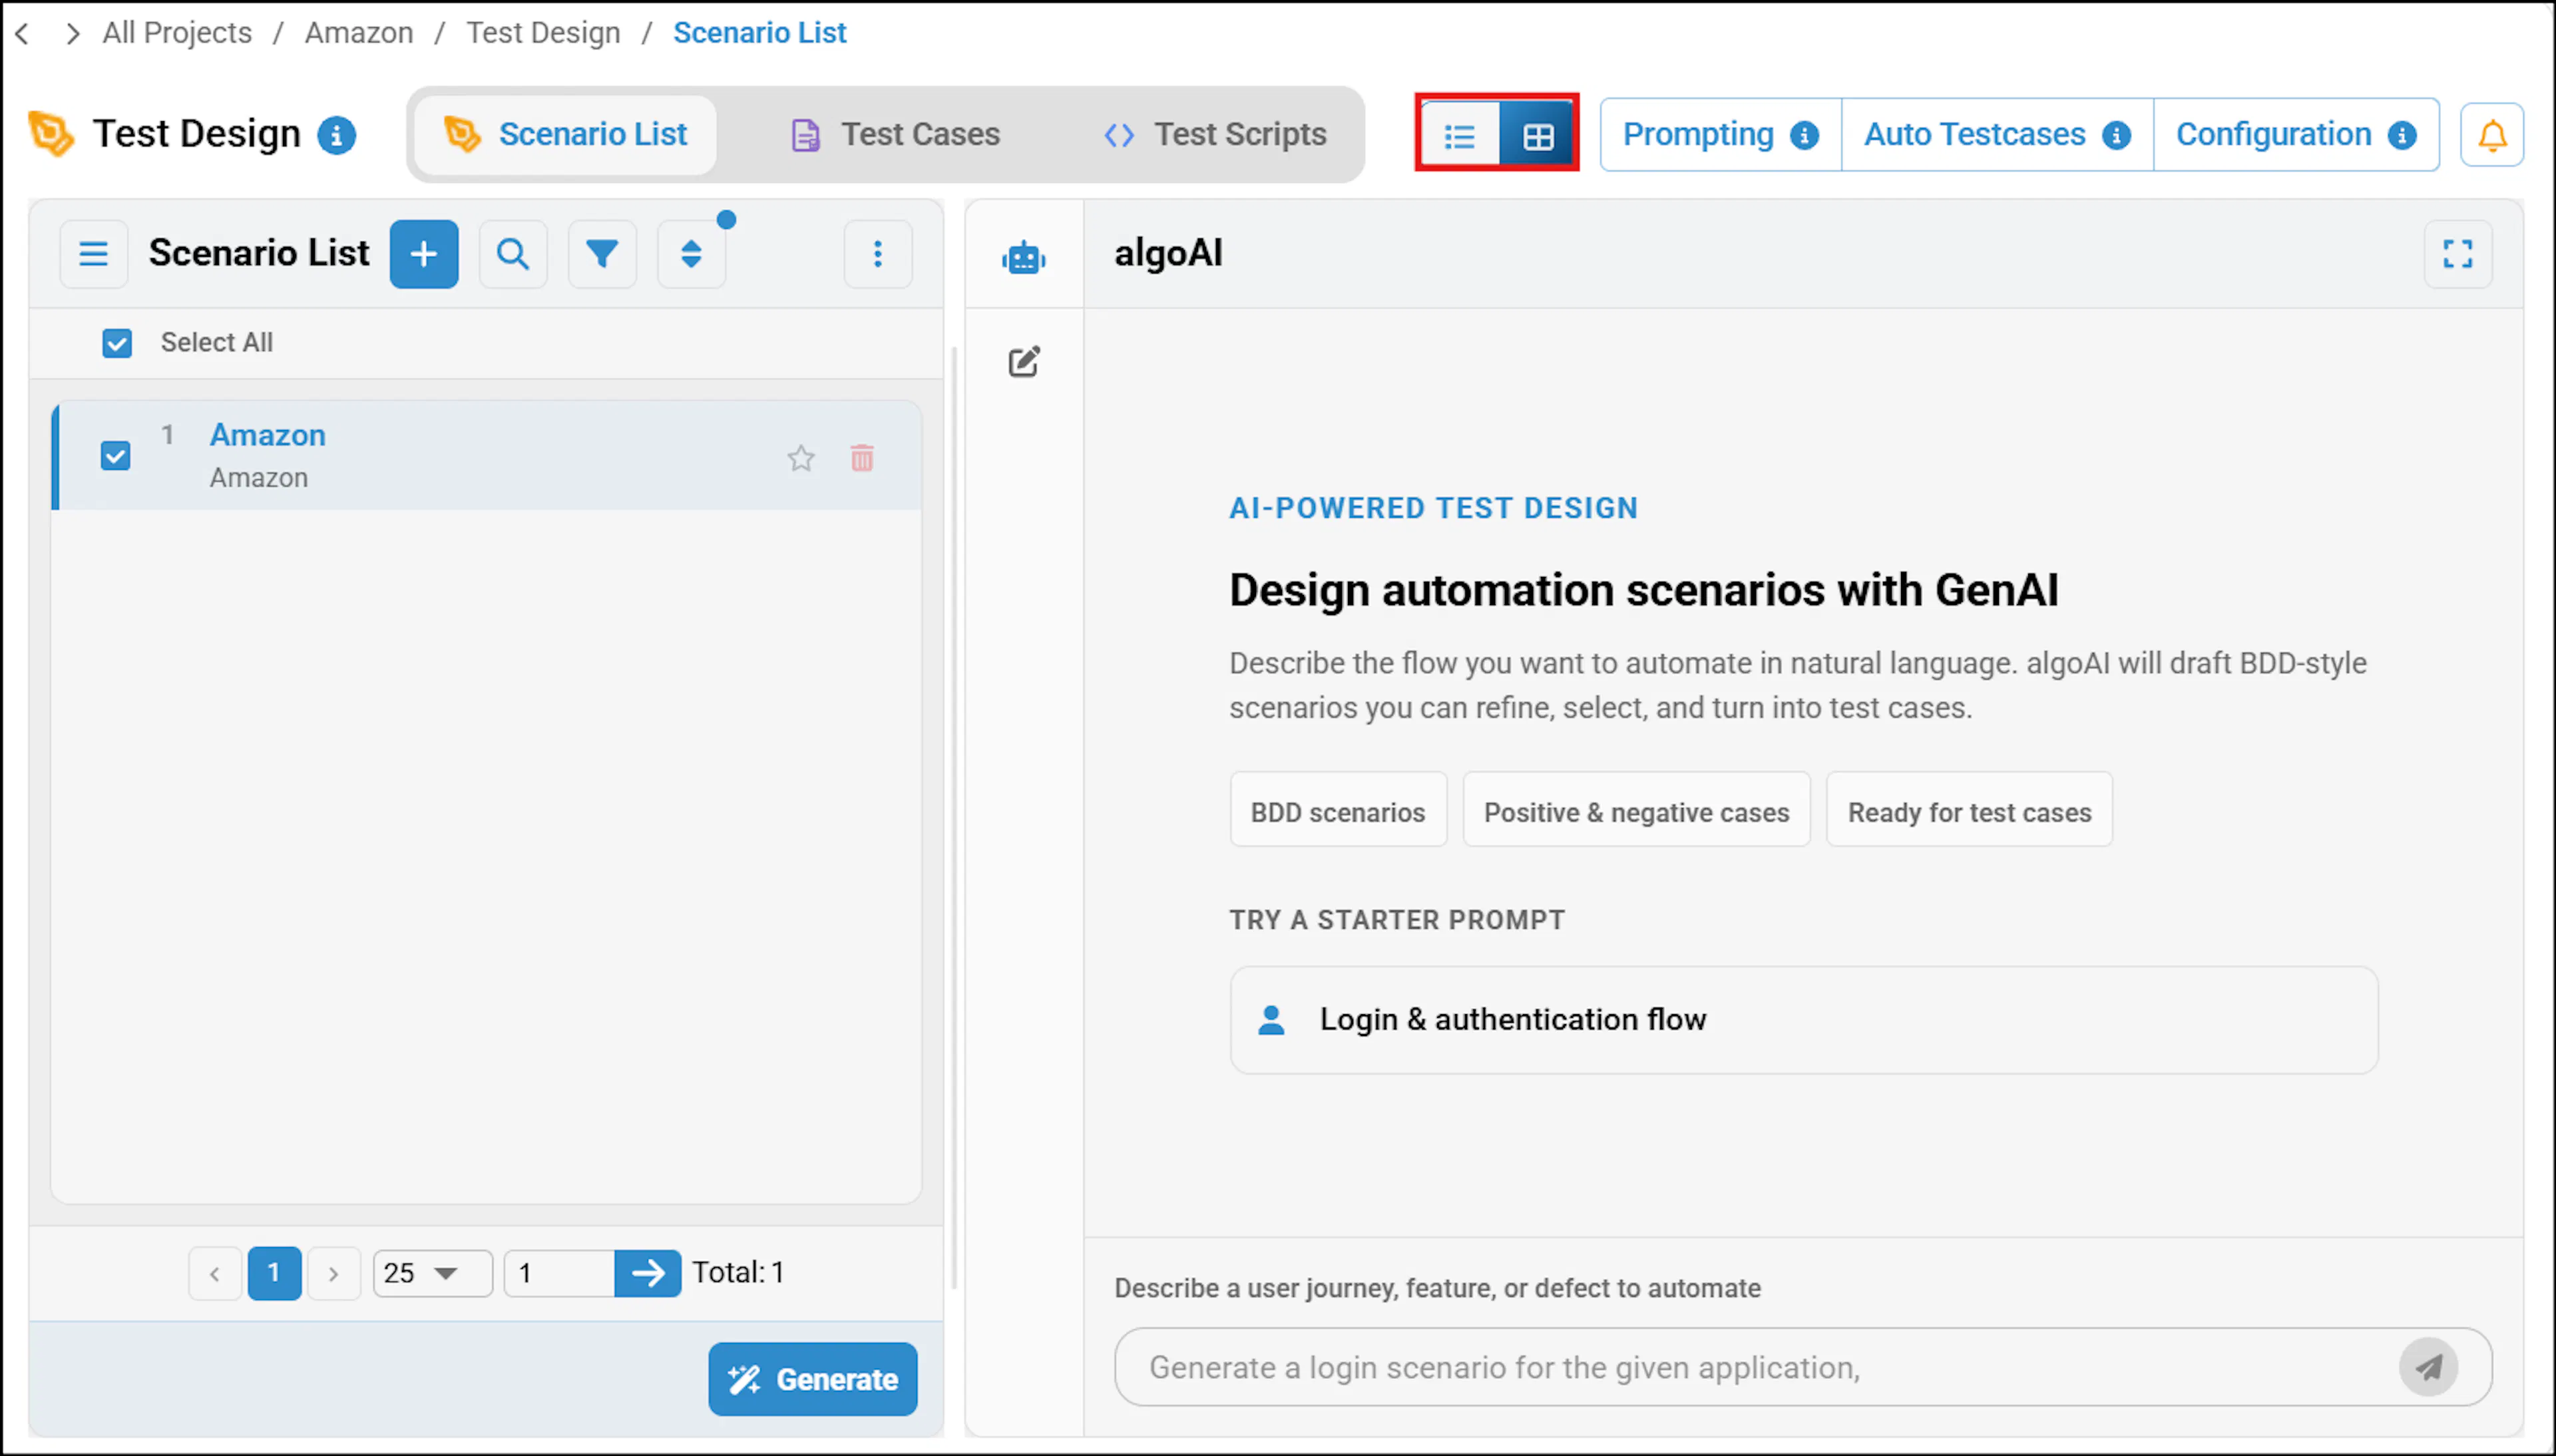
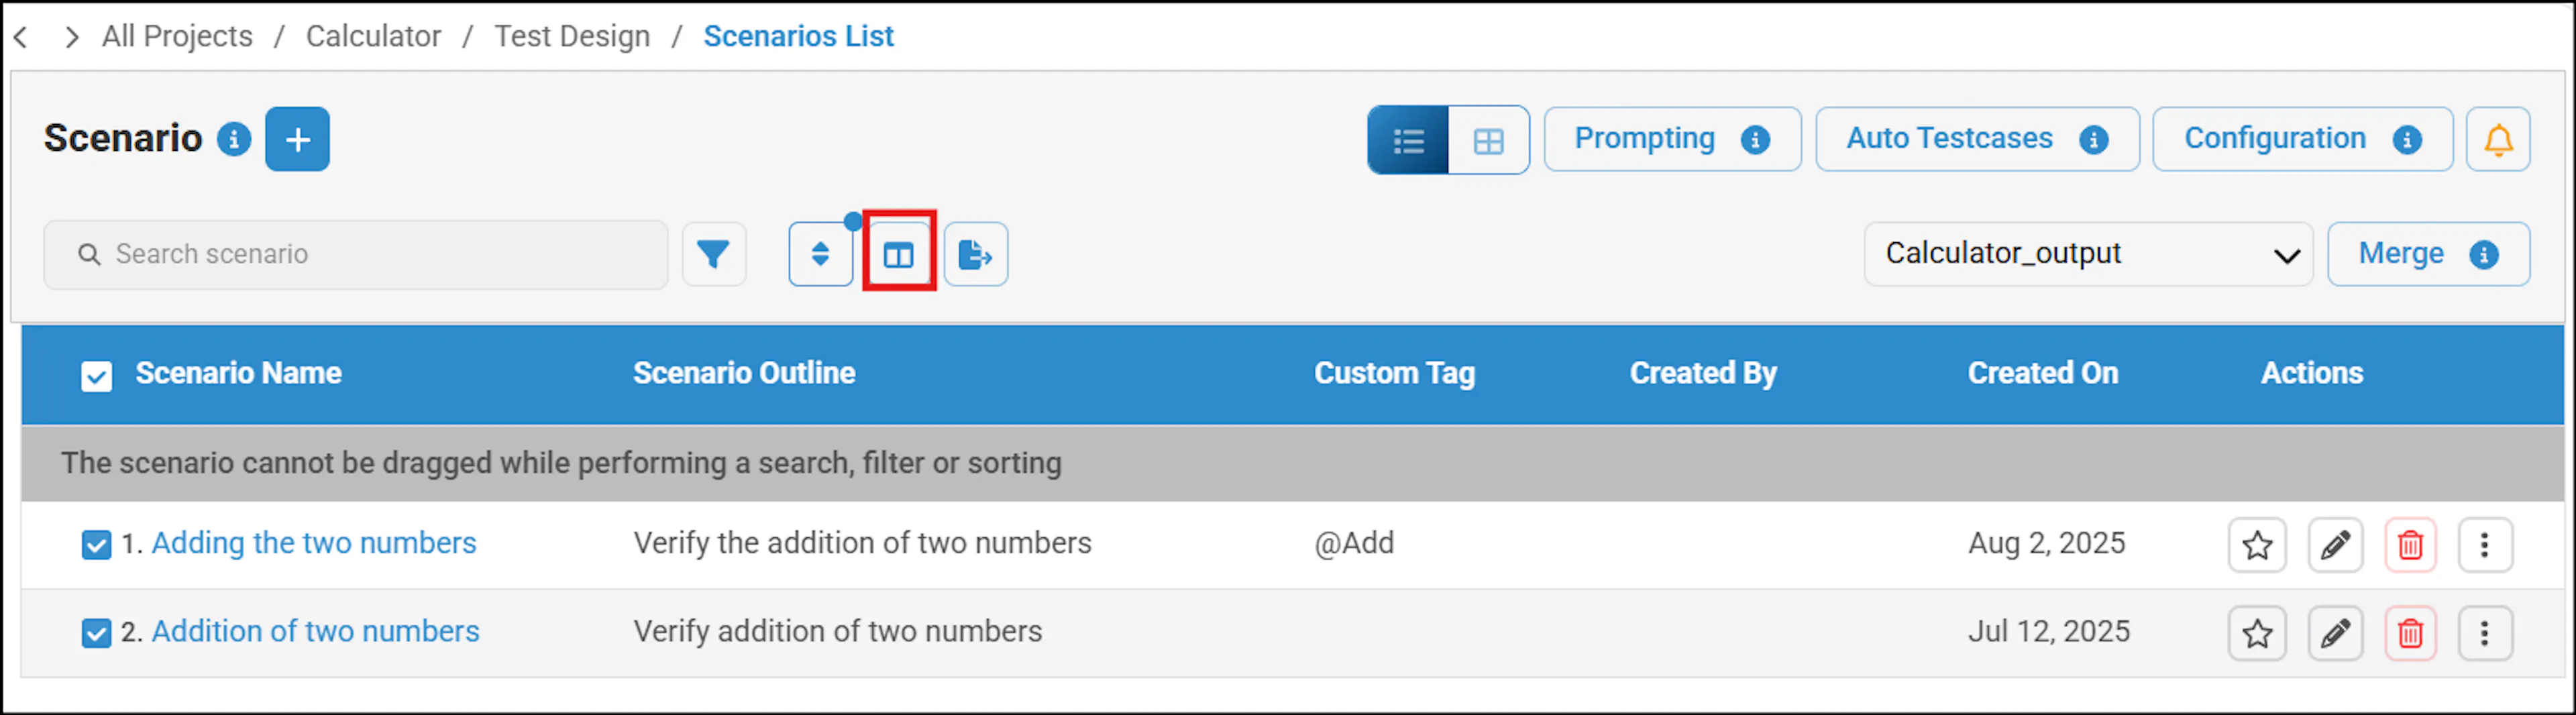
By default, the Studio View is displayed in the Test Design screen. Switch to List View to customize the table.
-
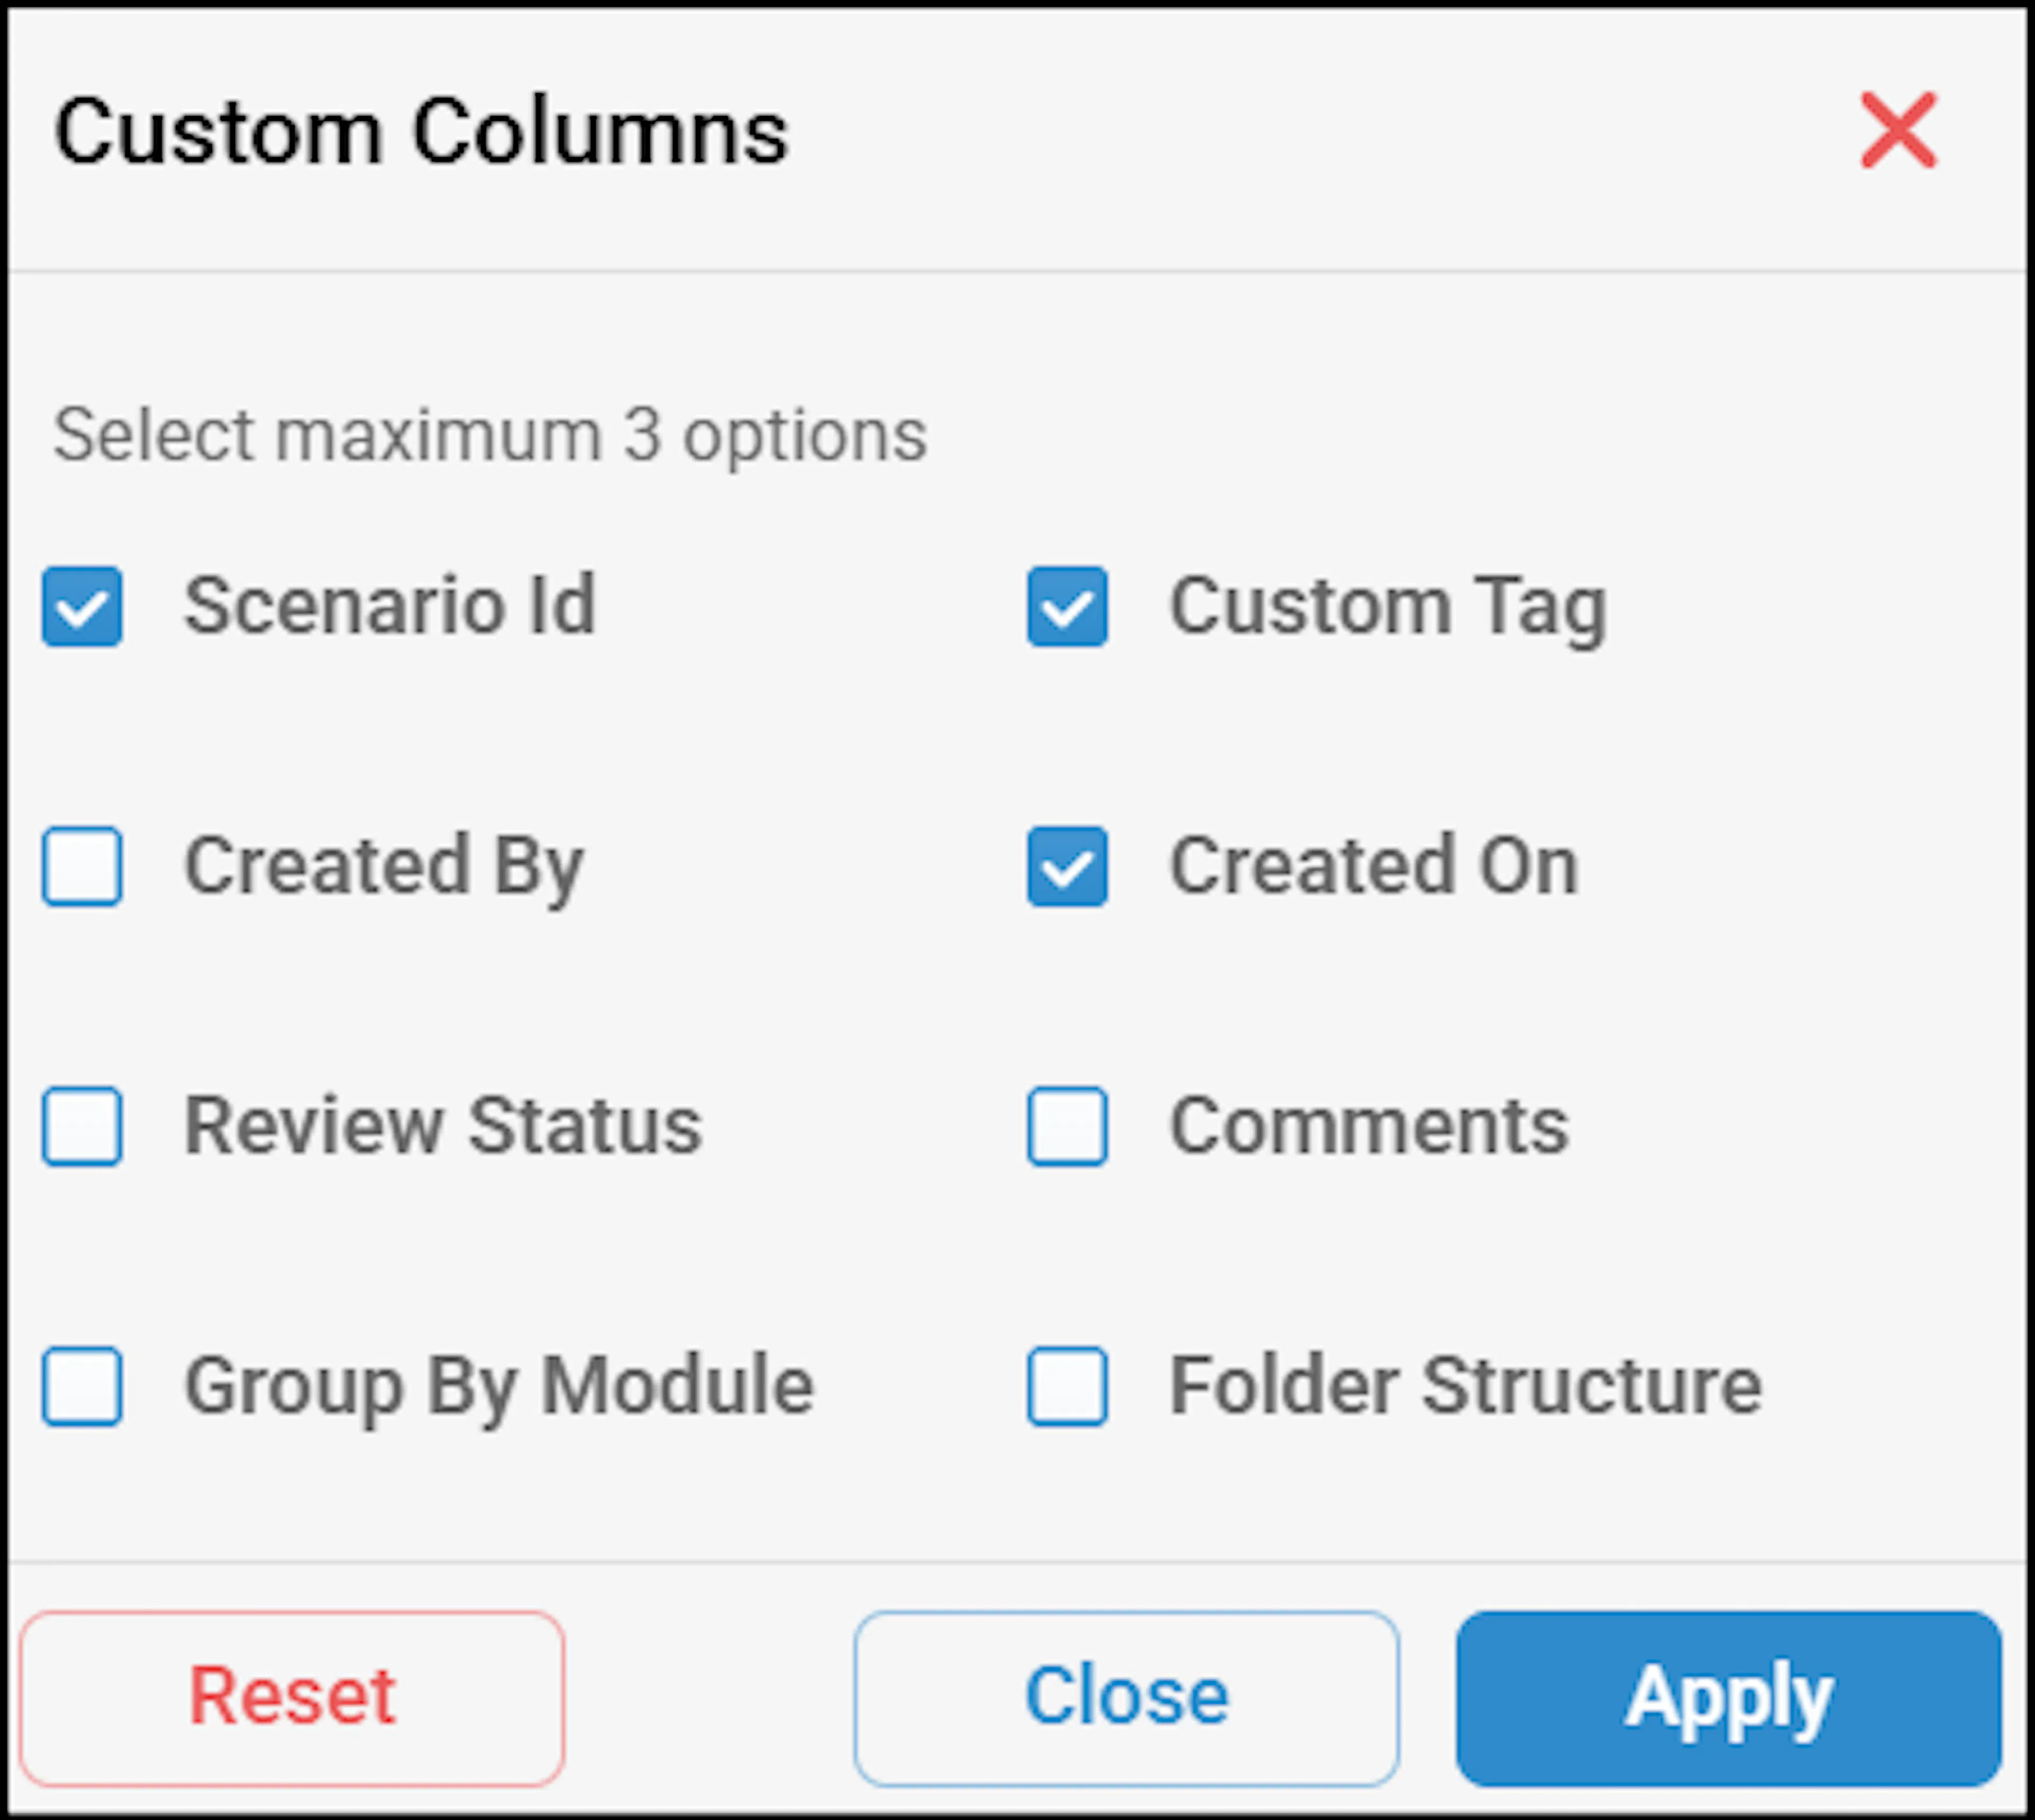
By clicking the Customize Table, you can choose which columns or information you want to display in the table. A maximum of 3 options can be selected.
-
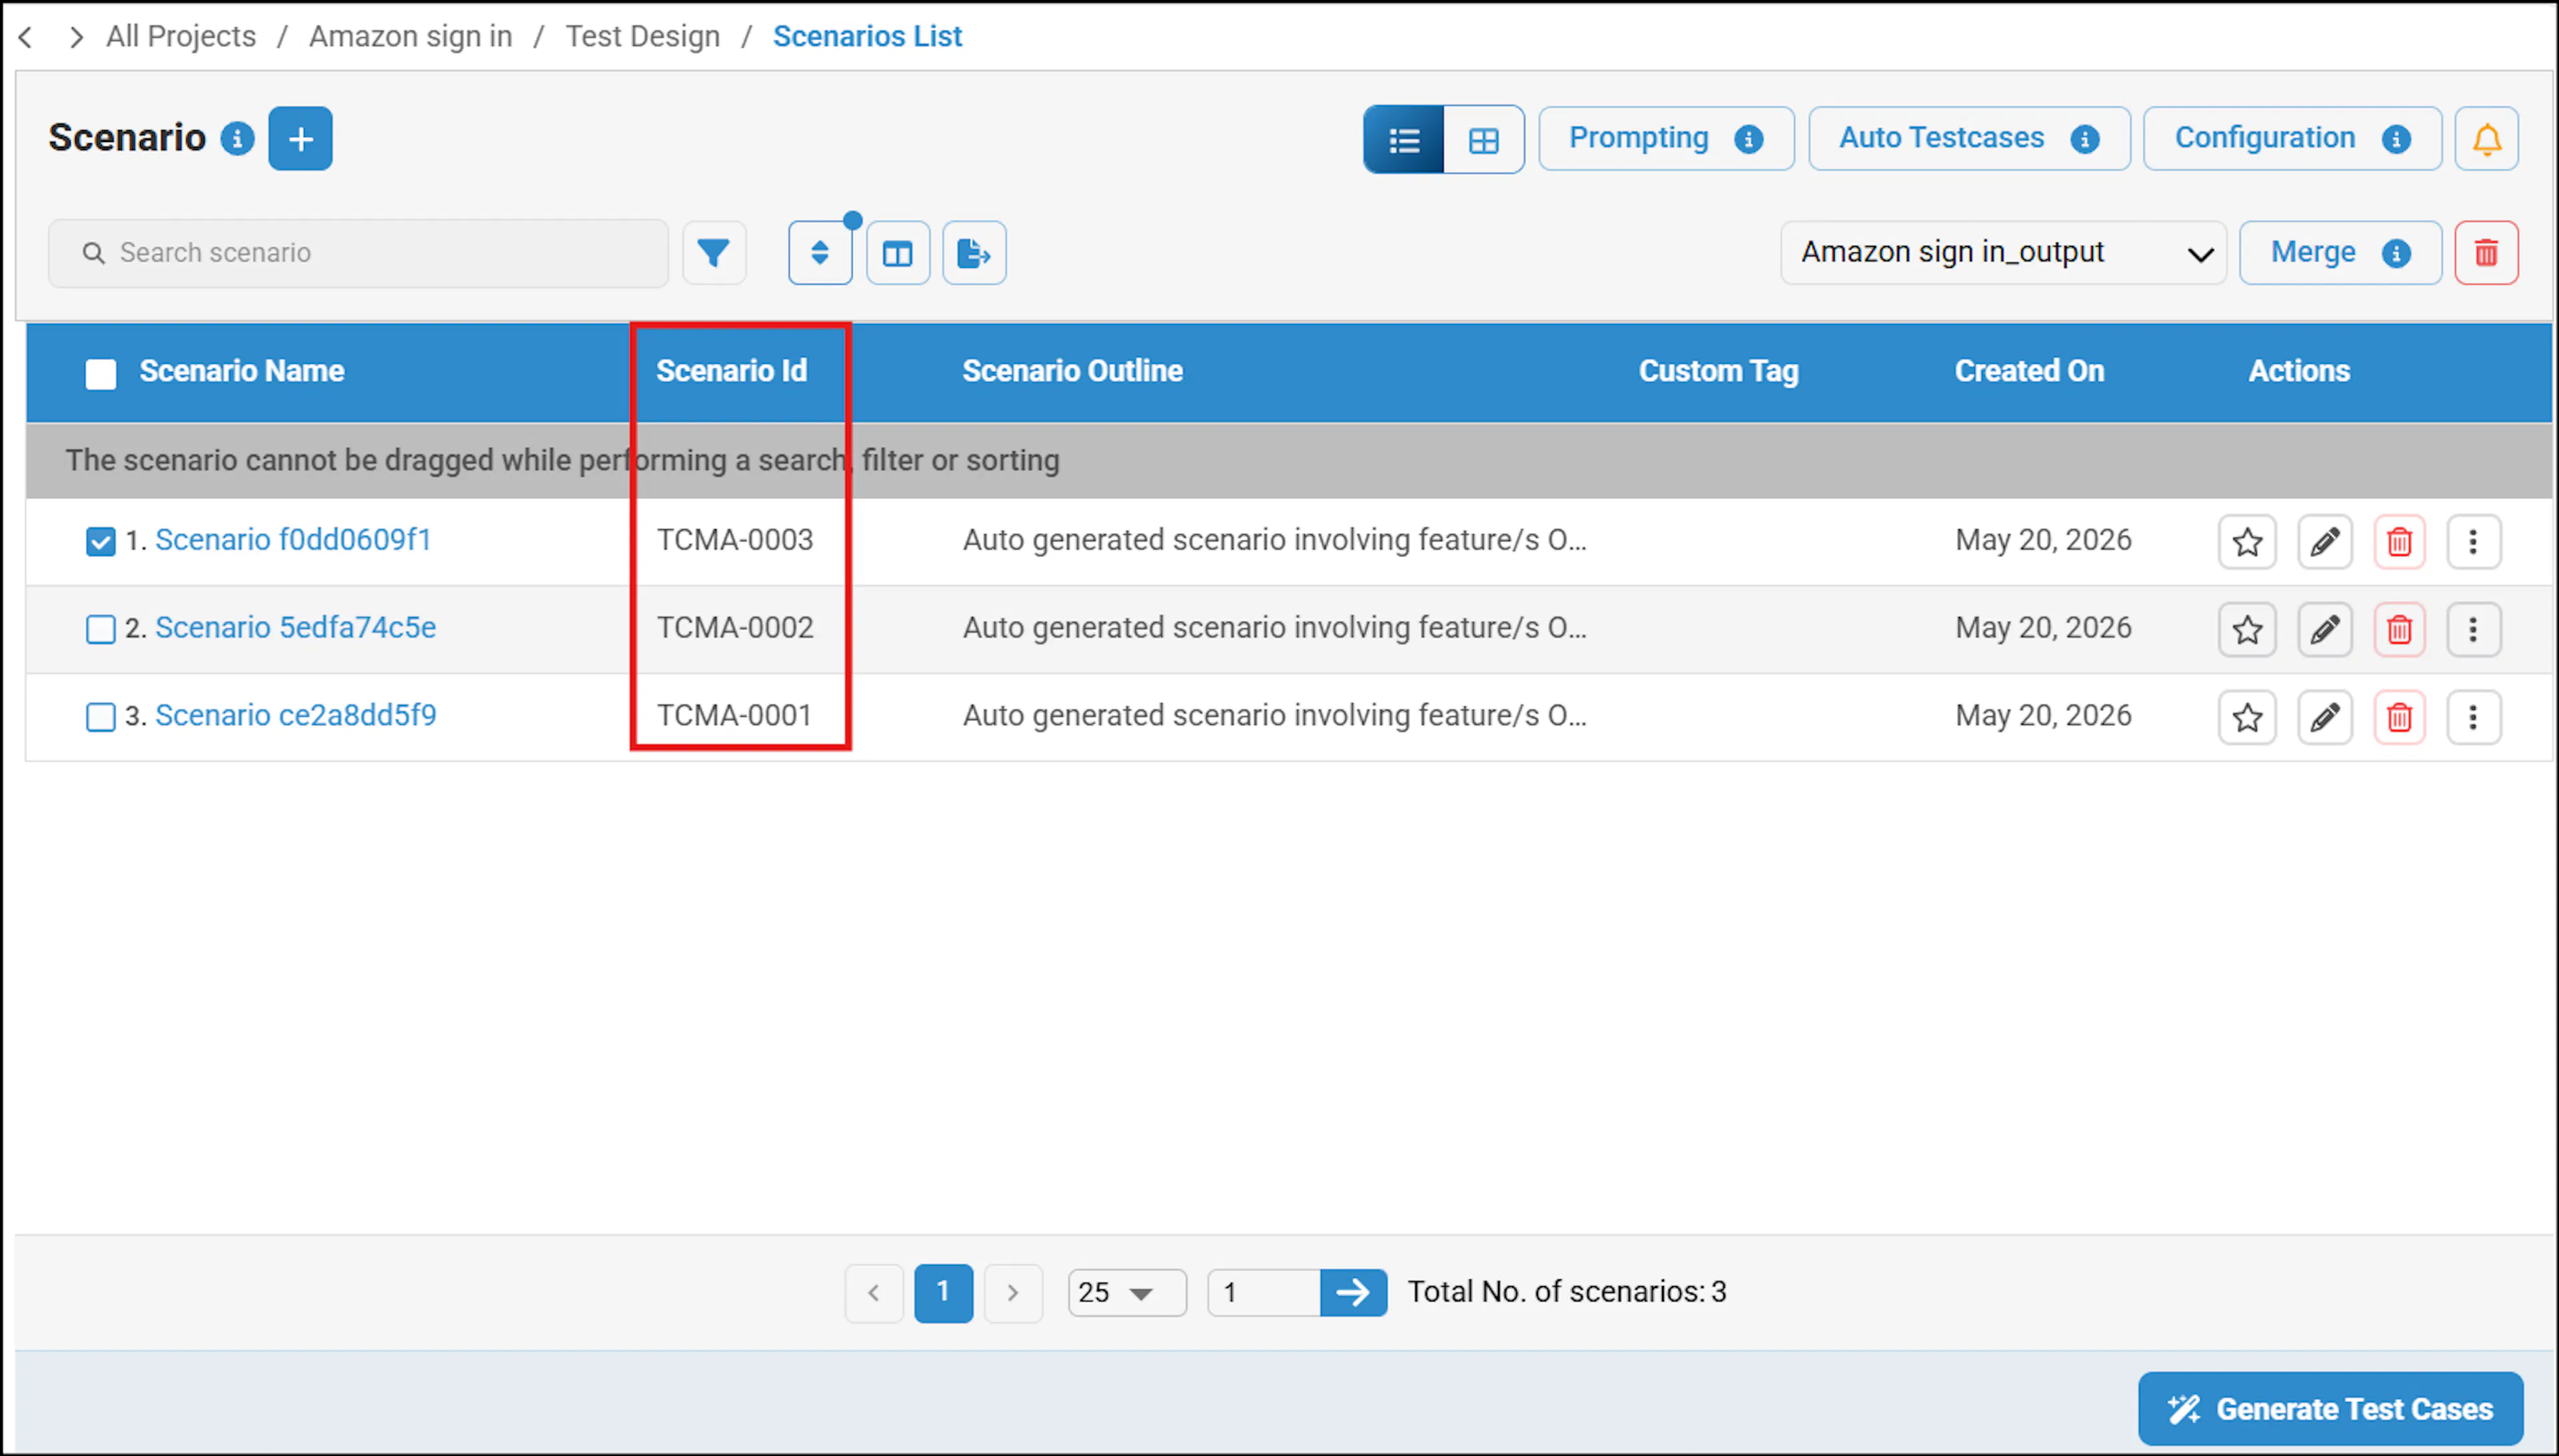
Select the items you want to view such as Scenario Id, Custom Tag, Created By, Created On, Review Status, Comments, Group by Module, and Folder Structure, and click Apply.
Selecting the Scenario ID checkbox under Custom Columns creates a unique ID for each scenario. Users can use this ID to search for a specific scenario. Once assigned, the ID is not reused for another scenario, even if the original scenario is deleted. The same ID is also available in the test cases after they are generated. The Scenario ID is also retained when you export and import the project.
-
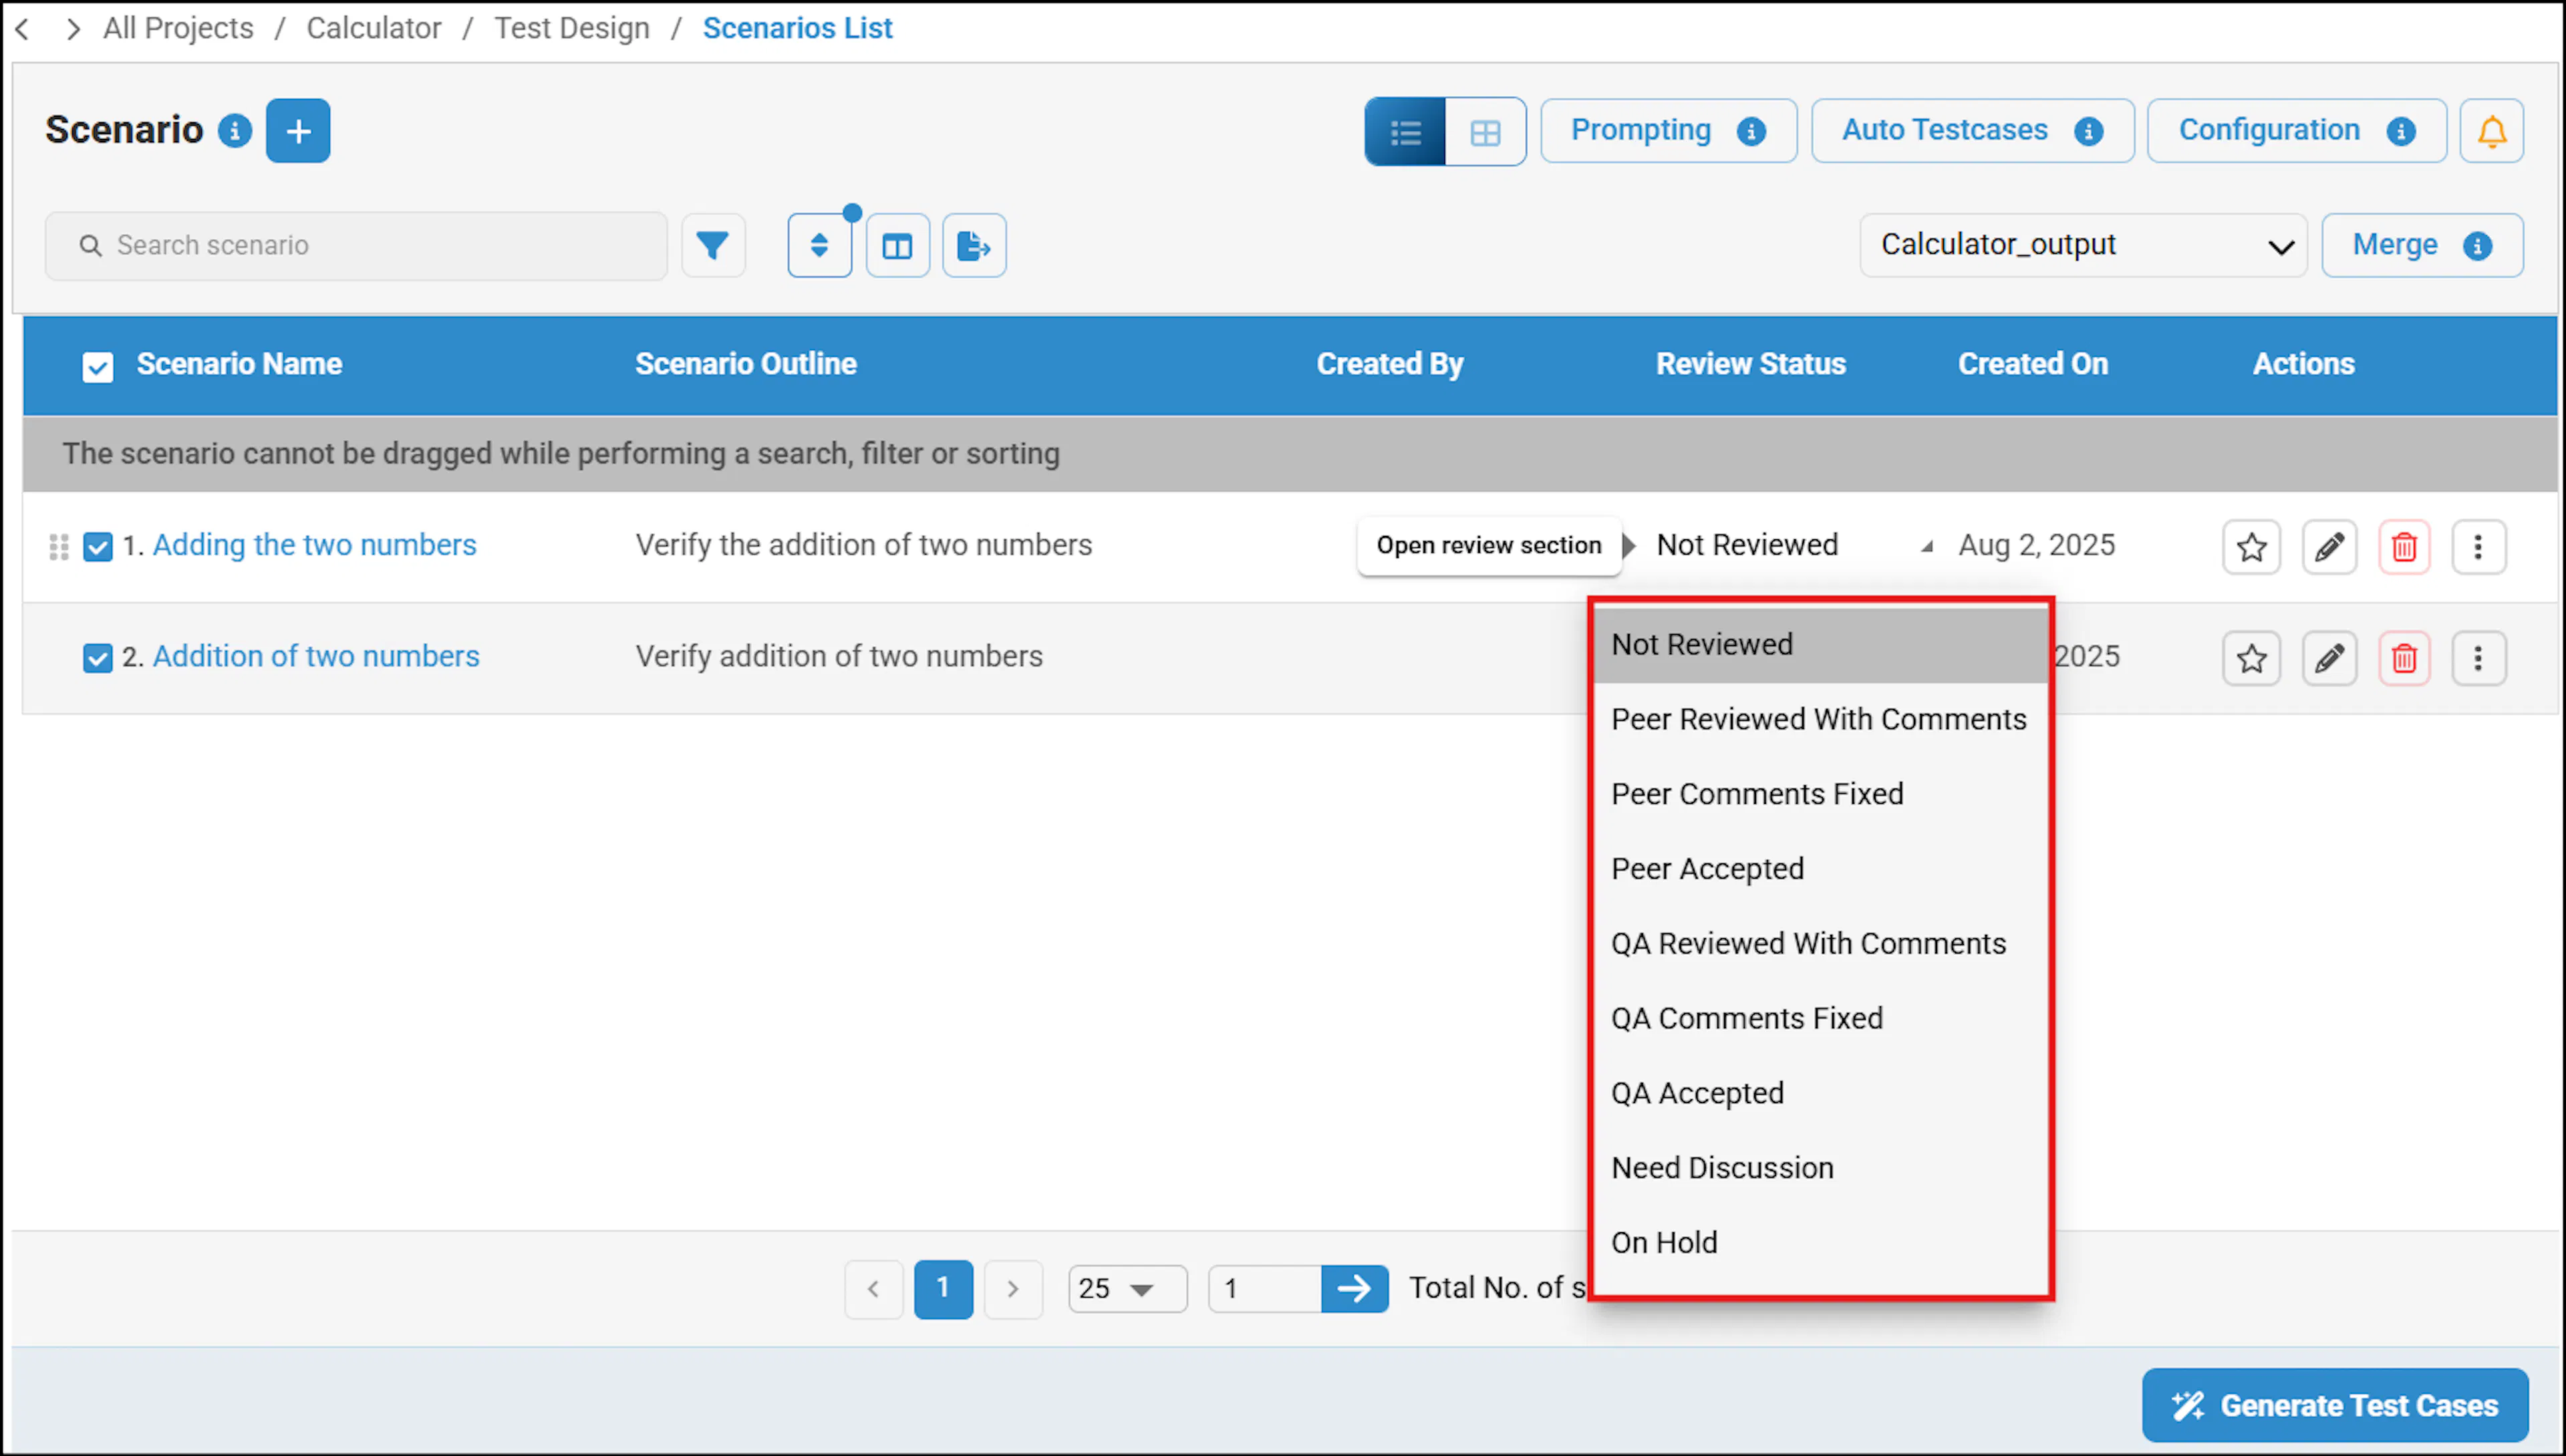
Review status can be updated by the reviewer, whether it is Not Reviewed, Peer Reviewed with Comments, Peer Comments Fixed, Peer Accepted, QA Reviewed with Comments, QA Comments Fixed, QA Accepted, Need Discussion or On Hold.
-
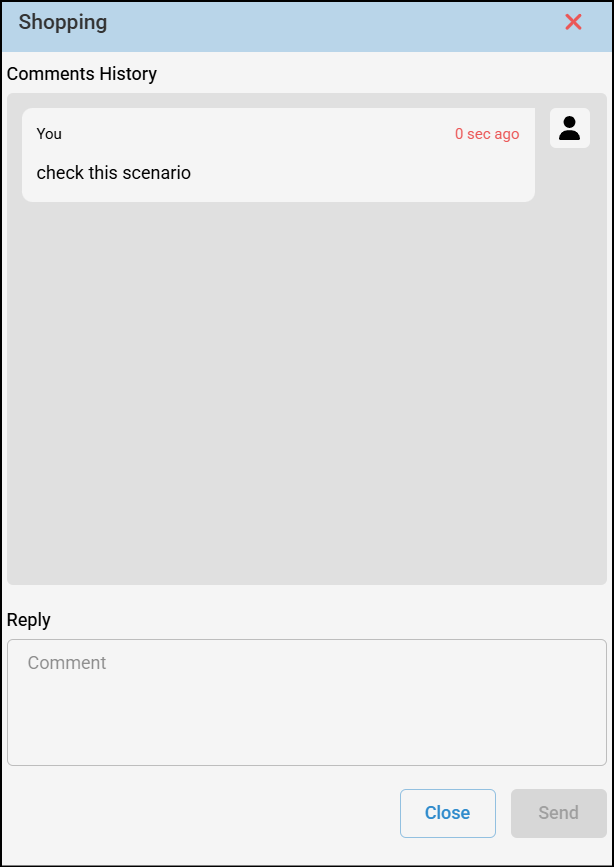
You can add comments in the Comments field, share them with other users, and click Send for the comments to be shared.
-
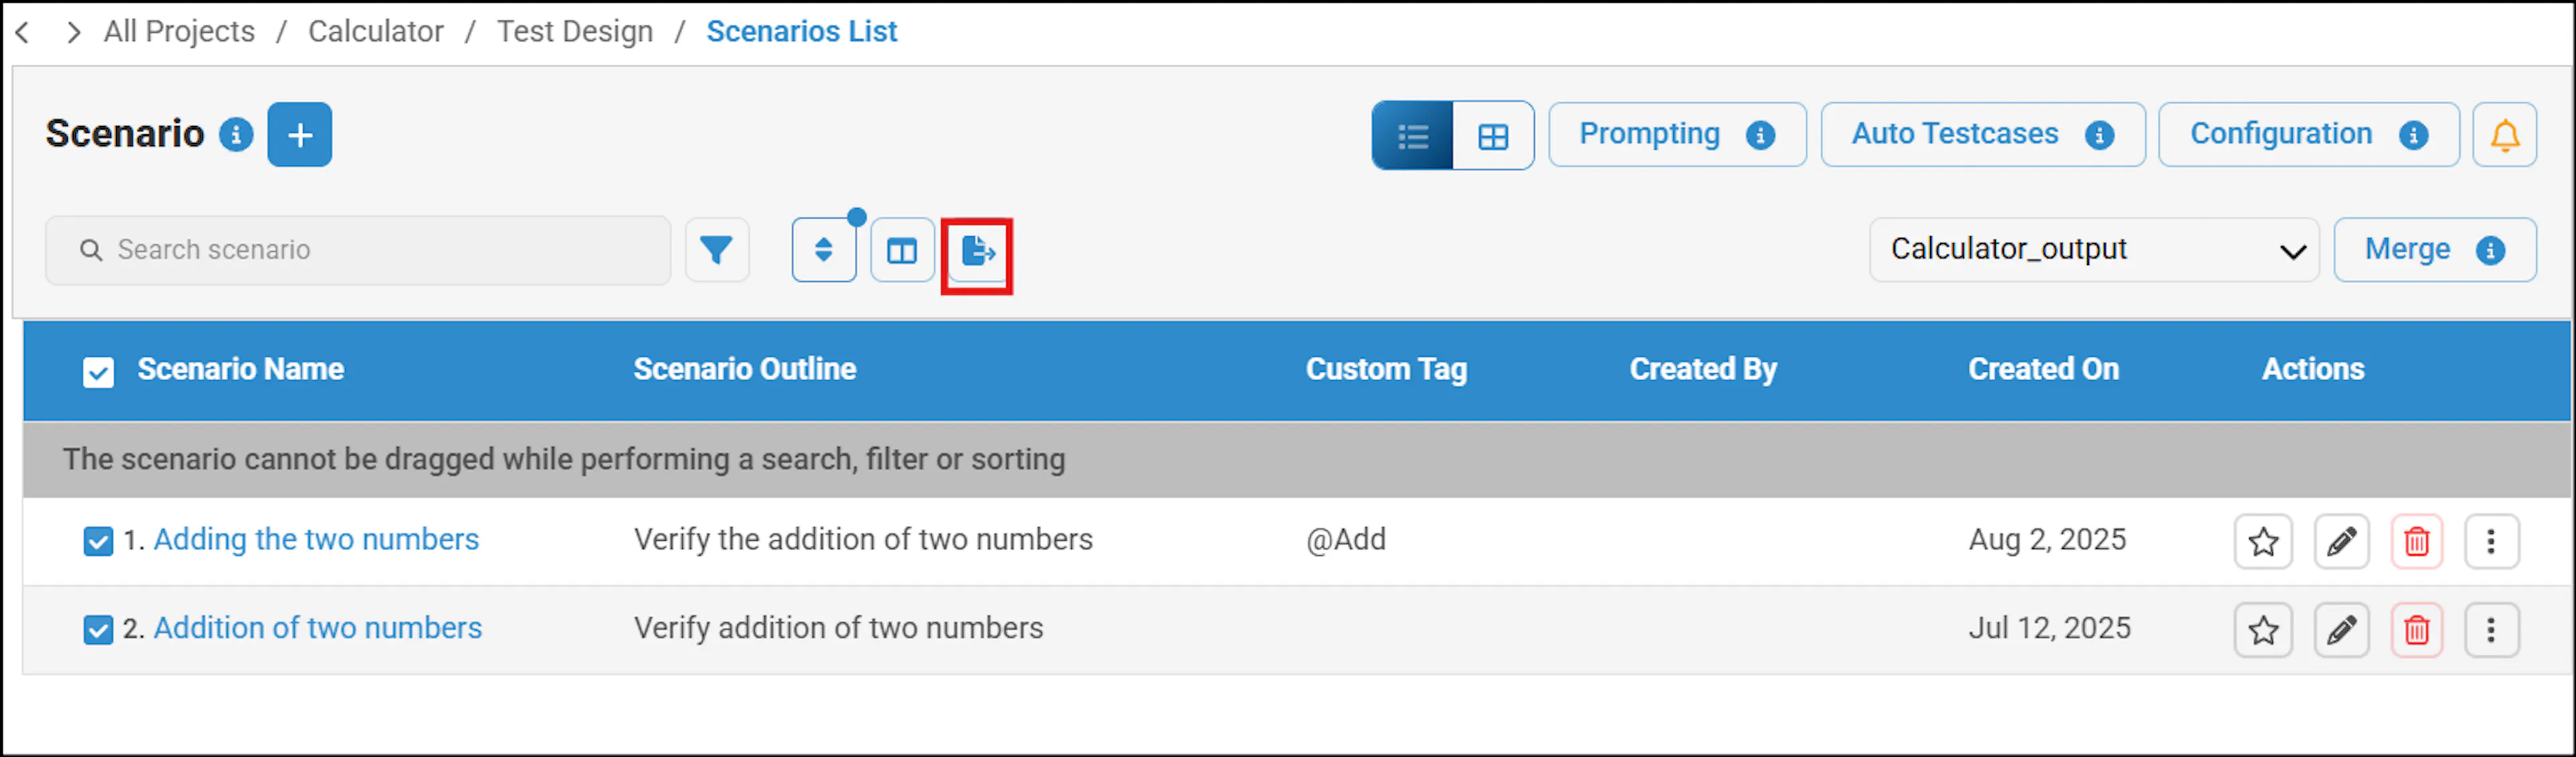
You can download the data available in Test Design > Scenario List by clicking the Export CSV button. A CSV file containing all the details displayed in the table will be downloaded.
In a centralized project, when concurrent users work on the same scenario using the Test Design feature, the active user must save their changes. Until this is done, if another user tries to edit the same scenario, they will see a lock icon displaying the username and ID of the person currently editing the scenario. Another user must wait until the active user saves their changes and exits the feature using the back button. In a centralized project, you can uncheck scenarios currently being worked on by another user in the Test Design and generate test cases.
Additionally, as an admin, you will be able to uncheck the scenarios in the Test Design screen and generate test cases. For a centralized project multiple users can't generate test cases at the same time
Test Design Interface
Upon accessing the Test Design feature, you will see a comprehensive range of functionalities designed for scenario management.
Viewing and searching scenarios
You can view and search a comprehensive list of scenarios using scenario names, custom tags, outlines, features, and structure. Use keywords or phrases in the search bar to quickly find relevant scenarios. Additional options include:
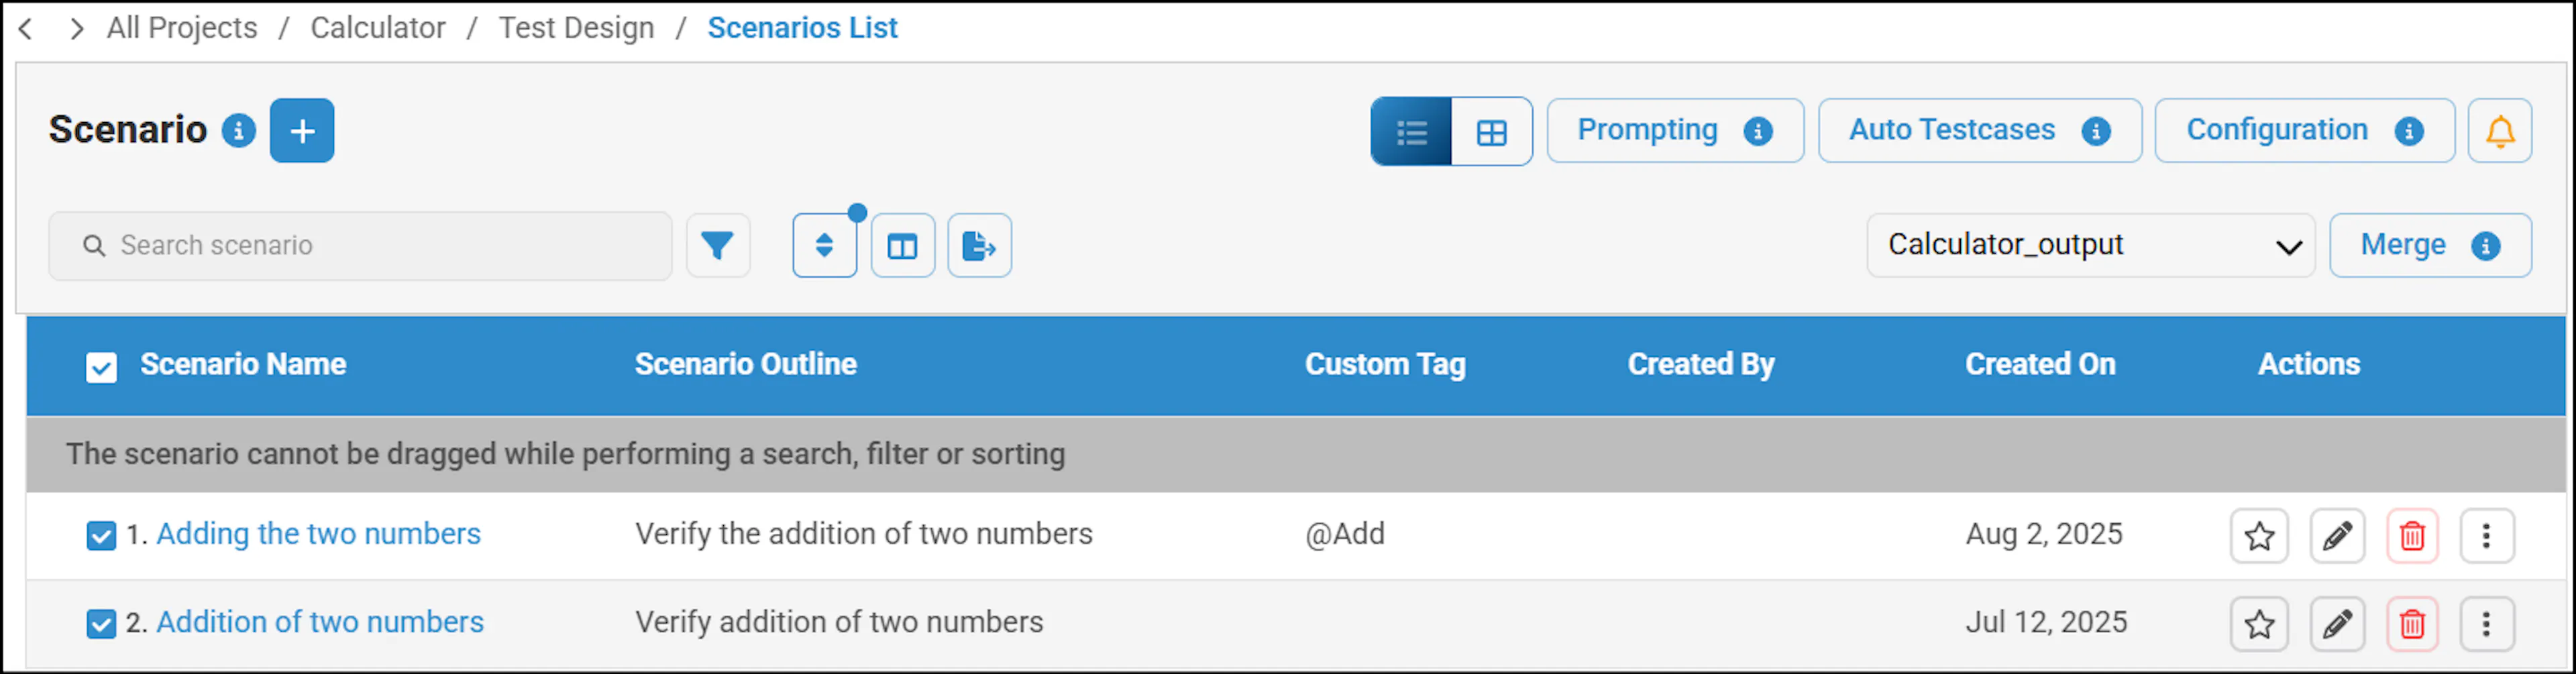
Managing scenario order
- Resetting the search options - Click the 'X' button to view default settings after performing search criteria.
- Create new scenarios - Click the '+' button besides Scenario List to add new scenarios.
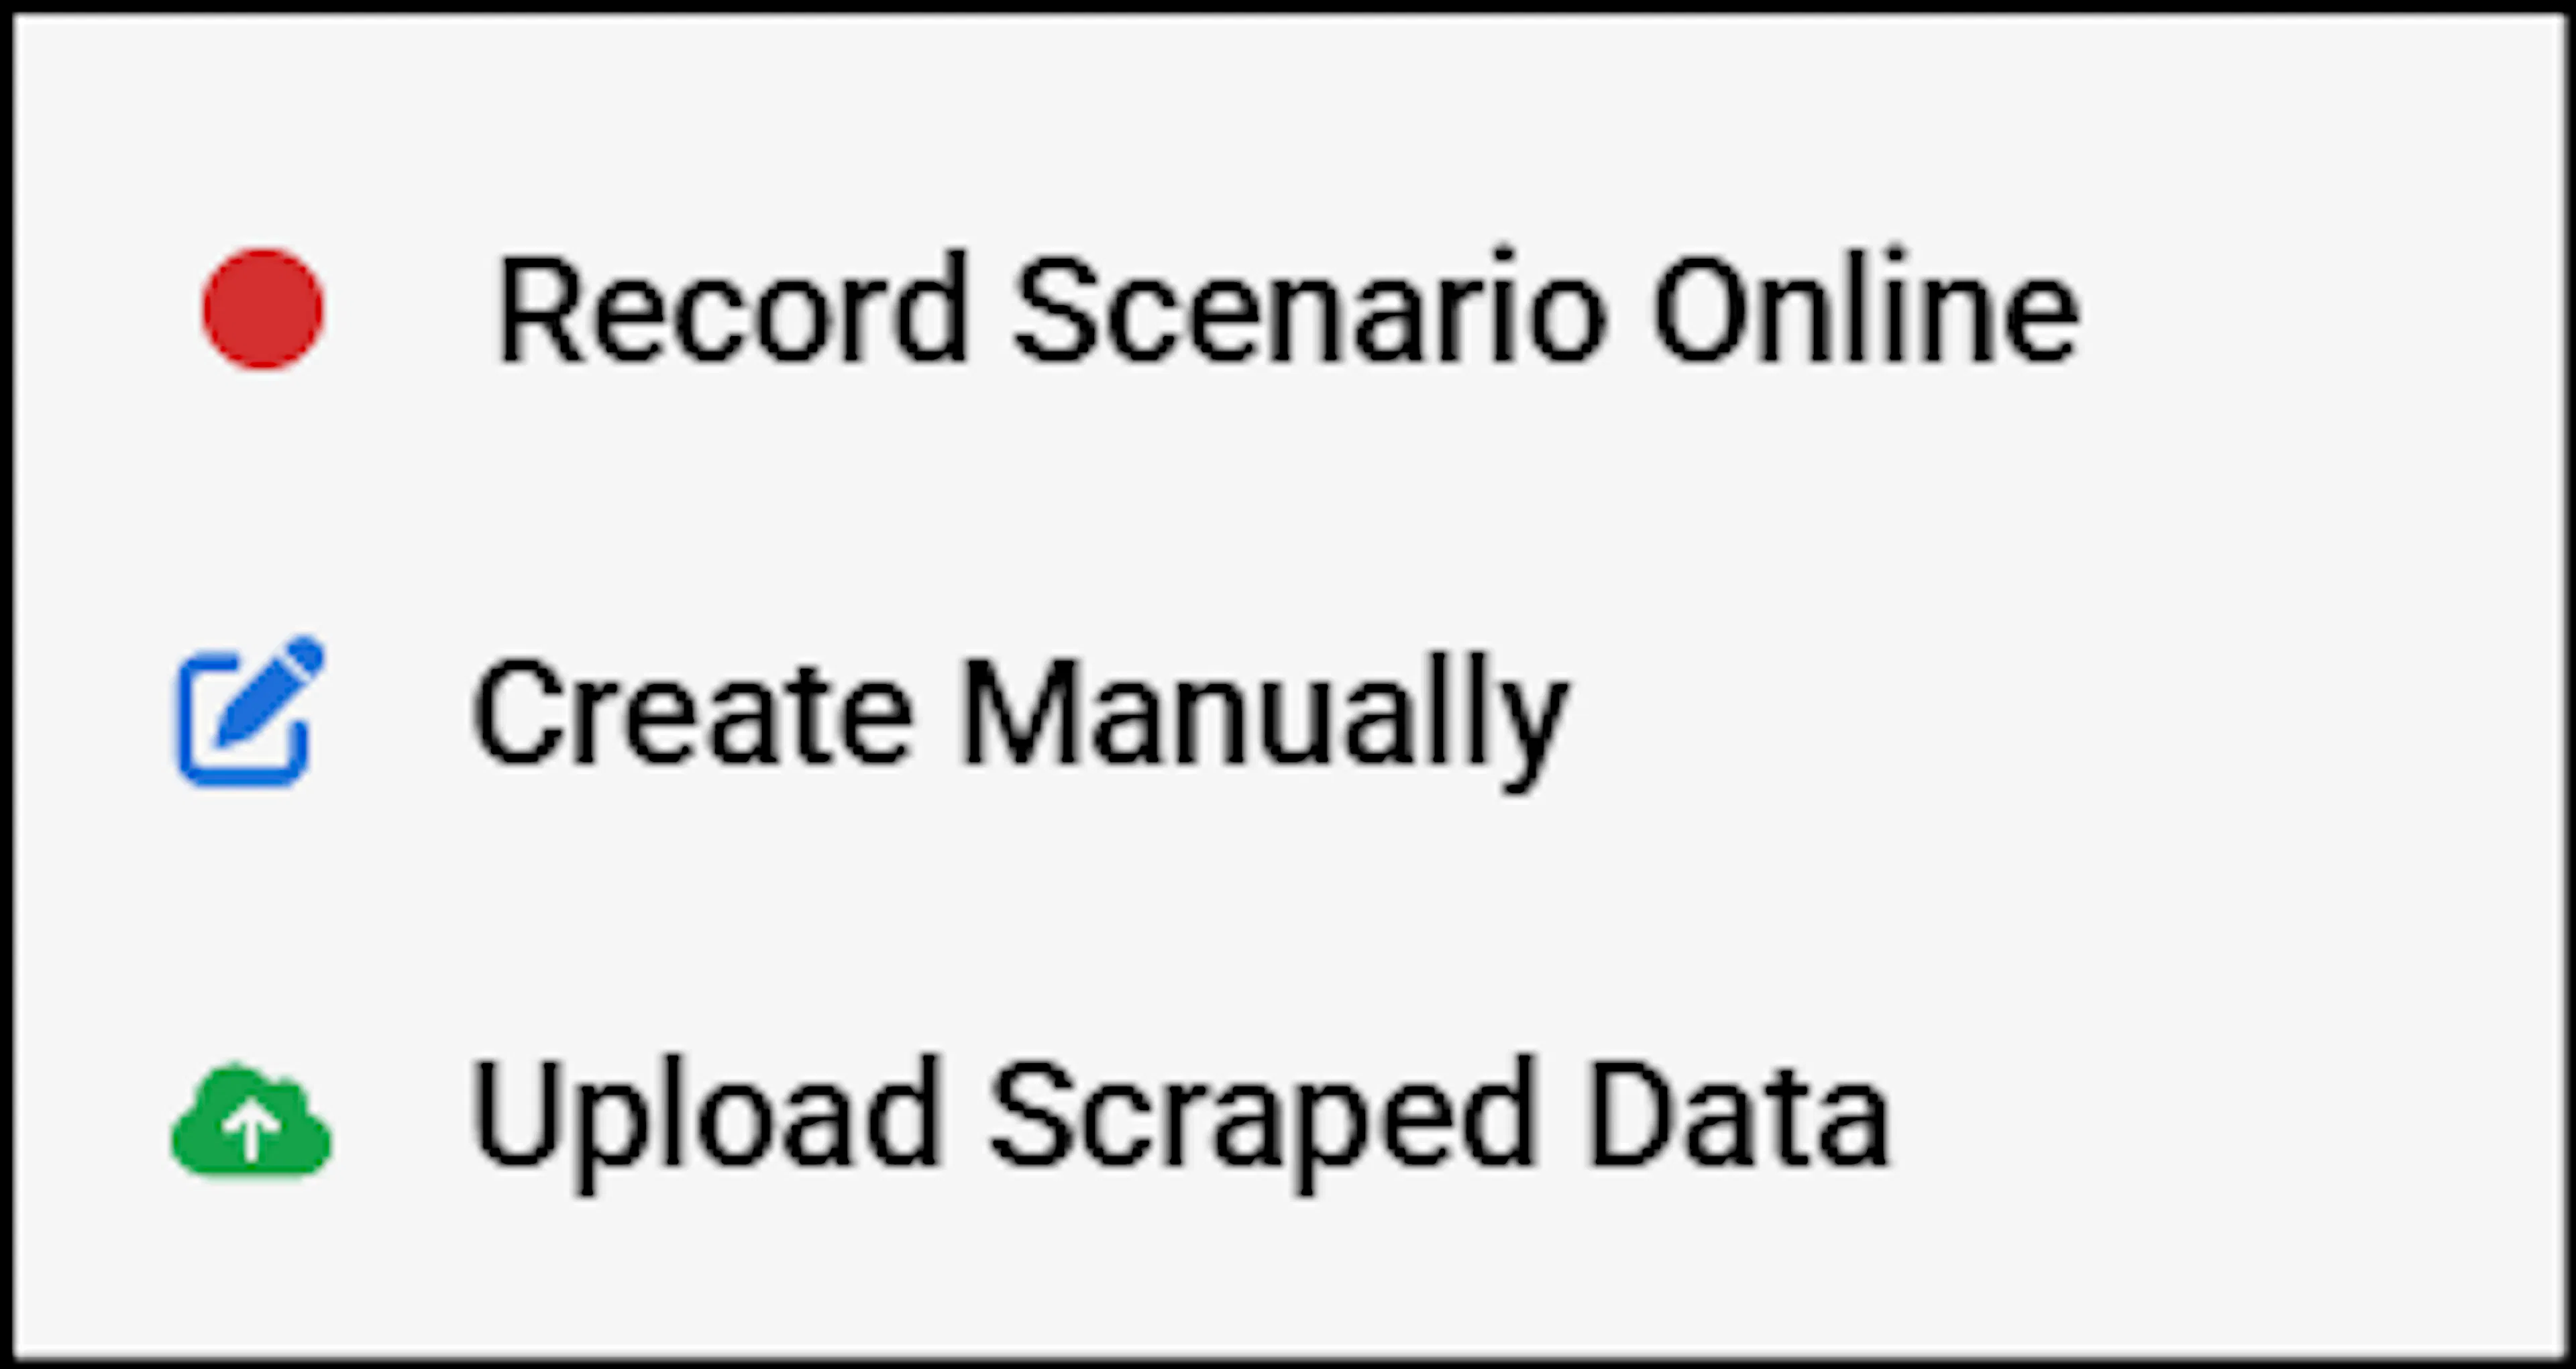
Select whether you want to Record Scenario Online, Create Manually, or Upload Scraped Data.
If you select Create Manually, the Create Scenario section appears.
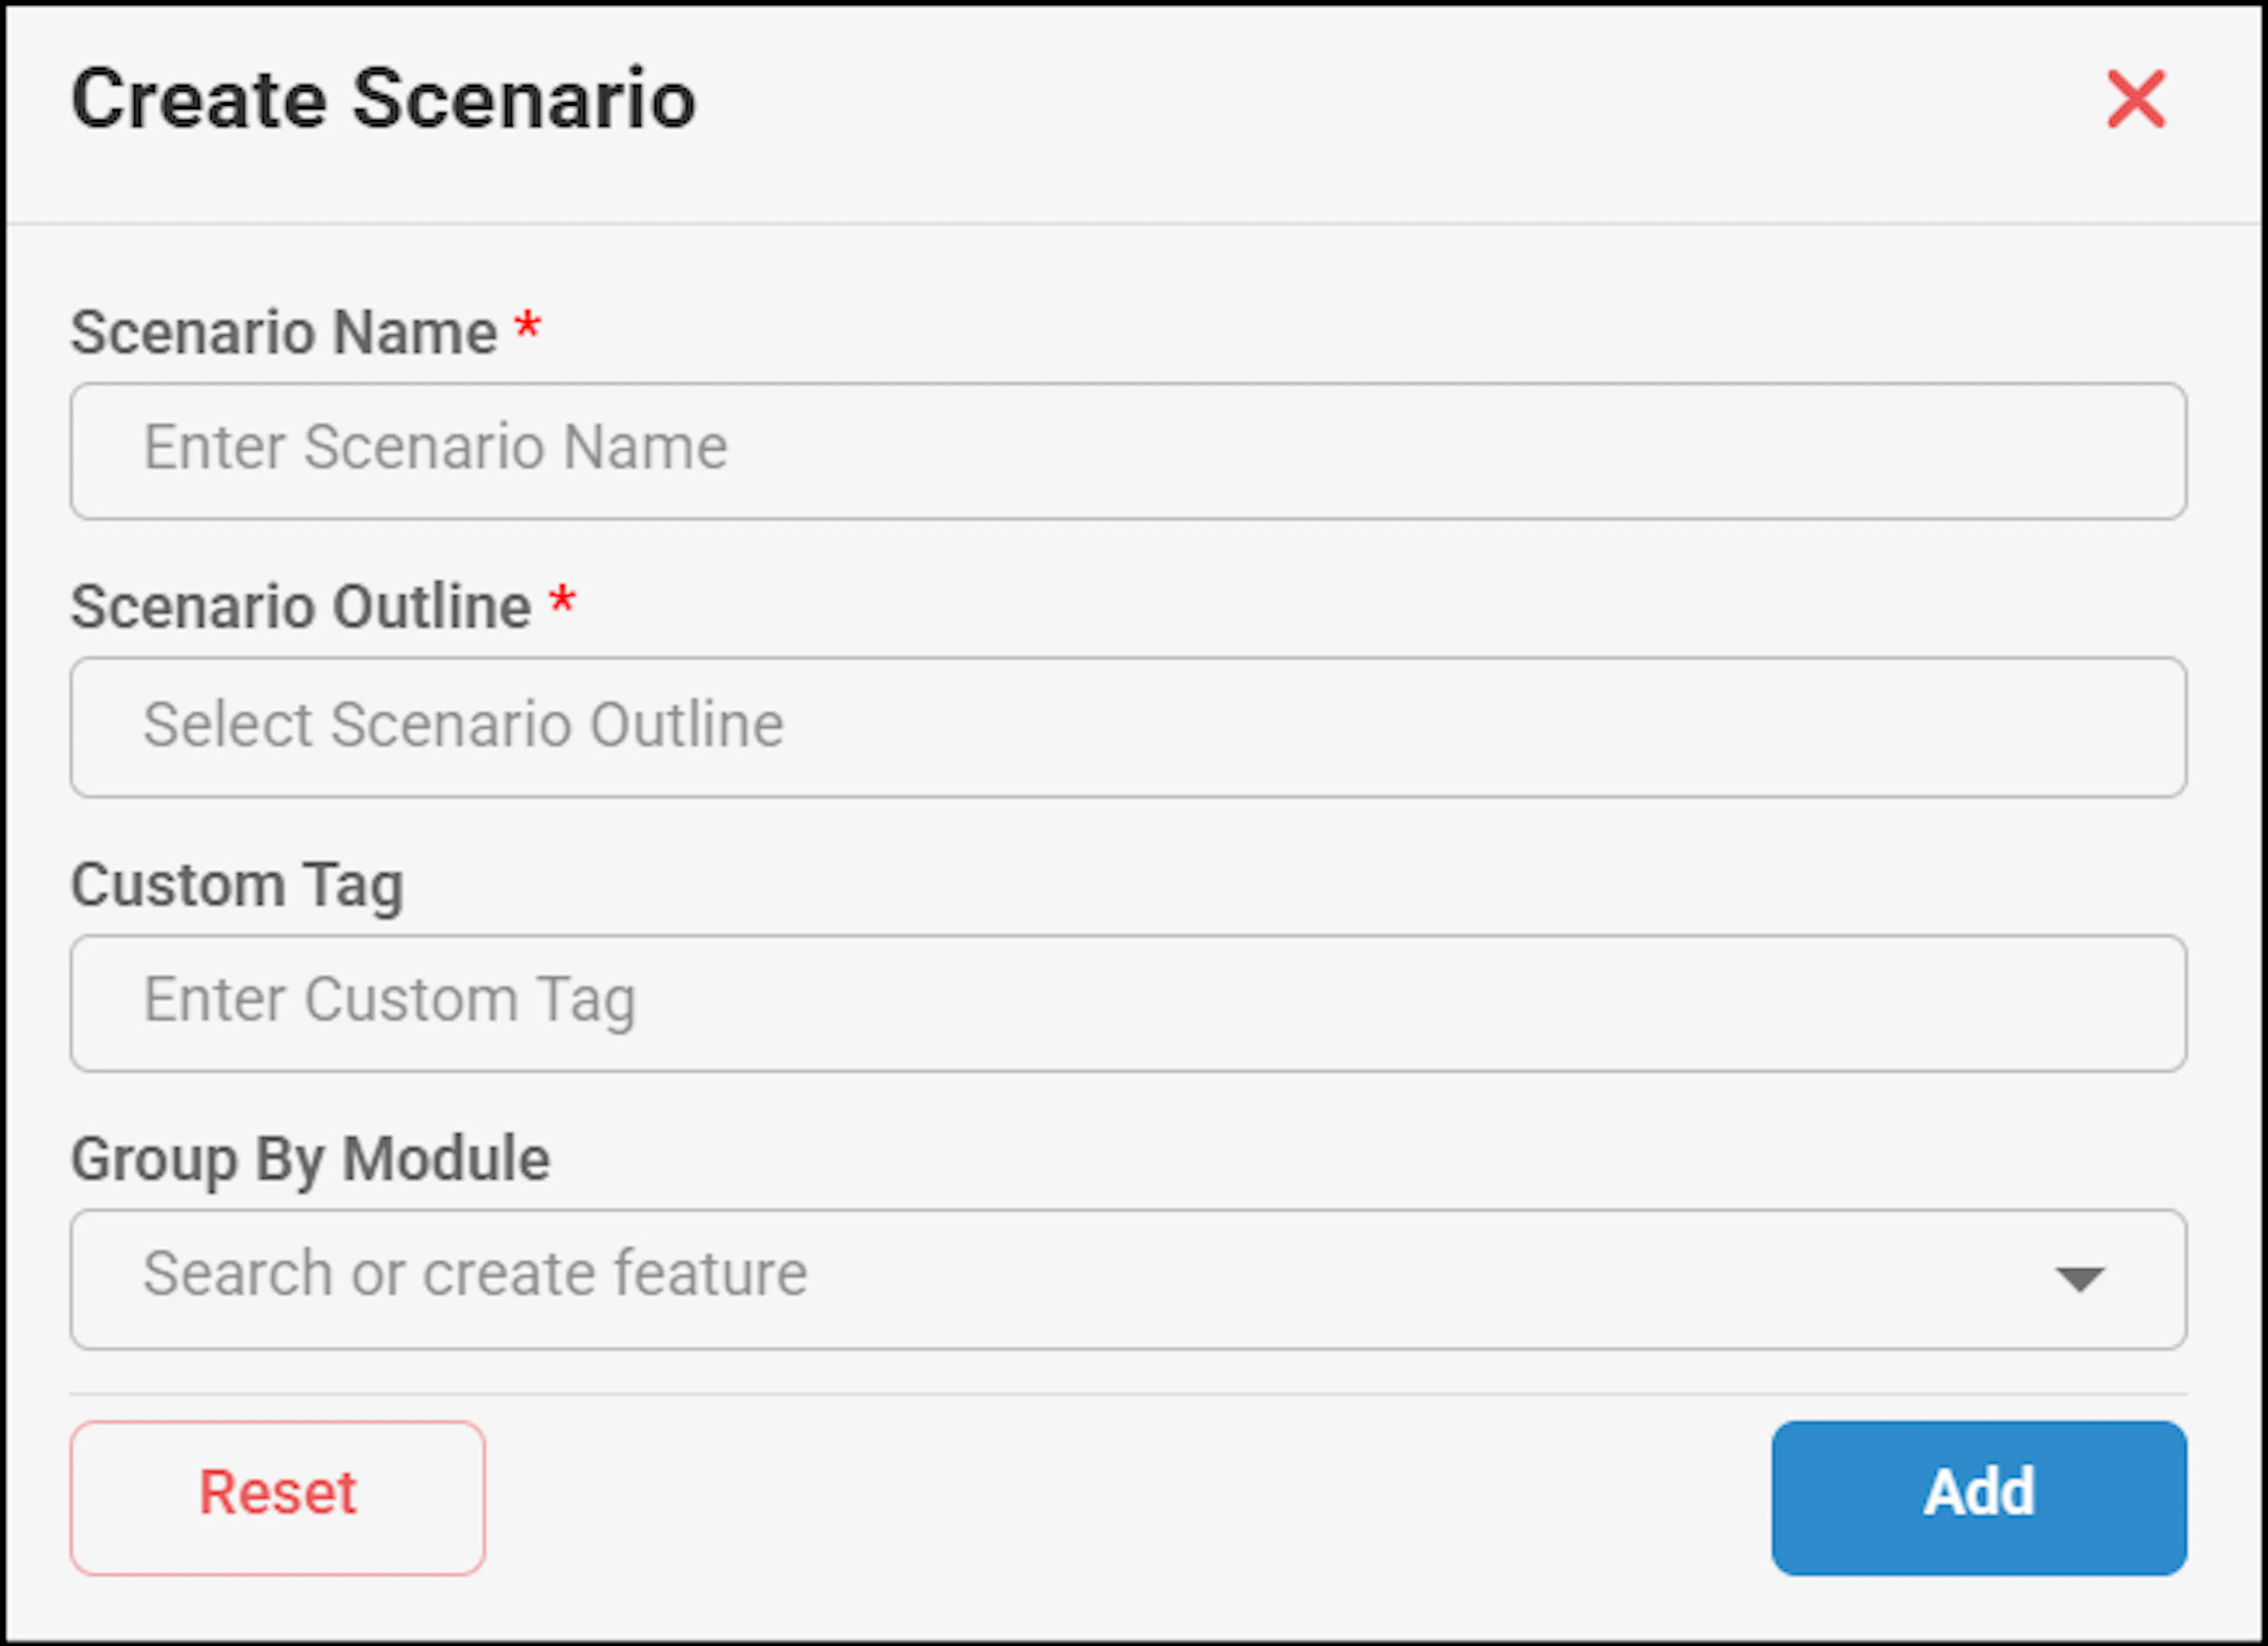
On the Create scenario section, if you provide an existing scenario name, an error message will alert you, saying 'Duplicate Scenario.' This means that the scenario name you entered already exists and cannot be used again. Ensure to choose a unique name for your scenario.
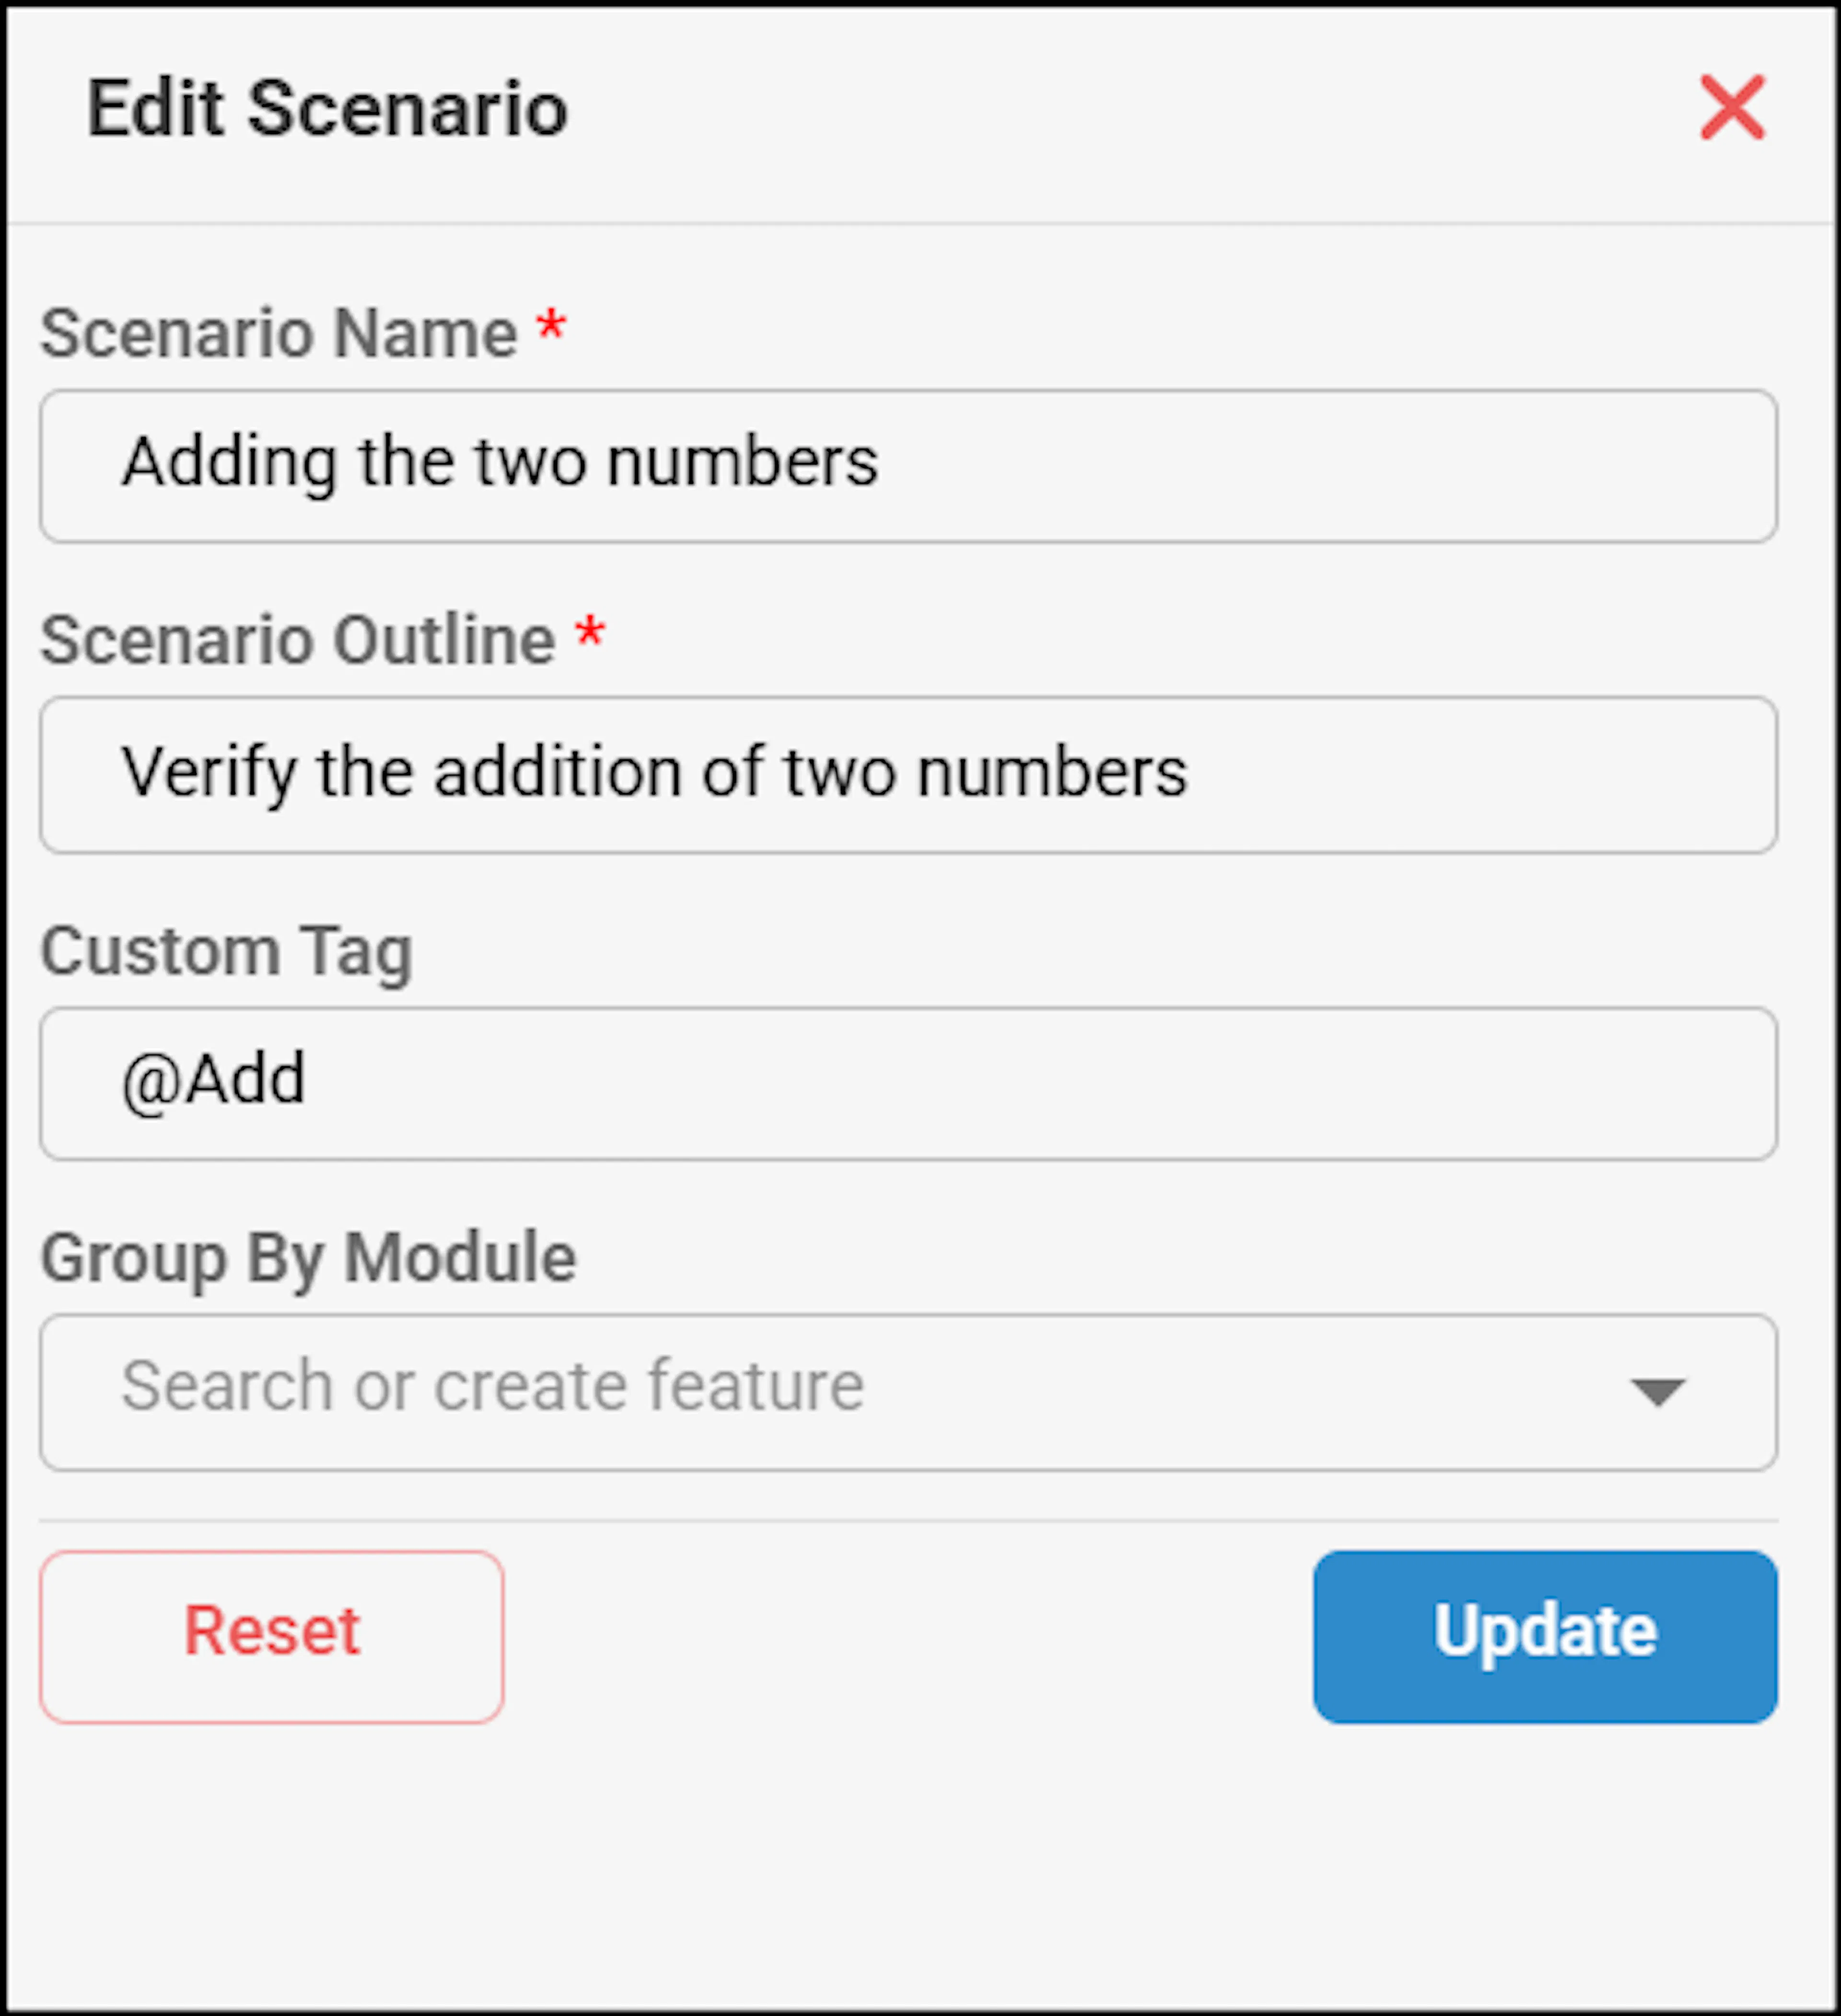
Enter the Scenario Name, Scenario Outline, Custom Tag, and Group by Module, then click Add. The Scenario Name and Scenario Outline fields are mandatory.
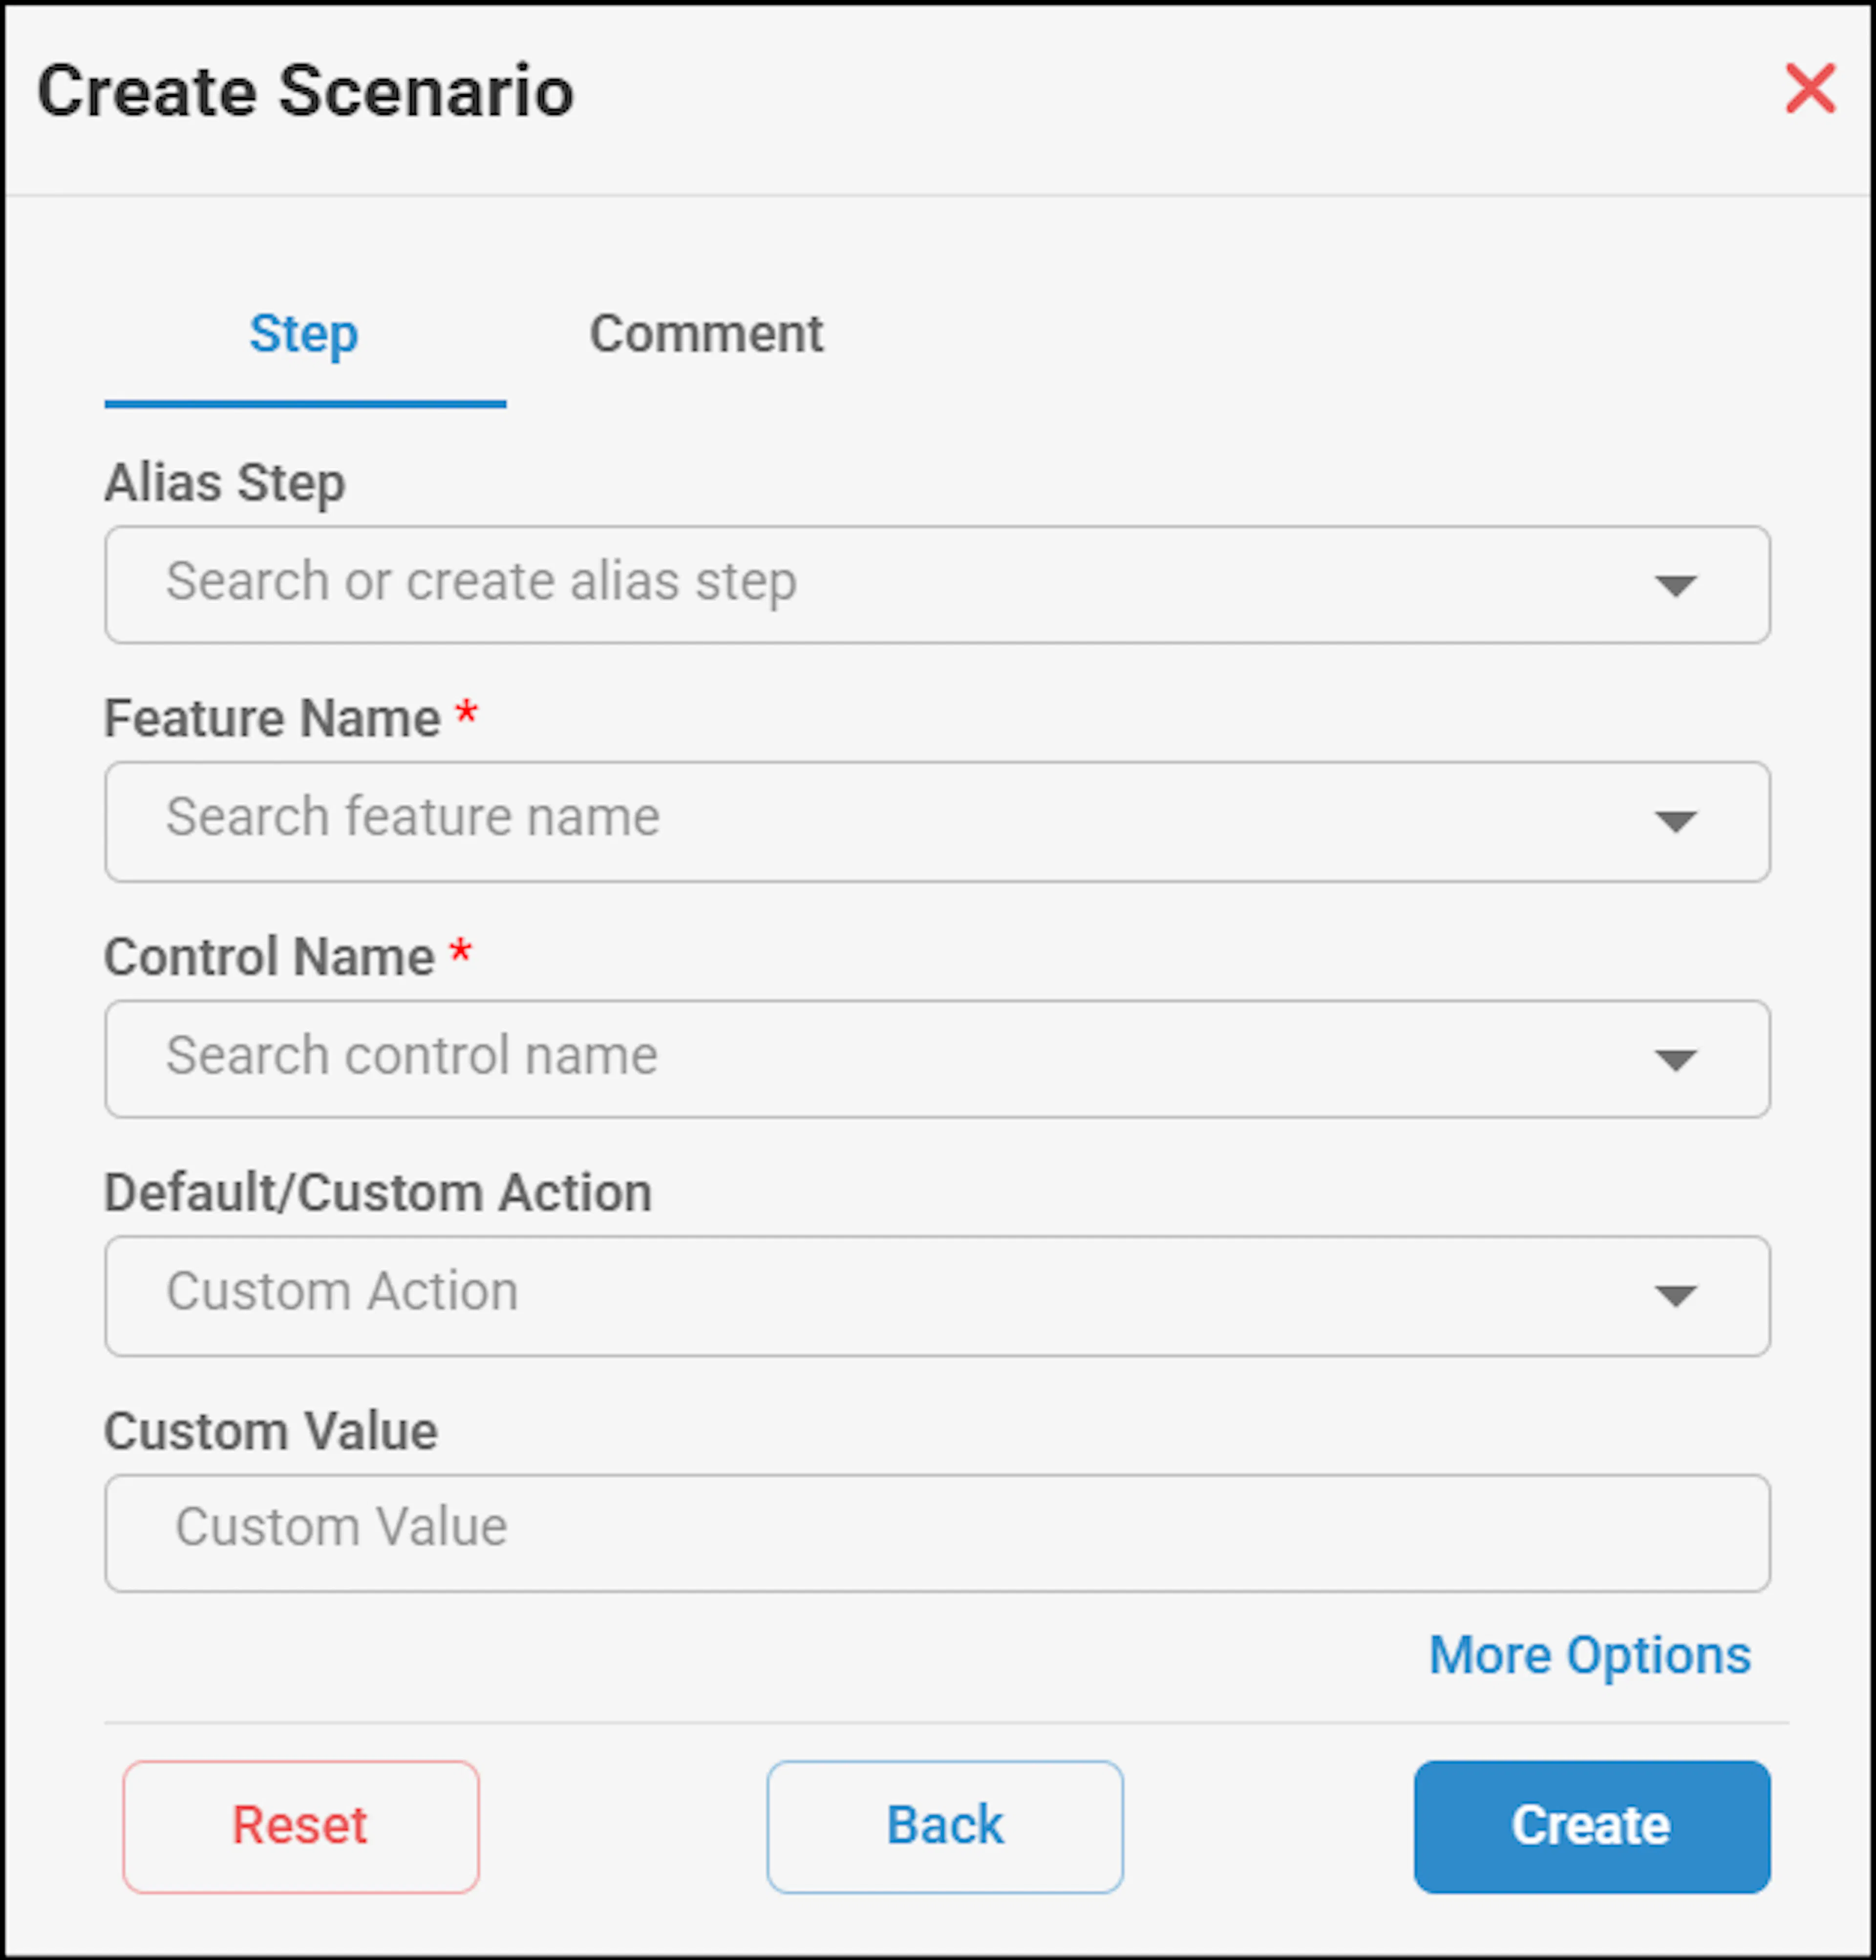
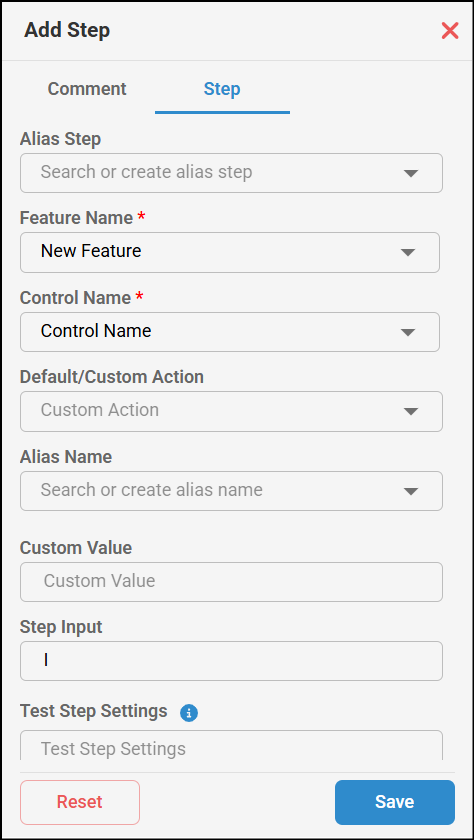
The Step screen appears. Enter the Alias Step, Feature Name, Control Name, select the Default/Custom Action, enter the Custom Value, and click Create. The Feature Name and Control Name fields are mandatory.
You can update an existing scenario step or add a new one by adding alias step by clicking the edit icon beside the scenario step in Scenario Steps List. Now there is auto suggestions available for reusing the Alias Step
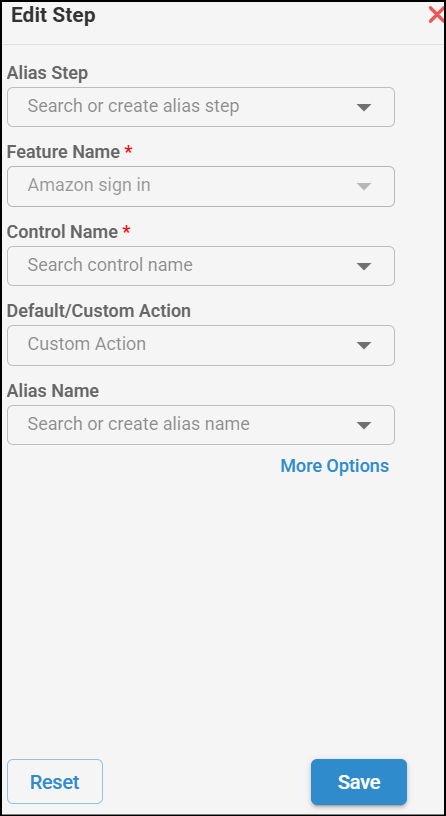
You can add comments by clicking More Options >> selecting Message. This text box is used when you are using the Karate Framework. The comments column provides additional notes about the test steps.
When you add a new step, make sure you save the step to view Successfully added scenario message. Edit and delete buttons will be enabled only after saving the changes to the test steps.
Rearranging scenarios- This action can be performed in two ways:
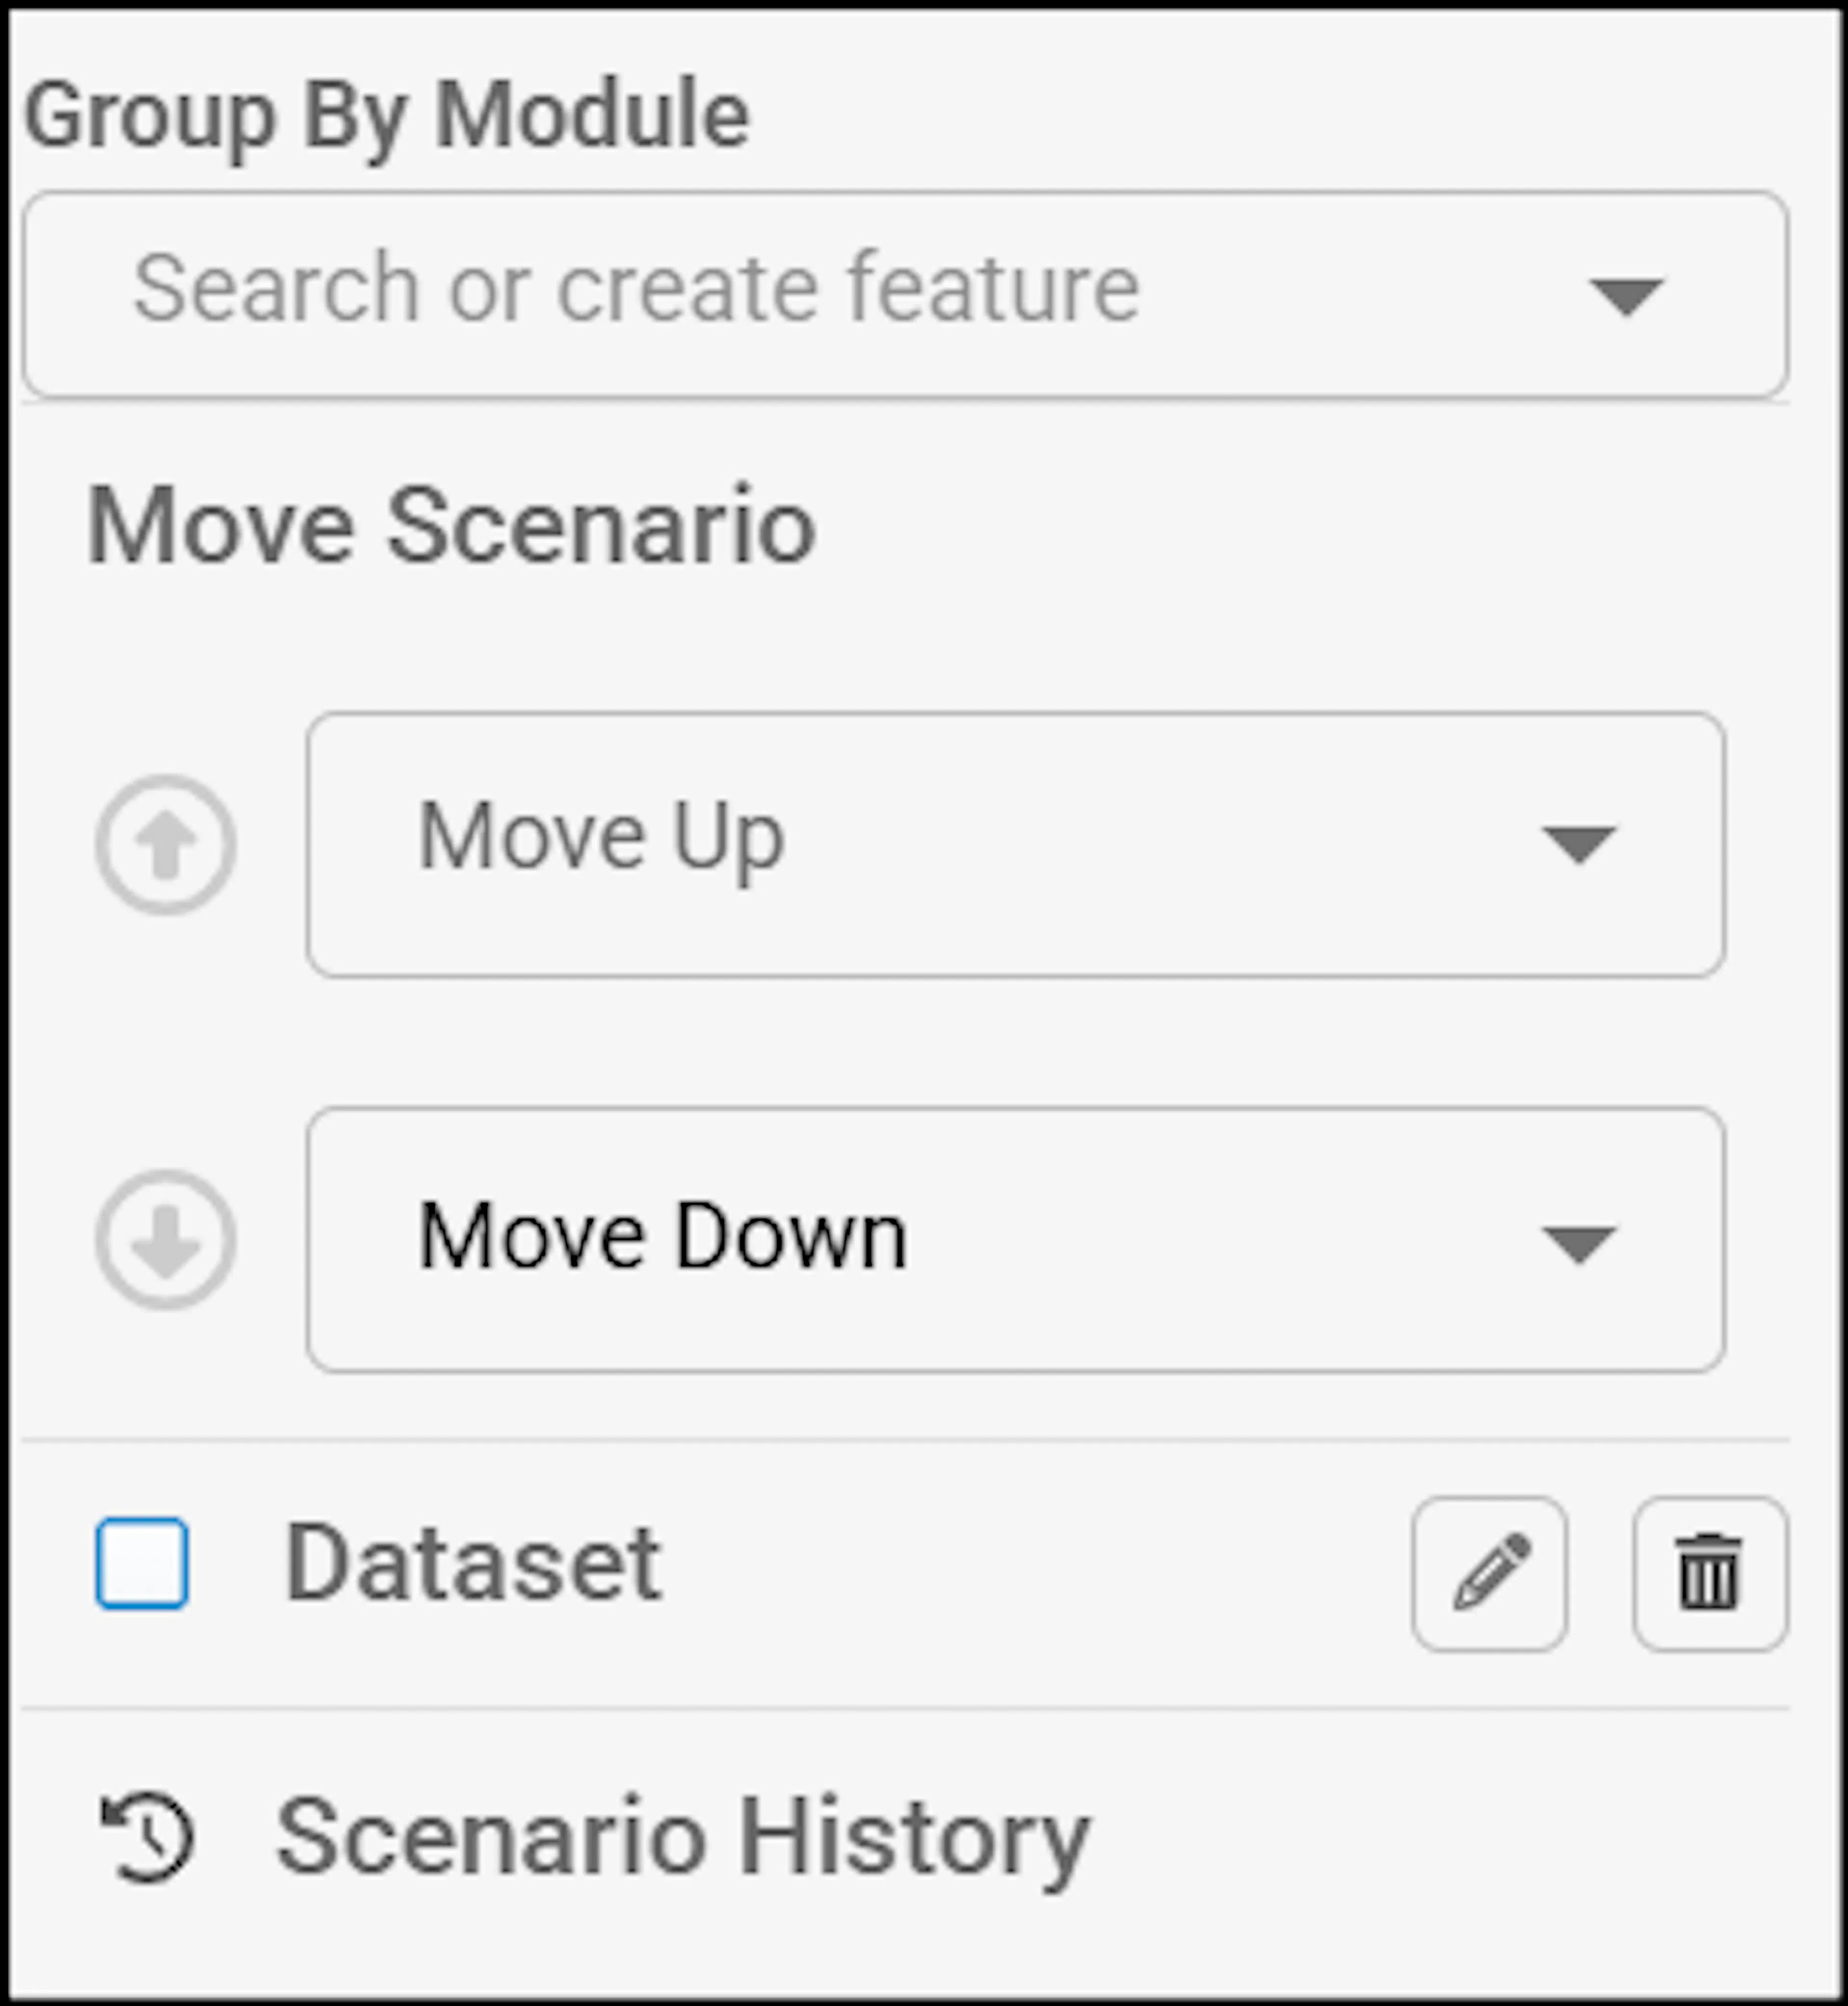
- Option 1: Choose the appropriate number from the Up or Down dropdown lists and then click the more menu( 3 dots ) and click the Move Up or Move Down buttons.
- Option 2: To drag and drop the scenario, press and hold the scenario to drag it to the appropriate location. Note: You can use Up and Down buttons by clicking the 'More Actions' next to the edit icon. This enables the rearrangement of the test cases, eliminating the need for drag and drop.
Editing and Deleting Scenarios
- To edit scenario, you can use edit icon located beside the 'More Actions' menu in the Scenarios List and Scenario Steps List, click the edit icon which is available between scenario name and search field, you can rename a Scenario Name. Once you've made changes, click the Update button.
- To delete a scenario, you can click the more menu and click the Delete Scenario button.
More Actions Menu
Click the More Menu ( 3 dots ) to access more actions as follows:
- Dataset option - When checked, this option allows you to generate datasets that were uploaded recently. When unchecked, the system will generate default datasets.
- Delete icon- Remove datasets as needed.
- Edit icon- this will navigate to dataset editor where you can create your own dataset.
- Click Create Table.

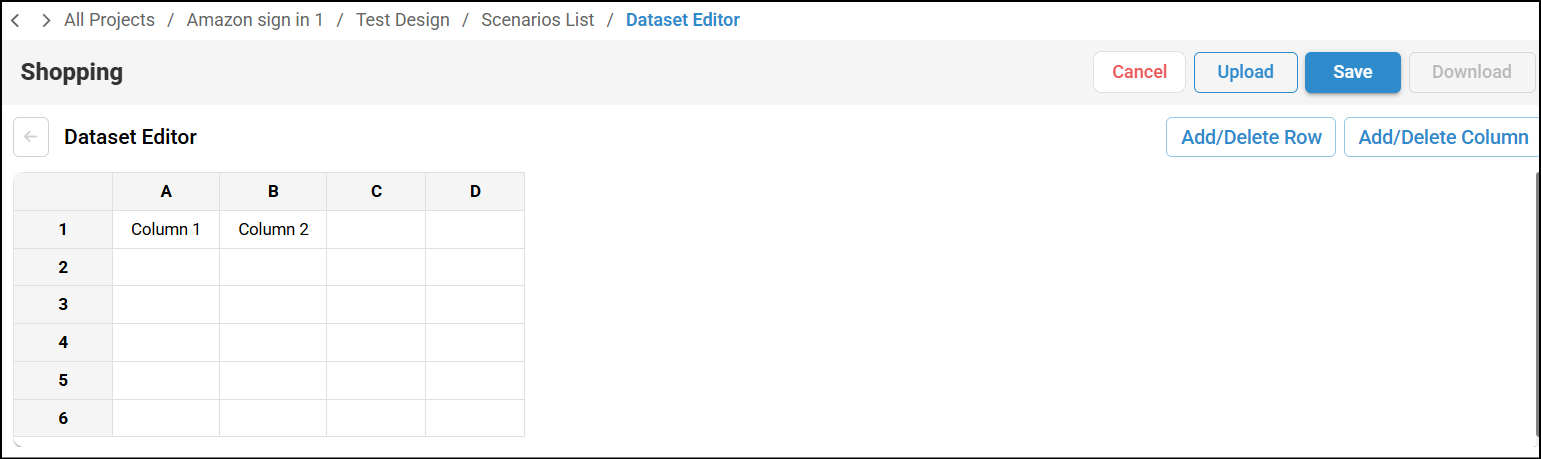
- Default rows and columns will be added, you can add and delete columns by clicking the Add/Delete Row and Add/Delete Column buttons.
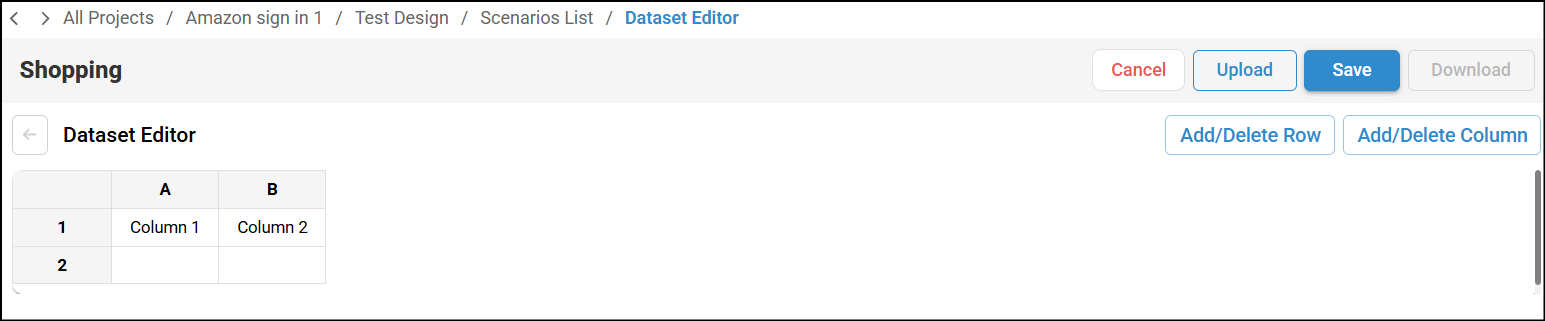
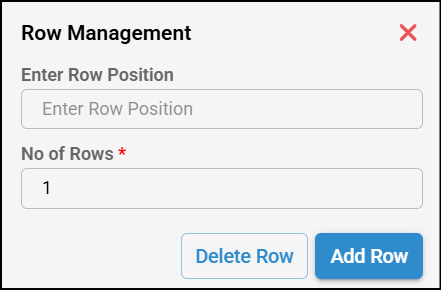
- Click the Add/Delete Row and Add/Delete Column buttons to add them, enter the Row or Column position, enter No of Rows or Columns and click Delete or Add as needed.
- Rows and columns will be added, you can fill the data as needed and click Save for the data to be saved.
- Cancel to reset to original settings.
- Upload - You can upload datasets in the CSV format. Ensure to select the same scenario which was created using Record Scenario feature.
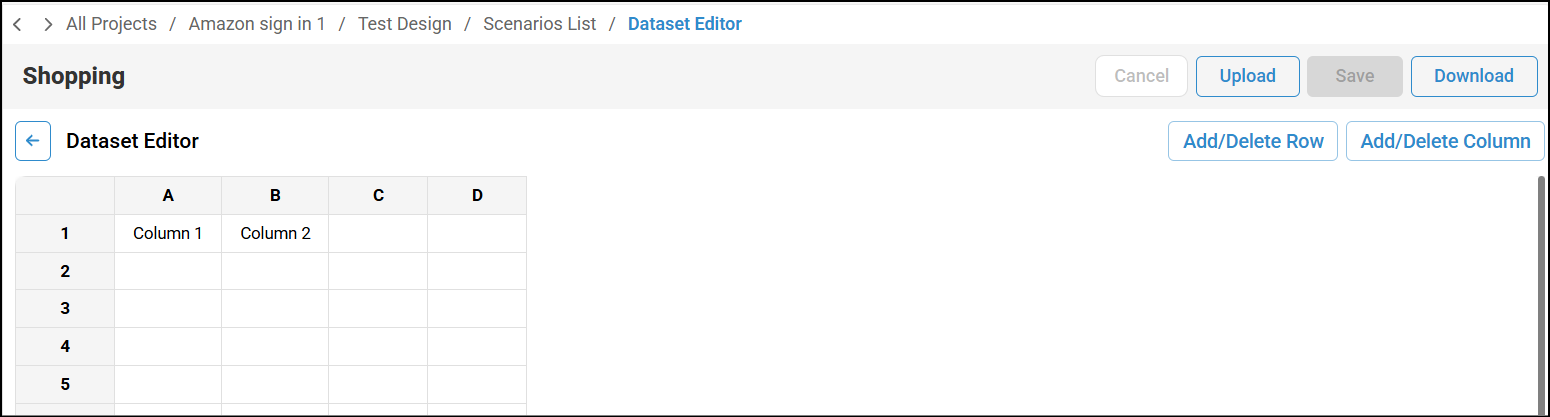
- Download - once data is saved, Download button is enabled and you can easily download datasets in the CSV format.
Adding Pre and Post Conditions for Scenario Steps List
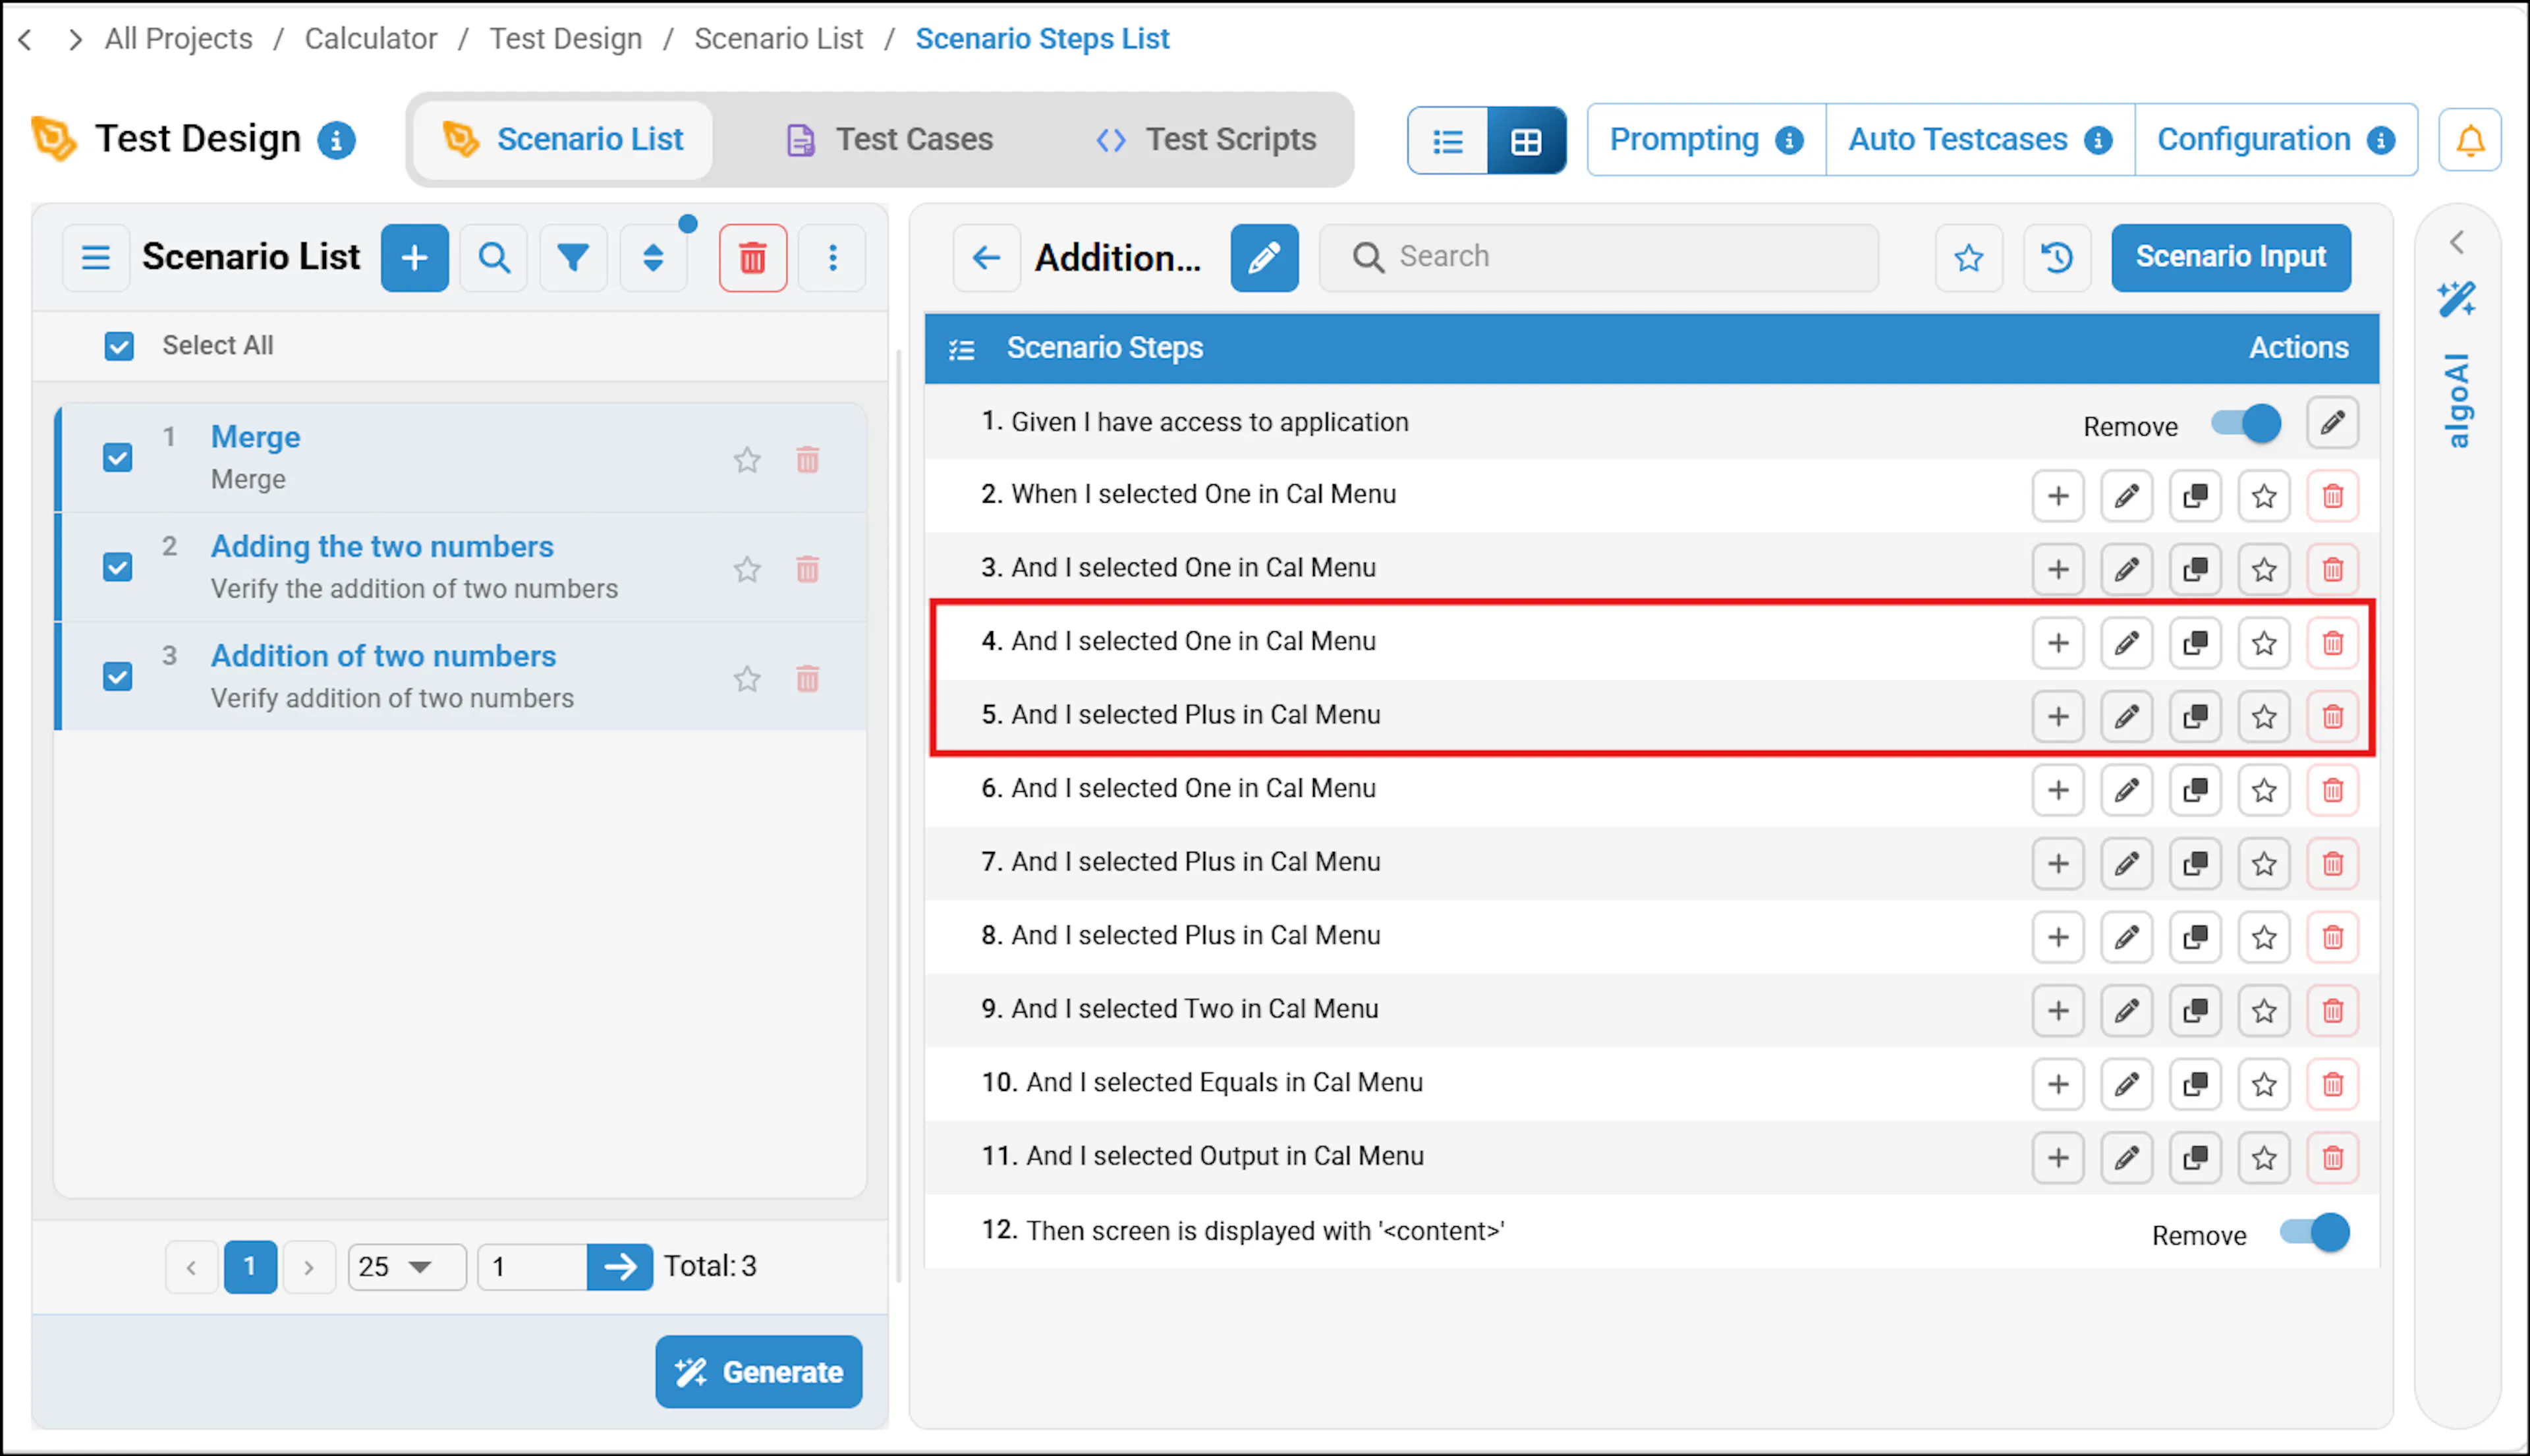
In the Scenario Steps list, you can add pre and post conditions using the toggle buttons next to them; these are enabled by default and can be disabled by simply clicking the respective toggle.
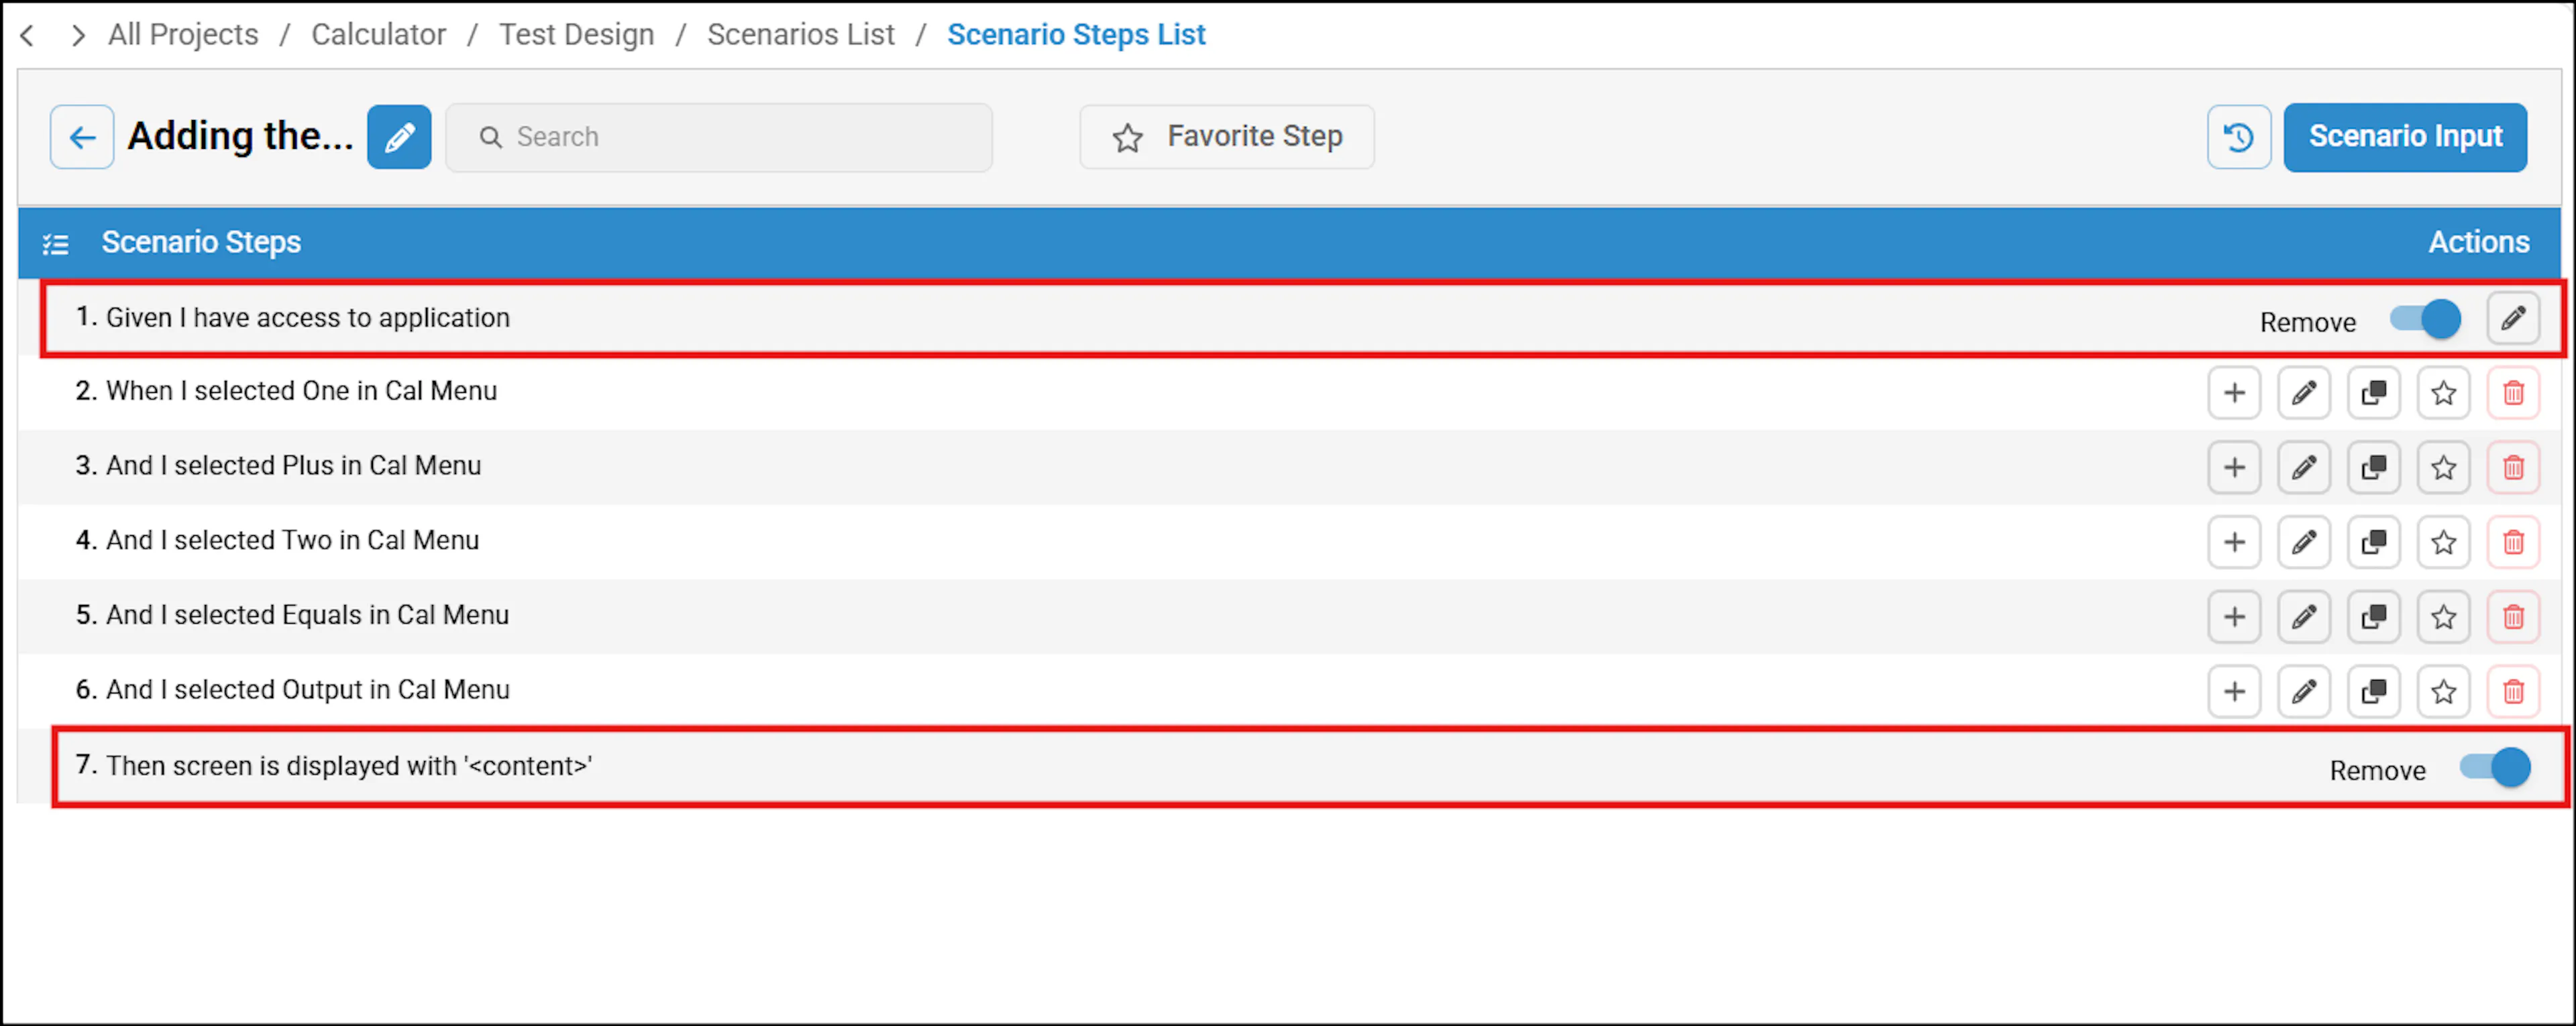
You can edit the application name and action for this scenario by clicking the edit icon next to the toggle button.

Enter the application name and action, then click Submit.
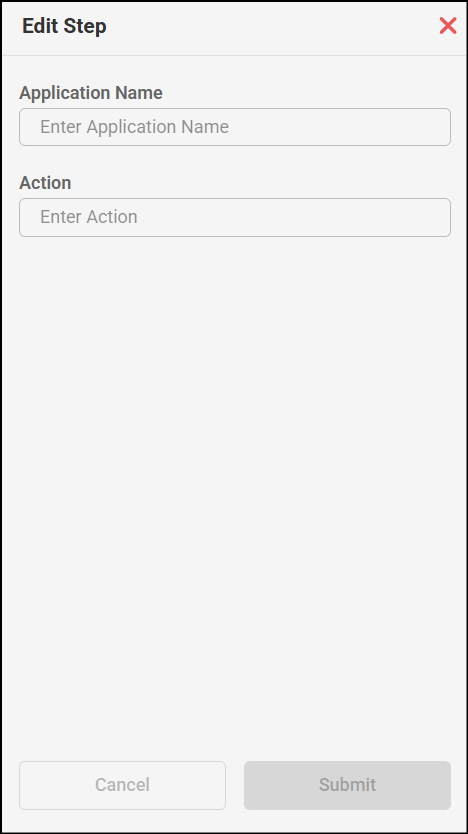
The application name and action will be applied to the Pre-condition step.

This application name and action will override the application name and action given in feature file settings.
Adding or editing Given-When-Then lines (GWT) for all steps
In the Scenario Steps List, you can edit 'Given, When, Then' lines for all steps in the scenario steps list screen. This functionality aligns with the structure found in the generated Feature File, providing you with an intuitive experience.
To add GWT for all the steps, perform the following:
- In the Scenario Steps List screen, click Scenario Inputs.
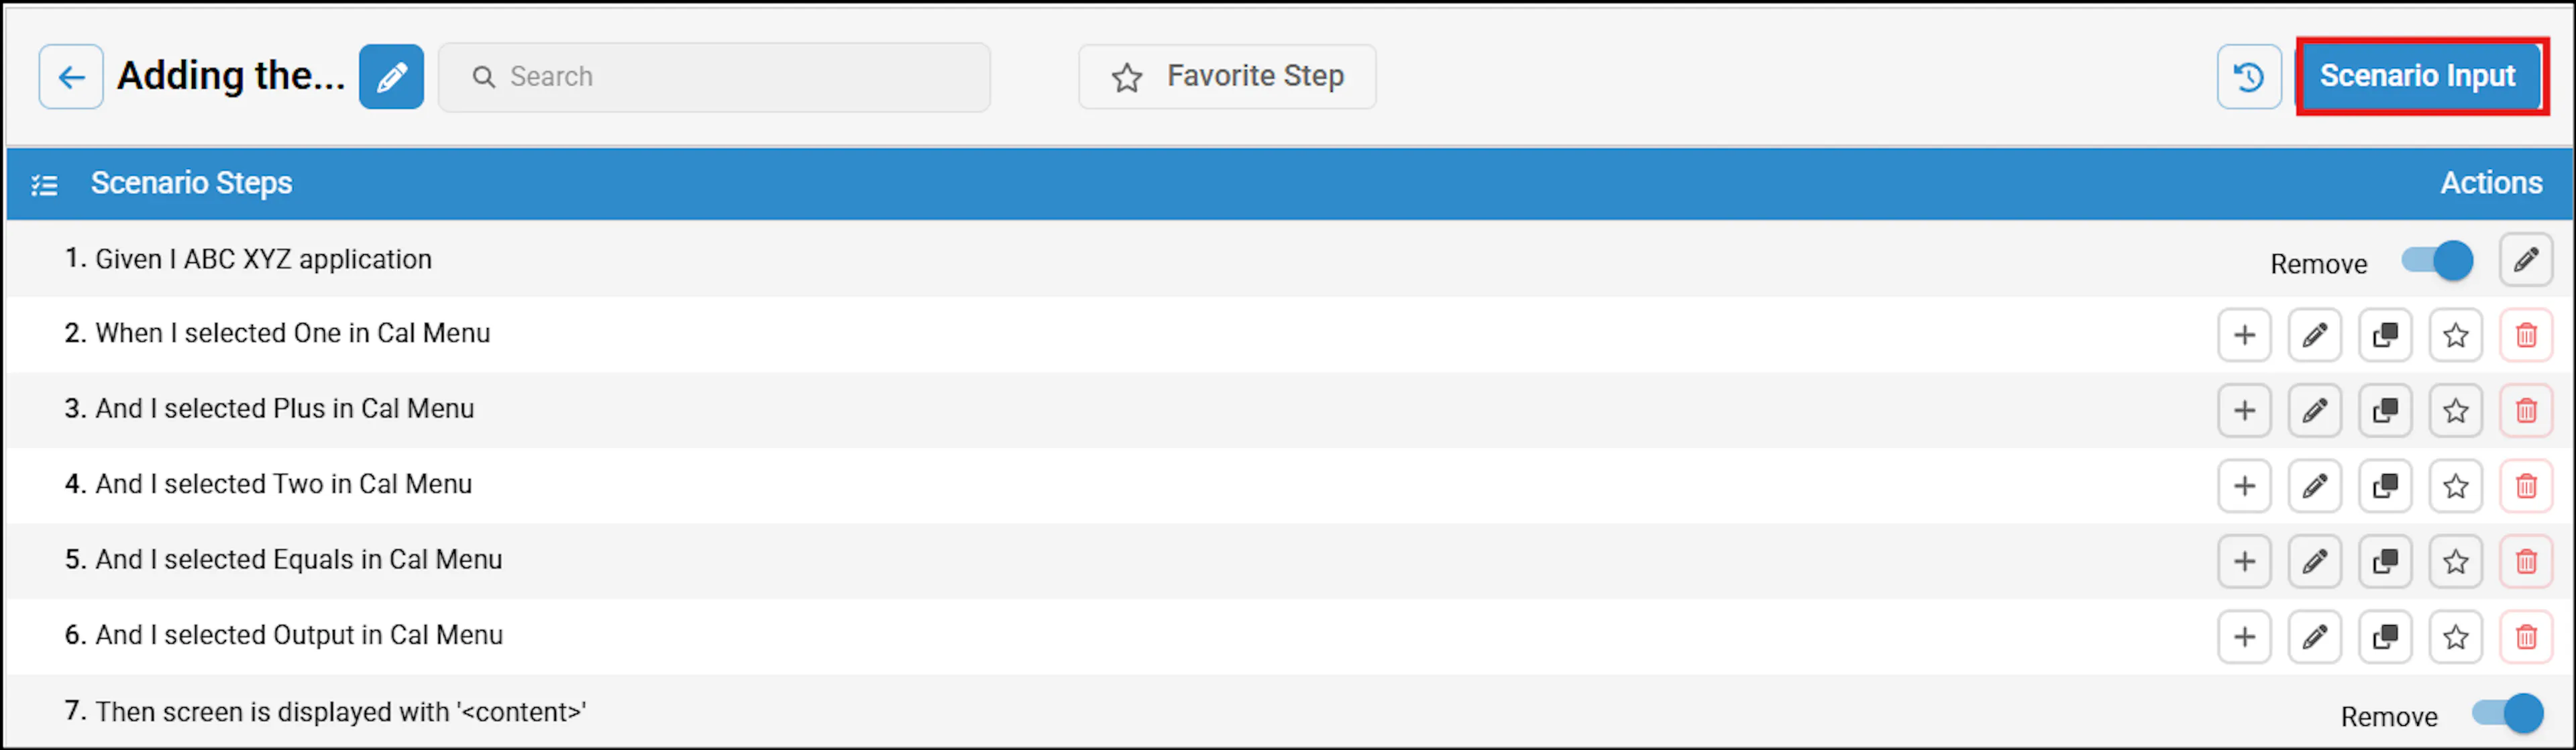
- On this screen, enter the Scenario Input and click Apply.
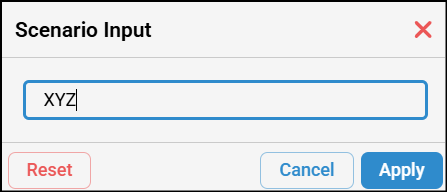
- The GWT will be applied across all steps, overriding any GWT input defined in the feature file settings.
- You can revert the changes by clicking the Reset button in the Scenario Input section.
The Test Step Settings field in a scenario step may sometimes contain an invalid format such as "no precondition-inline-param" instead of valid values like "no precondition" or "no postcondition", causing the Pre Step and Post Step toggle buttons to not update to False as expected; this can be resolved manually by toggling off the respective buttons.
Adding or editing Given-When-Then lines (GWT) for individual steps
In the Scenario Steps List, you can add or edit 'Given, When, Then' lines for individual steps in the Edit step screens. This functionality aligns with the structure found in the generated Feature File, providing you with an intuitive experience.
To add individual steps to the GWT lines, perform the following:
- In the Scenario Steps List, click edit icon beside the scenario step to view the Edit step.
- In this screen, you can click More Options to expand the Edit Step form.
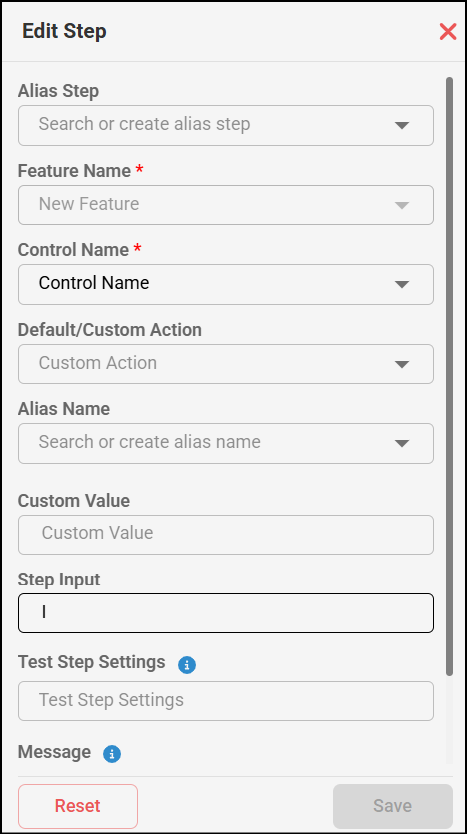
- In the Scenario Steps List, click plus icon to add a new step, select the appropriate feature, control type from the dropdown list. Click Save to save the changes. You can click More Options to add an alias step and required details. Refer to the next section.
- In the Scenario Steps List, click the edit icon beside the scenario step to view the Edit step. Here, you can update the UI element name (control name).
Note that delete and add icons are disabled. These buttons will be available after saving the changes.
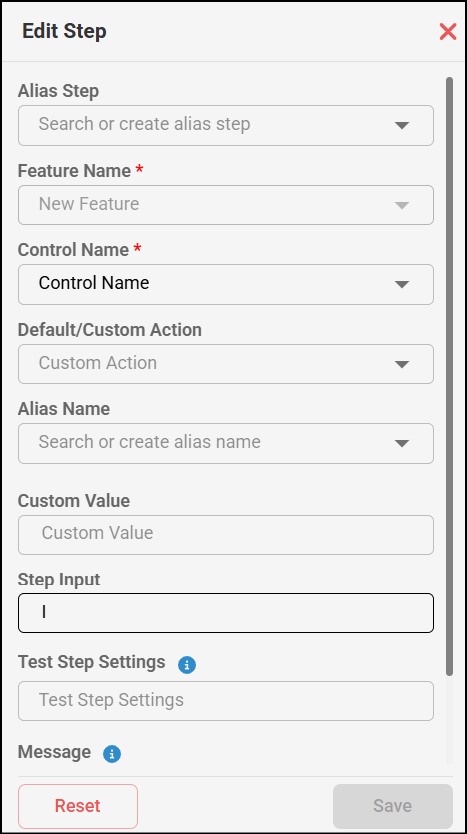
- Ensure to save the changes by clicking the Save button. You can view the message Data saved successfully.
Additionally, you can provide custom values into GWT Inputtextbox in the Project Settings page. To access Project Settings page > navigate to the Main Canvas > Gear icon.
Adding an Alias Step
You can use this functionality when you are adding manual steps. You can add a new step or edit an existing step.
To add an alias step, perform the following:
-
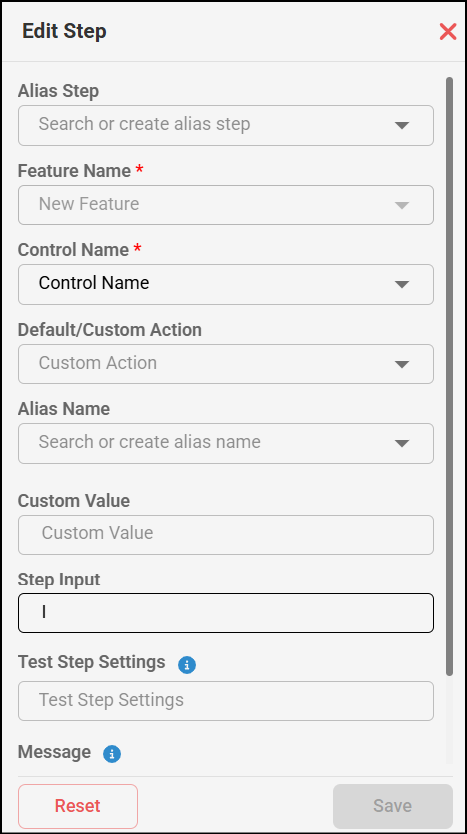
Click the scenario steps in the Scenario Steps List screen and click the Edit icon to view the details.
-
After entering the alias step, Custom Value, TestStep Settings, Alias Name and GwtInput text boxes will be disabled.
Users can replace an existing Alias step with another step that belongs to the same control. To do this, they can either select a step from the available auto suggestions from dropdown list or manually edit and enter a new step.
-
If you wish to provide alias name for the controls, then you can enter the alias name and other required details and save the details.
Note that if you are entering any custom values into the 'Custom Value' text box, and if you provide the value in DOUBLE_QUOTE
<value>DOUBLE_QUOTE format then you will see the custom value with double quotes generated in the Example table of the Feature File.If you provide custom values into the Custom Value text boxes in this format "
<value>", these values will appear in the Feature File without the double quotes.
Custom Actions and alias step are highlighted in a distinct color for easy identification. To use a Custom Action, refer to the article Using Custom Actions.
Filtering Scenarios
The Filter section of the Scenarios List feature provides a convenient way to filter and display scenarios based on specific criteria, enabling you to customize their view according to their needs. Access filtering options via the filter icon.
Following is an overview of the available filter options:
- Reset option: The Reset functionality operates in the same manner as described in the previous section.
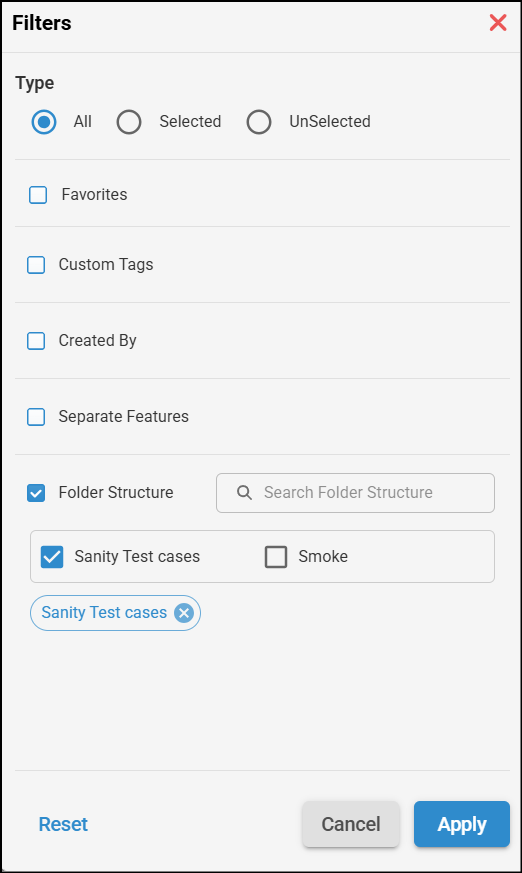
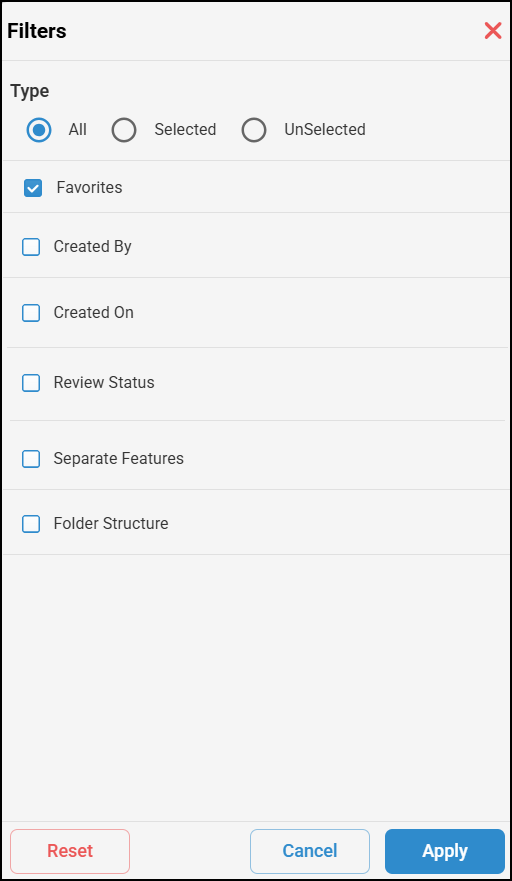
- Categories: You can utilize a range of categories to filter by selecting the checkbox beside the category, such as: Favorites, Created By, Created On, Review Status, Custom Tags, Separate Features and Folder Structure.
- Filter types: You can utilize a range of filter types to categorize scenarios according to different attributes. These options include:
- Selected: Check this box to view a comprehensive list of all selected scenarios.
- Unselected: Check this box to view a list of unselected scenarios that have not been chosen.
- All: By selecting this option, you can view both selected and unselected scenarios in a unified list.
Filters applied in the Scenario List are retained when you navigate to another scenario and return to the previous scenario. The filters will not be cleared automatically; you must manually remove them if required.
Similarly, filters applied in List View are retained when you switch to Studio View, and vice versa.
Filter option is available next to the search field to view:
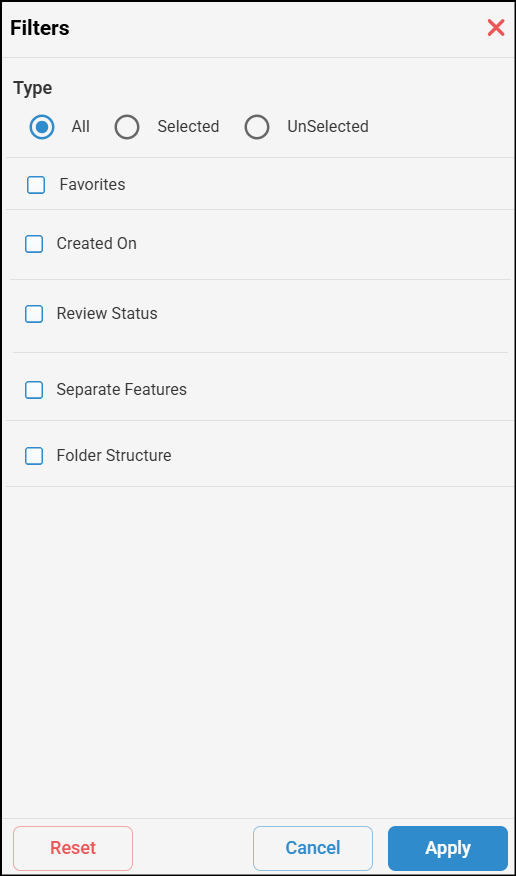
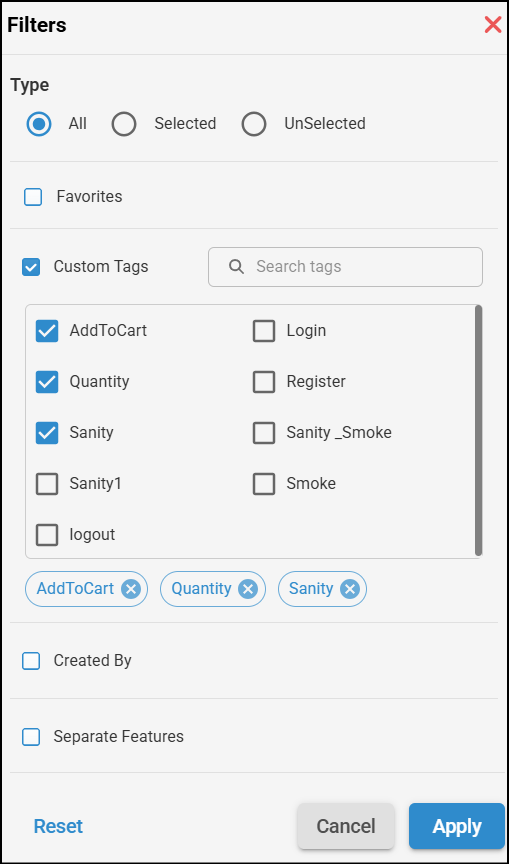
When you select the Custom Tags checkbox, all available custom tags will be displayed. You can then choose the specific tags you want to filter by and apply the selection.
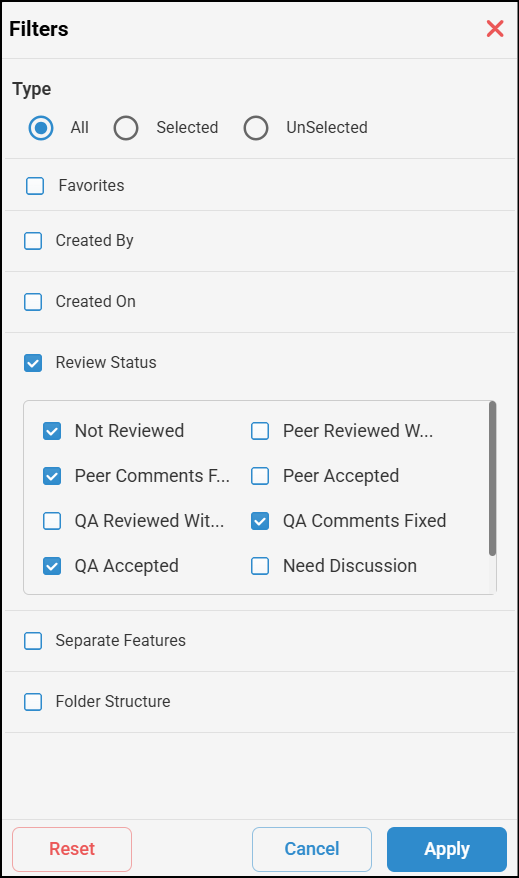
When you select the Review Status checkbox, all available Review Status will be displayed. You can then choose the specific status you want to filter by and apply the selection.
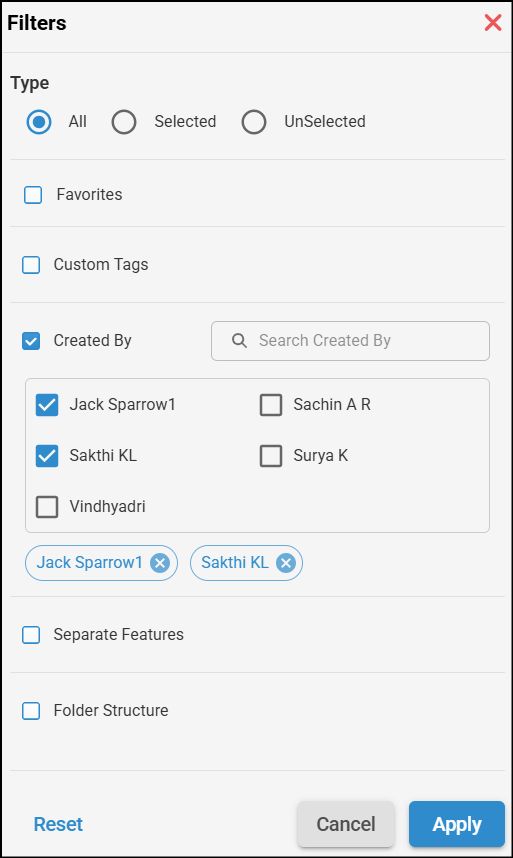
When you select the Created By checkbox, all the users who have created the scenarios will be displayed. You can then choose the user you want to filter by and apply the selection.
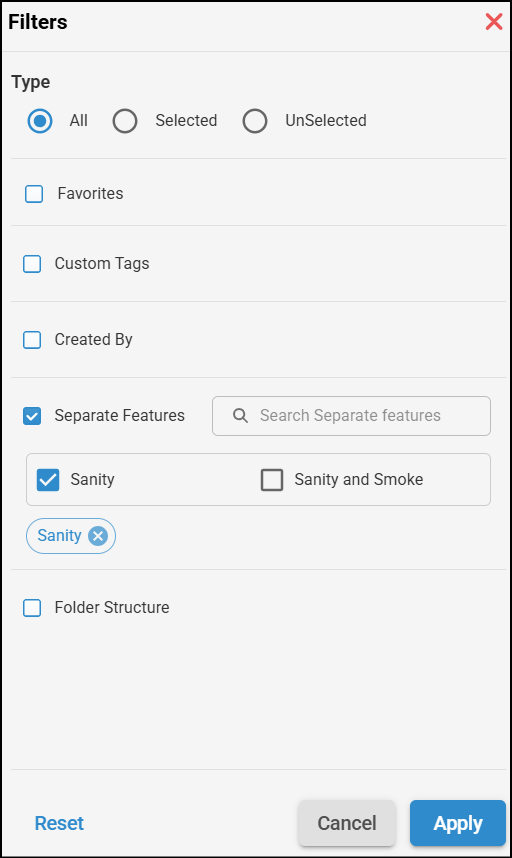
When you select the Separate Features checkbox, all the features which are created using Separate features will be displayed. You can then choose the feature you want to filter by and apply the selection.
When you select the Folder Structure checkbox, all the folder structure which are created using Folder structure feature will be displayed. You can then choose the folder structure you want to filter by and apply the selection.
When you select Favorites checkbox, all the scenarios which are marked as favorites will appear.
A Star button next to each scenario to mark a scenario as favorite.
Sorting Scenarios
The Sort by option in the Scenarios List allows you to organize and display scenarios based on specific sorting criteria, making it easier to arrange scenarios according to your requirements. The Sort option is available next to the Filter icon in both studio and list views.
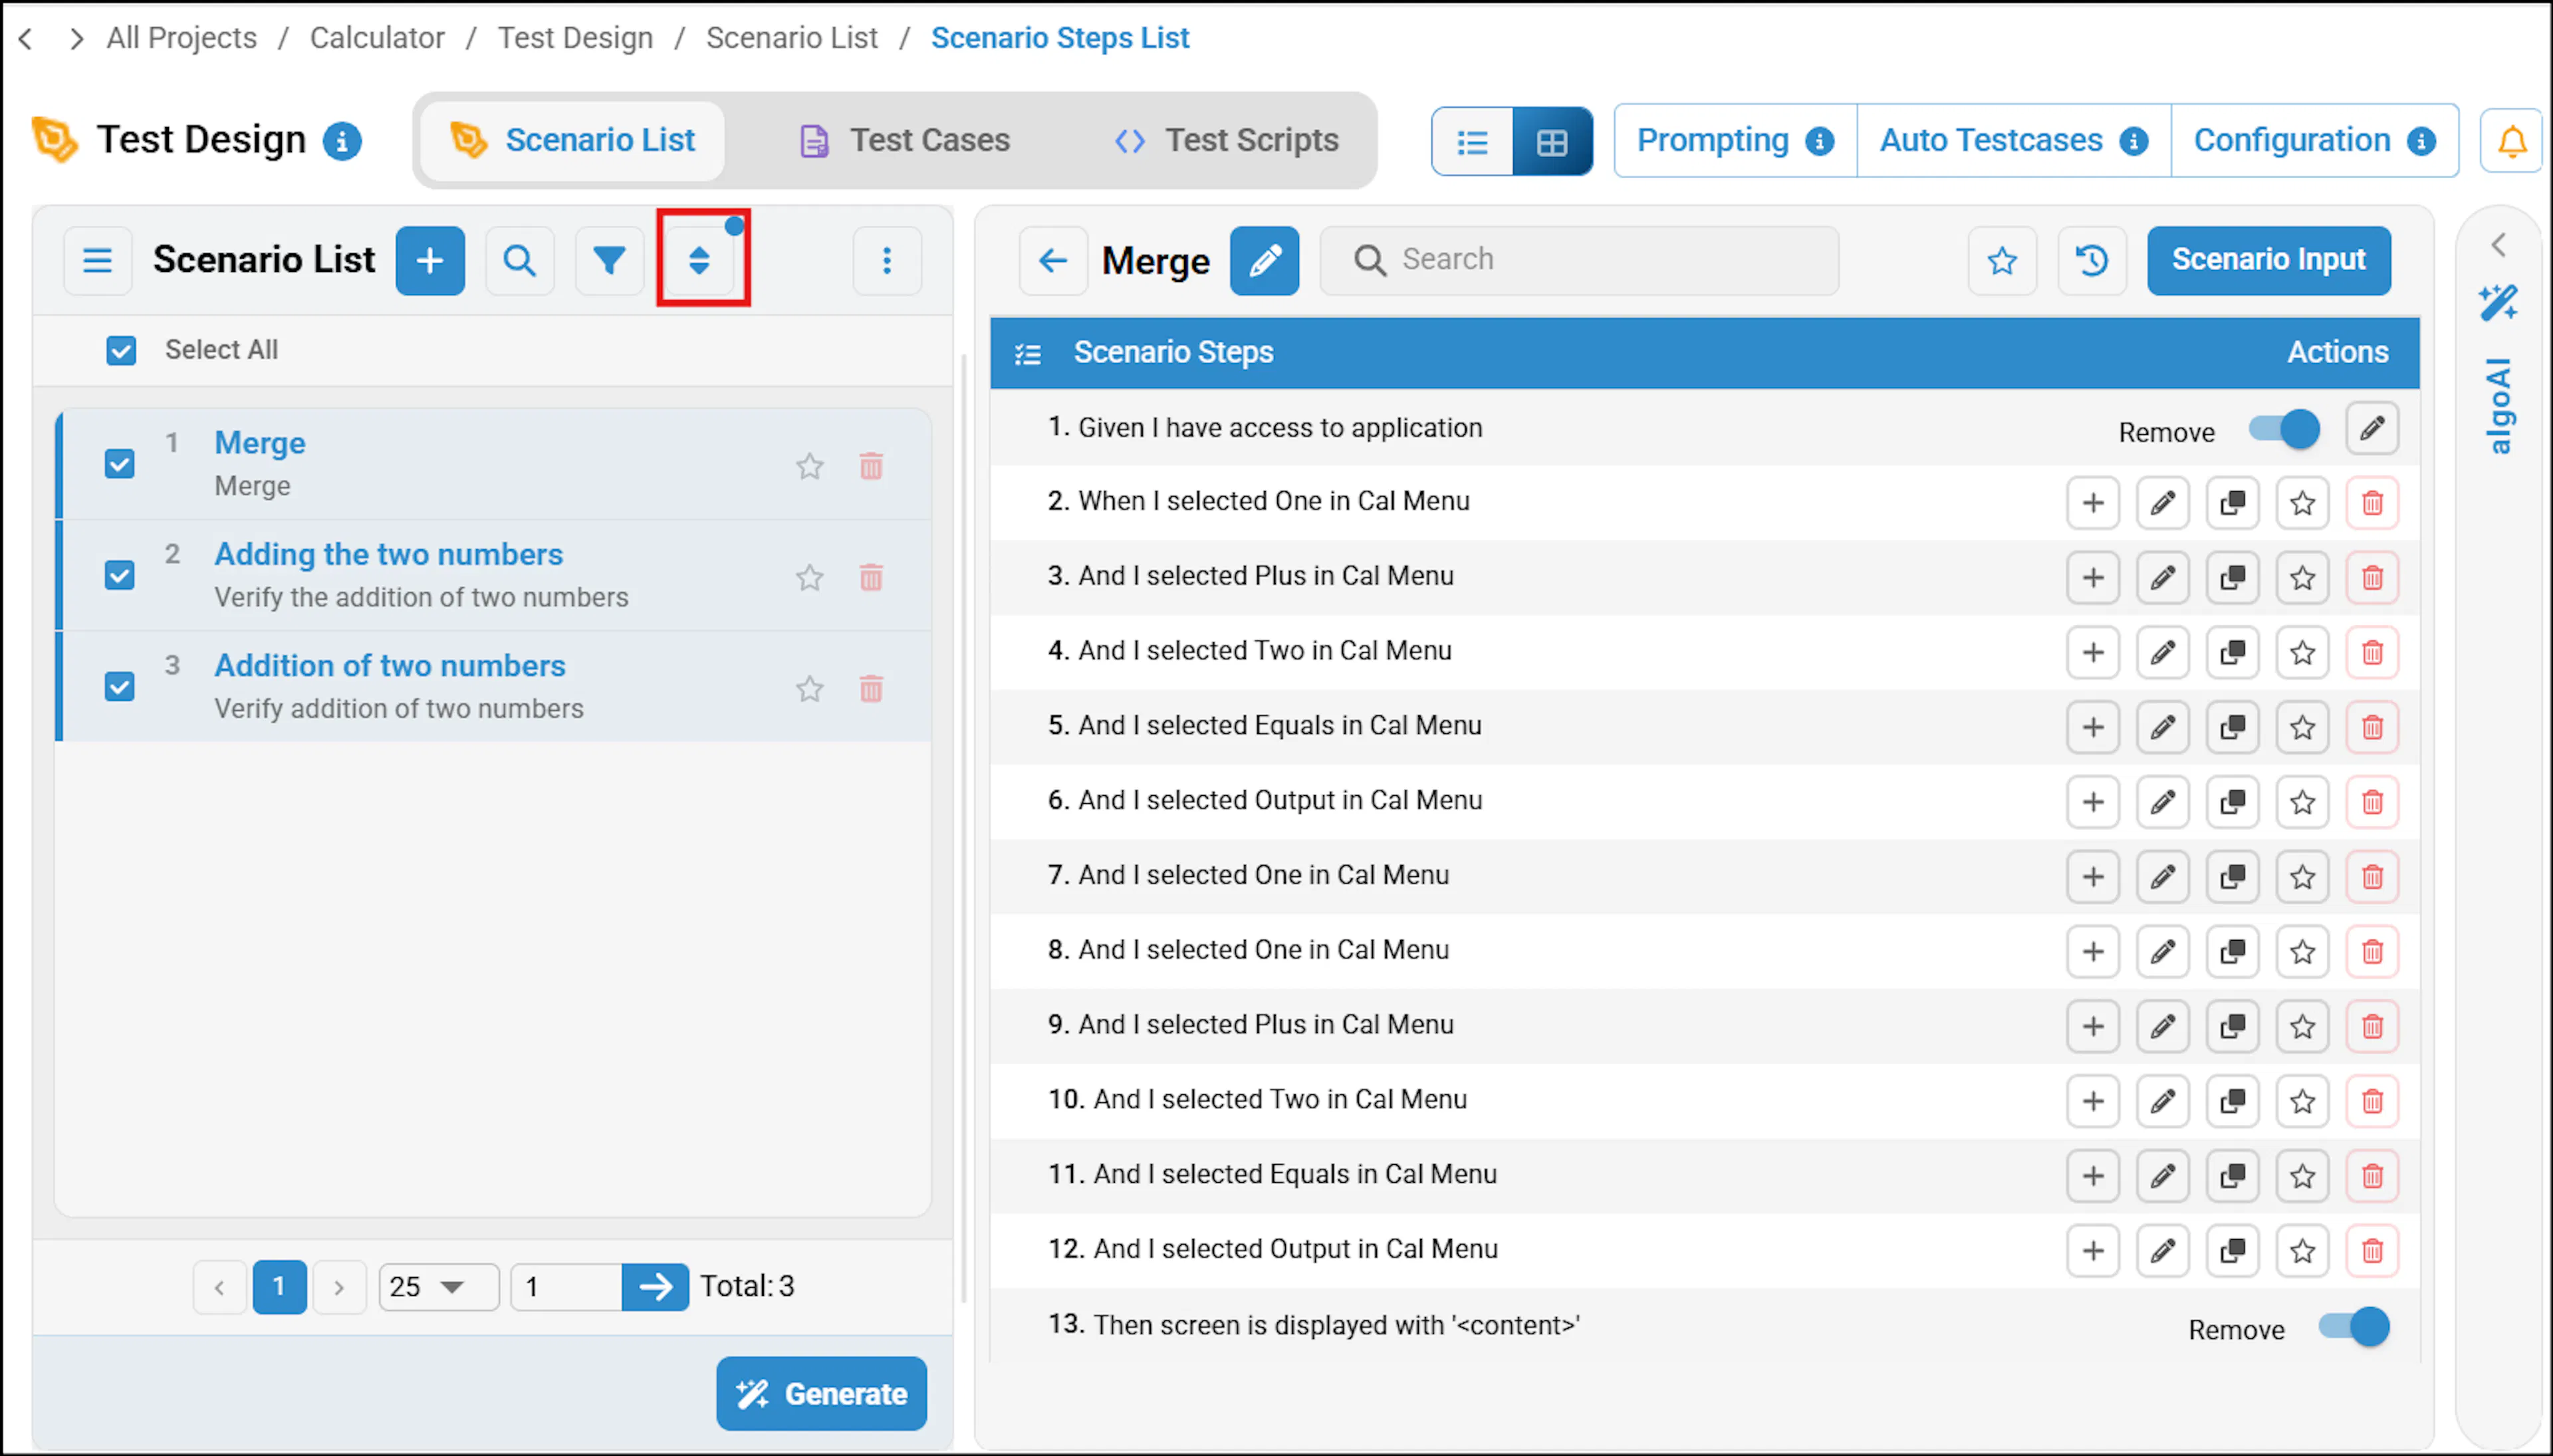
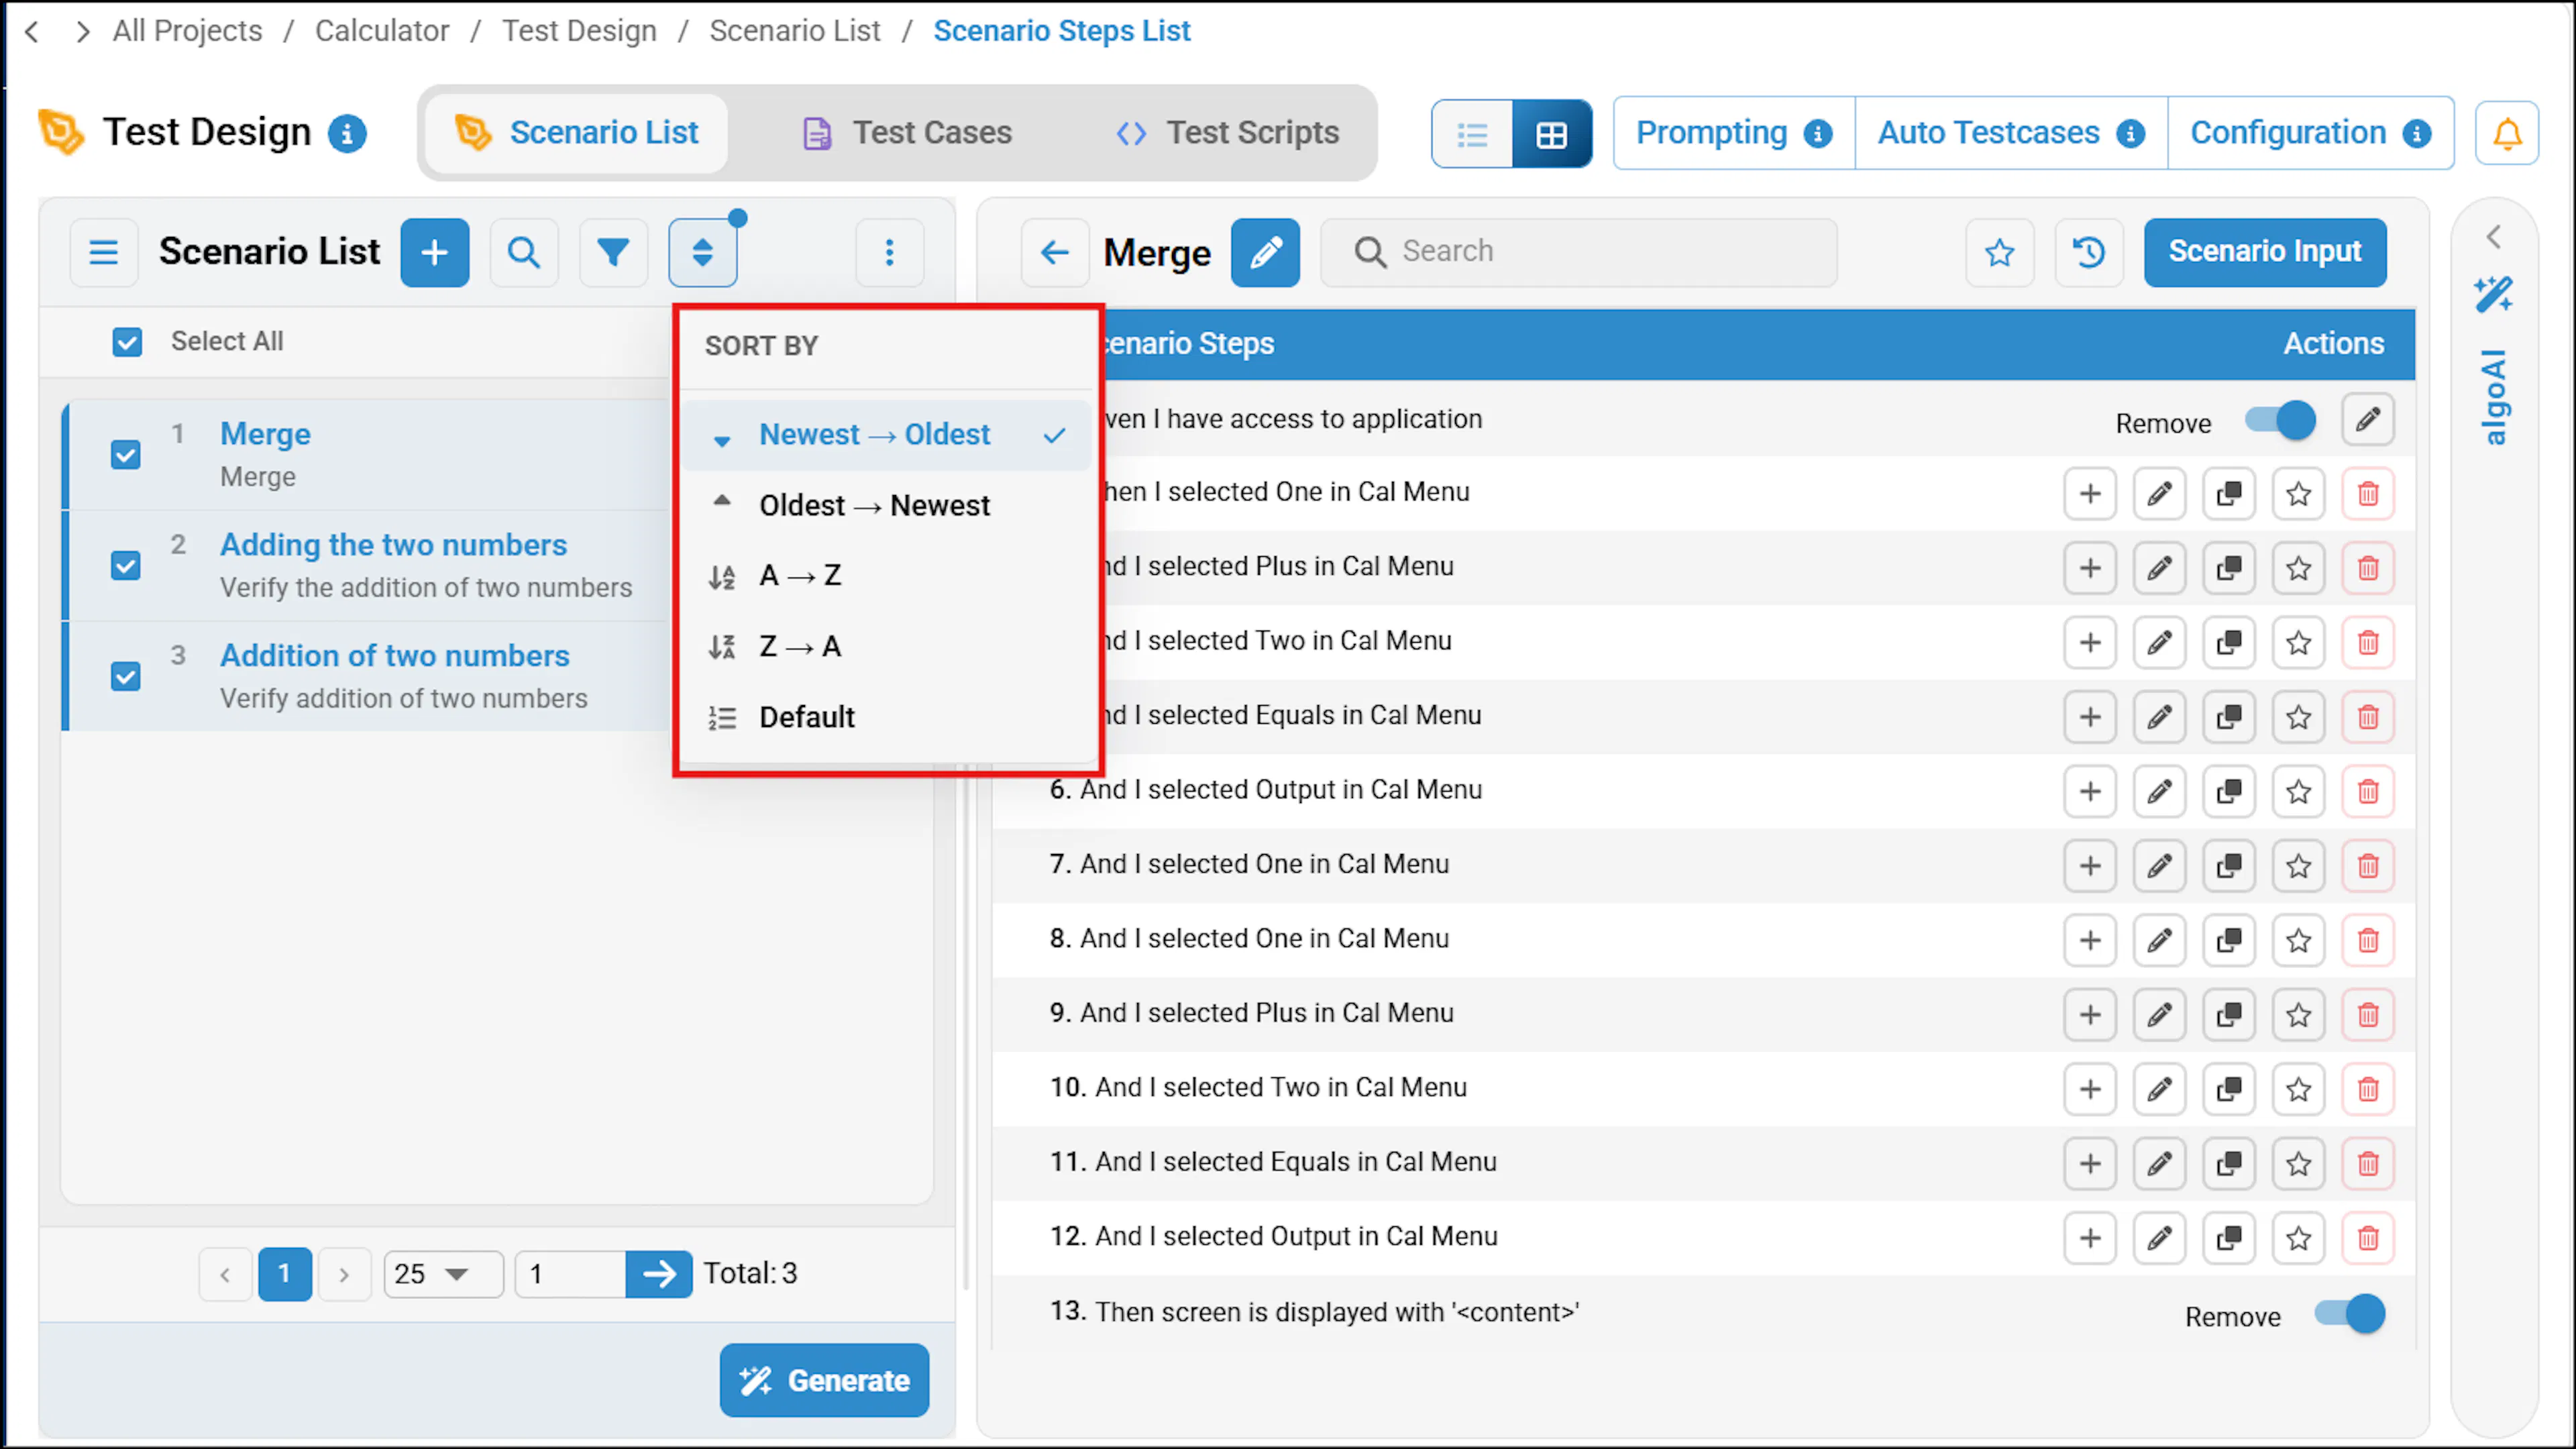
Following is an overview of the available sorting options:
- Newest to Oldest: Sorts scenarios from the most recently created to the oldest.
- Oldest to Newest: Sorts scenarios from the oldest to the most recently created.
- Alphabetical Order (A–Z): Sorts scenarios in ascending alphabetical order.
- Alphabetical Order (Z–A): Sorts scenarios in descending alphabetical order.
- Default Order: Displays scenarios in the default order.
Deleting Multiple Scenarios
The Delete Multiple Scenarios option allows you to select and delete multiple scenarios at once. The Delete Multiple Scenarios option is available next to the Sort option in Studio View and next to the Merge option in List View.
Select a project and navigate to Test Design.
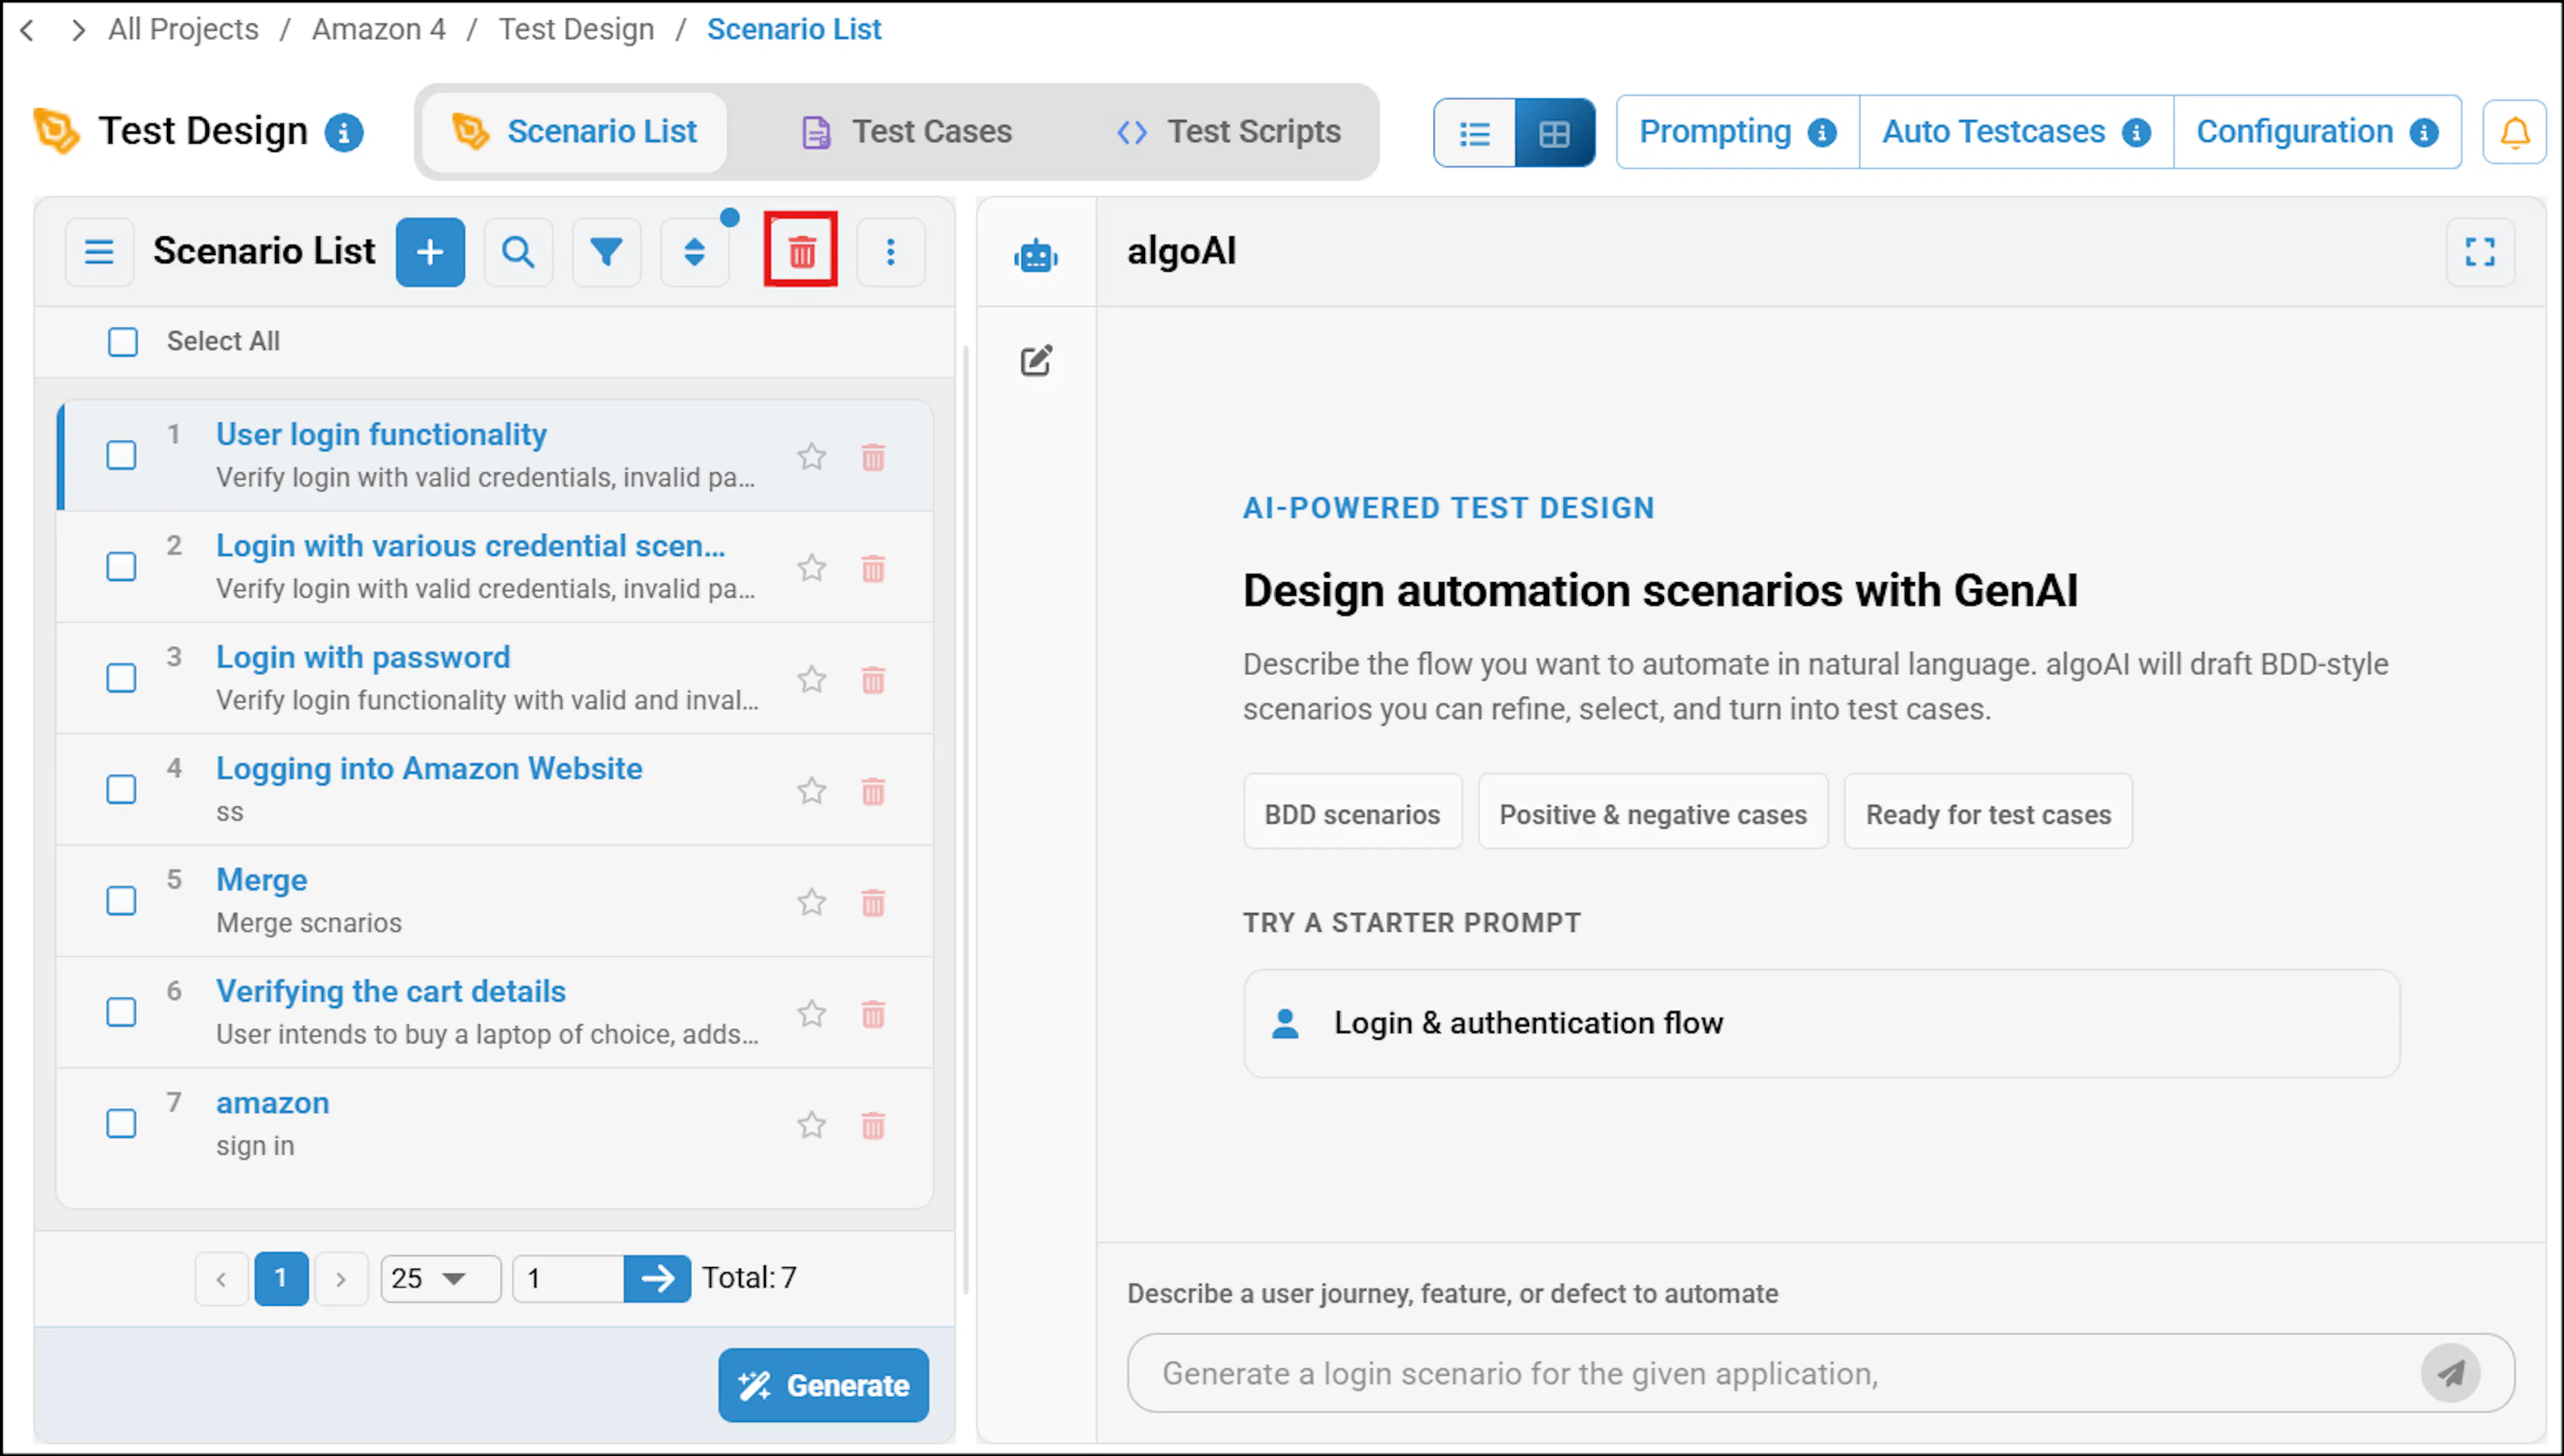
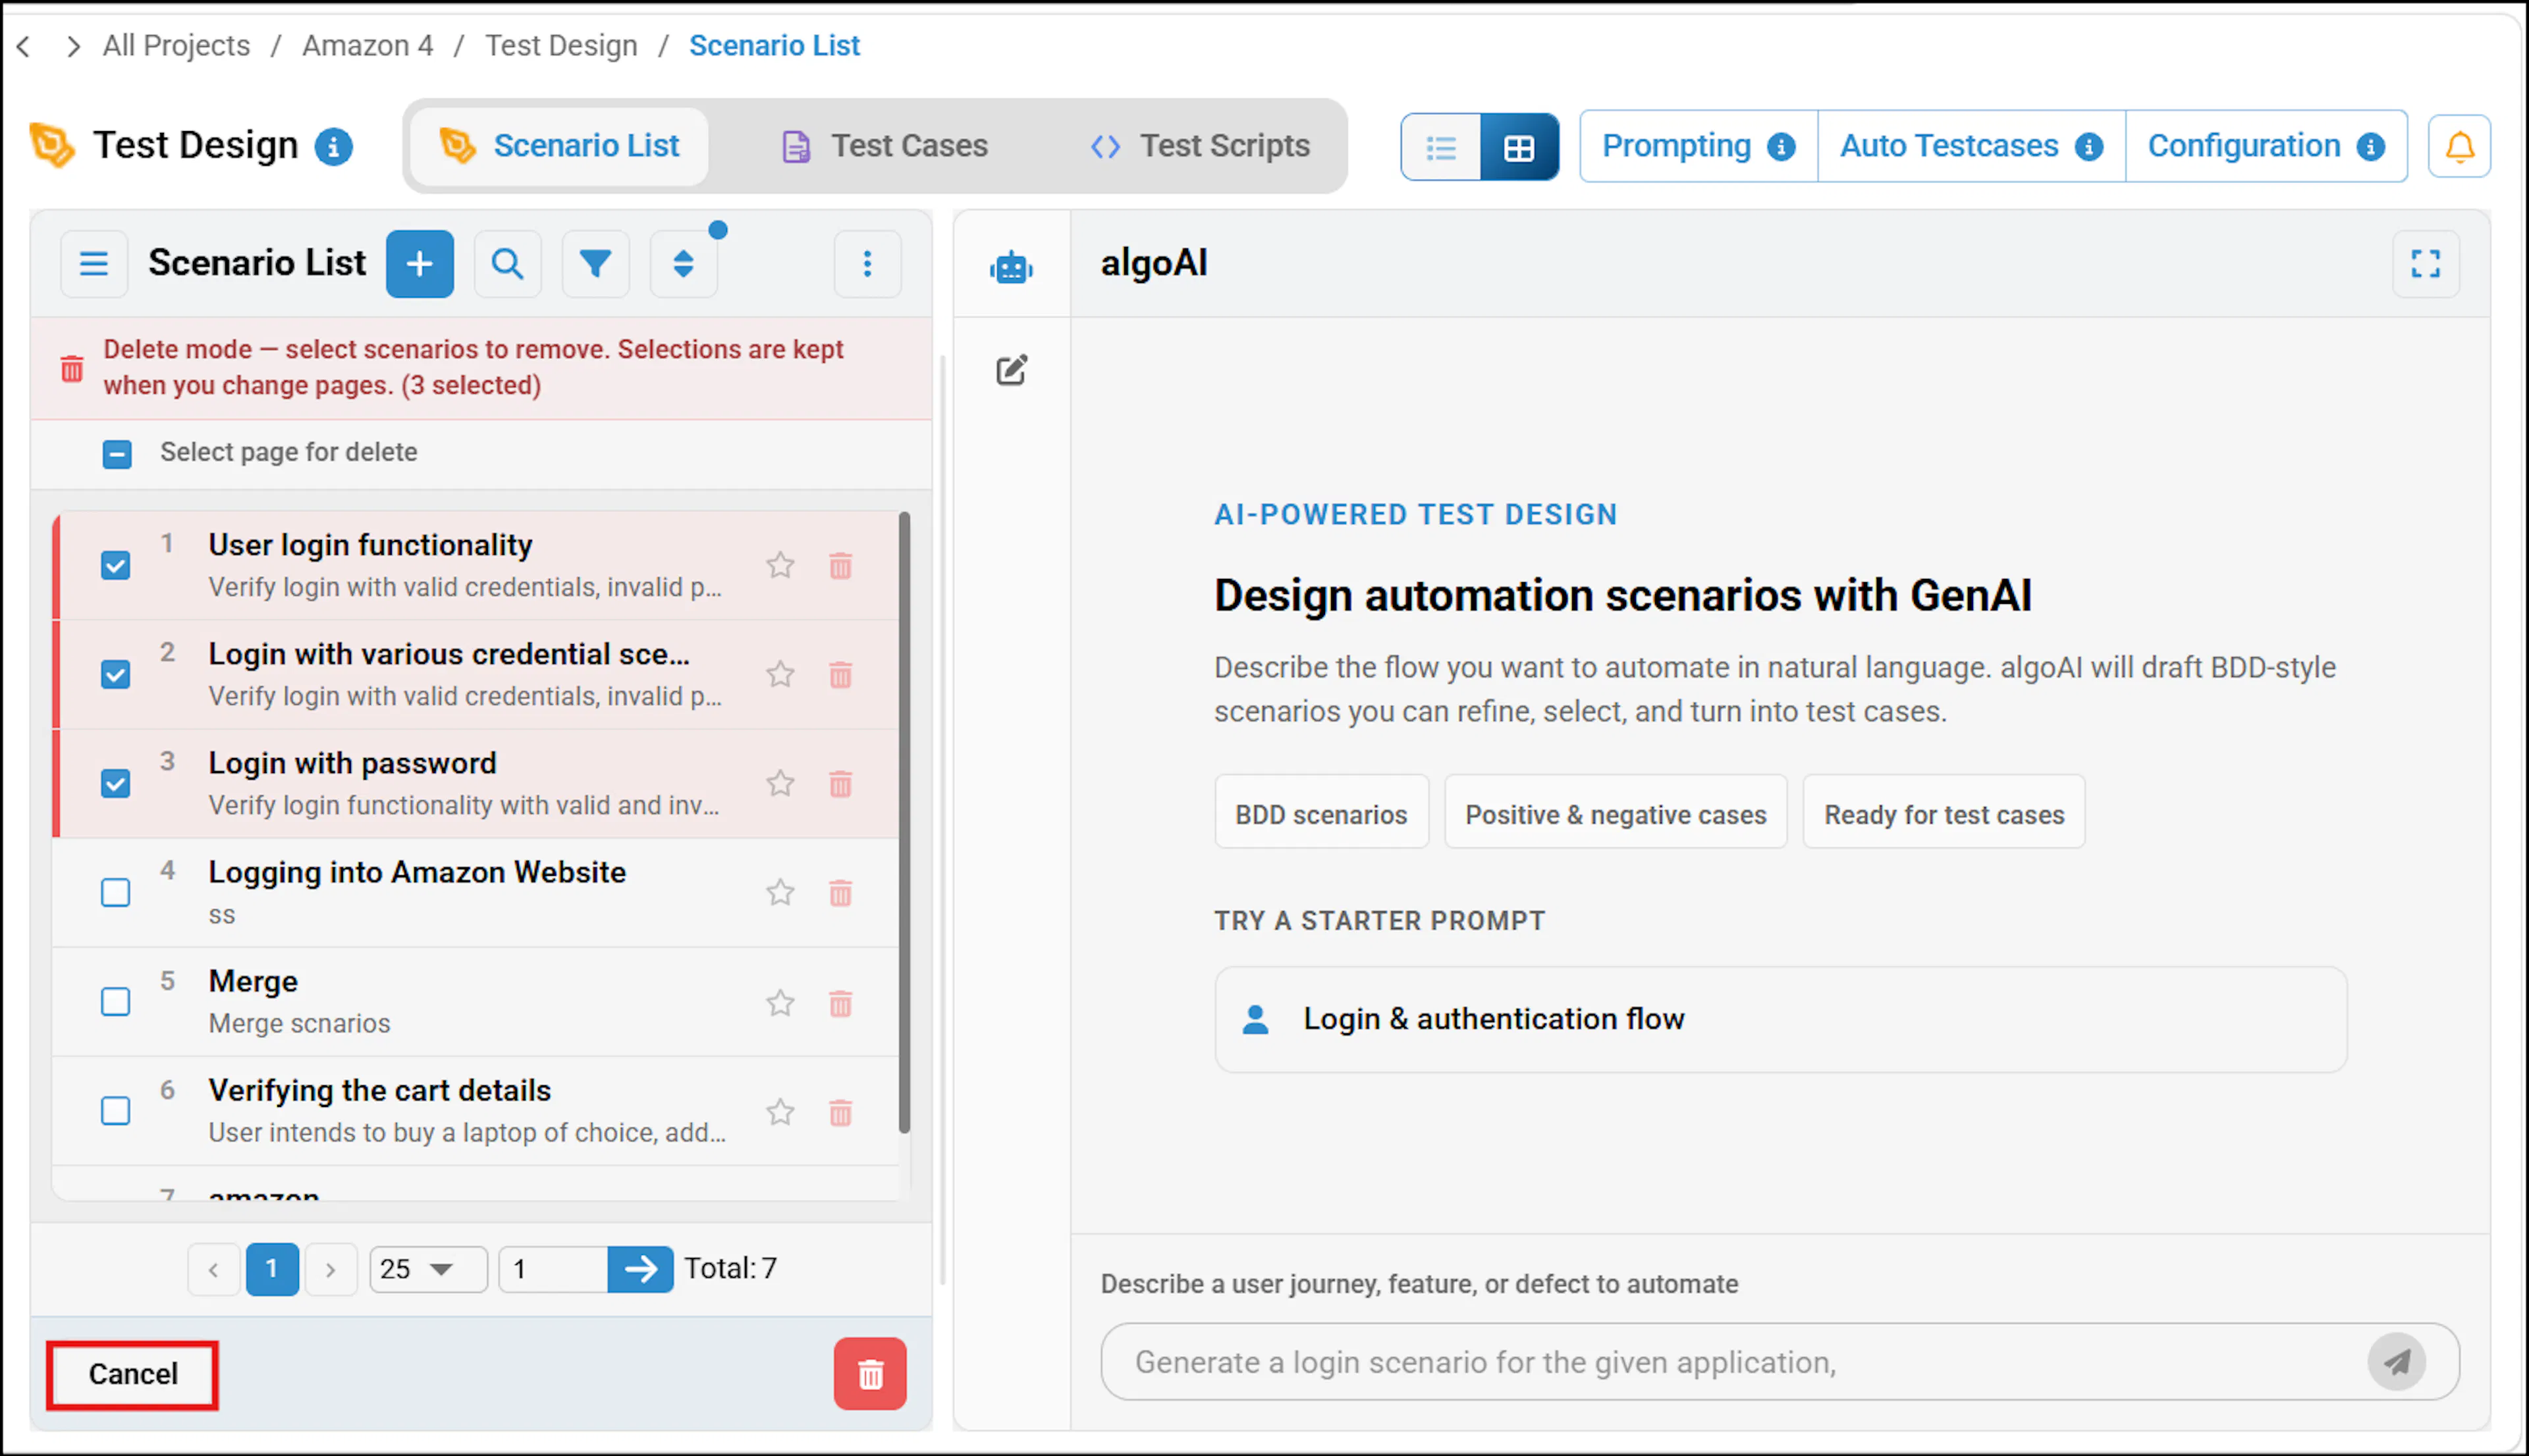
- Click the Delete icon at the top, next to the Sort option. This activates Delete Mode.
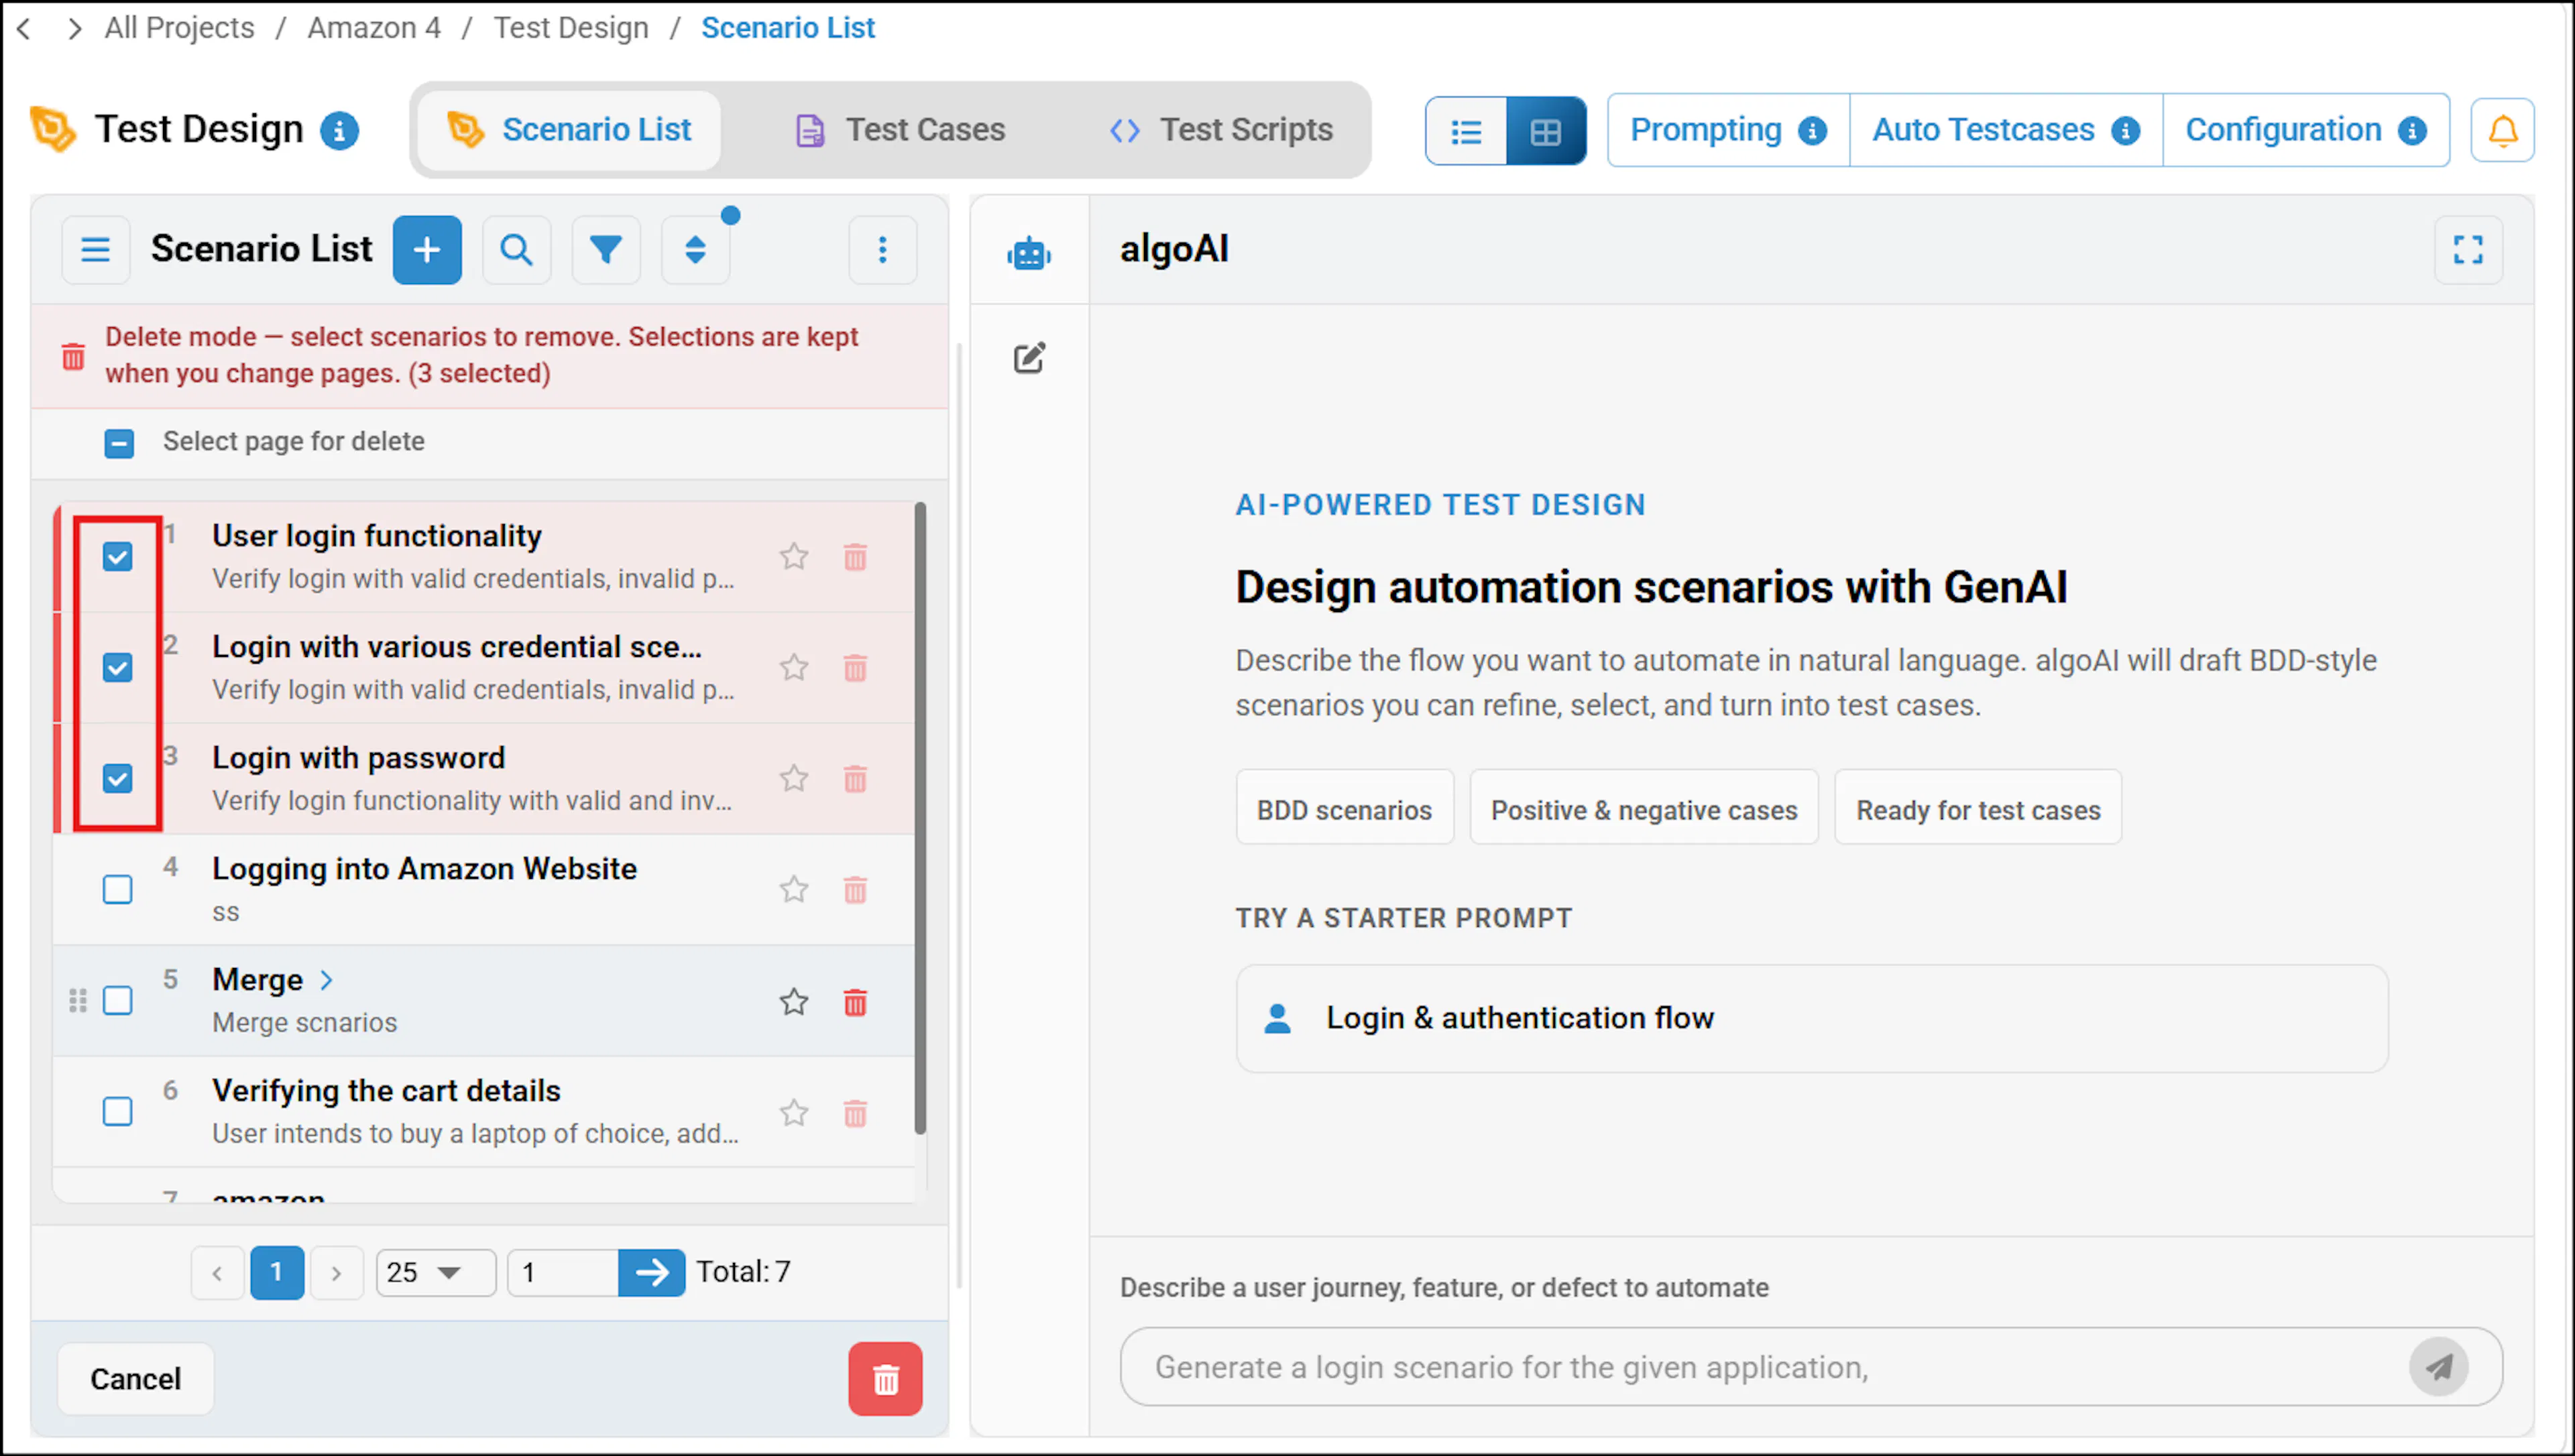
- Select the checkboxes for the scenarios you want to delete.
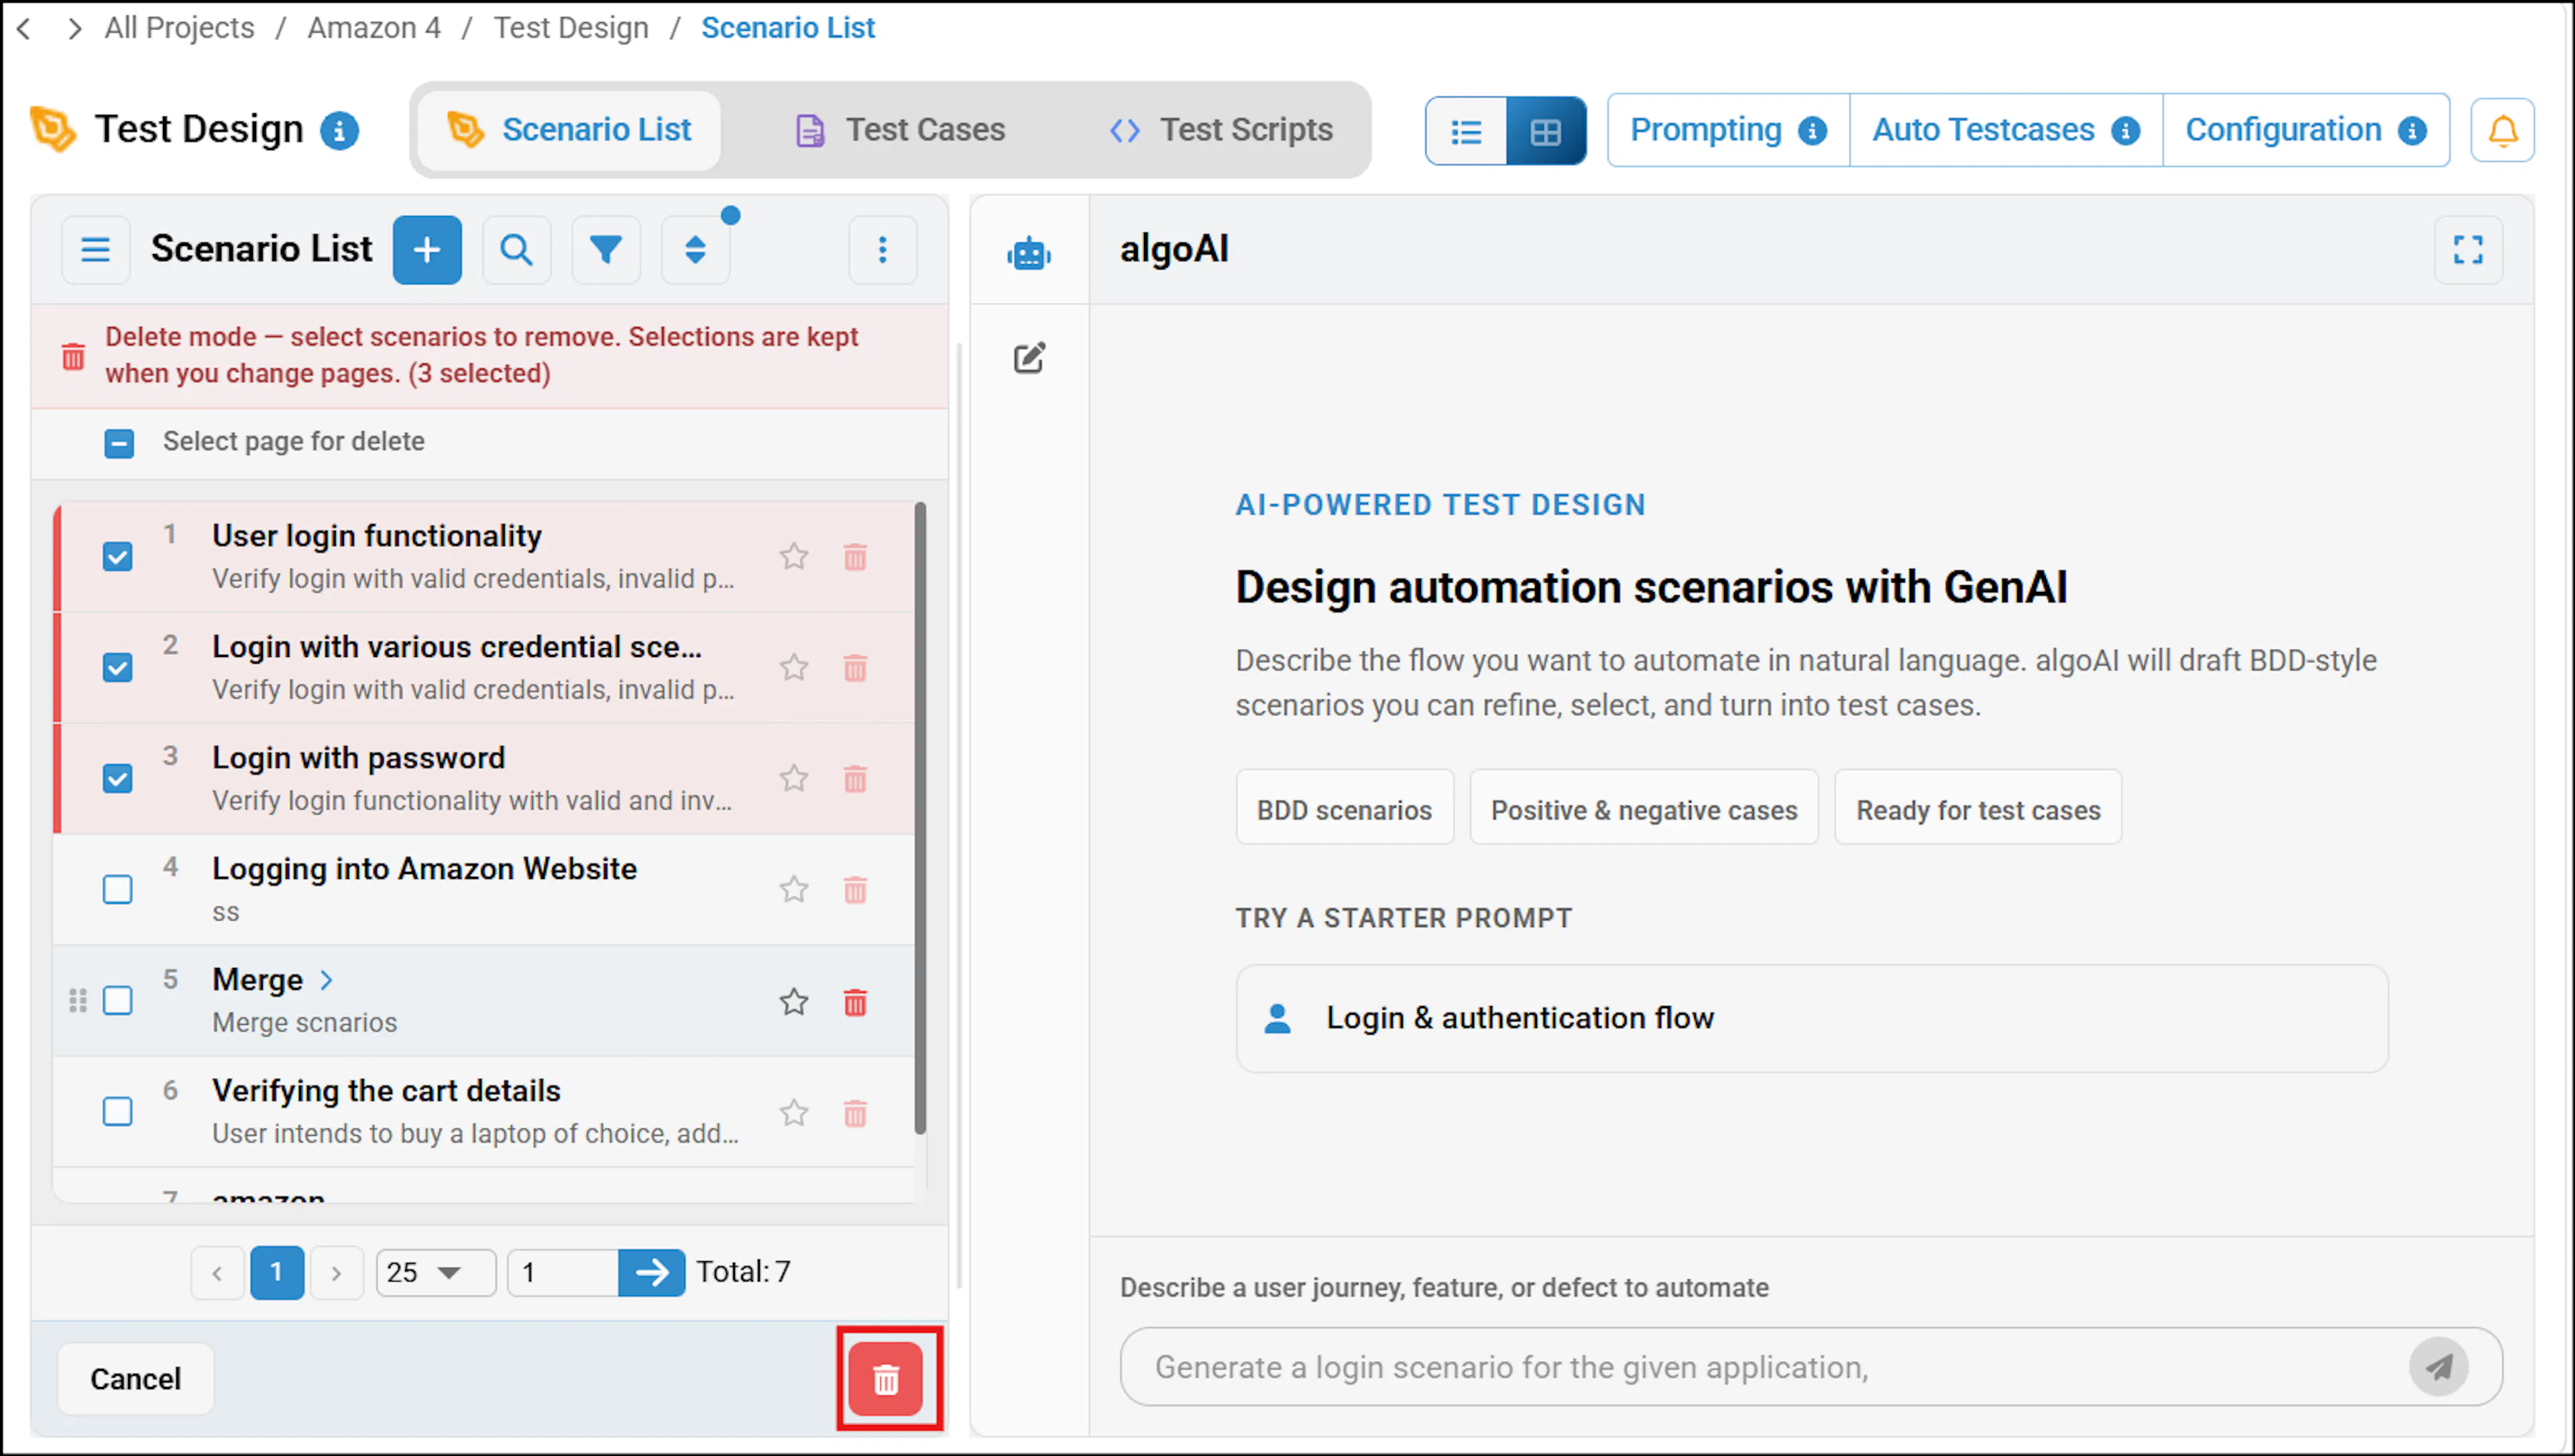
- Click the Delete icon at the bottom.
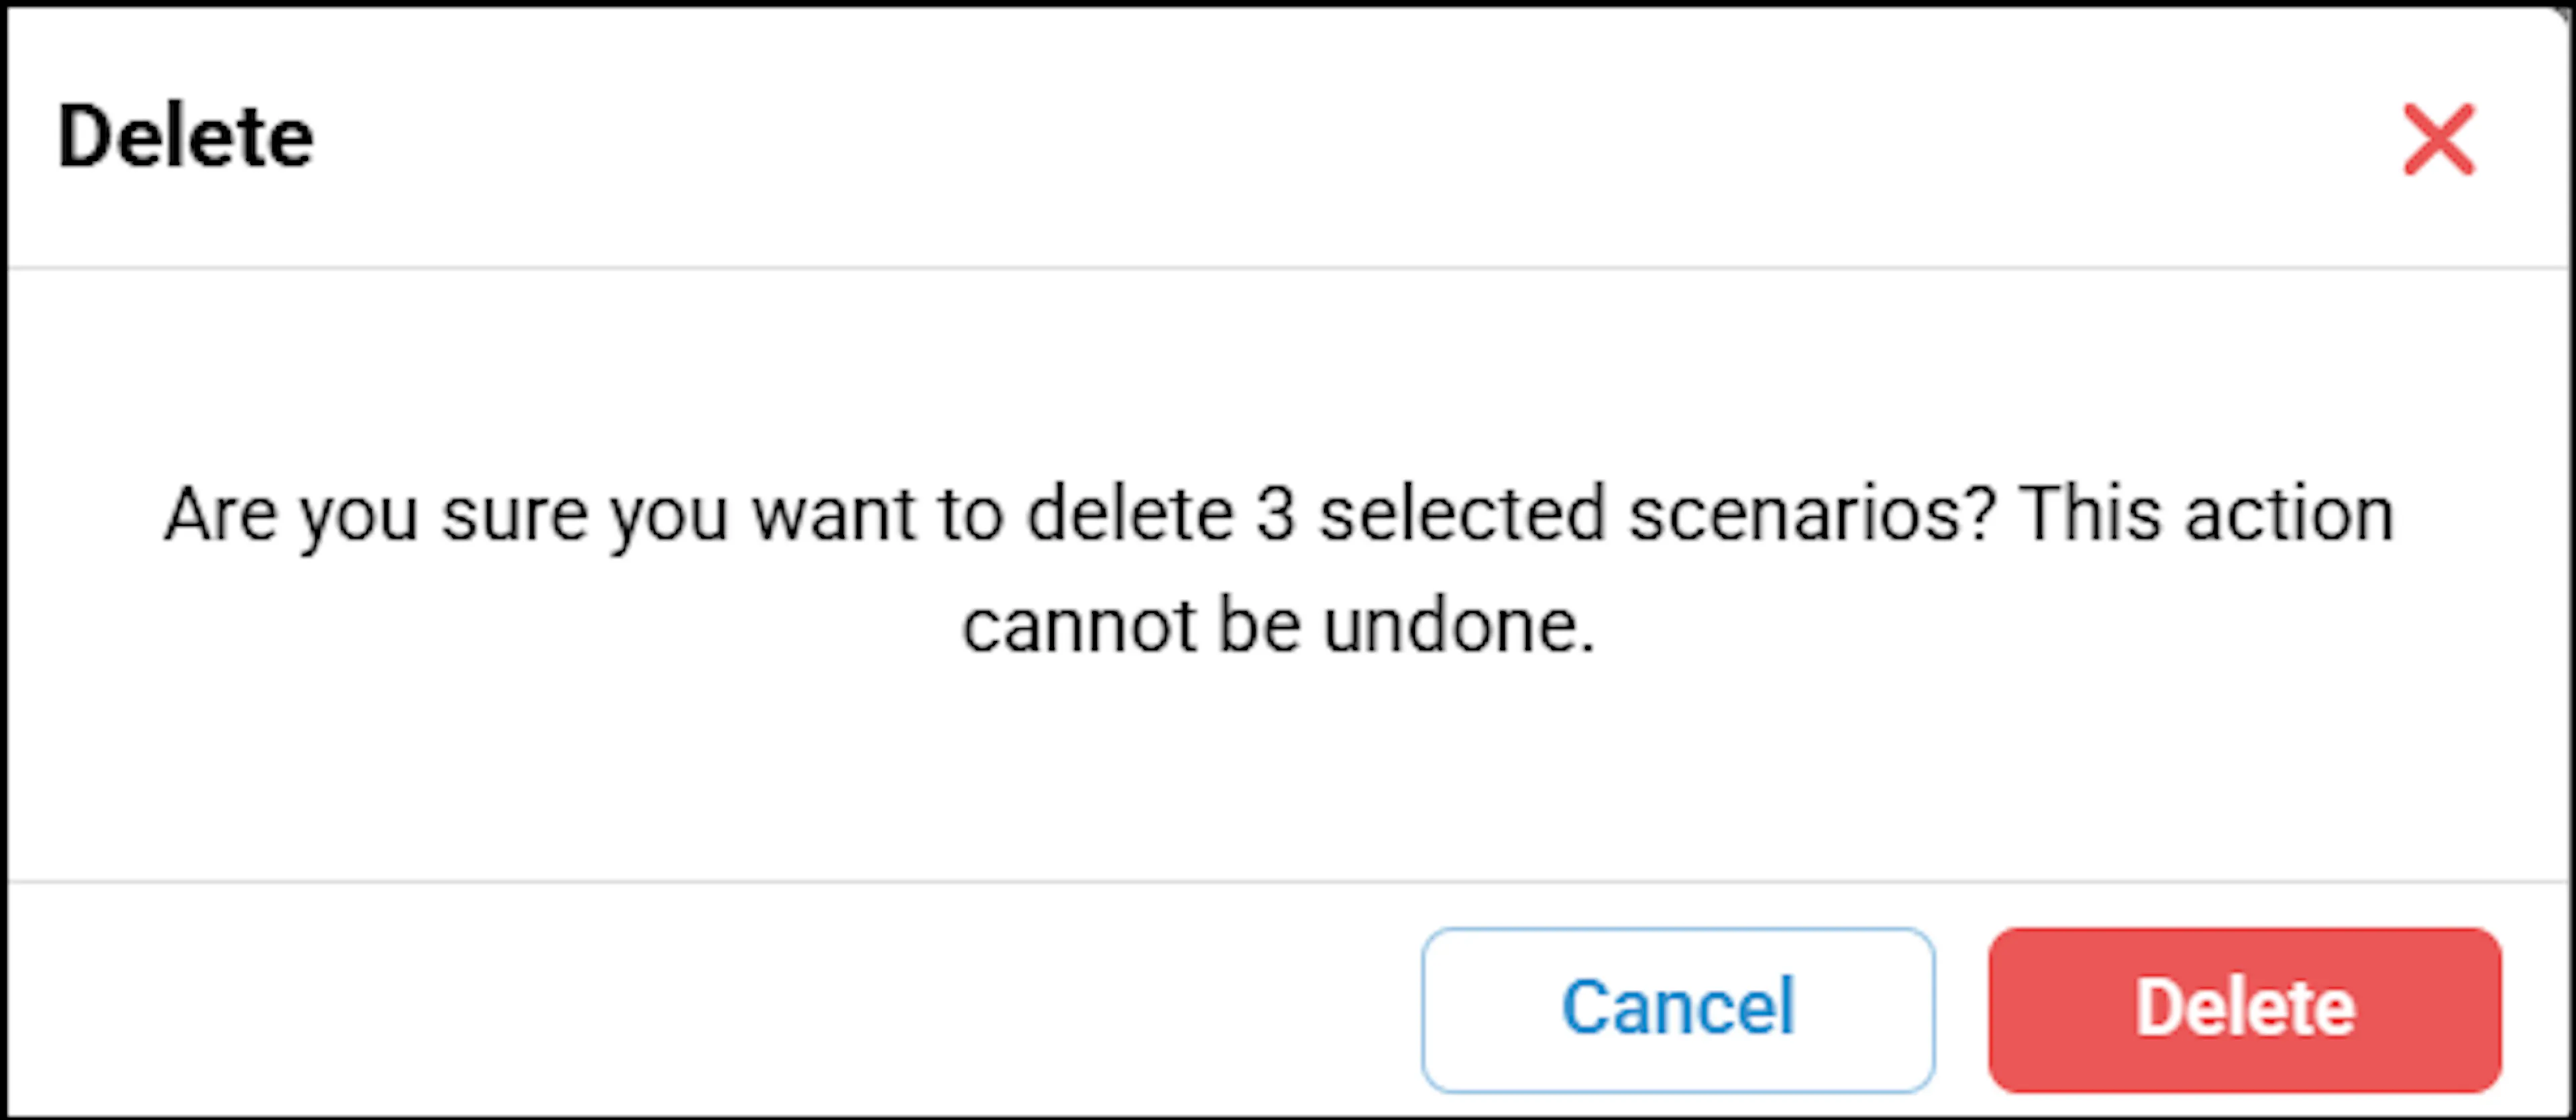
- A confirmation pop-up appears:
- Click Delete to proceed with deleting the selected scenarios.
- Click Cancel to cancel the deletion.
- To exit Delete Mode without deleting any scenarios, click the Cancel button at the bottom.
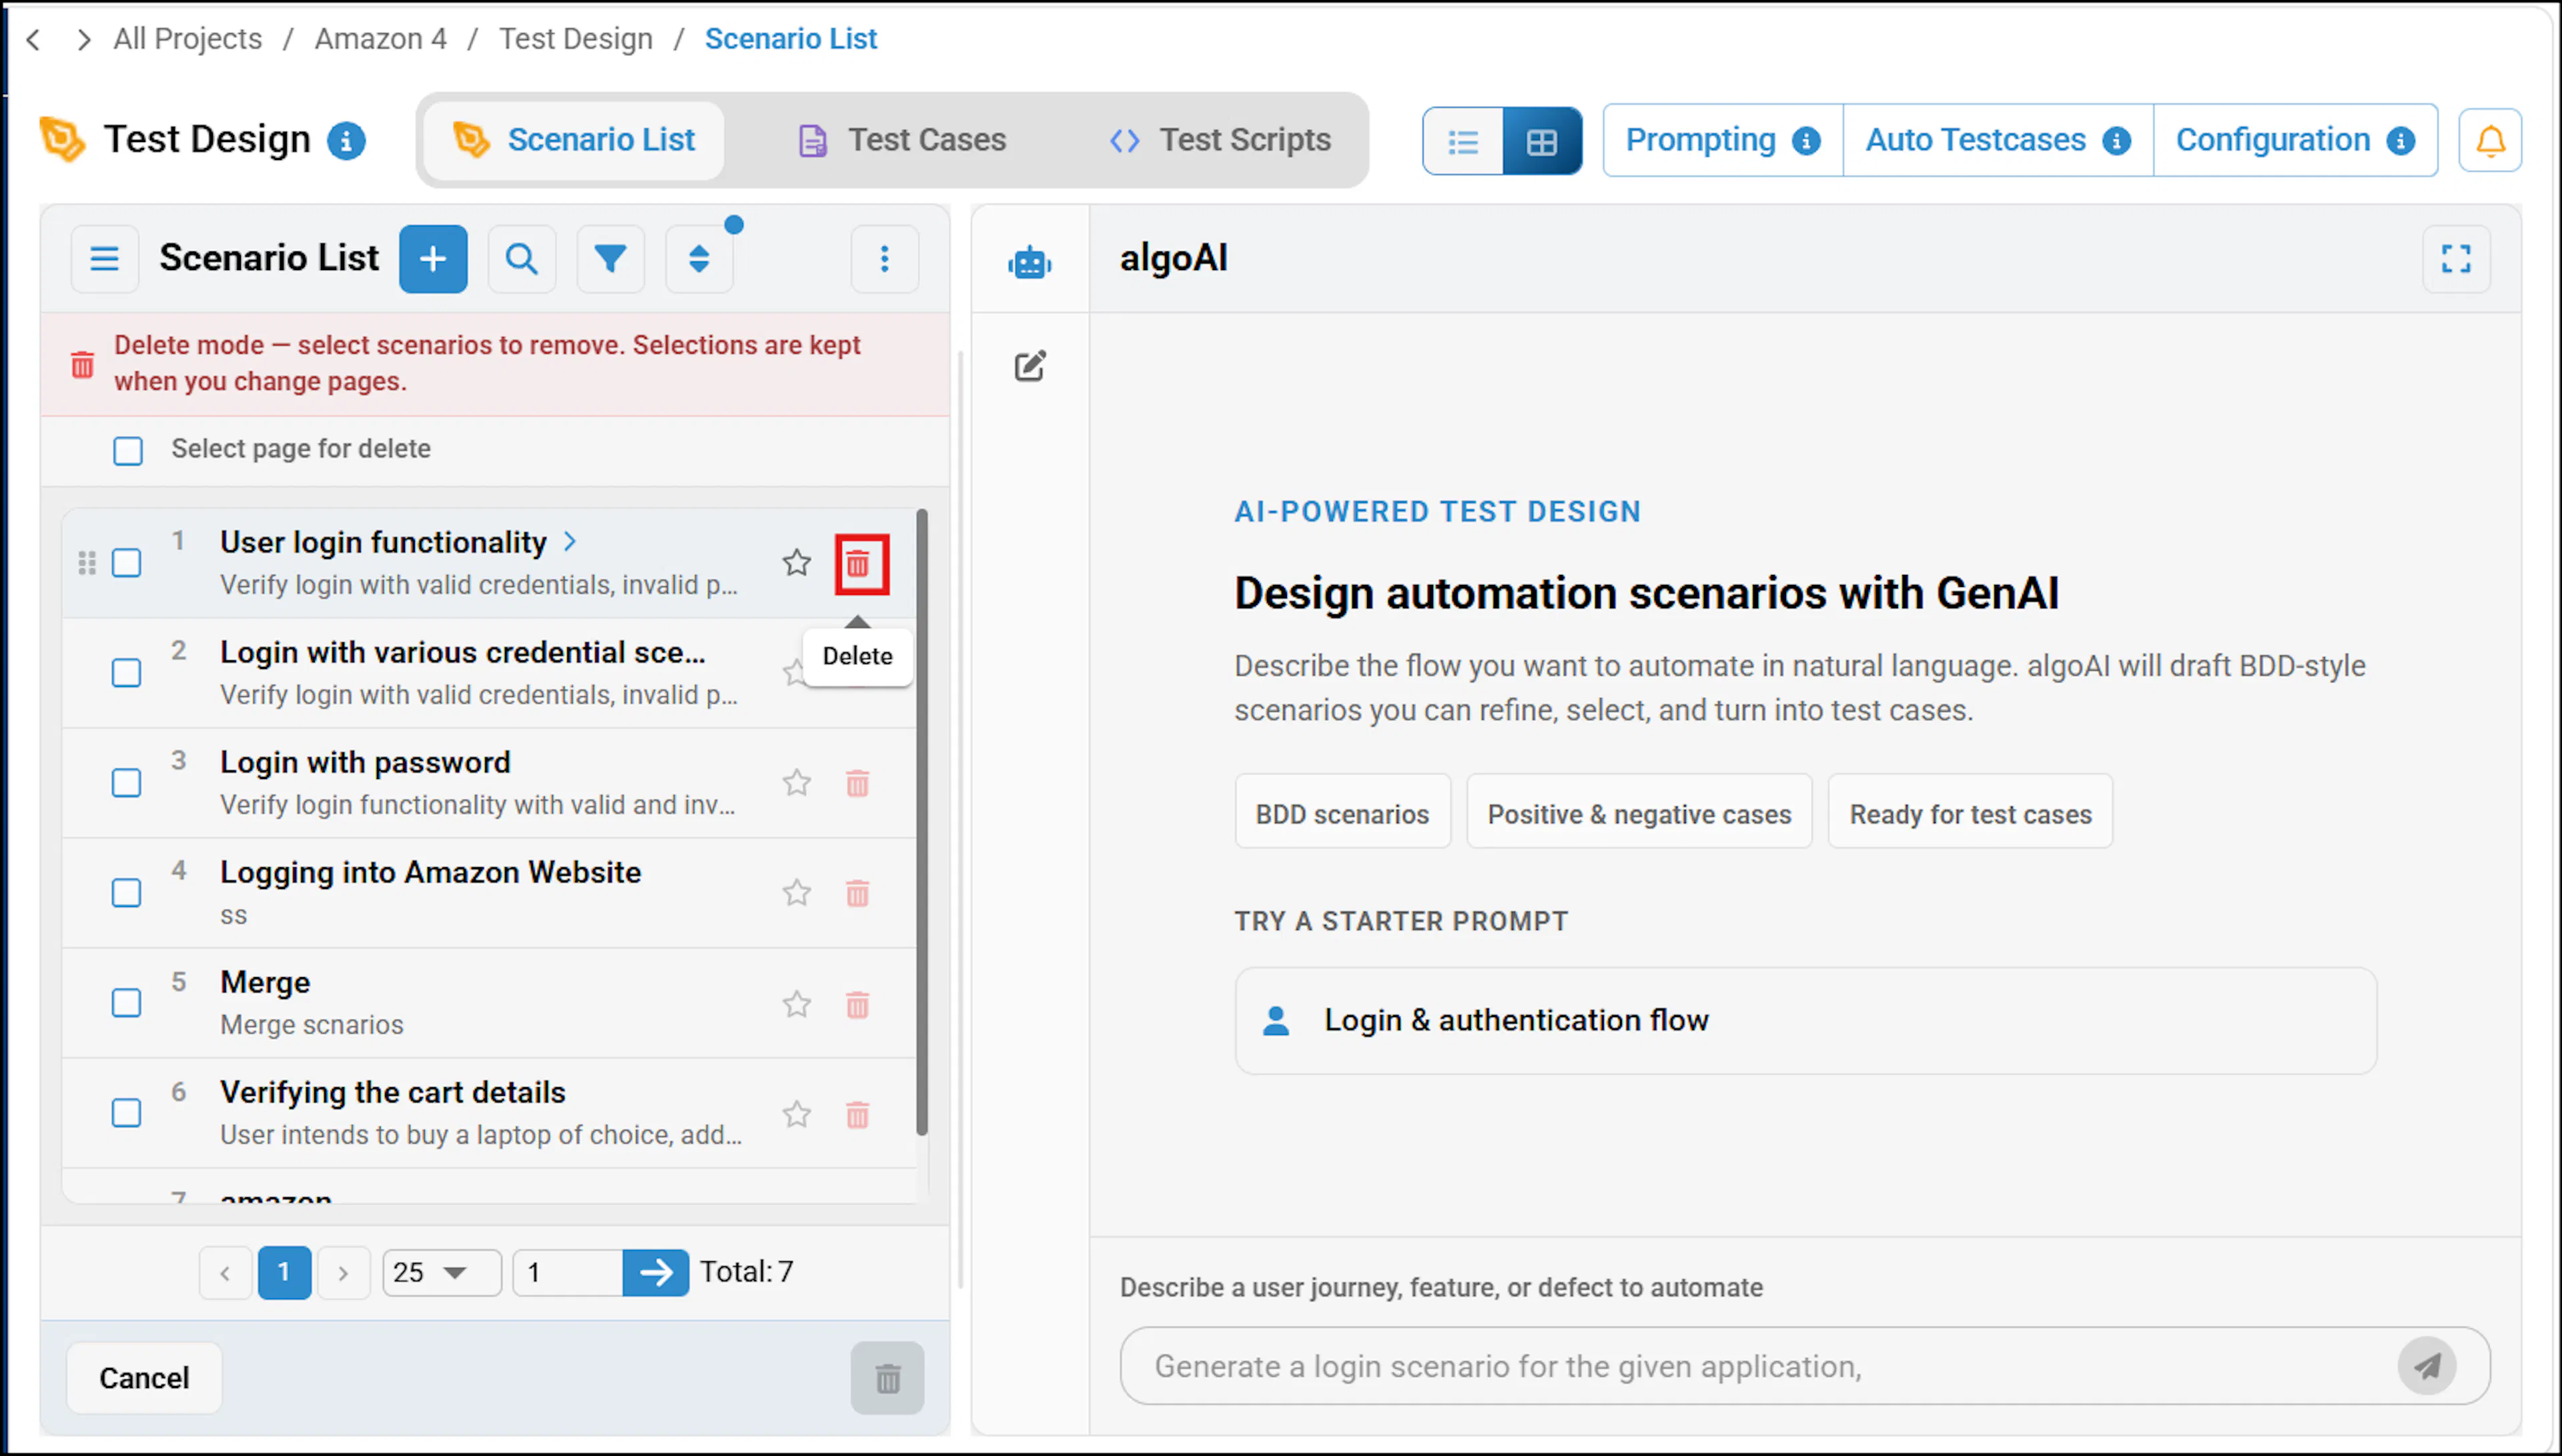
- You can also delete an individual scenario by clicking the Delete icon next to the respective scenario.
Merging Scenarios
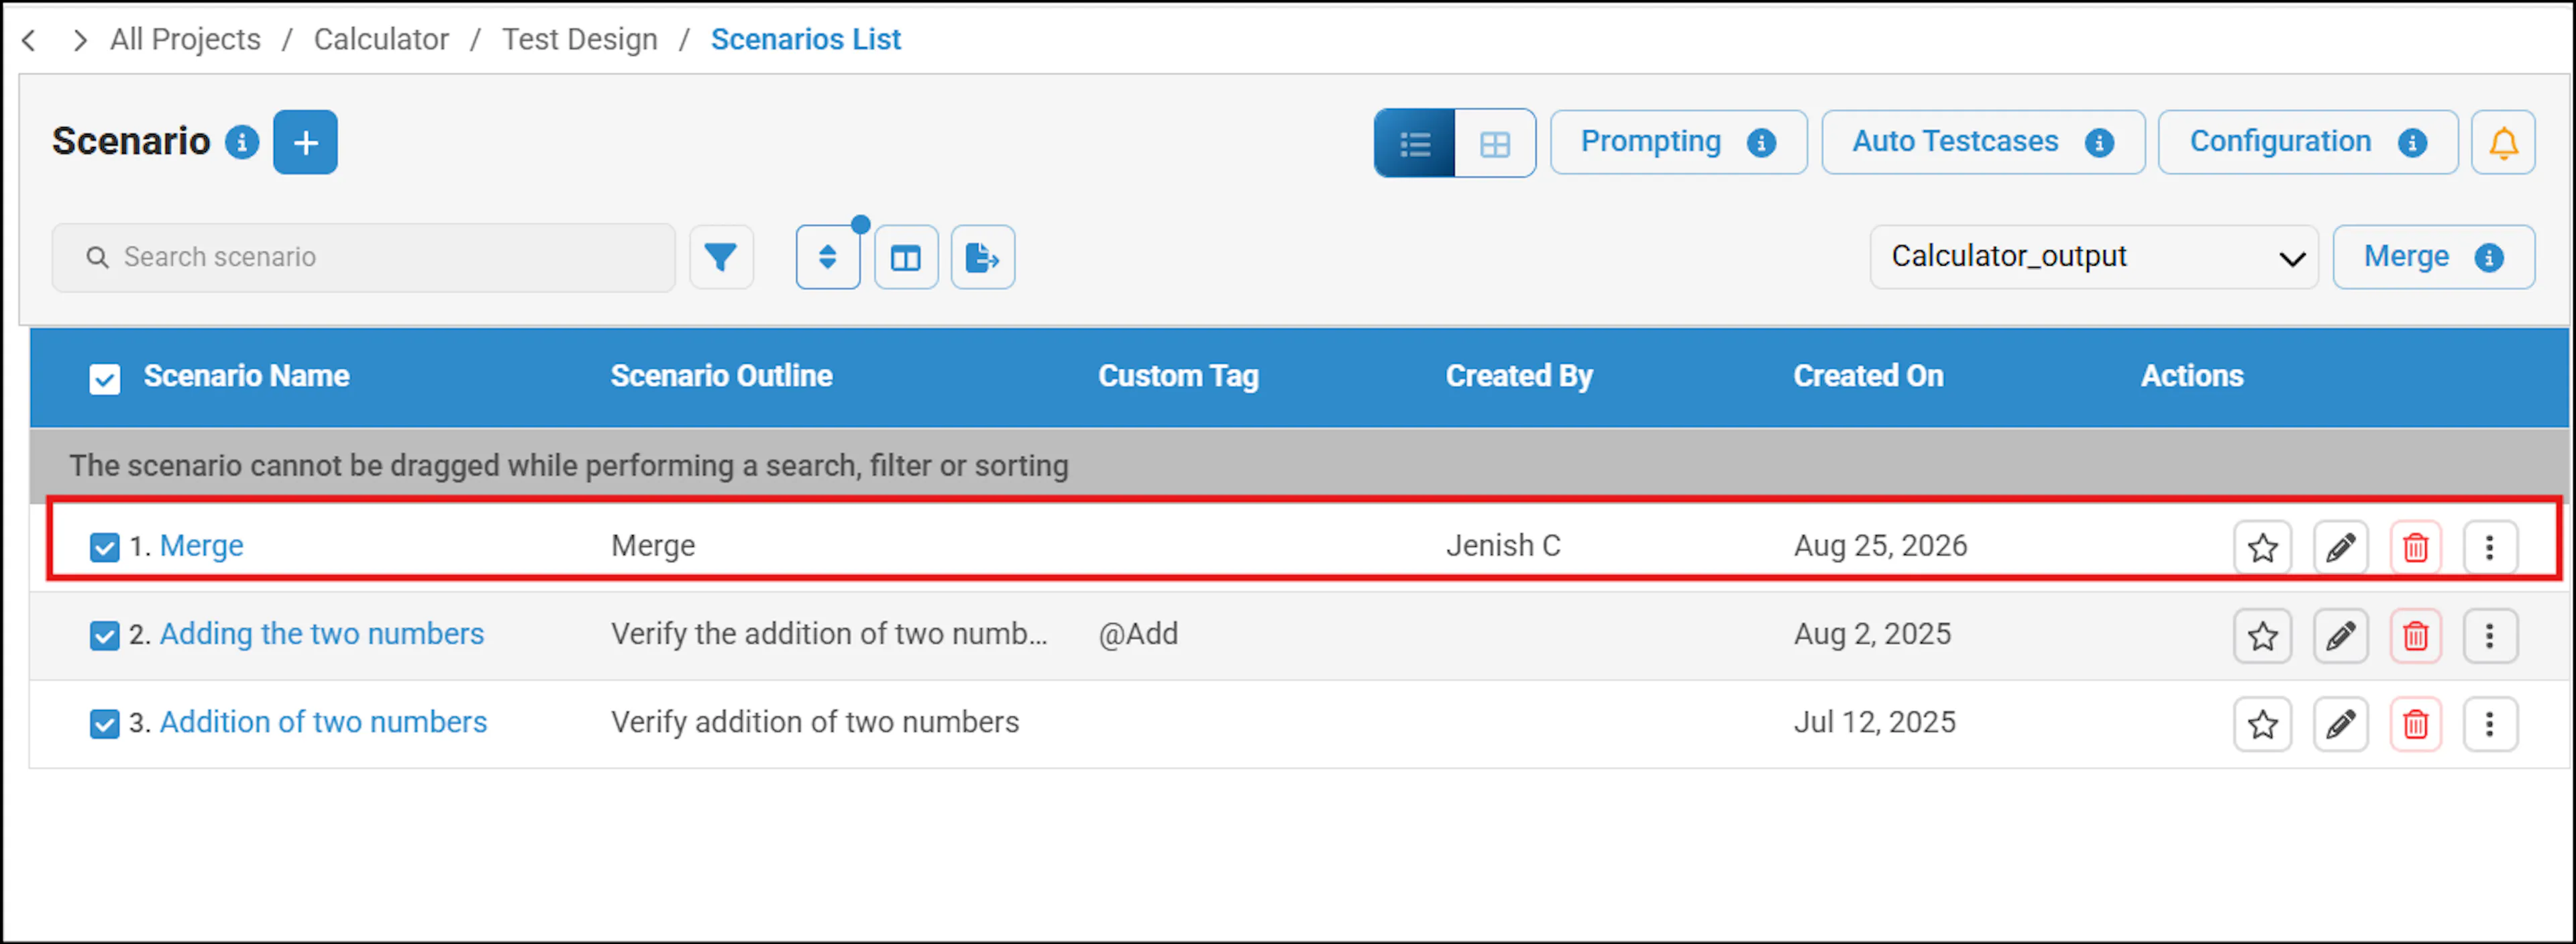
The Merge Scenarios option in the Scenario List allows you to merge scenarios. The scenario steps in the merged scenario are ordered sequentially, with the steps from the first scenario appearing first, followed by the steps from the second scenario. To merge scenarios, follow these steps:
- Navigate to the Scenario List.
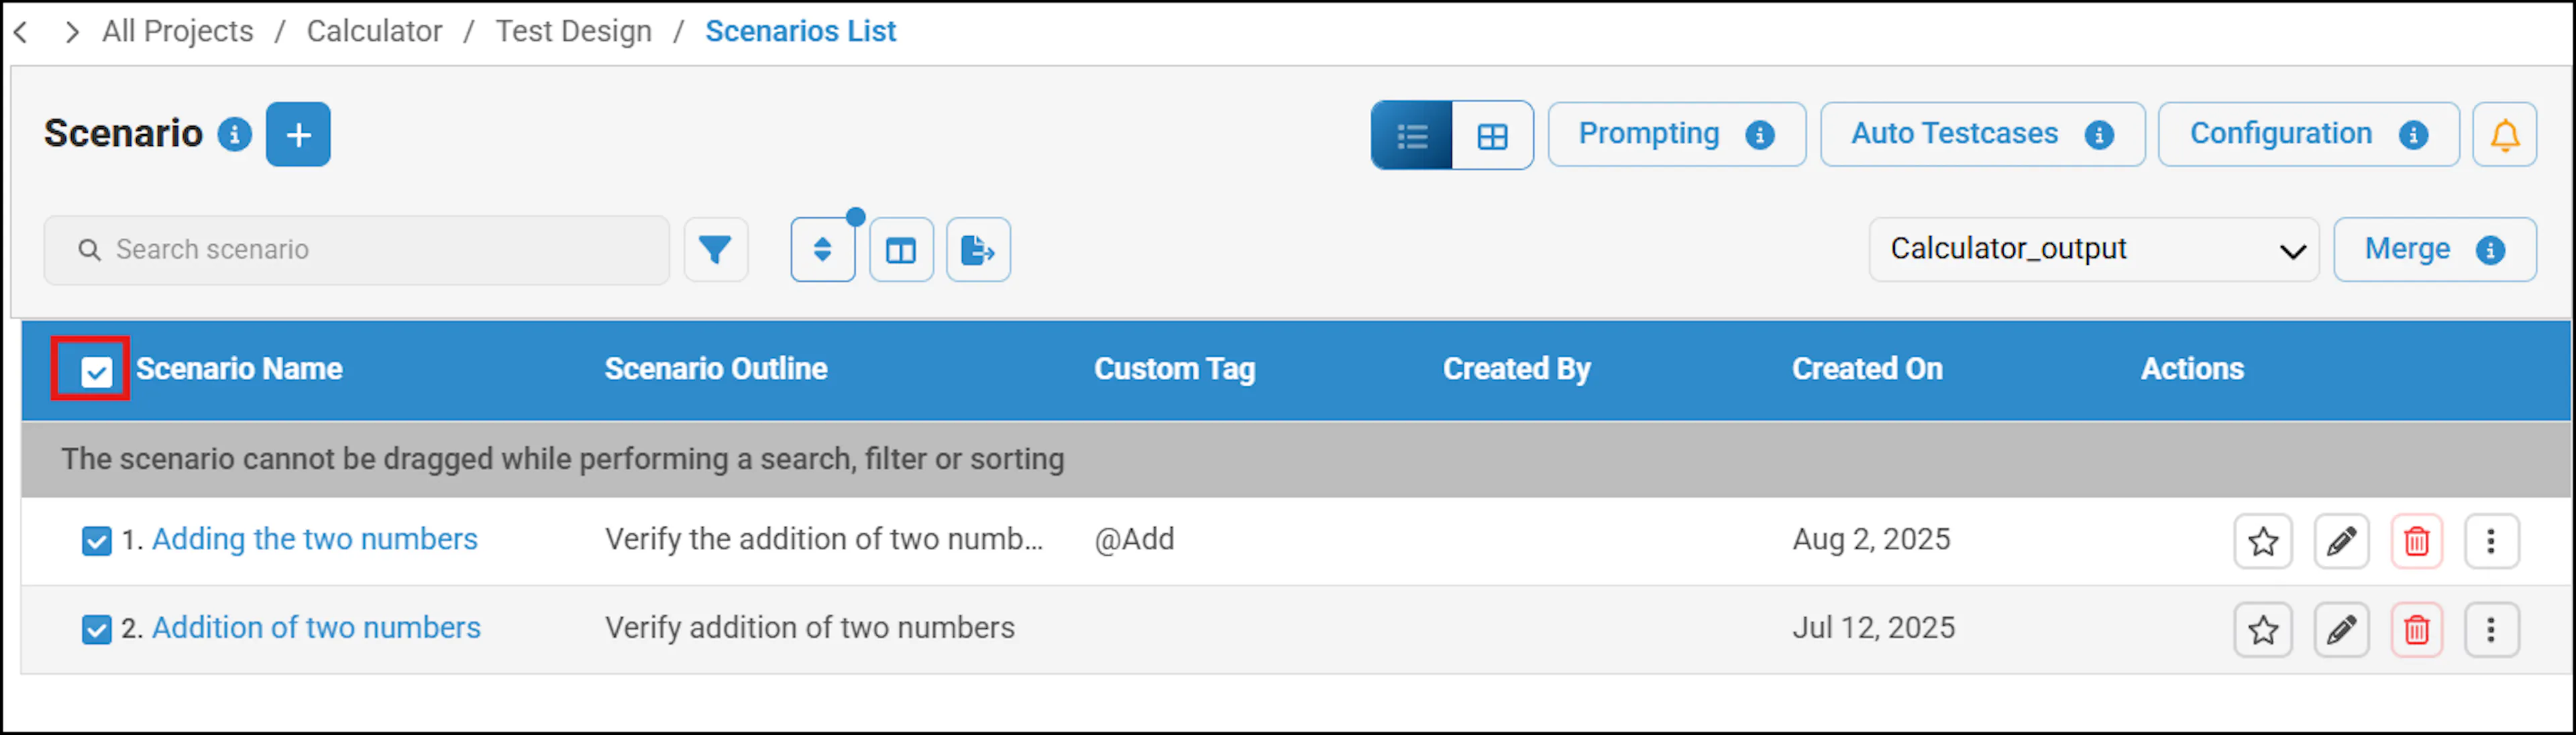
- Click the Merge button.
- Select the checkbox of the scenarios you want to merge.
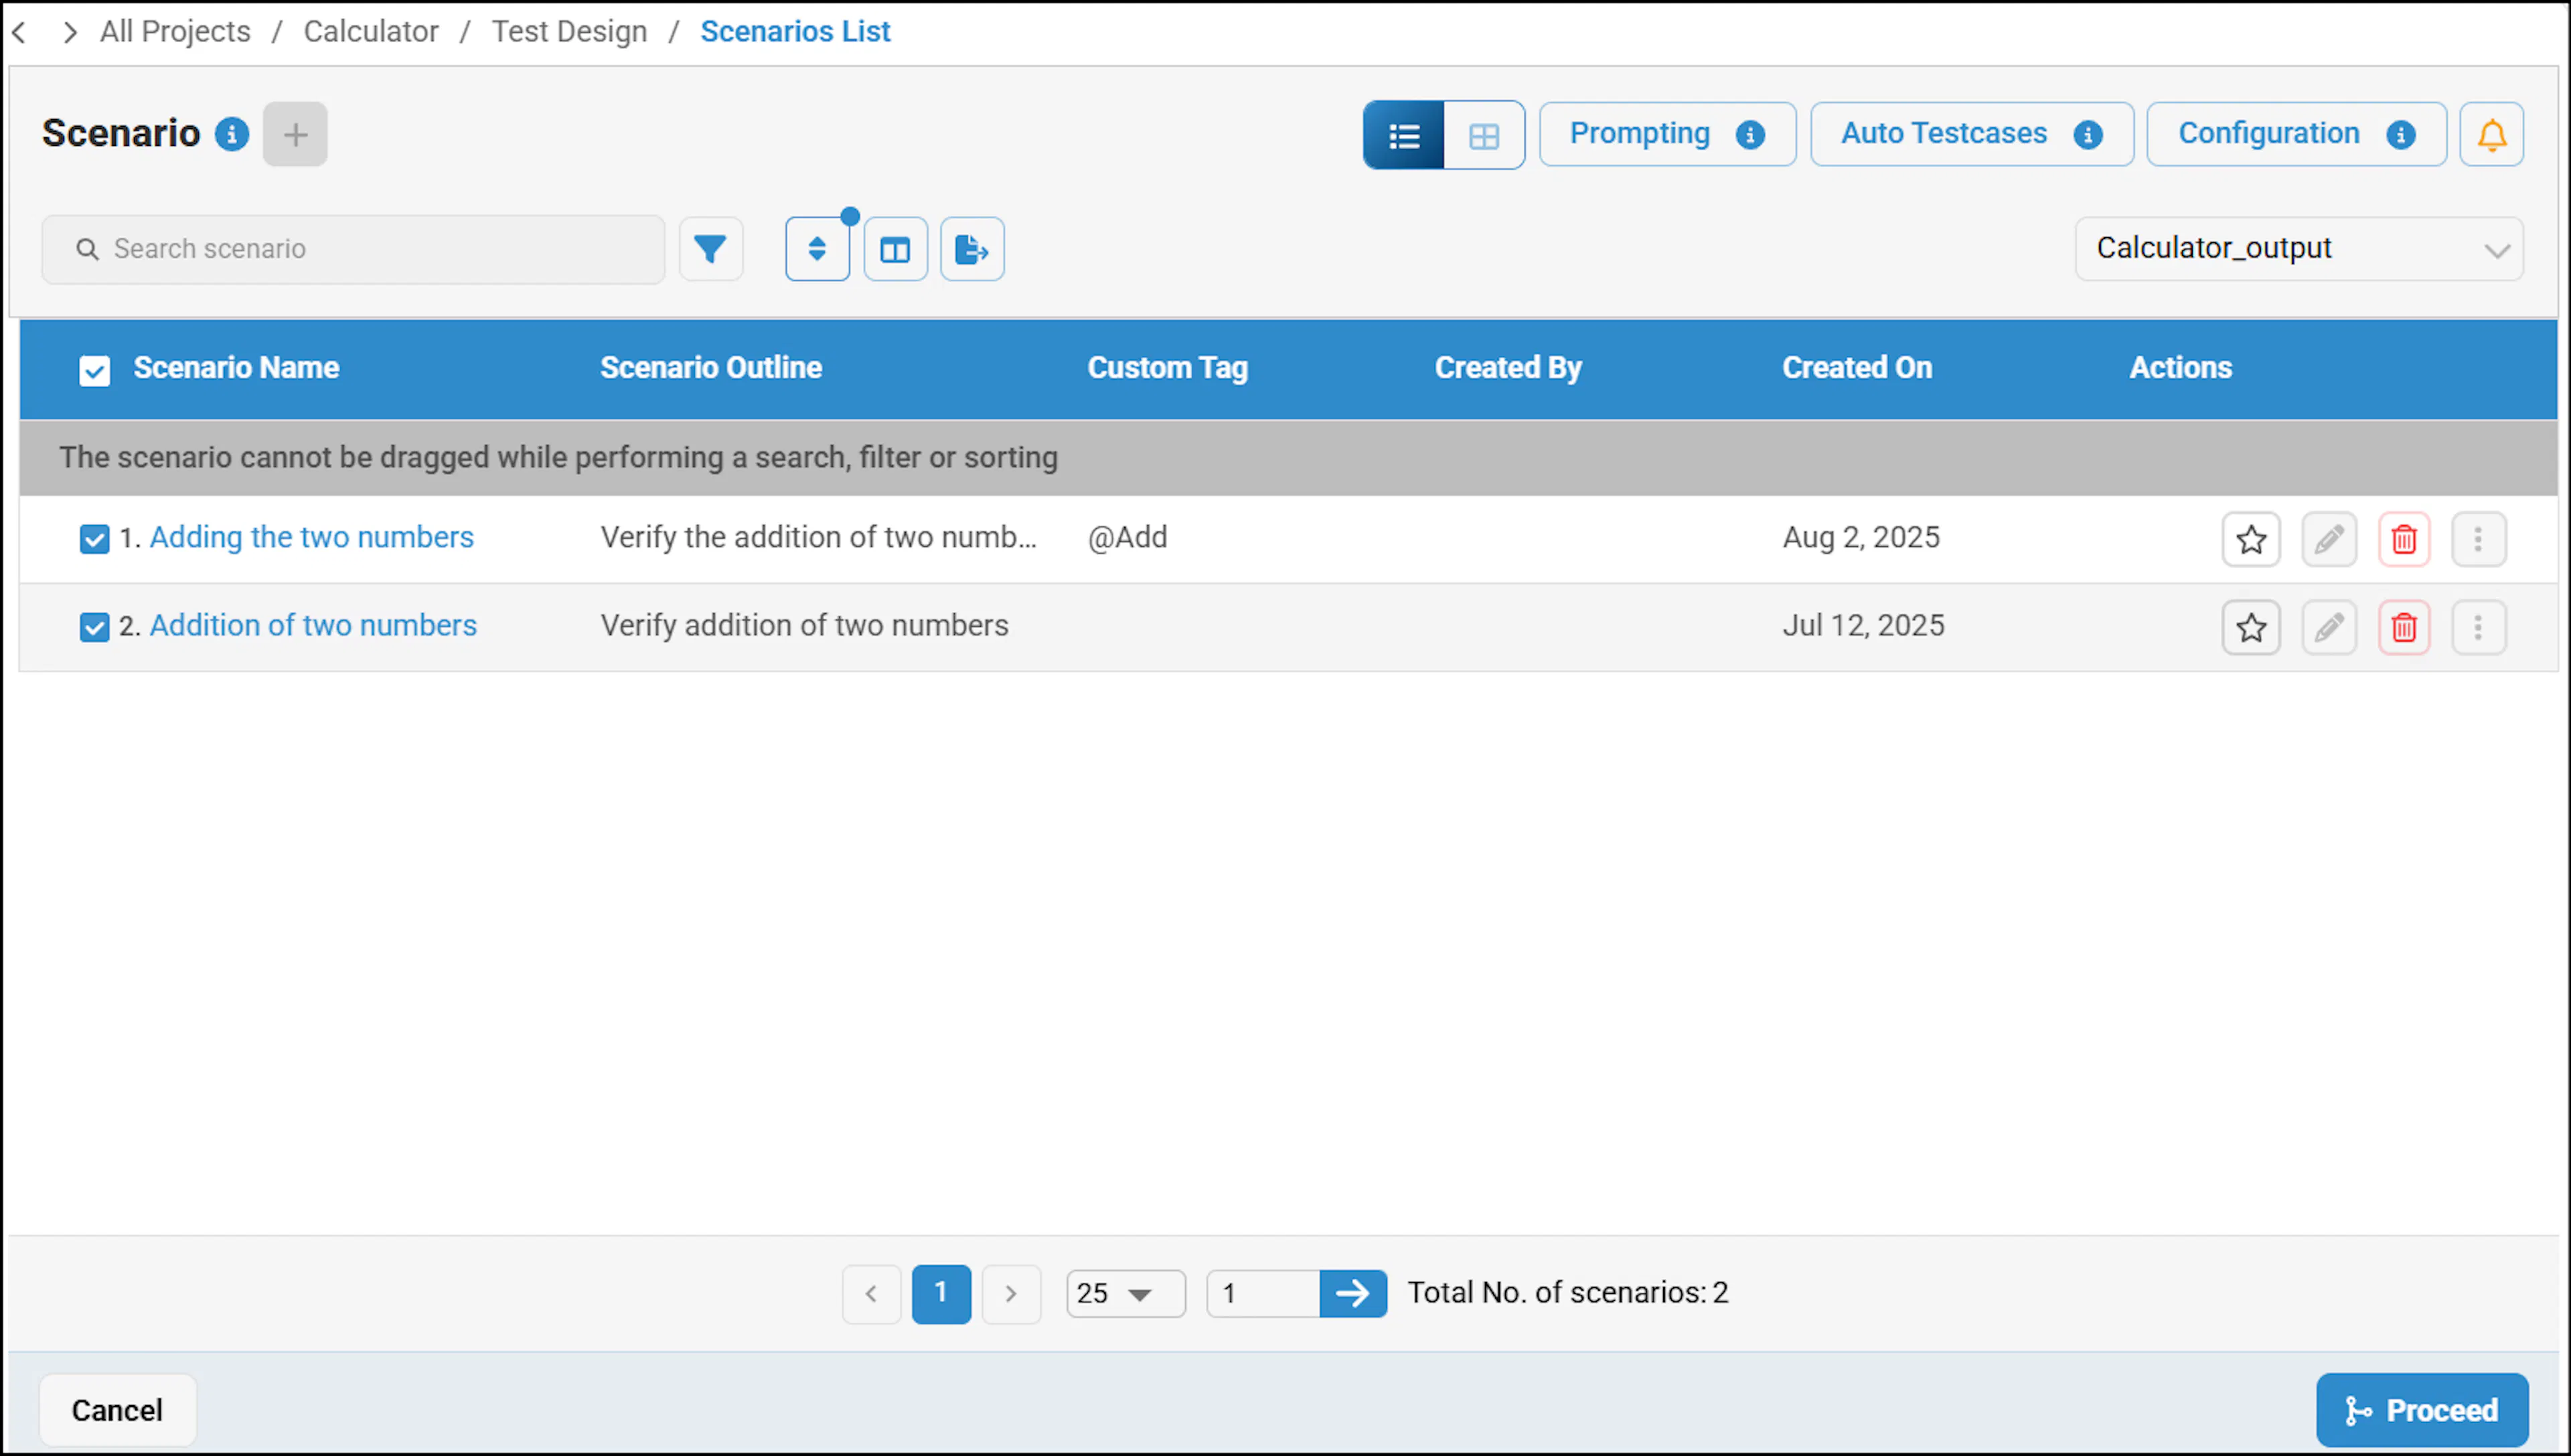
Scenarios are merged in the order they are selected. For example, if there are five scenarios and the user selects them in the order 4 → 2 → 3, the merged scenario will contain the steps from the 4th scenario first, followed by the 2nd scenario, and then the 3rd scenario.
- Click on Proceed.
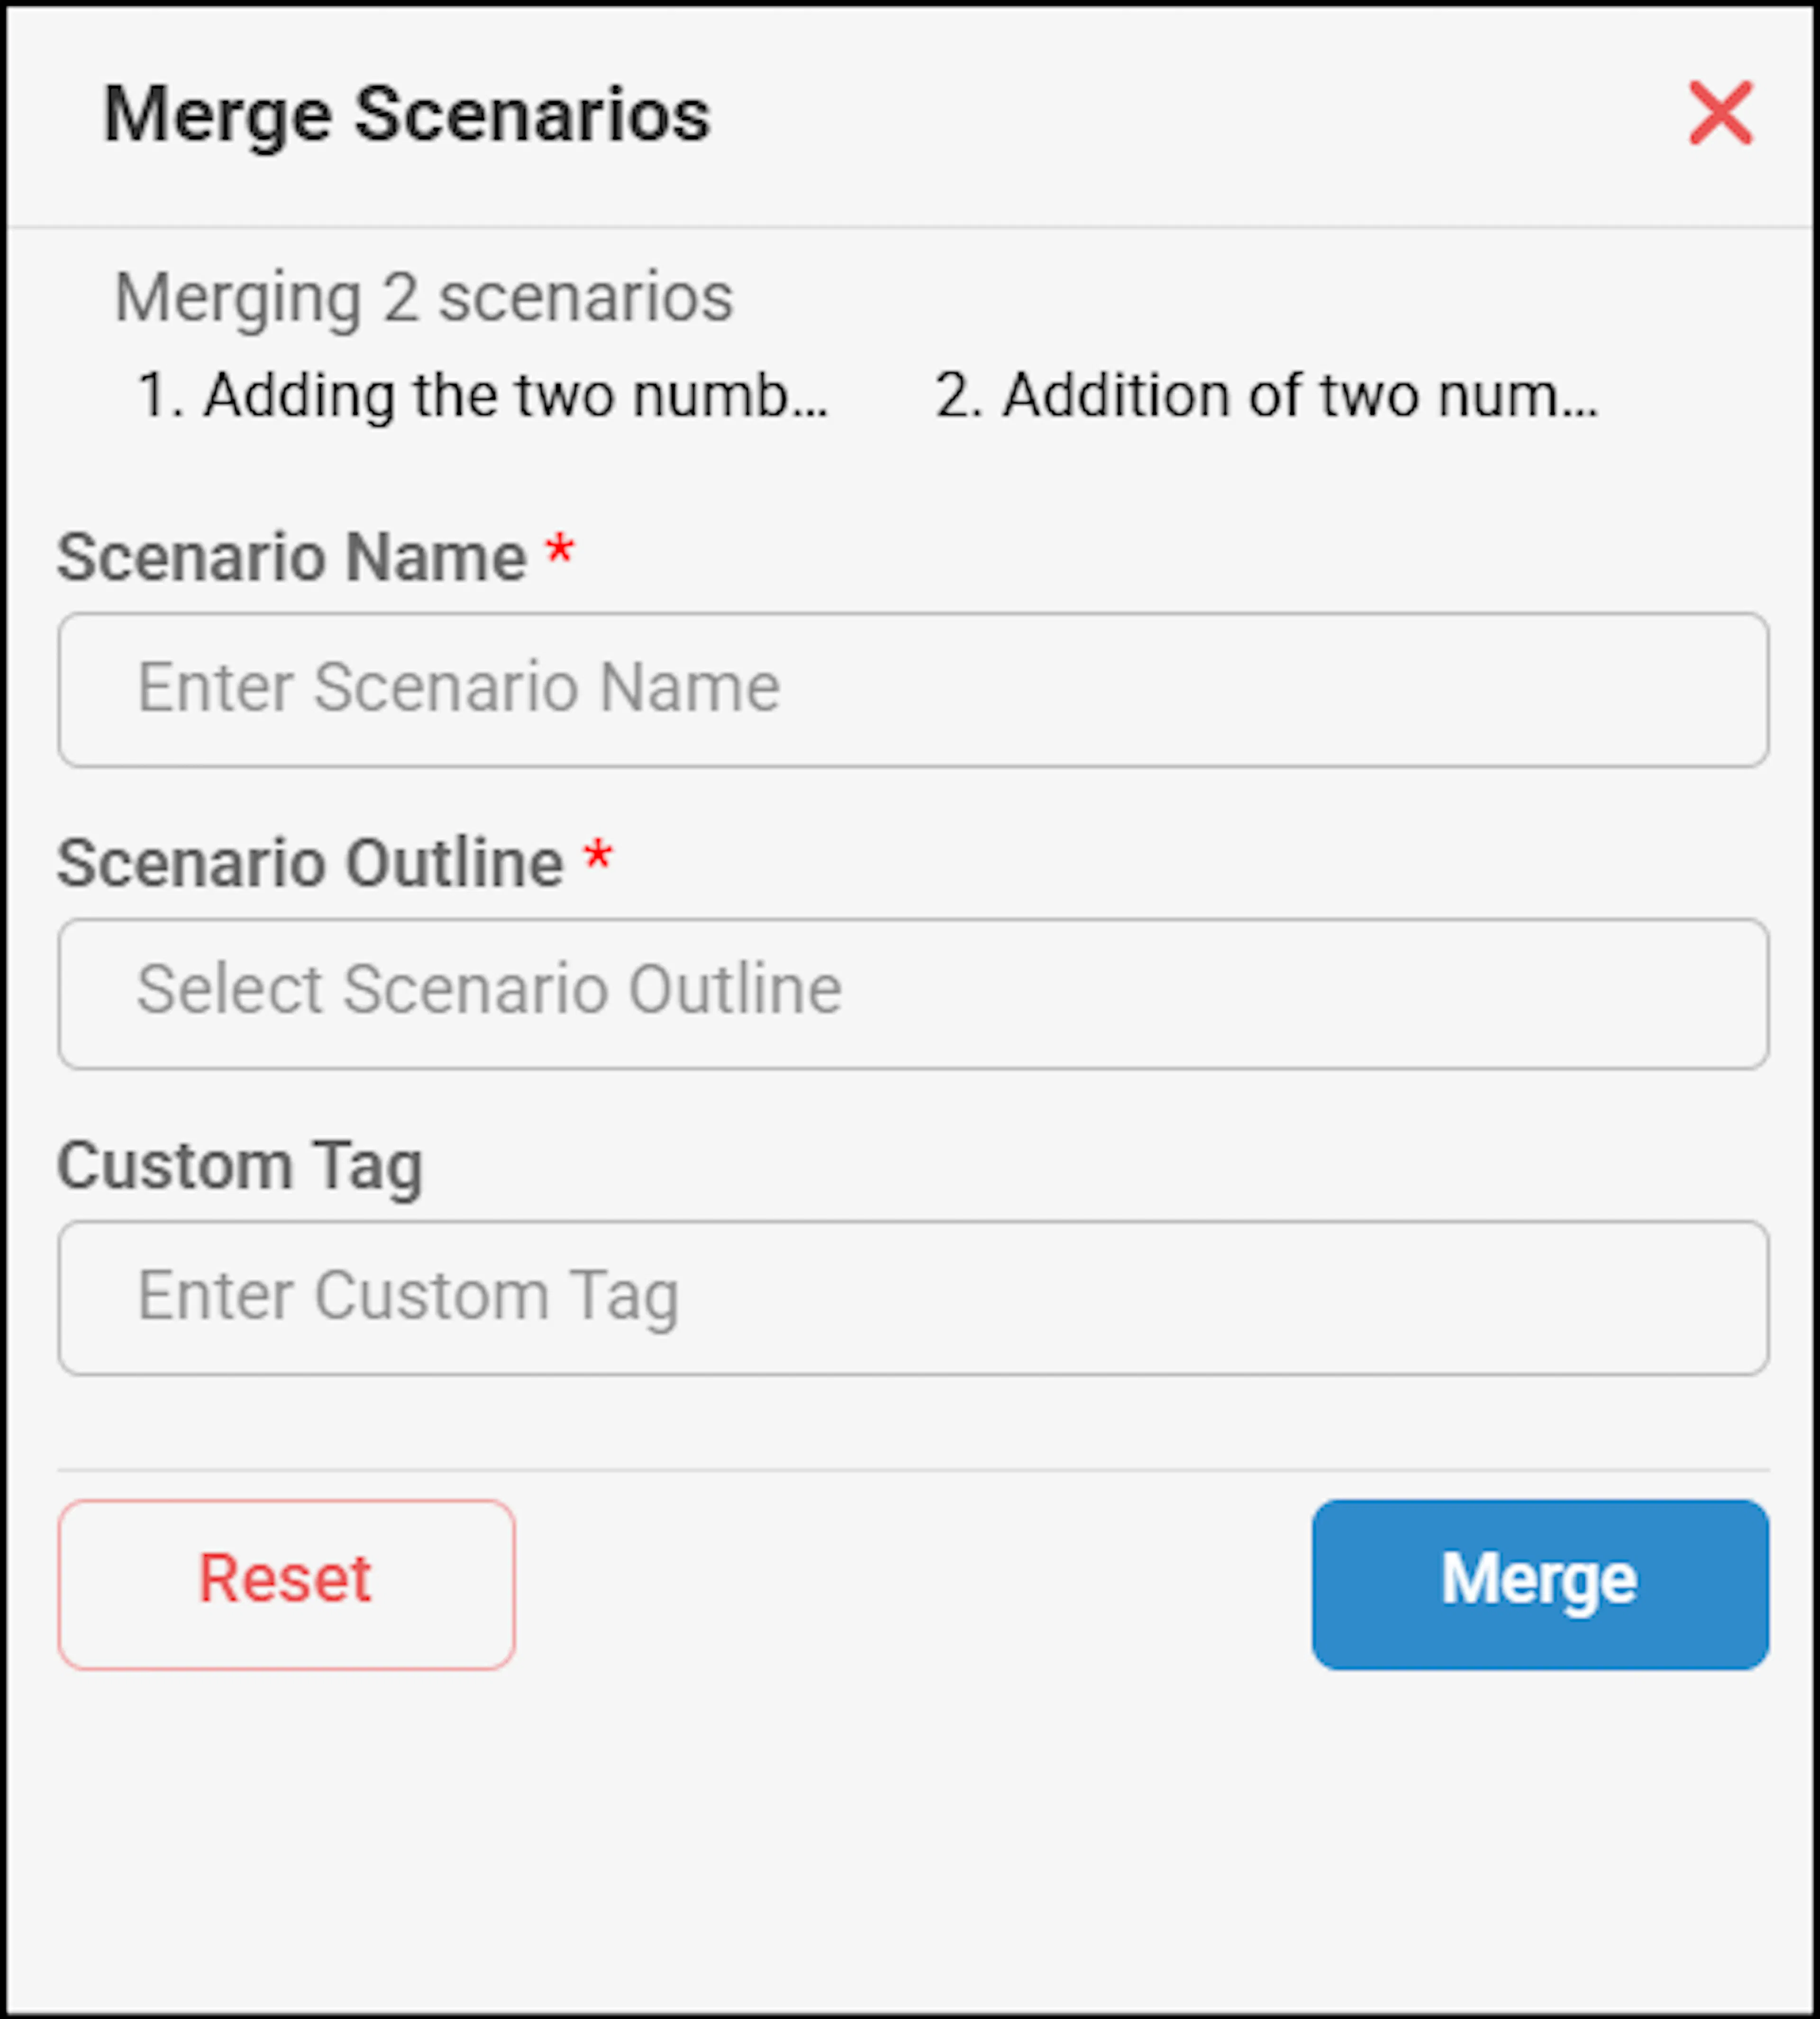
- The Merge Scenarios form will appear. Enter the scenario name and scenario outline, then click the Merge button.
- The selected scenarios will be merged, and their steps will be combined in sequence.
Copying Scenario Steps List from one Scenario List to another
The Copy Scenario Steps List feature allows you to duplicate a complete set of scenario steps from one Scenario List and paste it into another. This is especially useful when you need to replicate the same set of steps across multiple scenarios without recreating them manually.
To copy a Scenario Steps List:
- Navigate to the Scenario List from which you want to copy the Scenario Steps List, then click on the scenario next.
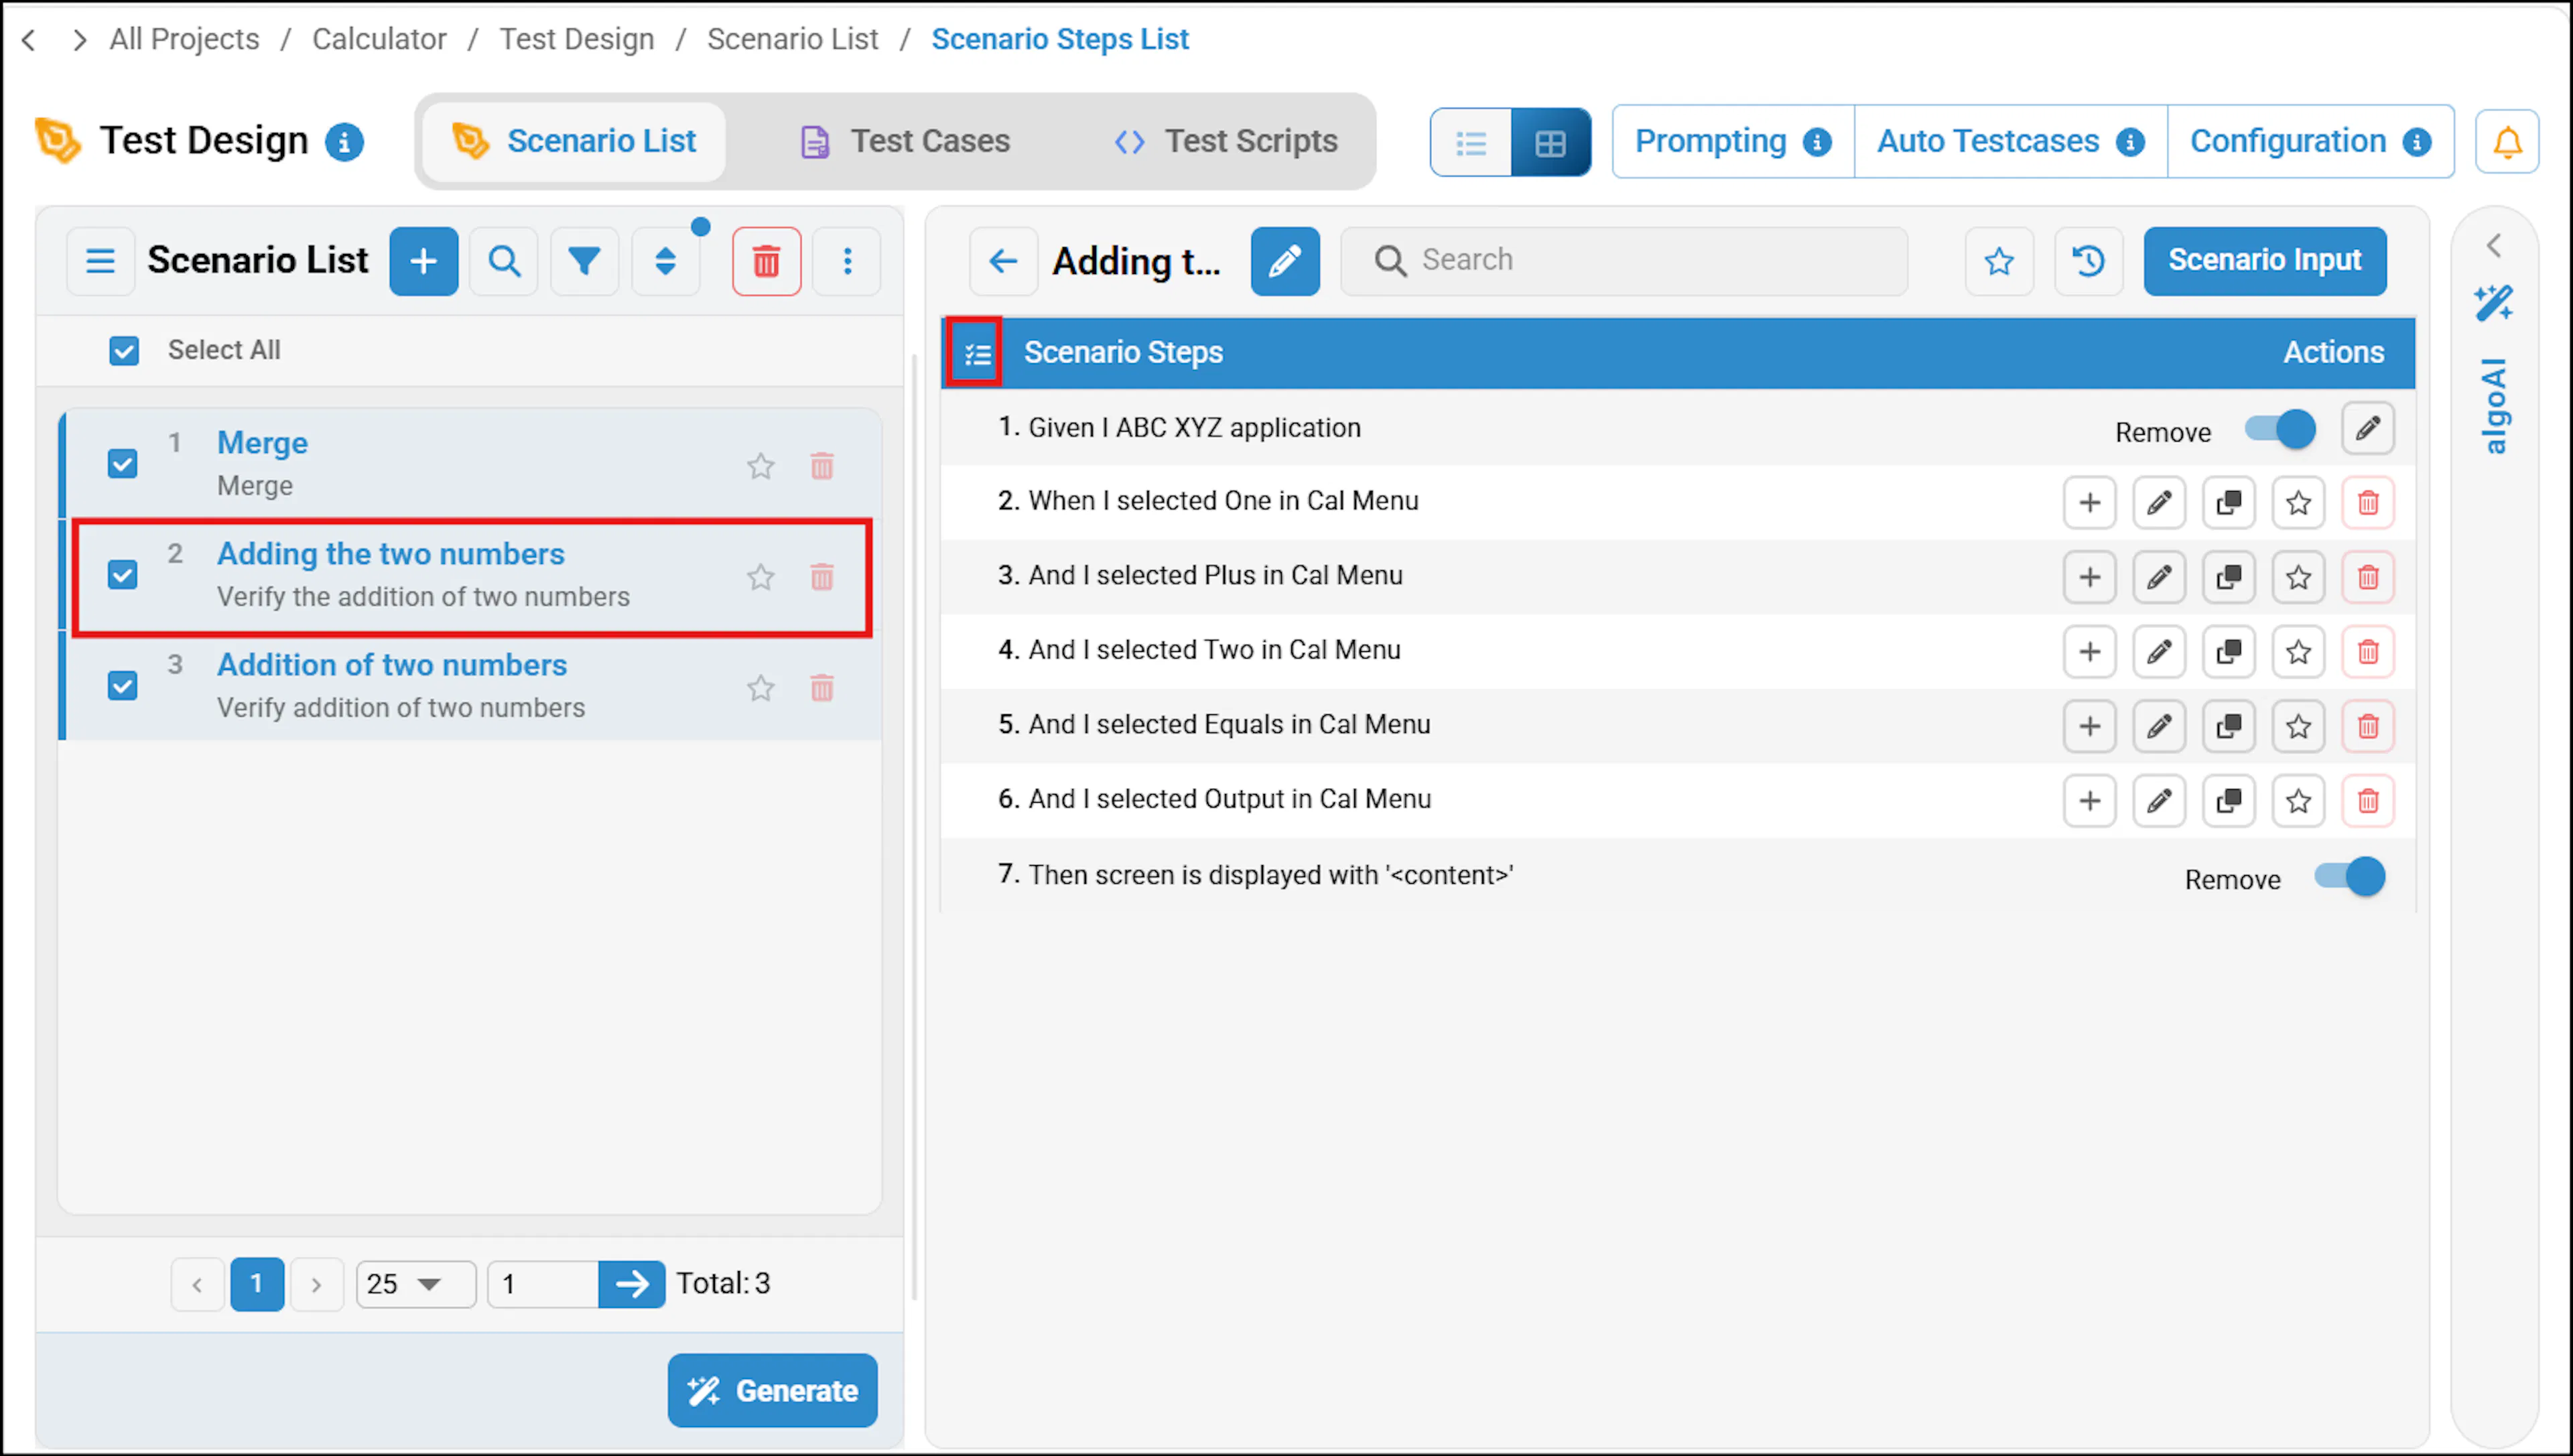
- Click Select Steps.
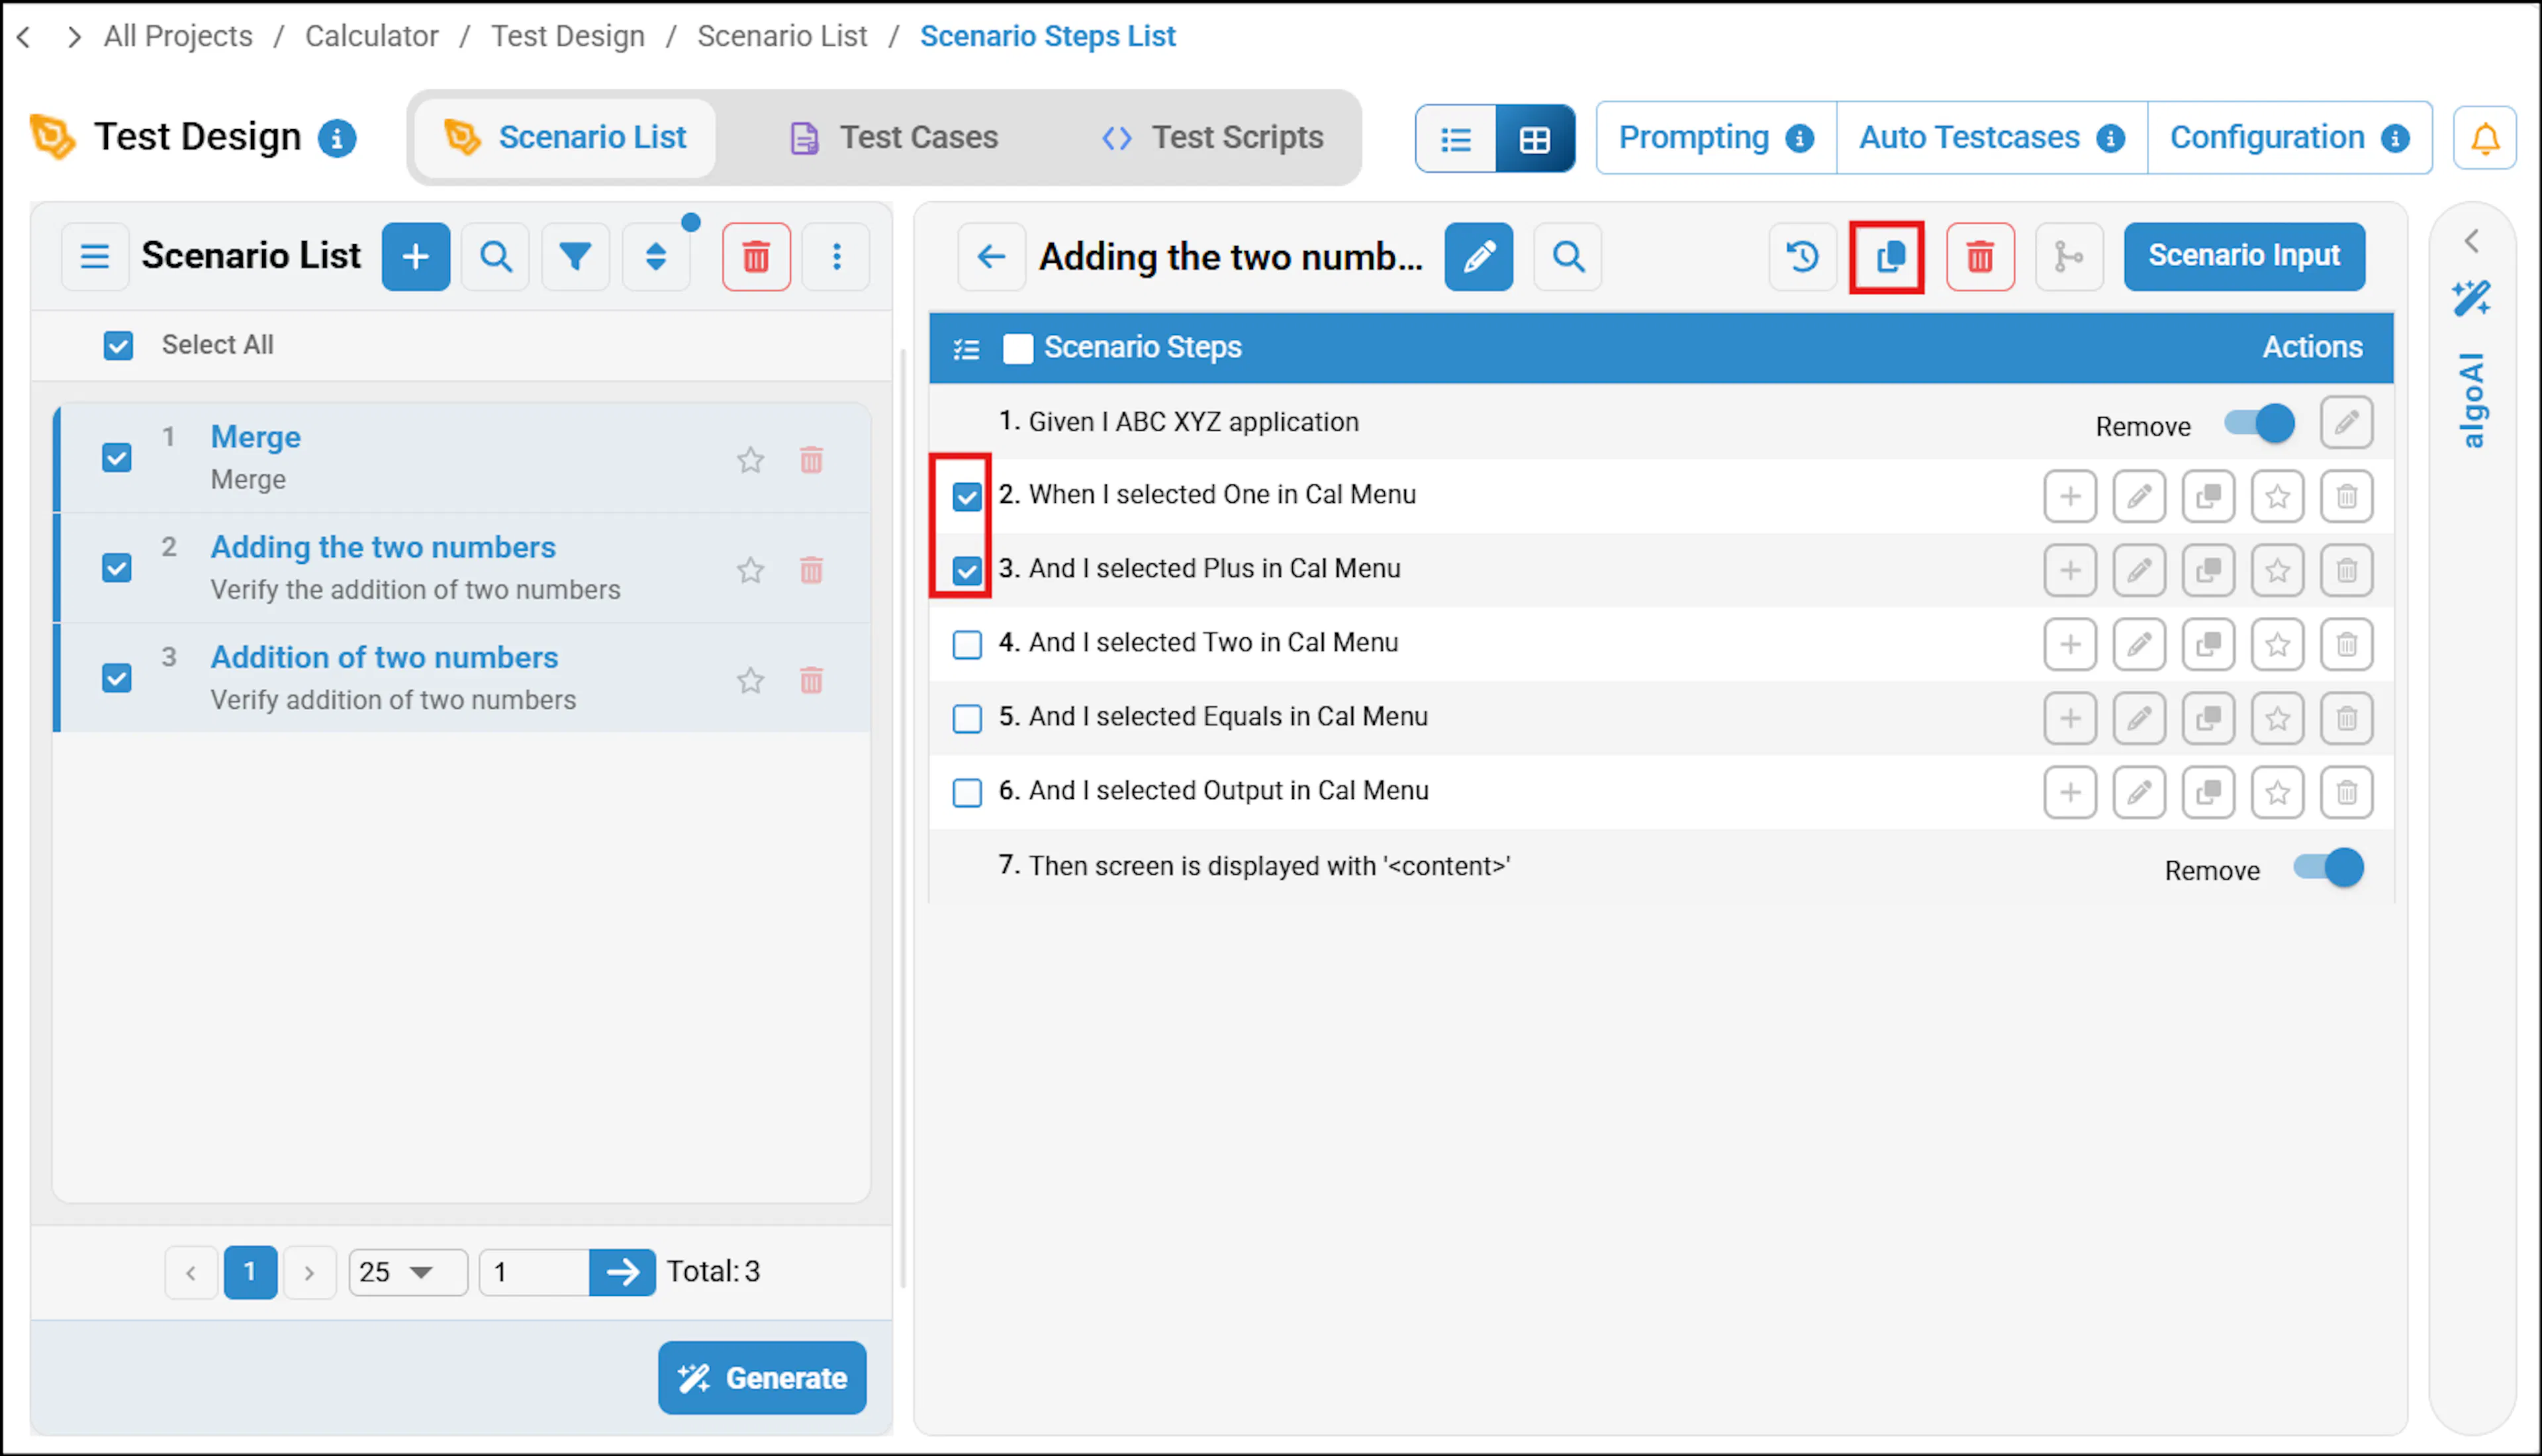
- Select the checkbox besides the steps you want to copy.
- Click the Copy Steps button.
- Navigate to the scenario where you want to paste the copied steps.
- Hover over a step to reveal the Paste Below button, then click it to paste the copied steps beneath that step.
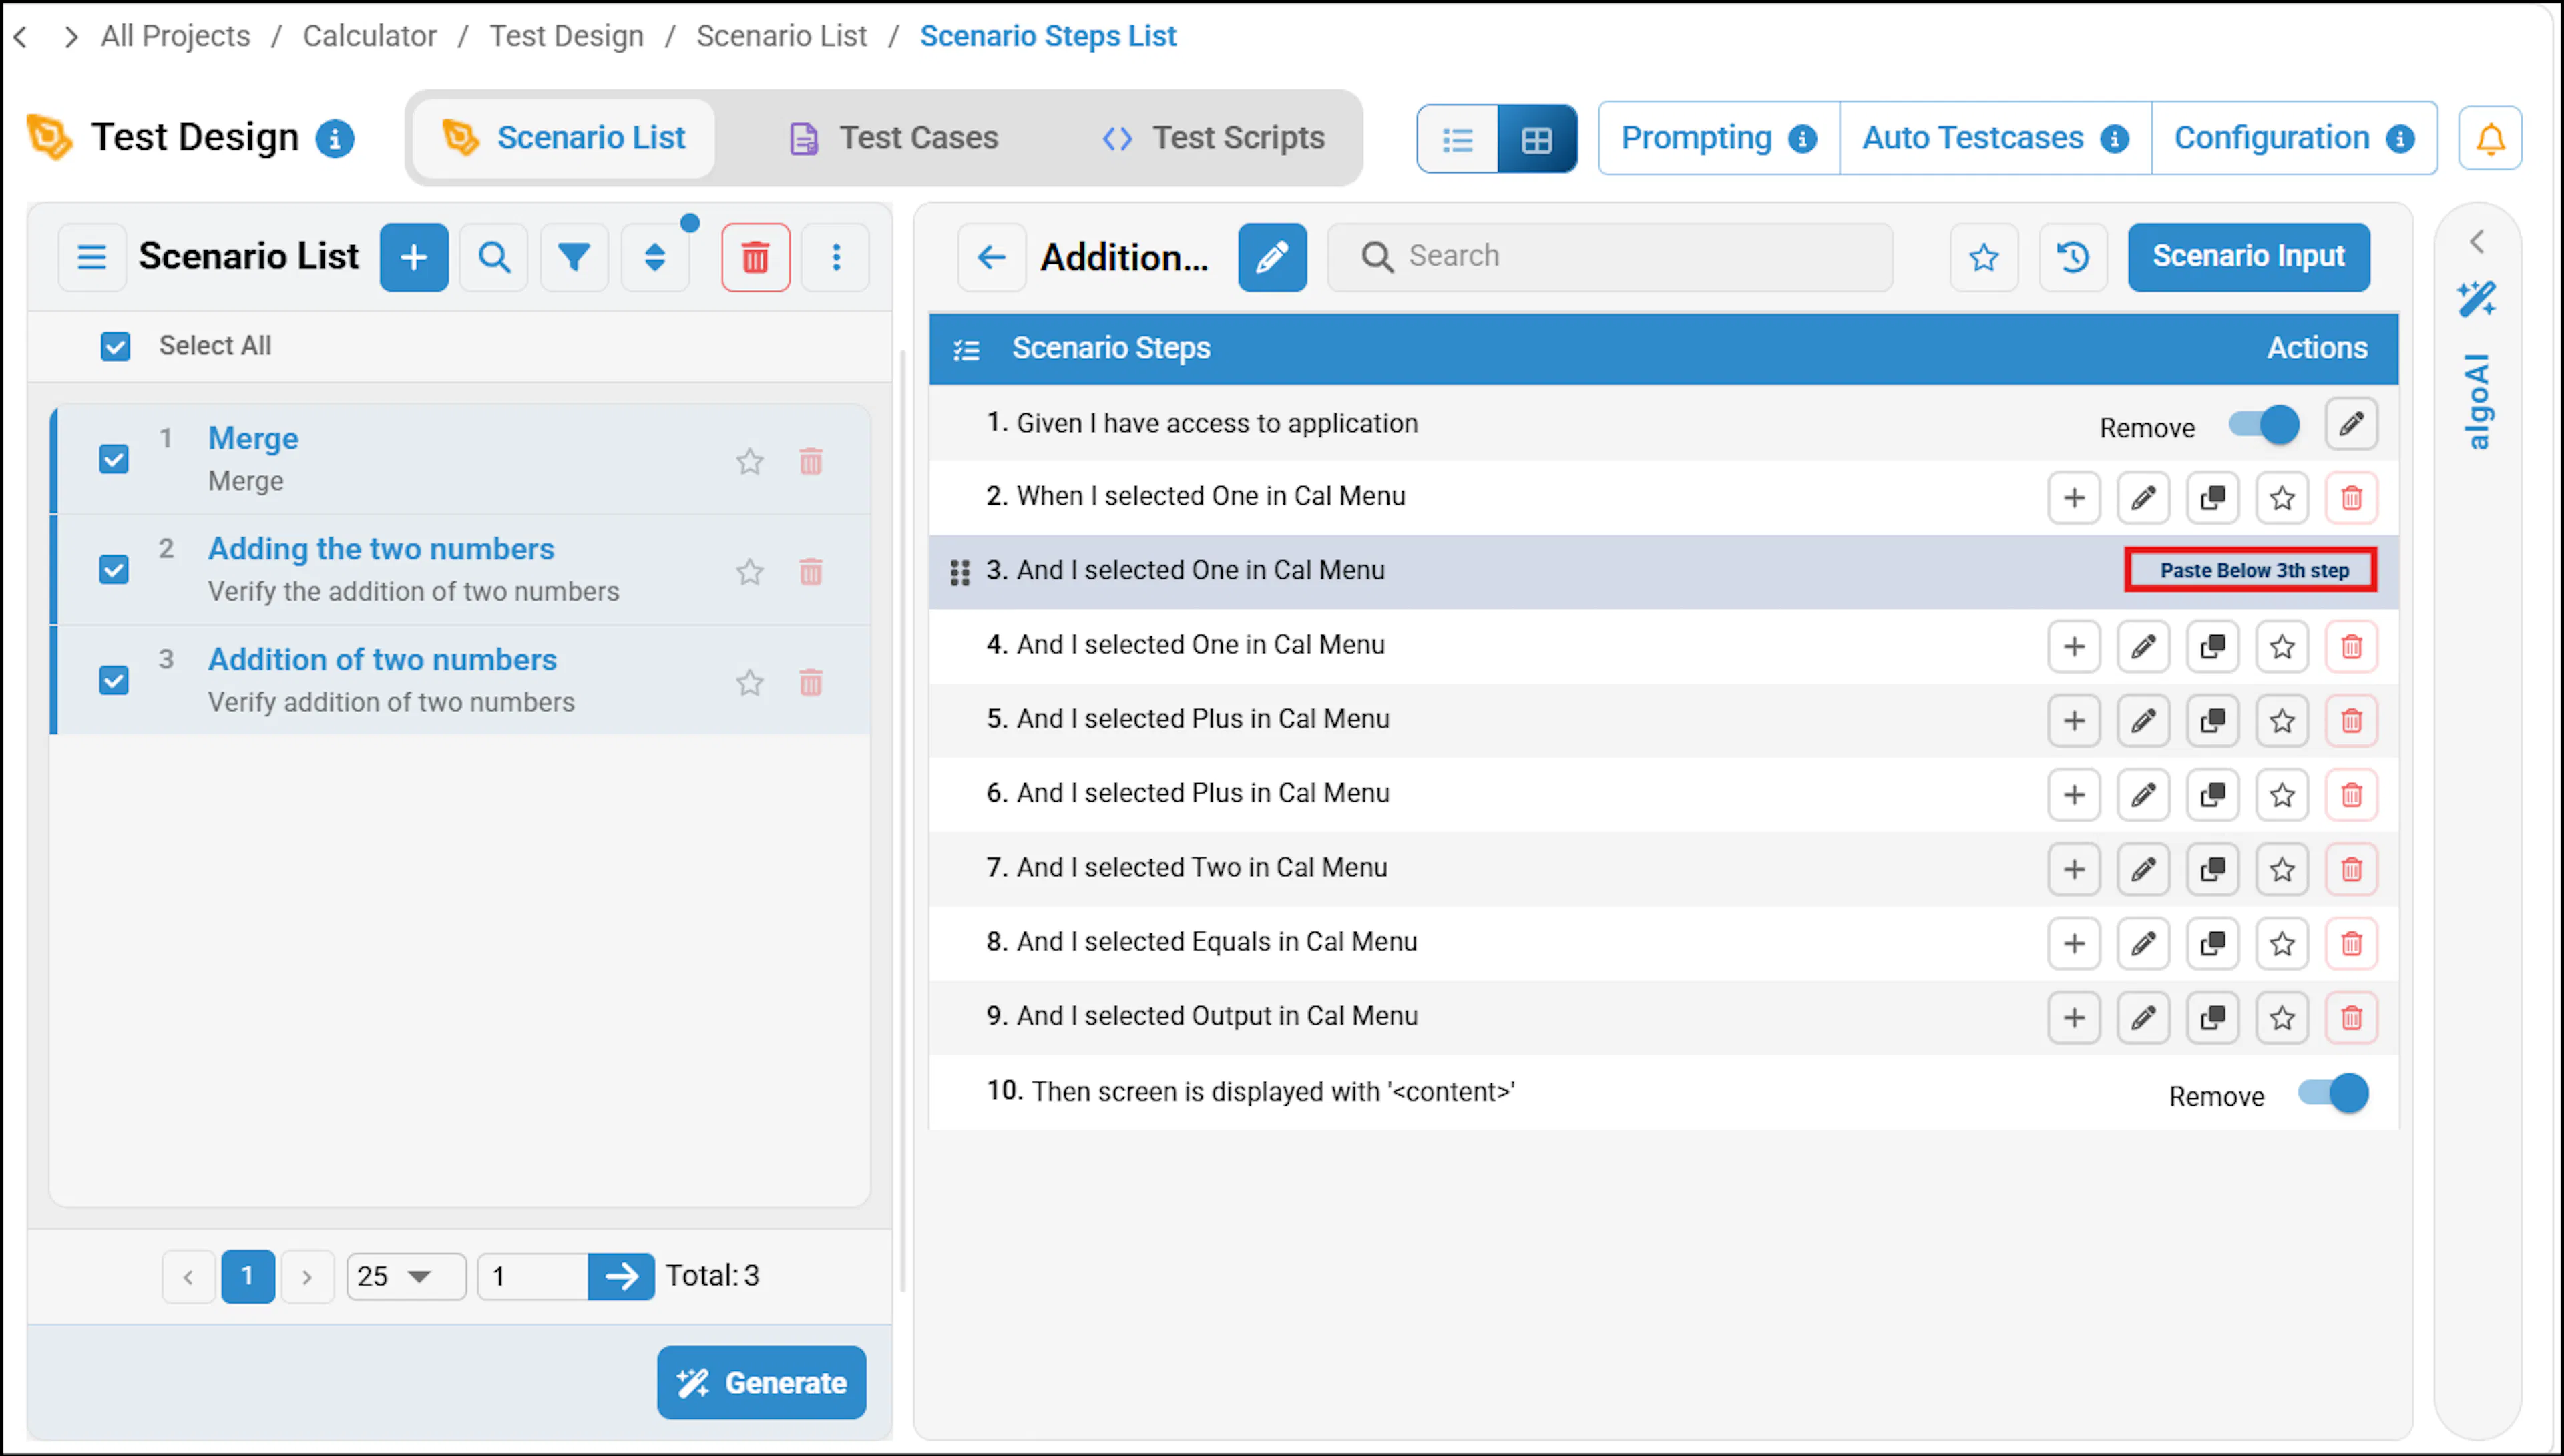
- The steps will be pasted.